Last updated on
Discover the world of pumpkin carving alternatives as we introduce a variety of creative ideas for your next Halloween masterpiece!
As the fall season approaches, the excitement of pumpkin carving begins to fill the air. However, if you’re looking for a unique and budget-friendly way to decorate your home this year, it’s time to think outside the box.
While traditional pumpkin carving is always a classic choice, there are plenty of other creative alternatives that can add personality and charm to your autumn decor without breaking the bank. In this article, we’ll explore some fun and easy ways to switch up your pumpkin game and create stunning decorations that will impress all of your guests.
So grab a cup of hot cider and let’s get started!
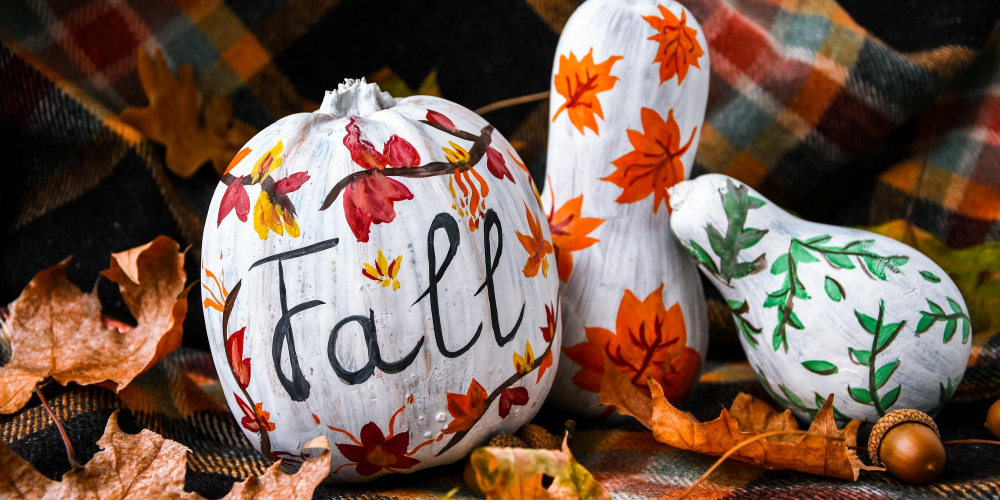
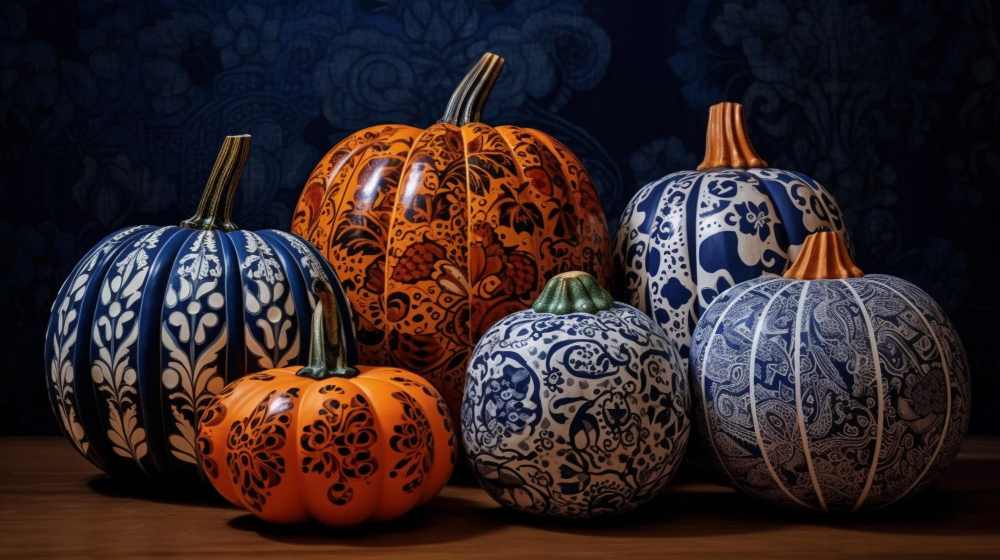
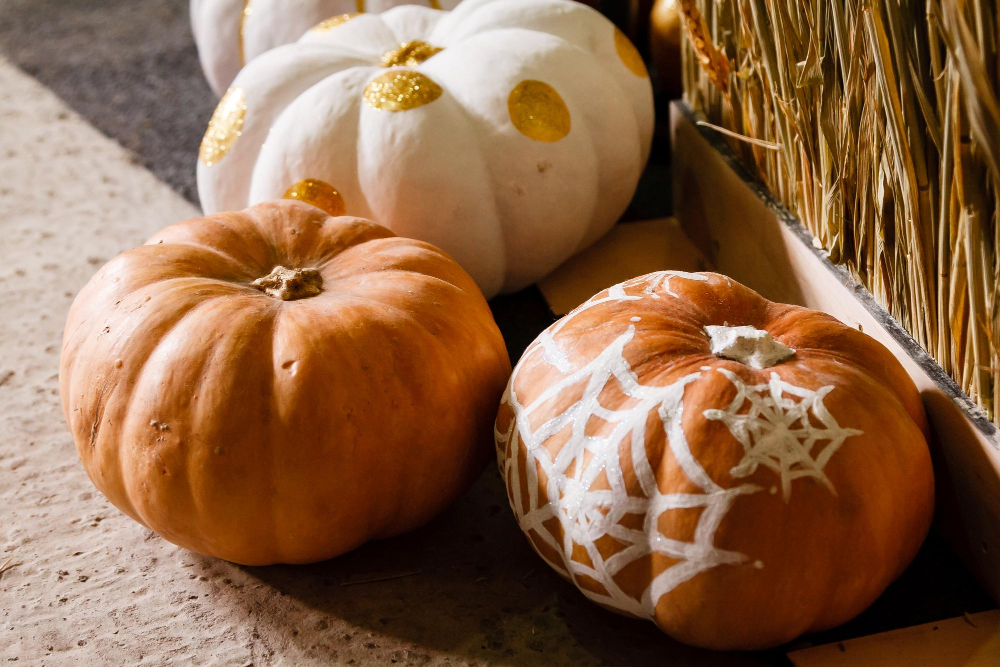
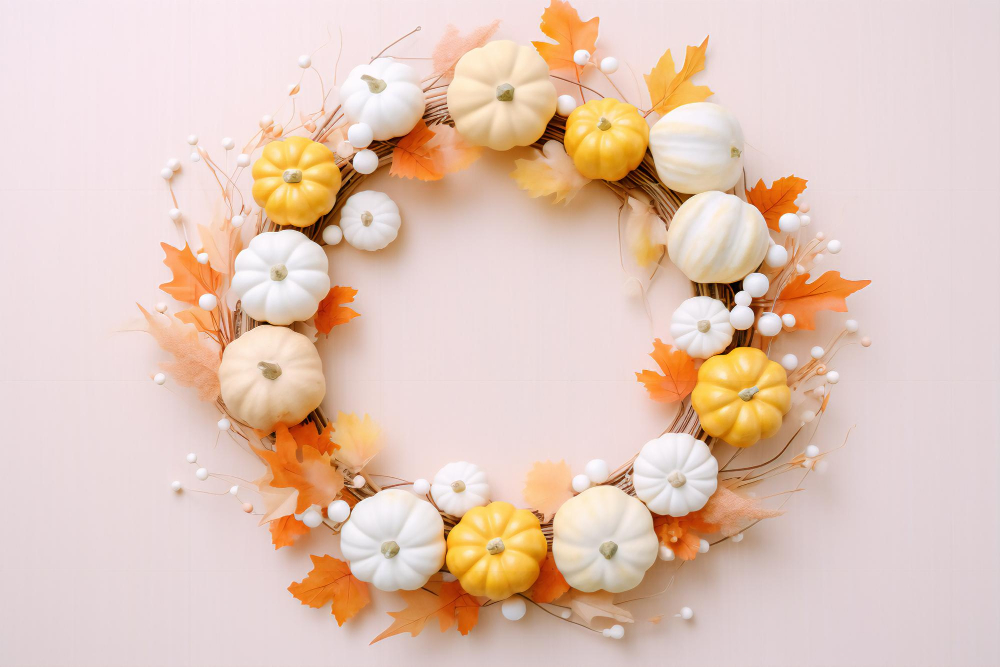
Painted Pumpkins
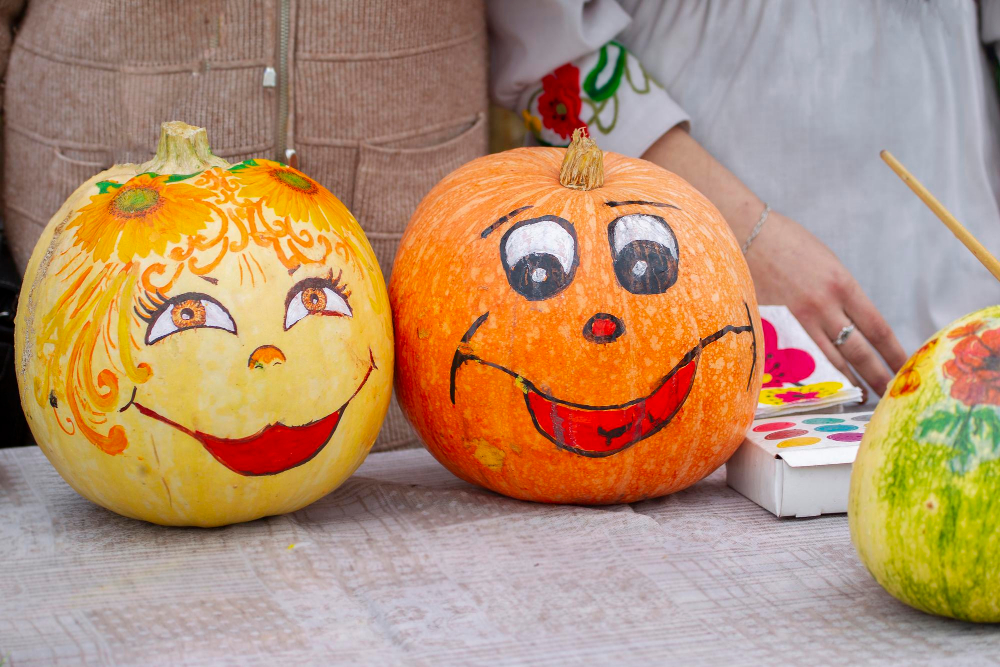
Painted Pumpkins: One of the easiest and most versatile ways to decorate pumpkins is by painting them. Not only does this method allow for endless creativity, but it’s also a great option for those who want to avoid the mess and hassle of traditional carving.
You can use acrylic paint, spray paint or even chalkboard paint depending on your desired look.
To get started with painted pumpkins, first choose your color scheme or design idea. You could go with classic Halloween colors like black and orange or opt for something more unique like metallics or pastels.
Once you have your paints ready, simply apply them directly onto the pumpkin using a brush or sponge.
For added detail and texture, consider using stencils to create patterns such as polka dots, stripes or chevron designs. Or try adding some glitter accents once the base coat has dried!
Decoupage Pumpkins
Decoupaging involves gluing paper or fabric onto an object and then sealing it with a clear coat of varnish. For pumpkins, this means covering them in beautiful patterns like floral prints or vintage book pages.
To get started with decoupaging your pumpkins, gather some decorative paper or fabric that you love. Cut out the shapes you want to use and apply Mod Podge (a type of glue) directly onto the pumpkin’s surface where you want each piece placed.
Once all pieces are glued on, let dry completely before applying another layer of Mod Podge over everything as a sealant. This will protect your design from moisture damage while also giving it a glossy finish.
Glitter Pumpkins
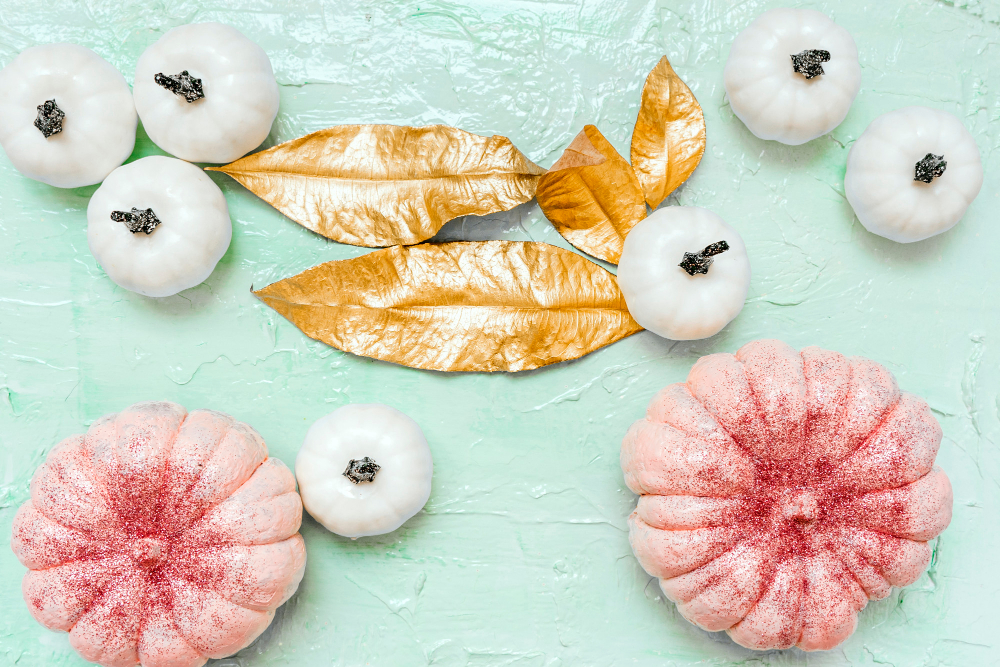
All you need is some glue, paintbrushes, and of course – glitter! Start by painting your pumpkin with a layer of glue using the paintbrush. Then sprinkle on the glitter until it’s fully covered.
You can use one color or mix different shades together for an ombre effect.
For those who want something more sophisticated than just plain old craft store glitter, try using metallic leafing sheets instead! These come in golds and silvers that will give your pumpkins an elegant touch.
The best part about this alternative is that it’s easy enough for kids to do too (with adult supervision). Plus, if you make sure not to carve into them first they’ll last much longer than traditional carved jack-o-lanterns!
Fabric Covered Pumpkins
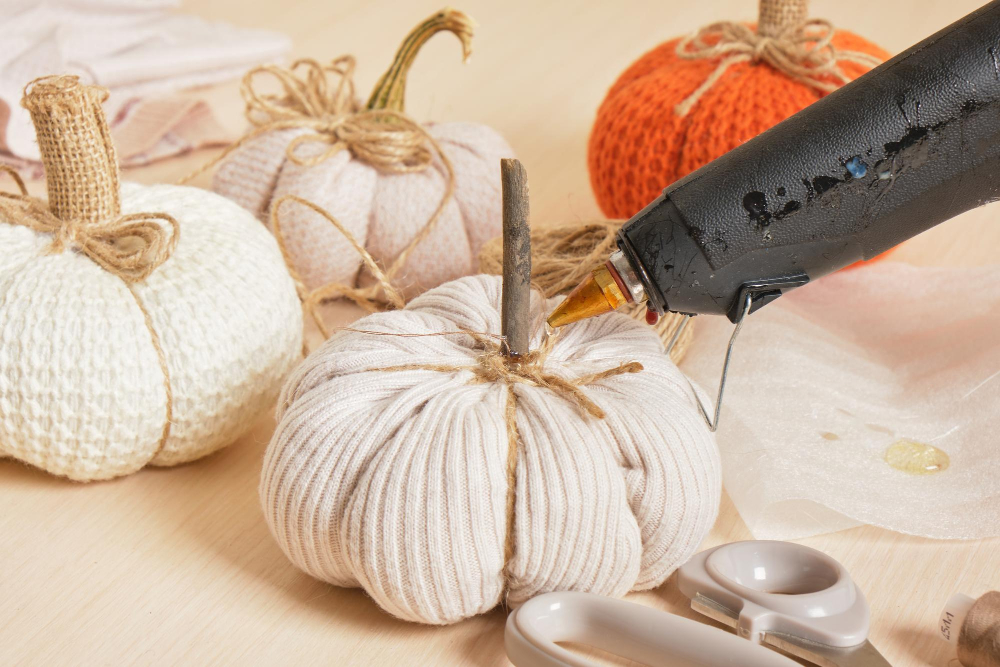
This alternative pumpkin decorating idea is easy to execute and can be customized in countless ways. All you need is some scrap fabric, glue, scissors, and of course – pumpkins! Simply cut the fabric into small squares or strips (depending on your preference), apply glue onto the pumpkin’s surface using a brush or sponge applicator, then press down each piece of cloth until it covers every inch of the gourd.
You can mix-and-match different fabrics for an eclectic look or stick with one color scheme for a more cohesive feel. The best part about this DIY project? It’s budget-friendly! You can use old clothes that no longer fit as well as scraps from previous sewing projects instead of buying new materials.
Once completed these adorable little guys will add texture and warmth to any room in your house without being too spooky.
Yarn-Wrapped Pumpkins
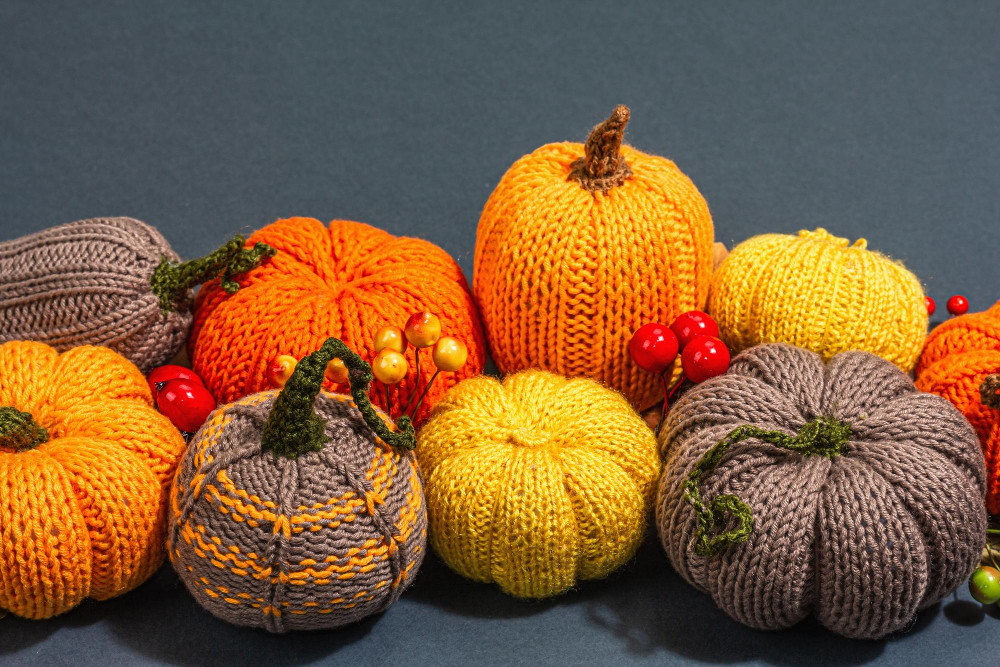
This DIY project is easy to make and requires only a few materials. All you need is some yarn in your favorite autumn colors, glue, scissors, and of course – pumpkins! Simply apply glue onto the pumpkin’s surface in small sections at a time then wrap it with yarn until it’s completely covered.
You can use different shades of orange or mix things up with other warm hues like brown or mustard yellow.
The result? A charming decoration that will add texture and warmth to any room in your house. Yarn-wrapped pumpkins also make great centerpieces for Thanksgiving dinner tables or as gifts for friends who love all things cozy during the colder months.
Pumpkin Planters
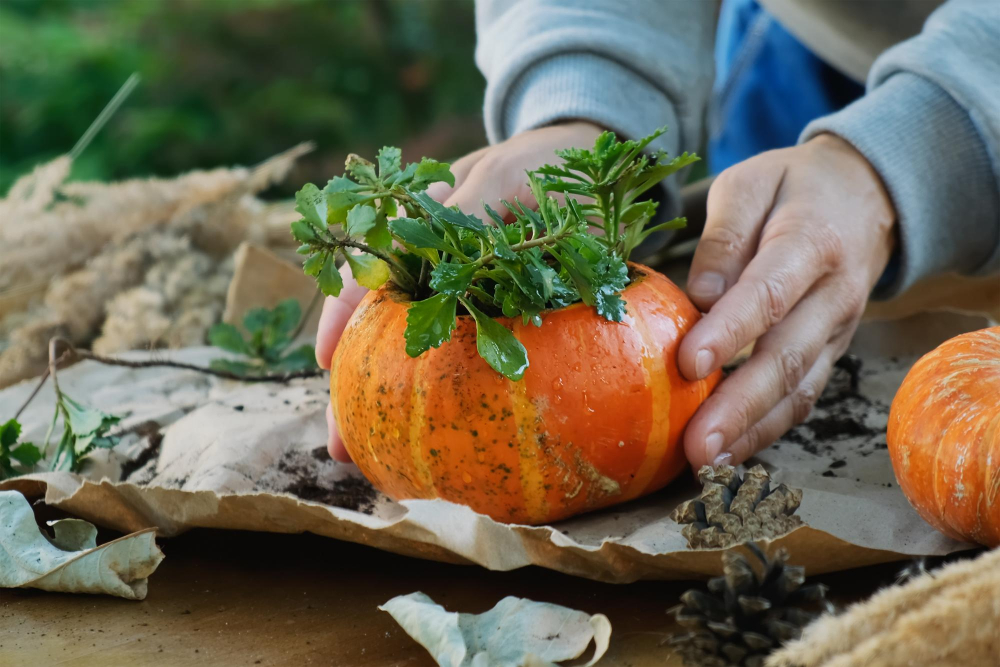
This is an easy and affordable DIY project that can add a touch of whimsy to your outdoor decor. Simply cut off the top of the pumpkin, scoop out the insides, and fill it with soil and your favorite plants or flowers.
You can even paint or decorate the outside of the pumpkin for added flair.
Not only do these pumpkin planters look great on their own but they also make excellent centerpieces when paired with other autumnal decorations like leaves, pinecones or candles.
Mosaic Pumpkins
This technique involves using small pieces of glass or tile to create intricate patterns on the surface of your pumpkin. You can use any color combination you like, from bold and bright hues to more muted tones that complement your existing decor.
To get started with this project, gather some colorful tiles or glass pieces in various shapes and sizes. Use a strong adhesive glue to attach them directly onto the pumpkin’s surface in whatever pattern you desire.
Once dry, add grout between each piece for added durability.
Beaded Pumpkins
This alternative pumpkin decorating idea is easy to execute and can add an elegant touch to your fall decor. All you need is some glue, beads of different sizes and colors, a paintbrush or sponge brush, and of course – pumpkins! Start by applying glue in small sections on the surface of the pumpkin using a paintbrush or sponge brush.
Then carefully place beads onto each section until it’s completely covered with beads.
You can create patterns with different colored beads or mix them up for an eclectic look. You could also use metallic-colored beads for added sparkle that will catch everyone’s eye.
Once finished let it dry overnight before displaying it as part of your autumnal decorations.
Sticker Decorated Pumpkins

Not only do they come in a variety of designs, but they also require no artistic skill or carving tools. Simply choose your favorite stickers and apply them to the surface of your pumpkin.
For an extra touch of creativity, consider using themed stickers such as bats or ghosts for Halloween or fall leaves and acorns for autumn decor. You can even mix and match different sticker designs to create unique patterns on each pumpkin.
To ensure that the stickers stay in place throughout the season, it’s recommended that you use adhesive spray before applying them onto the pumpkin’s surface. This will help prevent any peeling or falling off due to moisture changes.
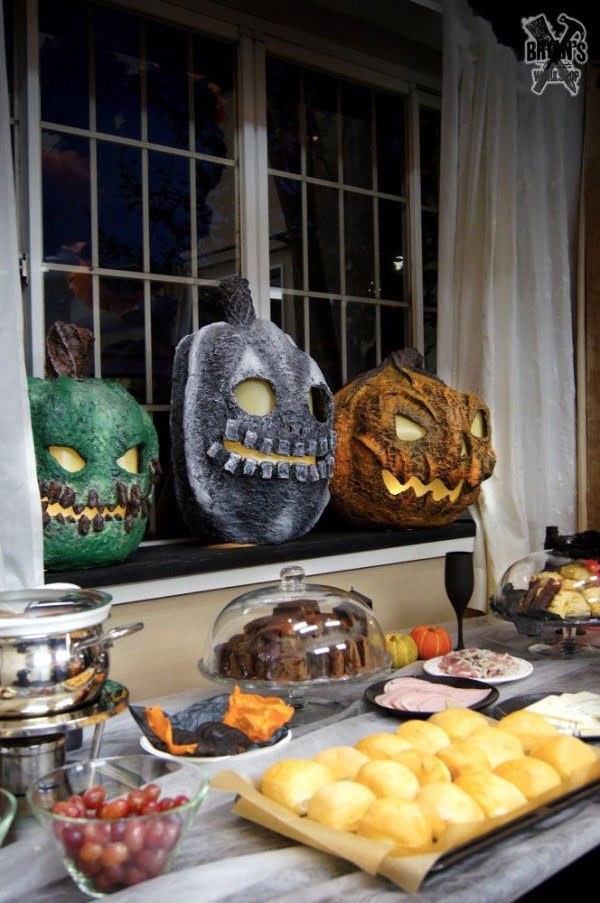
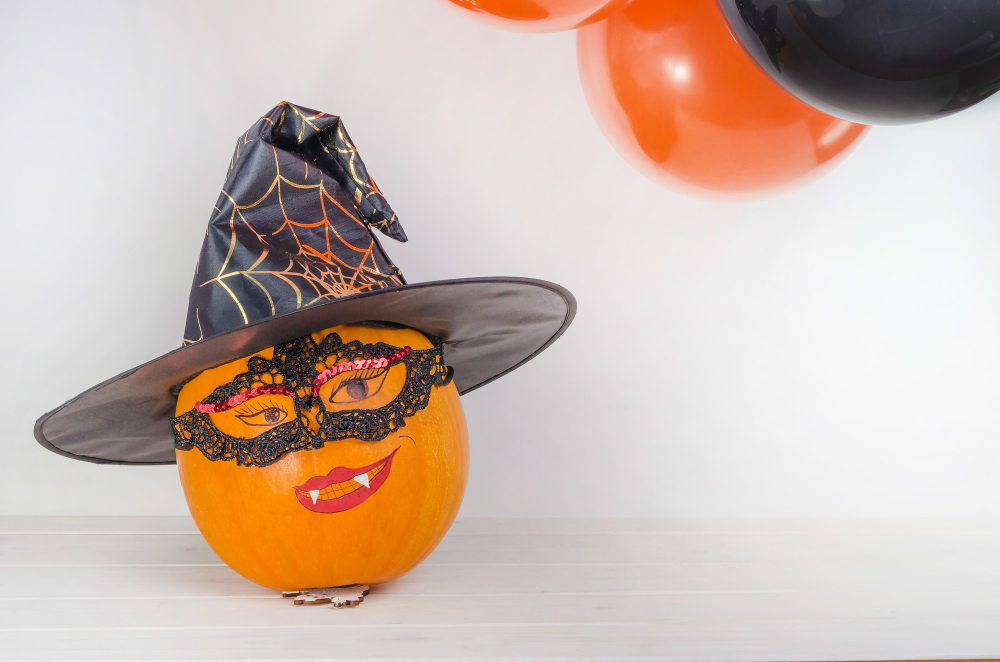
No-Carve Pumpkin Sculpture
This technique involves using various materials to create unique and eye-catching designs on your pumpkins. You can use anything from paint and markers to glue and glitter to make your sculptures stand out.
One popular method is creating a “pumpkin monster” by attaching googly eyes, pipe cleaners for arms, or even fake teeth made of clay or plastic. Another fun idea is painting geometric shapes onto the surface of the pumpkin with bright colors like pink, blue or green.
The best part about no-carve pumpkin sculpting? It’s easy! All you need are some basic crafting supplies like scissors, glue gun (optional), paintbrushes (if painting) – plus whatever decorations strike your fancy!
Mini Pumpkin Garland
This simple DIY project is perfect for those who want to add some autumnal charm without going overboard on the decorations. All you need are some small pumpkins (real or fake), twine, and a hot glue gun.
To make the garland, start by cutting a length of twine that’s long enough to span the area where you want to hang it. Then use your hot glue gun to attach each pumpkin onto the twine at equal intervals until all of them are secured in place.
Once finished, hang up your new decoration wherever you like – across doorways or mantels – anywhere that needs an extra touch of fall flair!
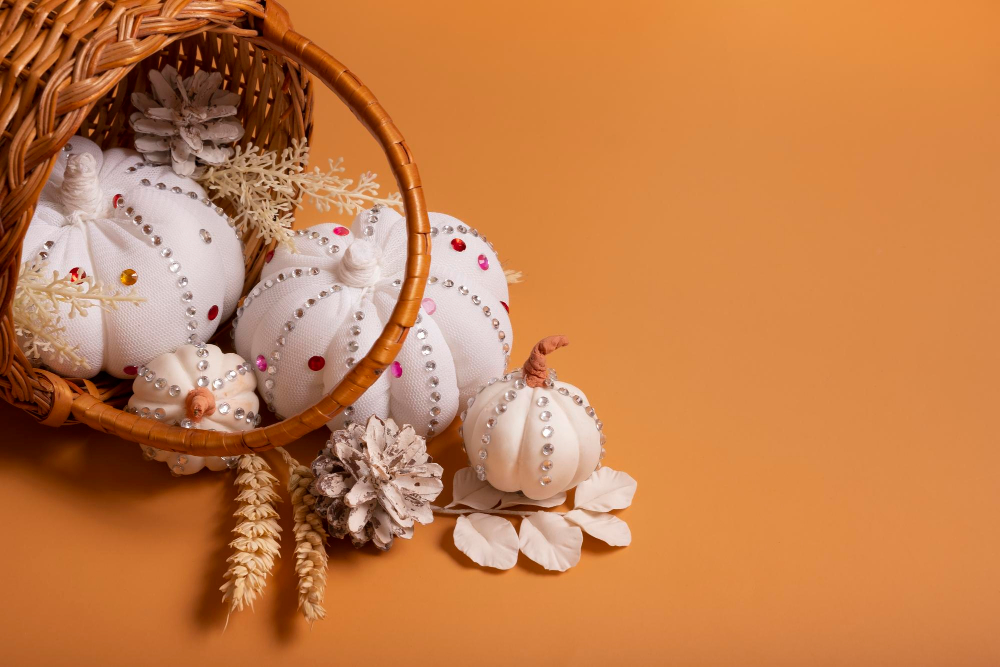
Rhinestone Pumpkins
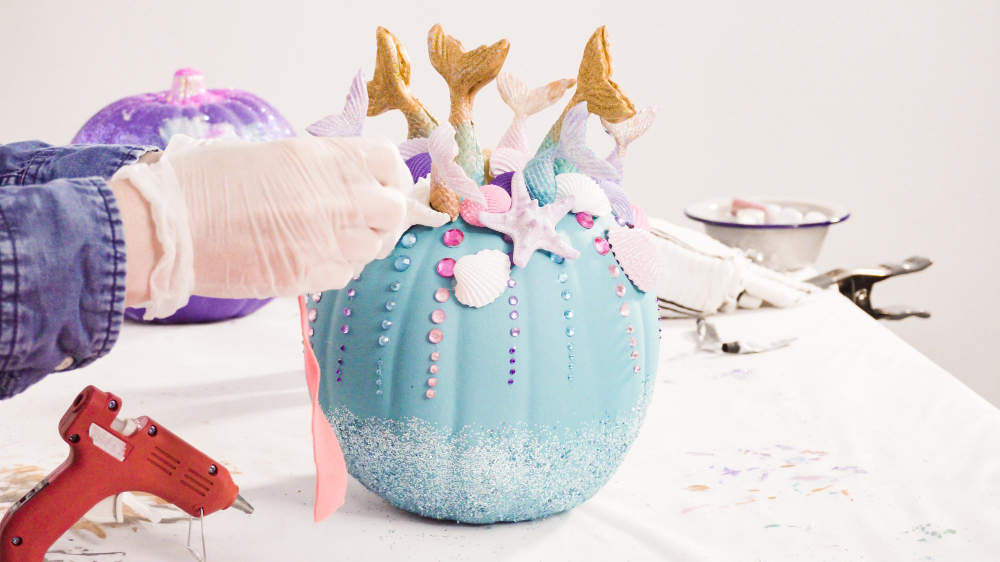
All you need is a hot glue gun and some sparkly gems to create an eye-catching design that will add some serious bling to your Halloween decor. You can cover your entire pumpkin in rhinestones or create intricate patterns and designs with different sizes and colors of stones.
This option is especially great if you want to add some elegance to your home without sacrificing the spooky vibe of Halloween.
As we continue our journey through creative pumpkin carving alternatives, it’s important not only to think outside the box but also consider what materials work best for each project.
Lace Pumpkins
All you need is some white or black lace fabric, scissors, glue and of course a pumpkin! Cut the lace into small pieces that will fit on your pumpkin’s surface. Then apply glue to each piece of fabric before sticking it onto the pumpkin in any pattern you like.
You can cover as much or as little of the surface area as desired. The result? A stunningly beautiful centerpiece that looks like it was crafted by an expert designer! Lace pumpkins are perfect for those who want something unique but still sophisticated enough to match their home decor style.
So why not try this simple yet effective technique this Halloween season? Your guests will be impressed with how creative and stylish your decorations look without breaking the bank!
Foil Pumpkins
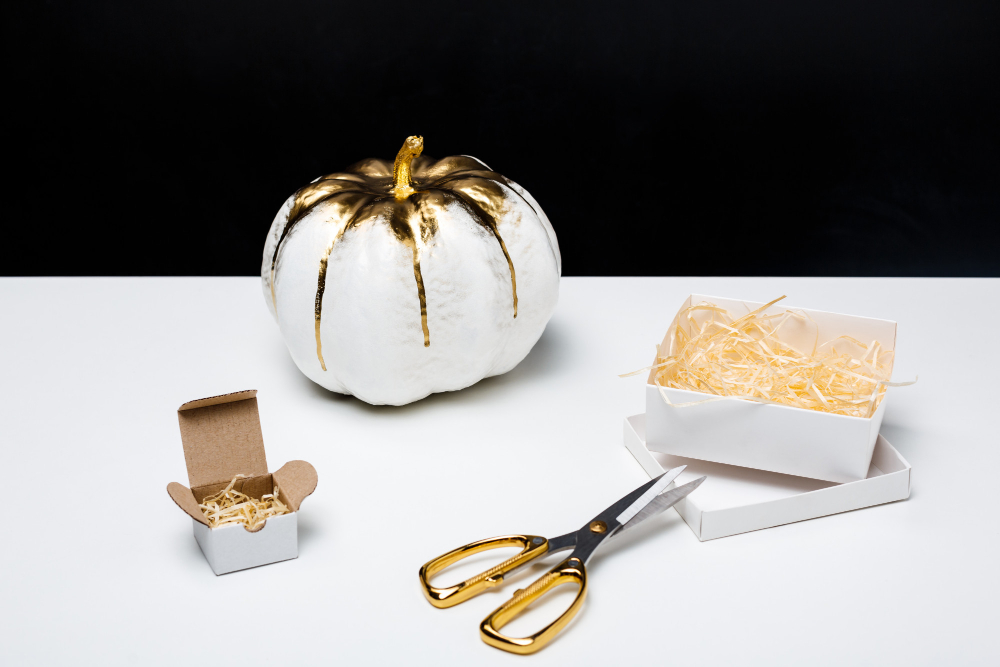
This technique is incredibly easy to execute and requires only a few materials. All you need is some aluminum foil, glue or Mod Podge, and your choice of paint or markers.
To create your own foil pumpkin masterpiece, start by covering the entire surface of your pumpkin with aluminum foil. Then use glue or Mod Podge to secure it in place.
Once dry, add any design elements using paint or markers that will stand out against the metallic background.
The best part about this technique is that it’s completely customizable! You can choose different colors of foils such as golds and coppers for an elegant look; silvers for futuristic vibes; blues & greens if you want something more oceanic etc.
Pumpkin Dioramas
These miniature scenes can be created inside of a hollowed-out pumpkin and can range from spooky to whimsical. To make one, start by carving out the top of your pumpkin and scooping out the insides as you would with any other carved pumpkin.
Next, create a small scene using figurines or other decorations that fit within the confines of your chosen gourd. You could use anything from tiny plastic skeletons to miniature fairy garden accessories! Once you’ve arranged everything just how you like it, add some battery-operated lights or candles inside for an extra touch of ambiance.
Not only are these dioramas fun and easy to make on a budget but they also provide endless opportunities for customization based on personal preferences!
Clay “Pumpkin” Sculptures
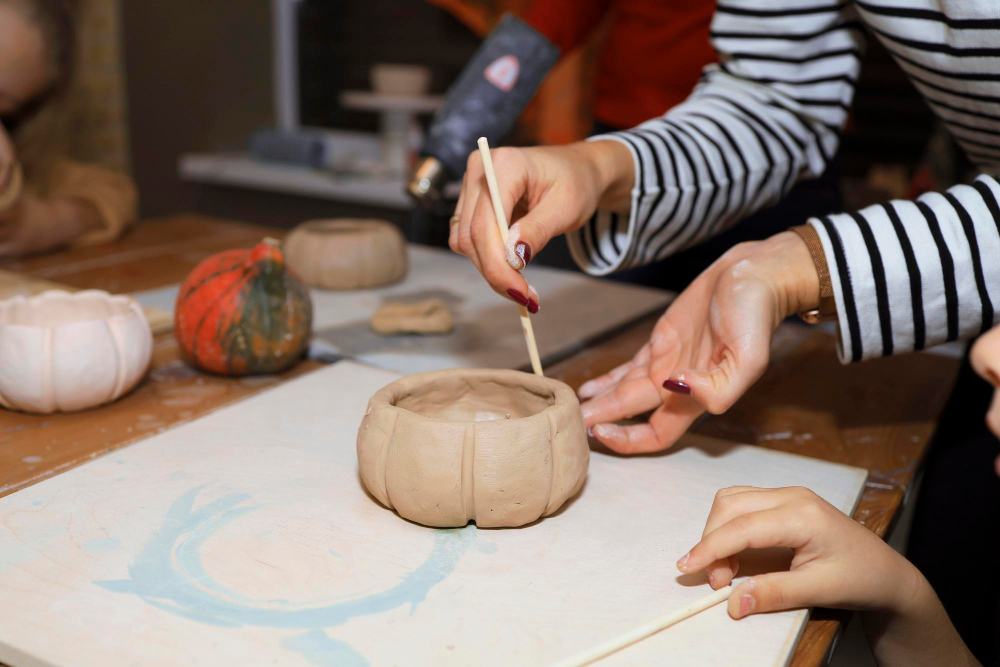
This option is perfect for those who want to keep their decorations year after year or even use them as centerpieces at Thanksgiving dinner. To make these sculptures, all you need is some air-dry clay and paint in your desired colors.
Start by molding the clay into a pumpkin shape using your hands or sculpting tools if available. Once the shape is complete, let it dry according to the instructions on the package before painting it with acrylic paints.
The best part about this project? You can get creative with different shapes and sizes of pumpkins! Make small ones to decorate your mantle or larger ones as statement pieces in your front yard display.
Paper Mâché Pumpkin Alternatives

Not only are they easy to make, but they also offer endless possibilities for customization. All you need is some newspaper strips, flour paste or glue mixture and a balloon to create your own unique pumpkin shape.
To start off with this project, blow up a balloon to the desired size of your pumpkin. Then mix together equal parts of flour and water until it forms into a thick paste or use white glue mixed with water in 1: 1 ratio as an alternative option.
Next step is dipping newspaper strips into the mixture one at time then placing them onto the surface of your inflated balloon until it’s completely covered (leave out space around where stem will be). Repeat this process several times until you have about three layers on top each other.
Once dry (it may take overnight), pop the balloon inside using scissors through small hole near stem area then remove any excess bits from inside before painting/decorating as desired!
Paper mâché pumpkins can be painted in traditional orange hues or decorated with patterns such as polka dots or stripes using acrylic paints once dried completely.
Pineapple Jack-O’-Lantern Trend
This fun and unique alternative to pumpkin carving is perfect for those who want to add a little bit of island flair to their Halloween decor. Pineapple jack-o’-lanterns are easy to make and can be customized in countless ways, from spooky faces carved into the fruit’s flesh, or even painted designs that will last longer than traditional pumpkin carvings.
To create your own pineapple jack-o’-lantern, start by selecting a ripe and sturdy fruit that stands upright without wobbling. Then use a sharp knife or saw blade (carefully!) cut off the top of your pineapple just like you would do with any other Jack-O’-Lantern.
Next up is scooping out all of its juicy insides using an ice cream scoop or spoon until it’s hollow enough inside. Now comes time for creativity! You can carve intricate designs into its skin using small knives or cookie cutters as stencils; alternatively paint them in bright colors such as orange & black stripes if desired.
Carved & Stuffed Capsicums
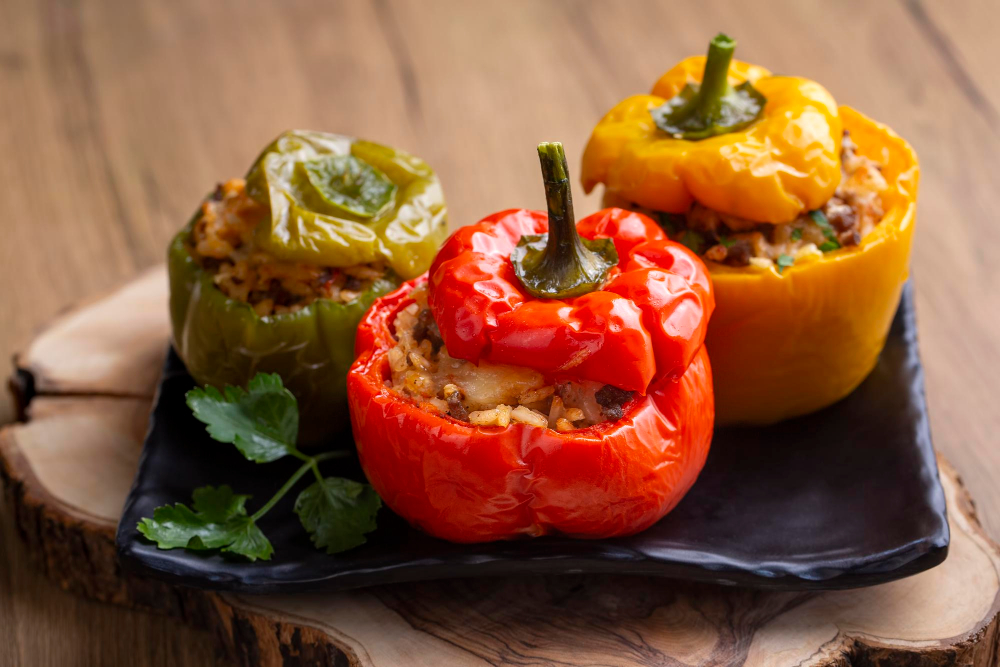
Simply cut off the top of the capsicum, remove the seeds and pulp, then carve your desired design into the flesh. You can fill them with anything from rice pilaf to quinoa salad or even chili con carne! The possibilities are endless.
Not only is this a fun activity that kids will love but it’s also an excellent way to incorporate more vegetables into your diet during Halloween season.
Carve Apples to Make Shrunken Heads
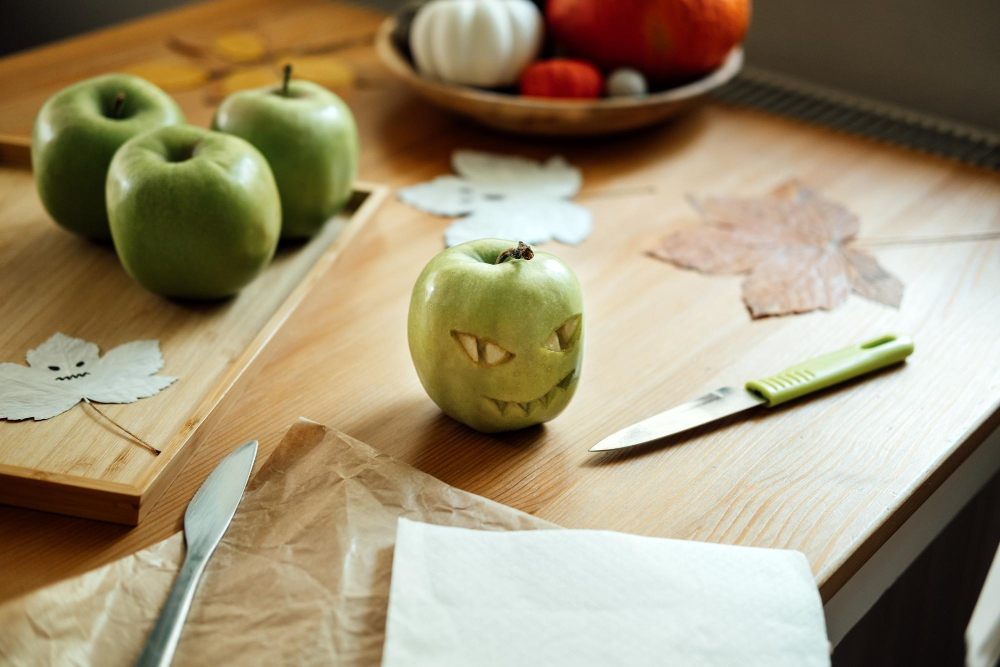
All you need are some apples, a paring knife or small kitchen tool, and some food coloring. Start by peeling the skin off of the apple in sections until it resembles a face shape.
Then carve out eyes, nose, mouth – whatever features you want! Once carved out completely soak them in lemon juice with salt so they don’t rot quickly. Afterwards let them dry overnight before adding any finishing touches like food coloring or paint for added effect.
This is just one example of how thinking outside the box can lead to amazing results when it comes to decorating on a budget. So get creative this Halloween season and see what other fun ideas you can come up with!
FAQ
What is a good substitute for pumpkin carving?
A good substitute for pumpkin carving is using gourds, squash vegetables, or peppers, as they provide smooth surfaces to carve spooky faces into.
How do you carve a pumpkin without pumpkin carving tools?
To carve a pumpkin without pumpkin carving tools, use a long, thin kitchen knife to carefully carve the design and push the cut pieces out from the inside to avoid breaks or tears in the pumpkin.
How do you scrape a pumpkin instead of carving?
To scrape a pumpkin instead of carving, use an ice cream scoop for gutting and thinning the sides due to its efficient scooping design and sharp edges.
What are some creative ways to decorate pumpkins without carving them?
Creative ways to decorate pumpkins without carving them include painting, using stickers, applying glitter, attaching ribbons, or utilizing fabric and lace.
Can you recommend any unconventional materials for creating pumpkin art?
Suggested unconventional materials for creating pumpkin art include toothpicks, yarn, chalk, and colorful buttons.
What techniques can be used to enhance pumpkin designs aside from traditional carving?
Various techniques can enhance pumpkin designs, such as using paint, stickers, markers, stencils, and embellishments.
Recap
Liked this article? Here's what you can read next: