Last updated on
These DIY kitchen island ideas will help you build one for your kitchen and save a lot of money. Read on to find out how!
If you have decided that installing an island in your kitchen would be a good idea, but your budget is limited, you might want to consider other options.
One option is to build and install your own DIY kitchen island. Even if you’re not very crafty, it can be done as long as you carefully follow a kitchen remodeling guide.
Choosing an island might be challenging in the beginning, but once you’ve narrowed down your choices, it should be easy.
There are numerous styles to choose from, and you can choose the one that would best accentuate your kitchen decor.
How to Build a Kitchen Island
The basic steps include:
- Choosing the material or repurposing furniture (for example, an old cabinet will save you a lot of time).
- Choosing the tabletop material (sturdy wood like oak or cedar is great for this project). The Butcher block top for the island is excellent.
- Measure and cut using basic kitchen island plans (see ideas below).
- Stain and Paint.
- Position your new island in your kitchen layout.
These guidelines will help you plan your DIY project and choose the right ideas. Read on to find the island you want to build.
The Anatomy of a Kitchen Island
Function
Before deciding on storage solutions, it’s important to work out the island’s main purpose. Typical ones have two separate sides with one devoted to cooking and the other for eating. If there are going to be any appliances and sinks, more space will be required. If it’s mainly meant for casual meals, seating should be the priority.
Appliances
If appliances need to be integrated, one needs to plan for spacing as well as function. If the island is going to be the main prep area, then trash, compost and recycling spaces will be needed nearby. For better planning, one should make a list of everything they want, in order of priority. If it’s not possible to get everything, then the top five features can be prioritized.
This largely depends on the kitchen’s layout. If there’s space for lots of cabinets in the kitchen, then the island won’t need much storage. In most cases, a width of 3 feet would be ideal, with the length measuring 4 to 7 feet to accommodate a cooktop and dishwasher.
The Height of the Counter
To do this, one needs to first determine their seat height. If bar stools are going to be present, one needs to decide if their height will be 36 or 42 inches. The latter option tends to offer more flexibility because the island can have two levels with the dining side higher and the working side lower. The step in between also comes in handy for electrical outlets. Though the 36-inch stool doesn’t allow much flexibility in layout, it can be ideal for a defined eating area. The seating space needs about 12 to 18 inches of overhang for seating areas.
Vintage
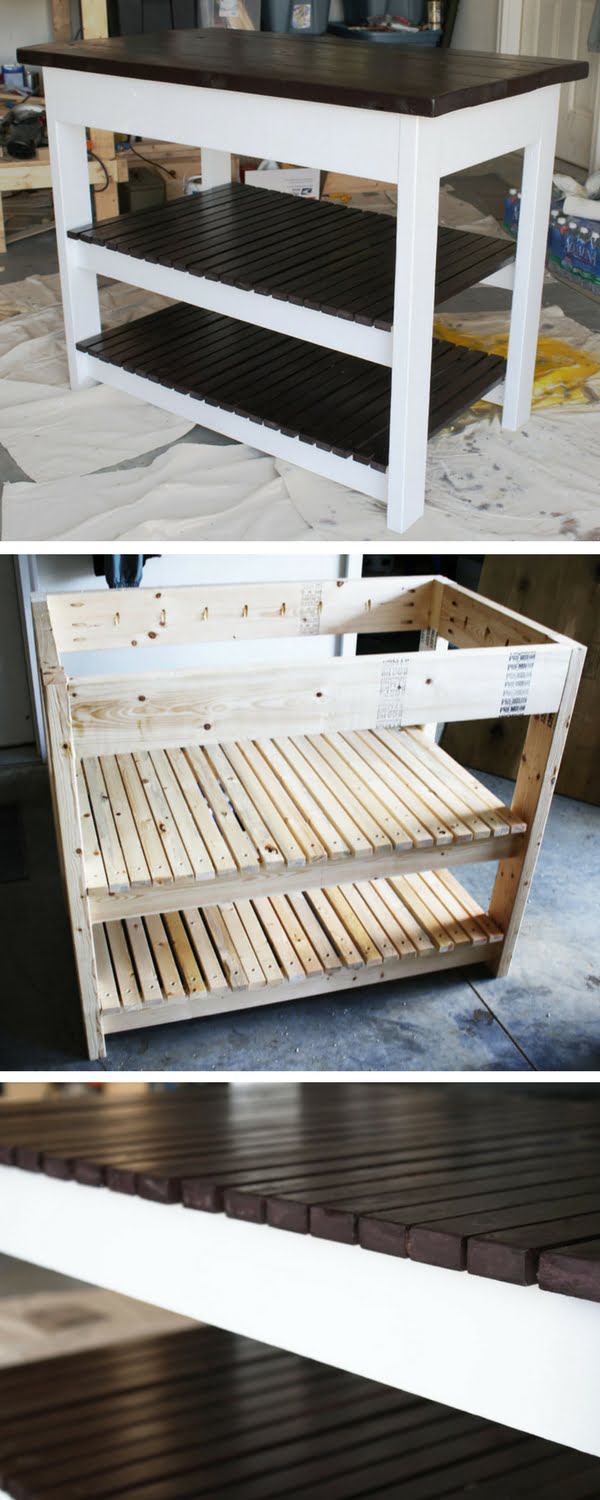
Jen has built her own kitchen island that is used as a coffee bar. Not only does this kitchen island provide ample additional space, but it adds a bit of charm that is sure to complement your kitchen as well as it does hers. The bar measures about 46″ in length and can be customized in any manner.
Walk-Around
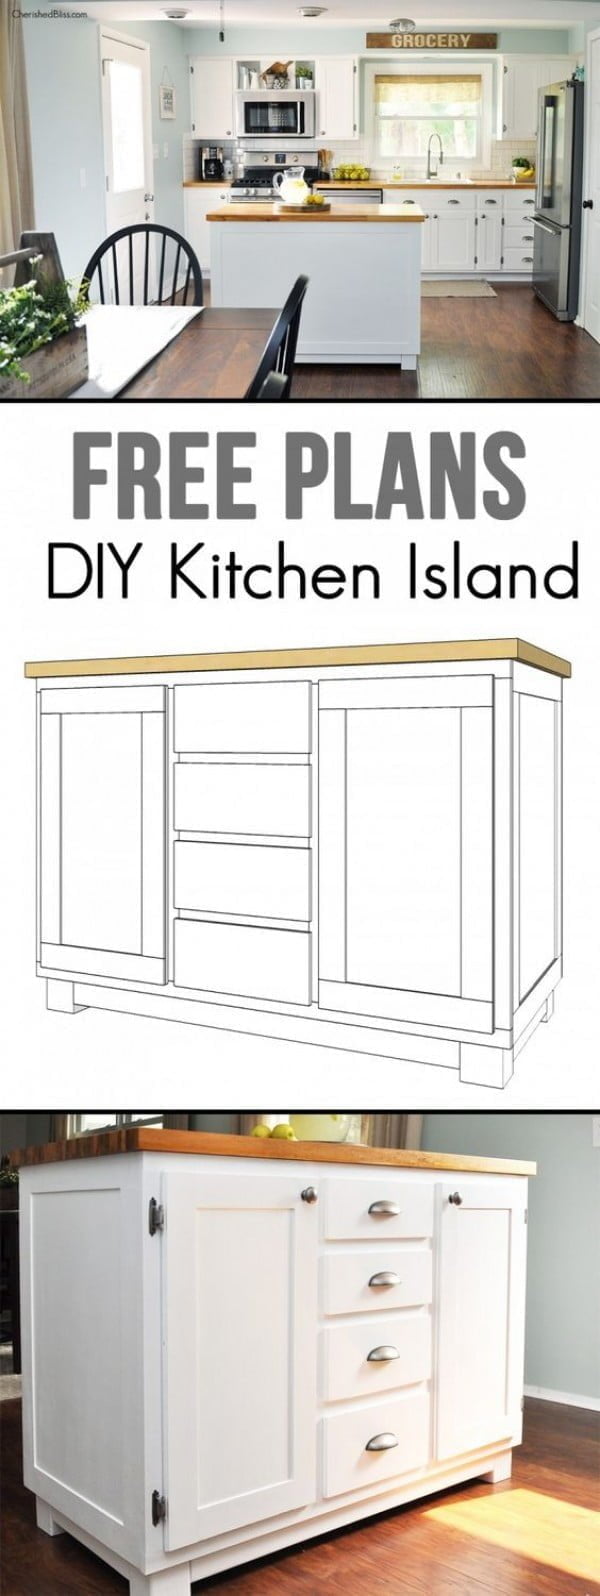
This DIY kitchen island has a unique design, as it is a “walk around island.” This choice is compact, versatile and relatively easy to make. The supply and tool list is available, along with the complete instructions building and possibly personalizing this particular island.
From a Dresser
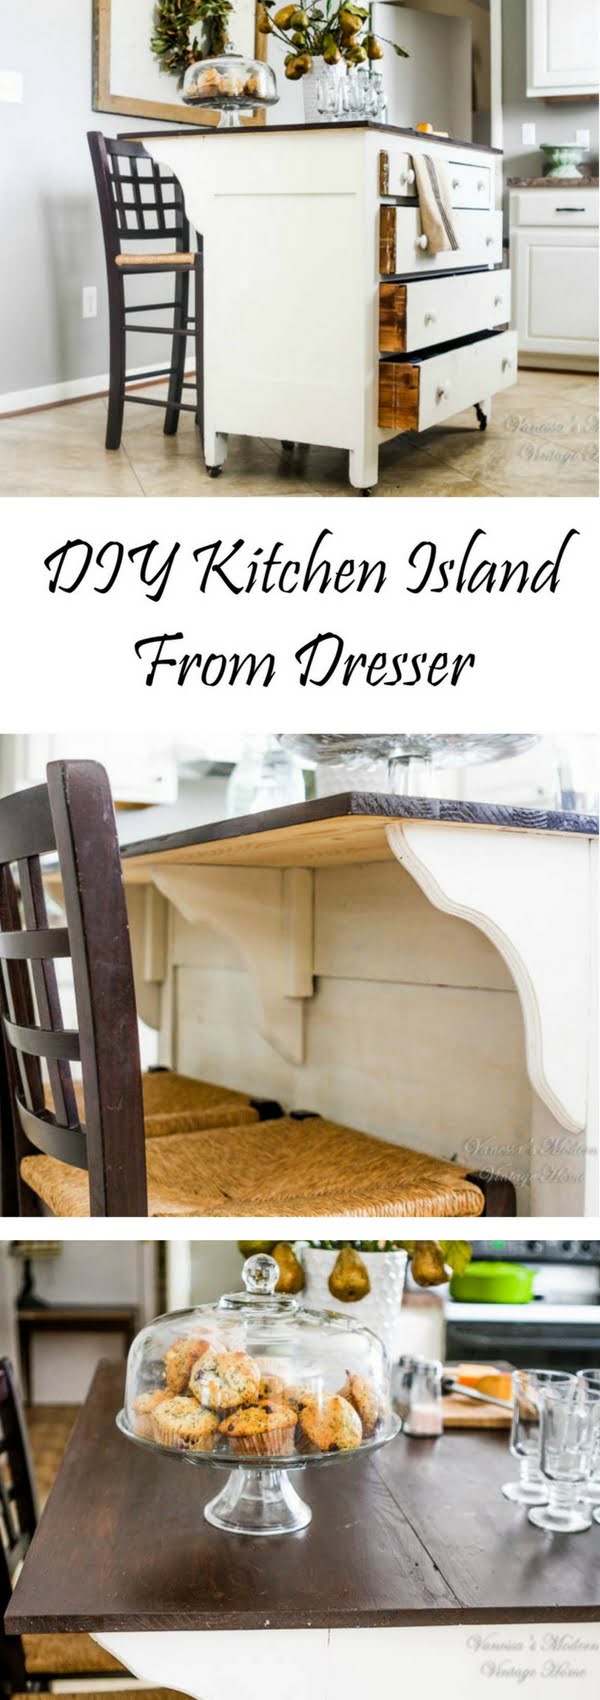
This choice is also unique, as it is built using an old dresser. In addition to the space on top of this attractive island, there is also additional storage space inside the drawers that can be used for utensils, towels, aluminum foil and so much more.
From a Bookshelf
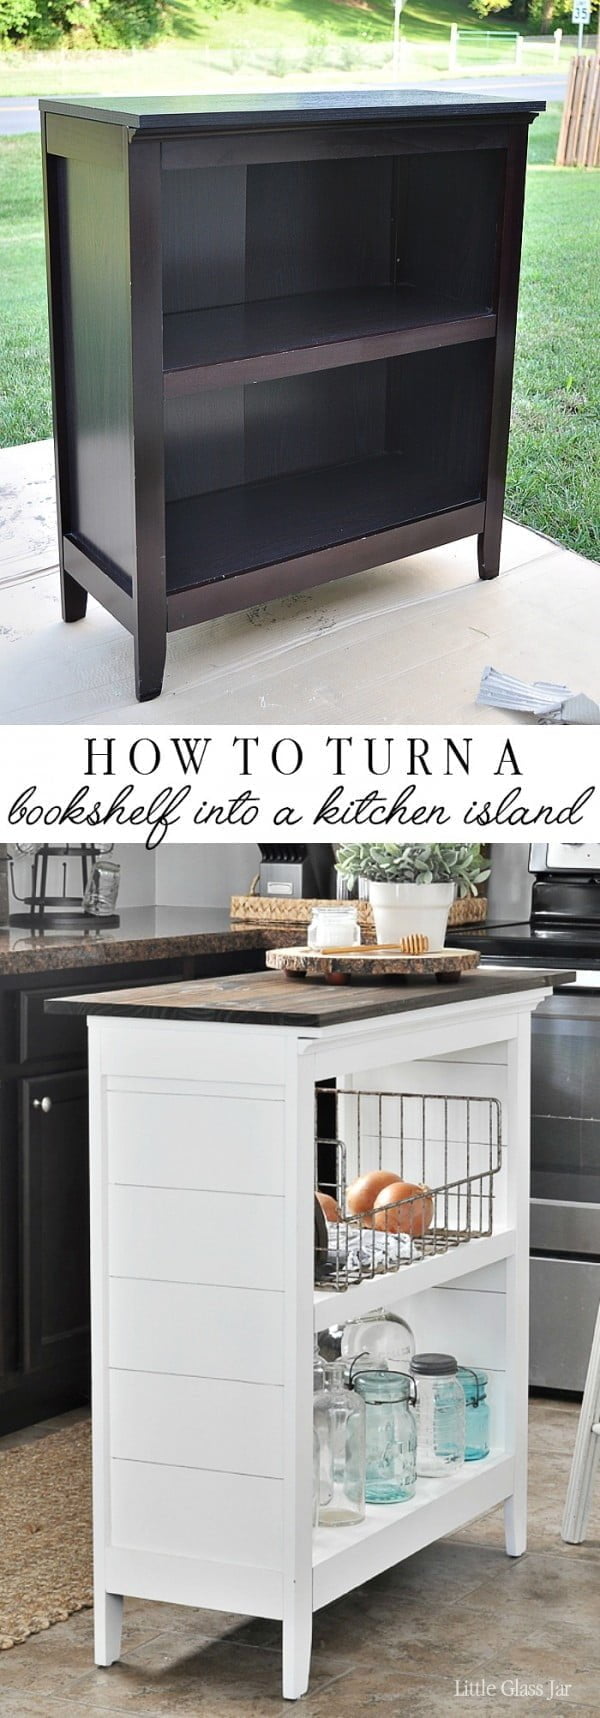
If your kitchen is on the smaller side and you don’t have much space available to accommodate an island, this bookshelf kitchen island may be the perfect choice. It’s easy to transform any bookshelf into the kitchen island you’ve always dreamed about.
Furniture Style
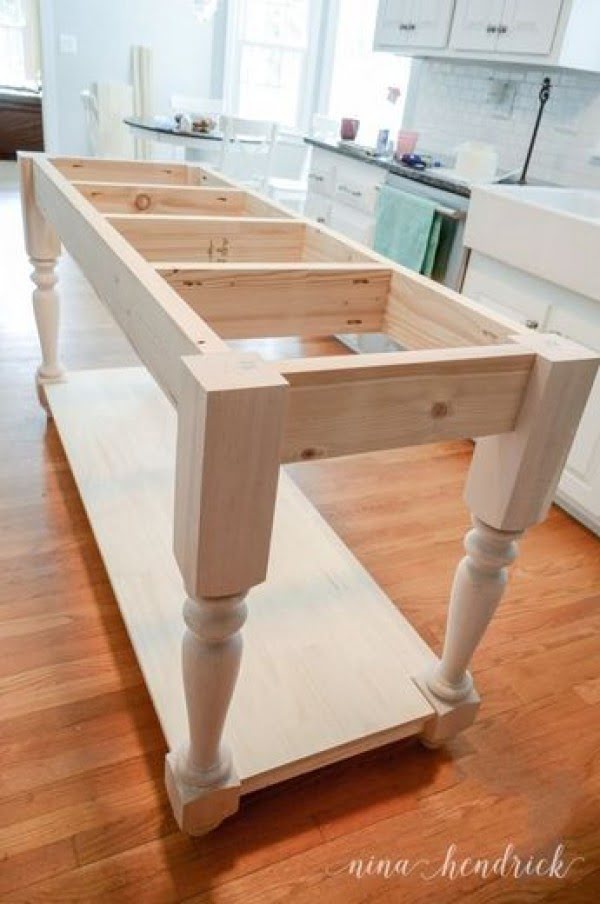
This is yet another great choice, as it has a charming and rustic look that you will likely fall in love with. It’s large, so as long as you have the room available, it can provide you with beauty and a great space for food prep and more.
Using 2x4s
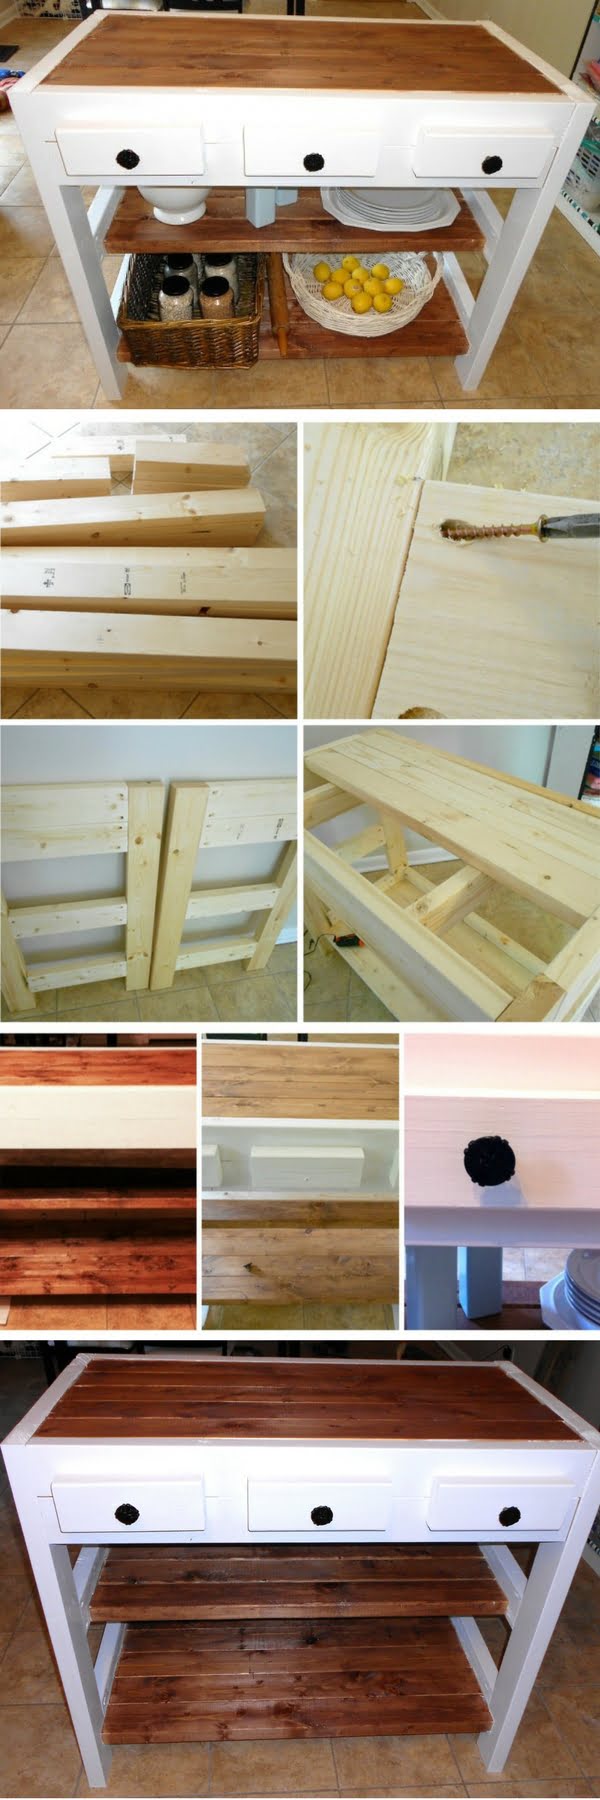
By looking at this attractive and practical kitchen island, you would never believe that it only costs $30 to build. Despite its inexpensive cost, this island is a great choice and can add beauty and space to any kitchen, so why not add it to yours?
From a Wash Tub

There are many very unique kitchen islands, and this one is no exception. Built from a wash tub, this kitchen island is lovely, compact and old-fashioned. You will absolutely love the look, and so will family members and friends.
From an Old Door
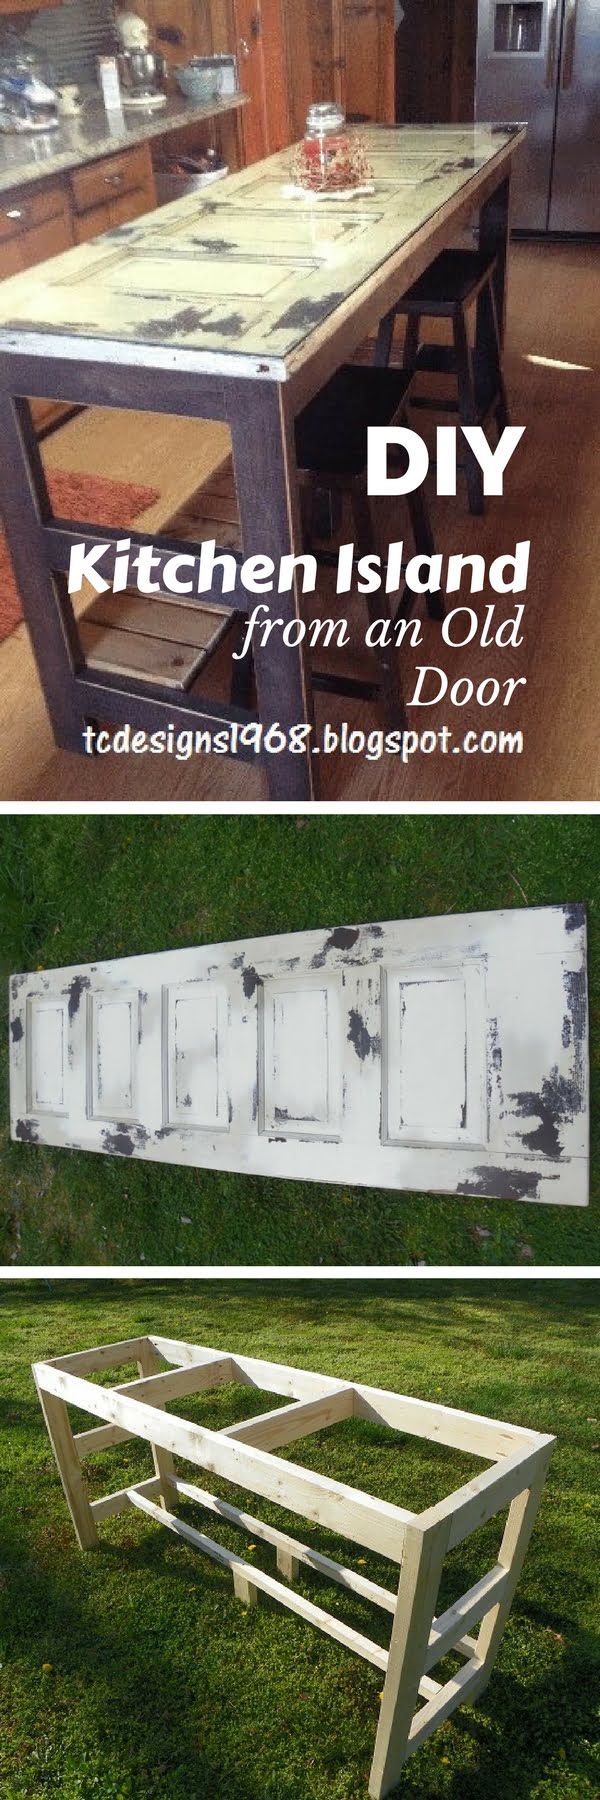
The creator of this attractive and large kitchen island was inspired to build it using a door. Although you can tell the top is actually a door, the design is so ingenious that it appears to be a perfect kitchen island.
Reclaimed Wood

The designer of this kitchen island utilized repurposed wood that had been lying around unused in the garage for a while. If you opt for this choice, you can use one type of wood or different types, just like the designer did.
Pallet Wood
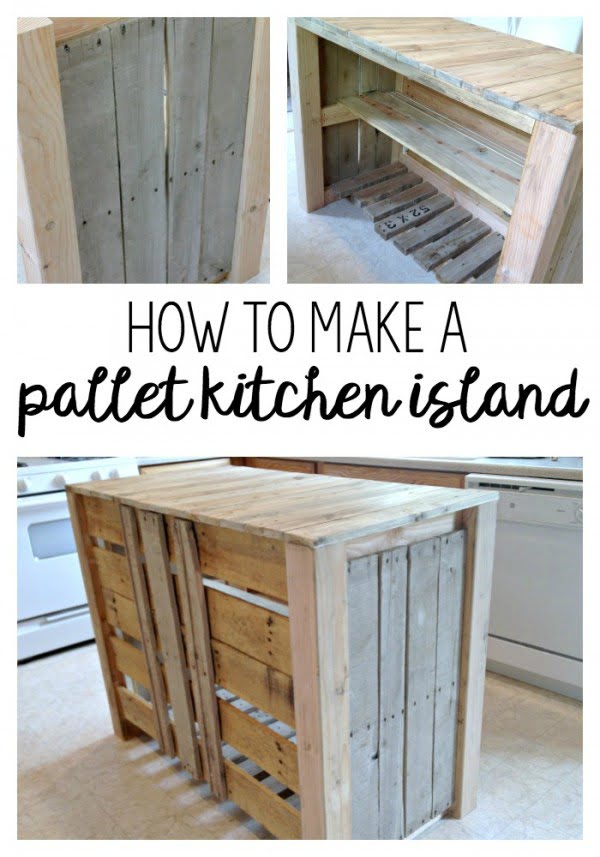
This island is another possibility if you’re on a very tight budget, since all supplies and materials cost around $50. By attaching a pallet to 2 X 4s and 4 X 4s, you can create this beautiful and very inexpensive island for your kitchen.
Low-Cost Reclaimed Wood
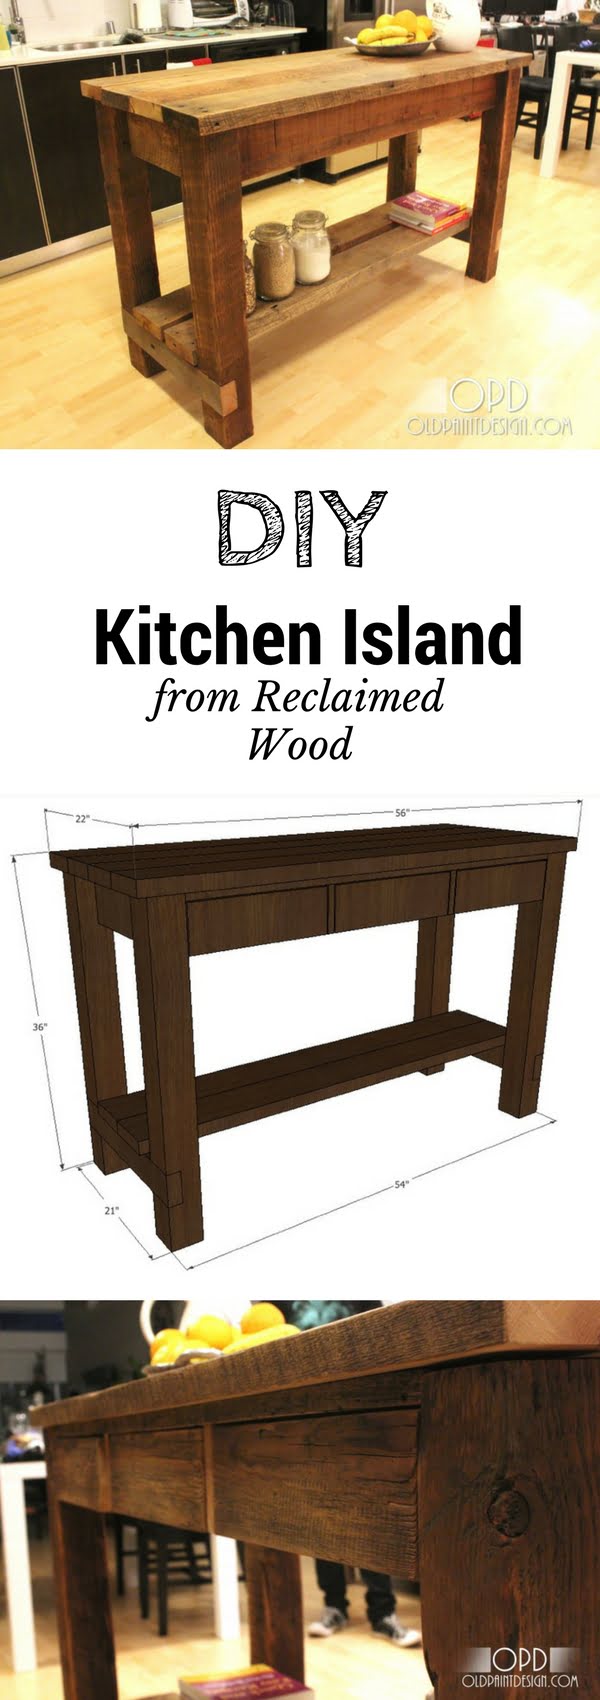
With materials and supplies totaling $100 or less, this handsome kitchen island is another terrific choice. By utilizing reclaimed wood, you can create this island that can add additional space and functionality to your home.
From a Coffee Table
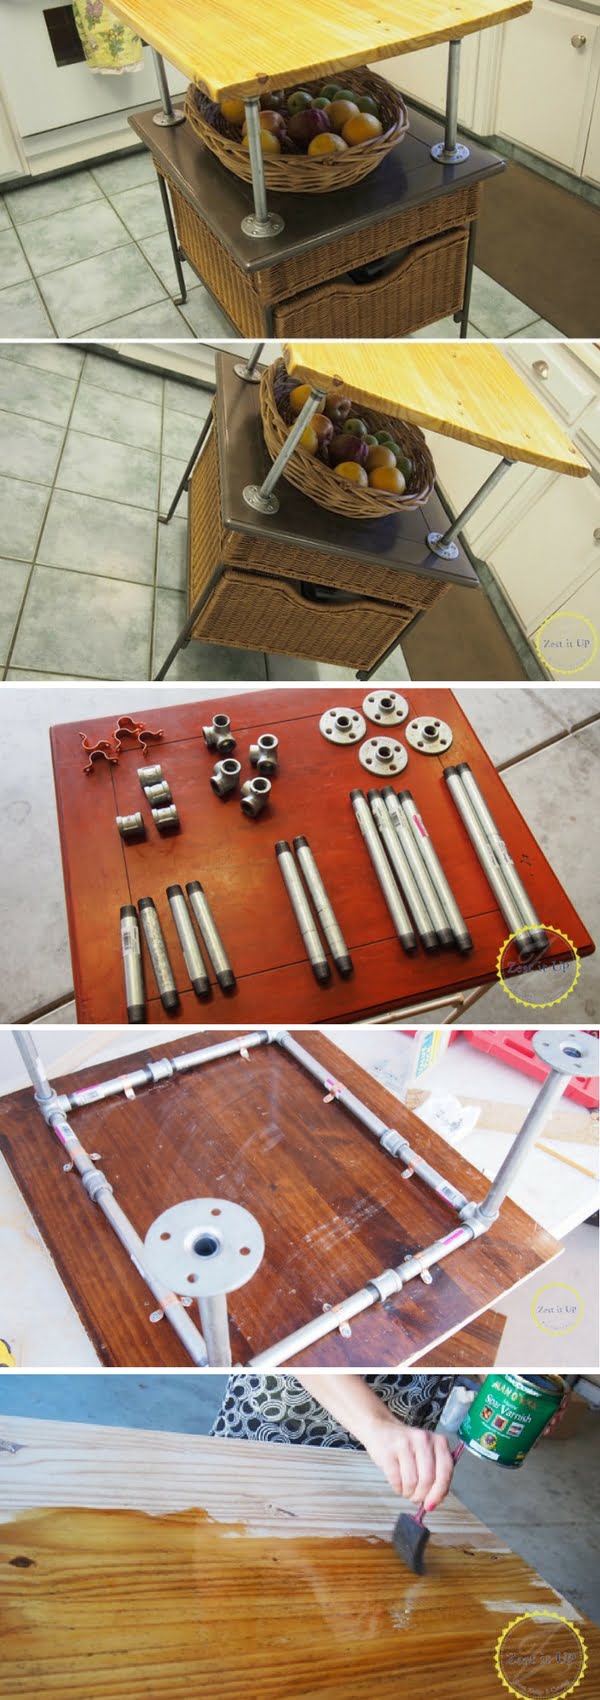
This choice is a great idea if you like transforming other pieces of furniture into newer, more useful pieces. With a bit of paint, some hardware and some hard work, you can create this kitchen island that will provide you with the ability to showcase items in your kitchen, including the island itself.
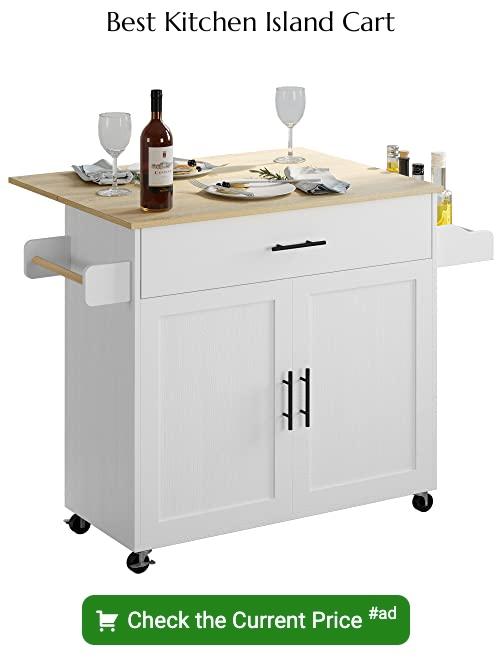
Cart

If you’re looking for a colorful and compact kitchen island that is sure to bring pizazz to your kitchen, you might want to choose this choice. Despite its compact size, this convenient cart provides you with a place to store mugs, potholder, and so much more.
Tabletop
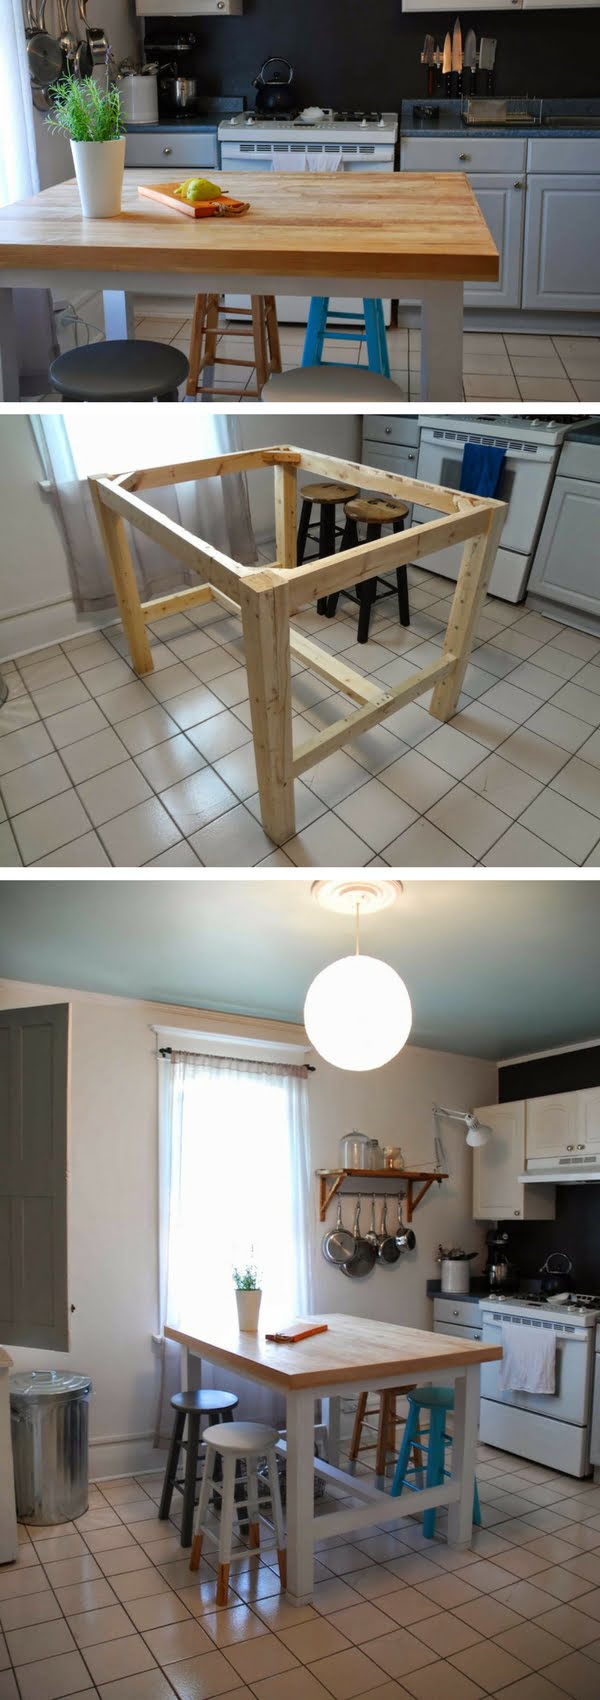
This choice is great if you’re on a budget but want an attractive and useful kitchen island. It’s easy to construct, and with a bit of work, you’ll have a beautiful addition to your kitchen where you can store items, prep food, and more.
Countertop
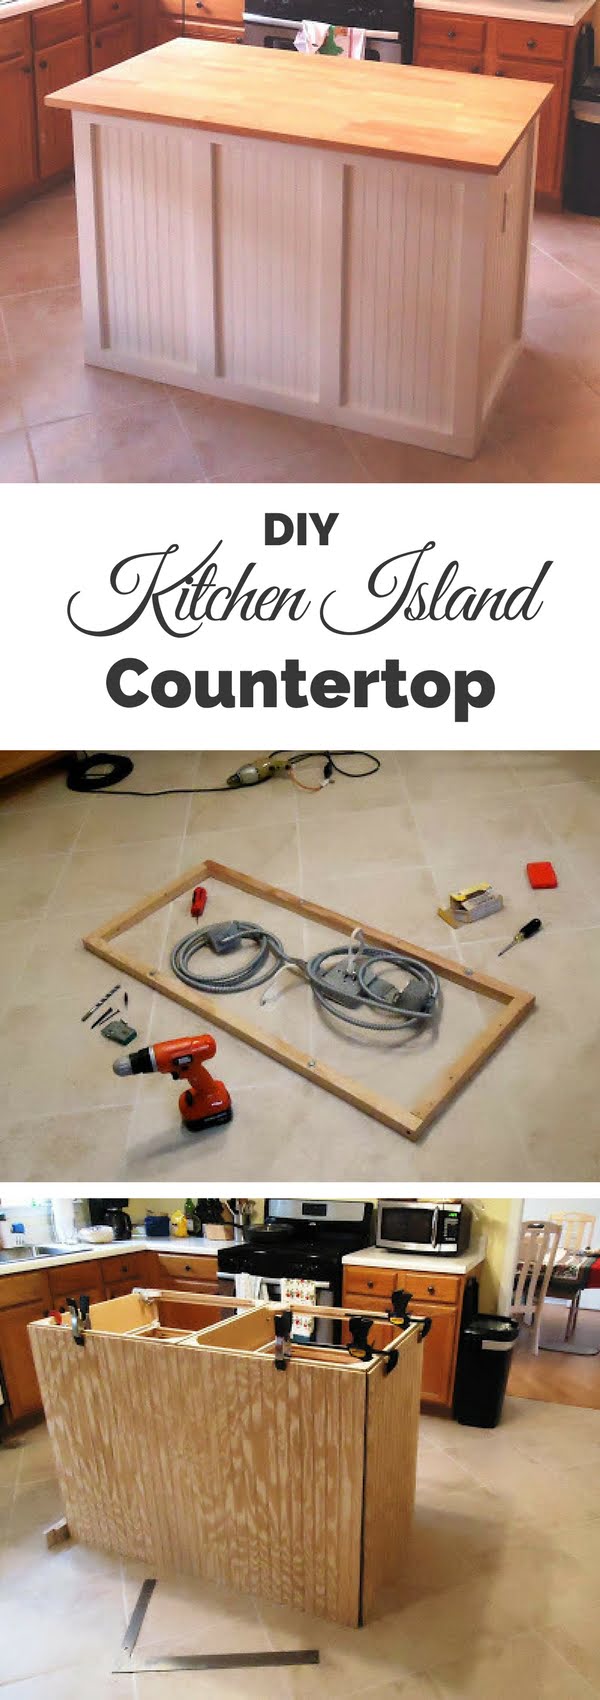
You don’t have to be anywhere near retirement to choose this island. Although the designer was preparing to retire when this was built, any homeowner (or renter) might choose this wonderful choice. This kitchen island adds additional counter space where various kitchen tasks can be completed.
Rustic Retro
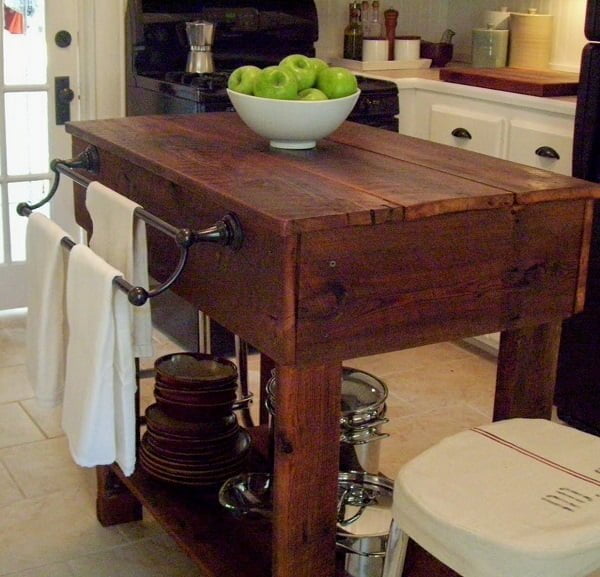
A great way to bring your kitchen to brighten up is by creating a statement kitchen table, and this amazing rustic kitchen island project is begging you to make it happen. The table itself take a simple design, but is a bit trickier to complete, in terms of putting it all together. However, if you have the will to play with wood, iron, and some dimension, we highly recommend it. Built from scratch, this table requires wood planks from the top and lower shelf, table legs, and a rustic towel holder. With an easy tutorial to follow, this DIY kitchen island is surely a captivating one.
Vintage Rustic
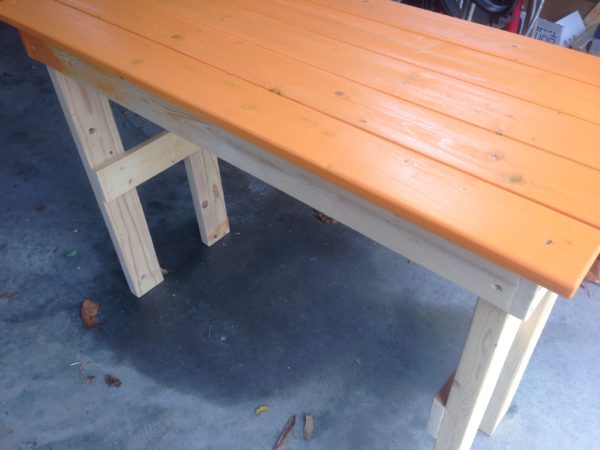
Every lover of the simple and staggering DIY project can give this playful kitchen table island a try. The table itself uses a simple design, fortified with strong and popping colors, which add chicness and class to the piece. To build it, you will need to build your top first and then add the remaining elements, such as lower shelves and strong, supportive legs. Painted wood looks amazing every time, so feel free to use bright and contrasting colors to give your kitchen island a little kick. Follow the tutorial below for more details on how to achieve this piece!
Dreamy White
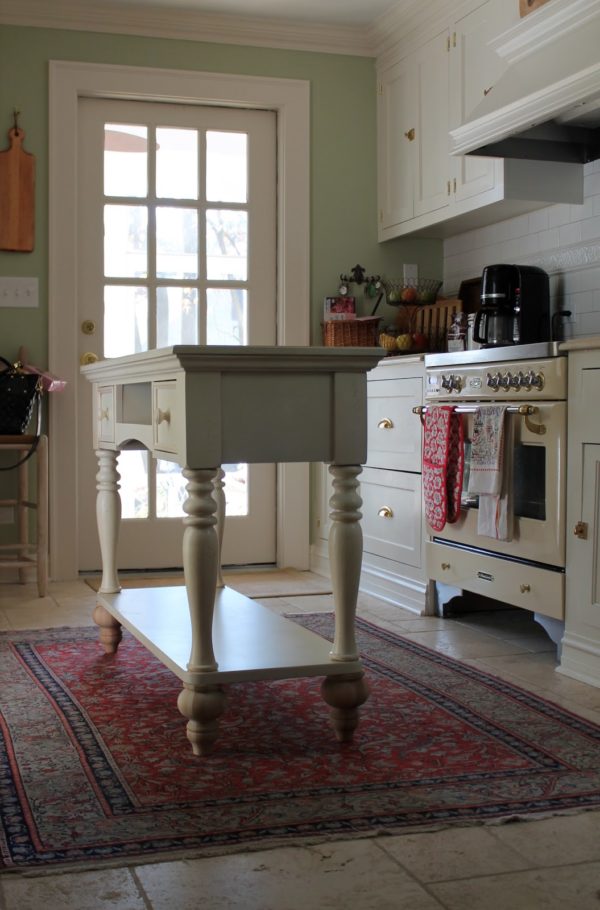
Keeping things clean and classy is still a trending idea in the interior design world, and this sophisticated DIY kitchen island invites you to have a go! What is used on this occasion is an old sofa table piece, which will be strengthened with a brand new kitchen top and a change of paint, if necessary. All white kitchen pieces introduce lightness and vibrancy, so we are rooting for pale and space-opening shades when painting it. With a sofa table already at your hands, you will spend very little on this piece and still complete a great project for your kitchen!
Lumber Mill Style
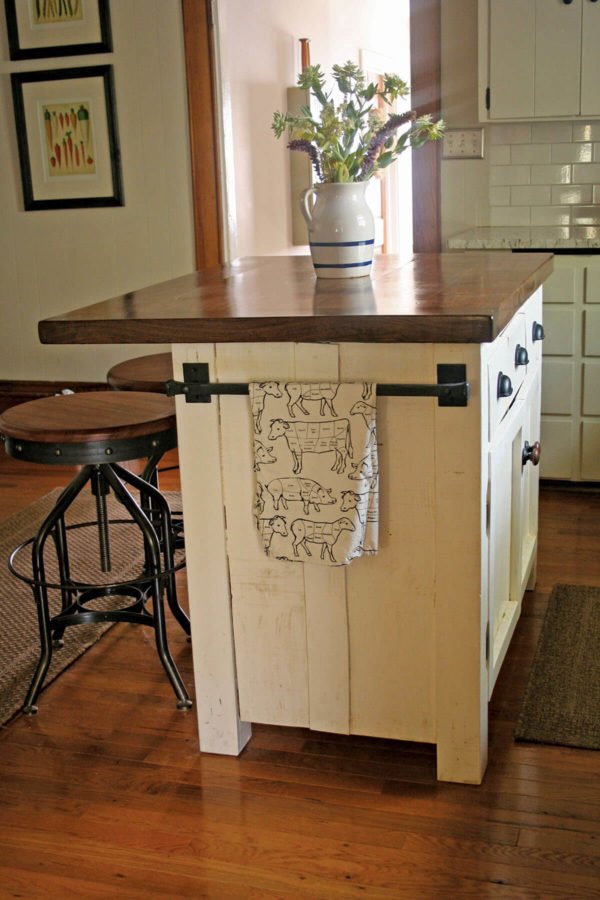
Seemingly impractical lumber pieces can be easily revolutionized into a fabulous kitchen table island, which speaks of elegancy and charm. This dark and bright piece is an extraordinarily crafted, so your skills need to be on point if you are interested in building it.
You will need various supplies to make this piece happen, including wood, an iron towel holder, and the classic nails and drill. Use white and dark wood tones to create a texture in the piece itself, and follow the elaborate tutorial ahead to learn more. This piece won’t be too much of a challenge, but a few days work, for sure!
Trash Storage
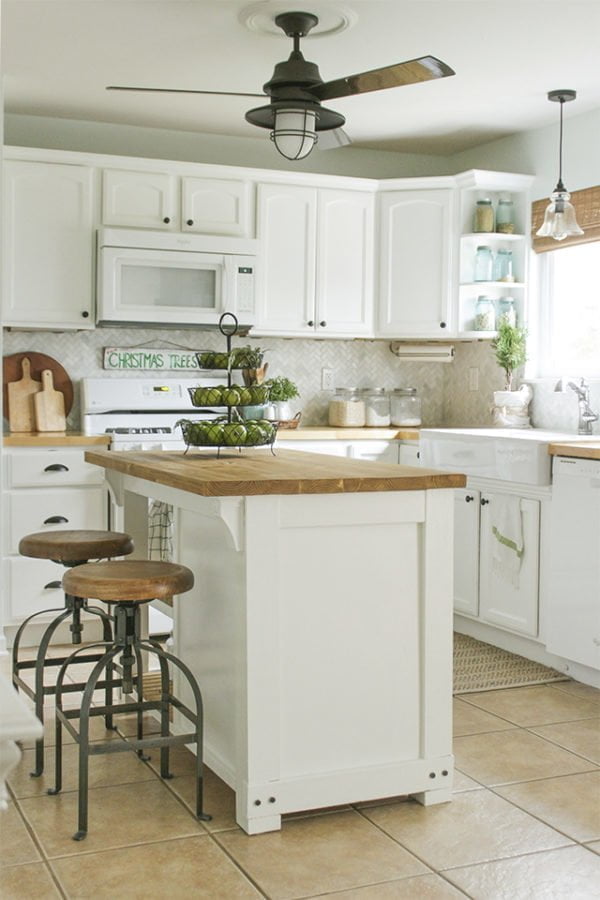
Making a multi-purposeful design stand out is a task any handyman would like to take on, and where better to start than with this sensational kitchen island? Basically, this DIY project is designed to introduce more space and practicality to your kitchen.
As you will need to build the kitchen island, the main thing to focus on is the trash can partition, which uses a simple open-close mechanism. The tutorial explains all steps in detail, leaving very little to the imagination, which will ultimately help you create a wonderful replica. One thing is certain, you can never go wrong with a white and wooden tone combo!
Repurposed Bookshelf
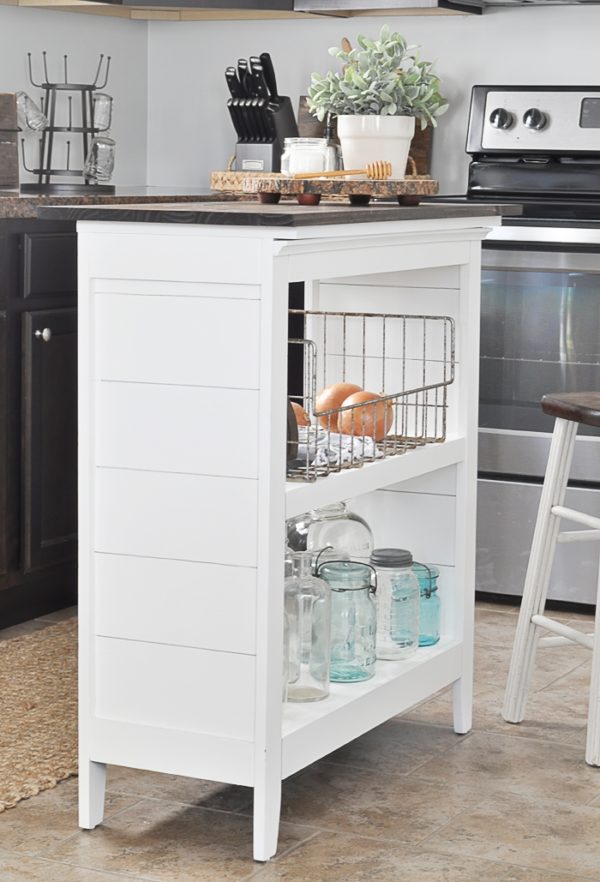
This fascinating DIY kitchen island is as easy to make as it is to look at! The kitchen piece brings a balanced space into your cooking area, making sure lots of light enters the room.
In fact, what you need for this project is an old or a new and affordable bookshelf, which will need to be repainted, redecorated and repurposed to fit the kitchen island’s purposes. The shelves and body of the kitchen islands are managed separately, before finally coming together in a sizzling design.
With a light budget in mind and a detailed tutorial, this may become one of your favorite projects yet!
Desk
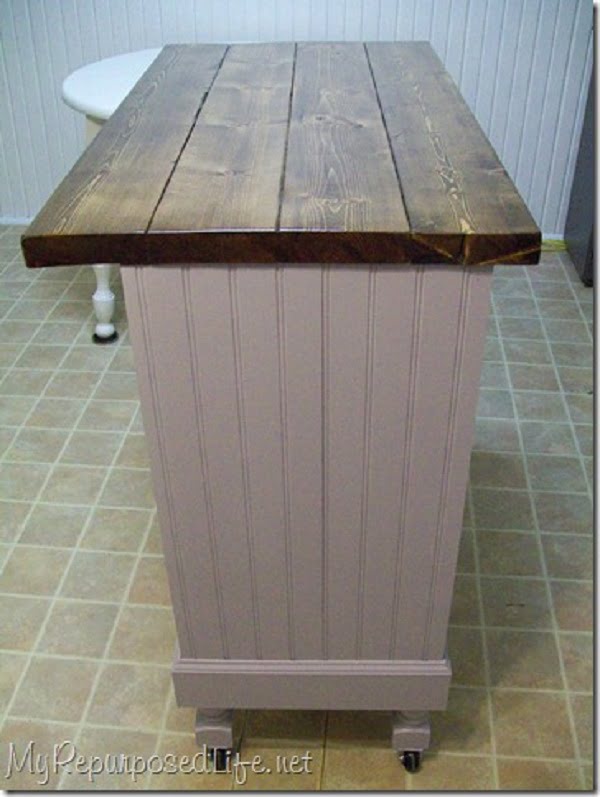
Repurposing decorative pieces in your house is trending more than ever before, so let’s have a look at this incredible DIY kitchen island inspired by an office desk. Transforming the desk into a classic kitchen island is possible, and with half the job done already, can you really ignore this project?
You will certainly need to make a few amends on the piece itself, like adding a mobile bottom and closing the frame entirely, so some room for shelves exists. While you can leave the frame plain white, feel free to play with a top of your choice, but definitely stick to wood!
Pantry
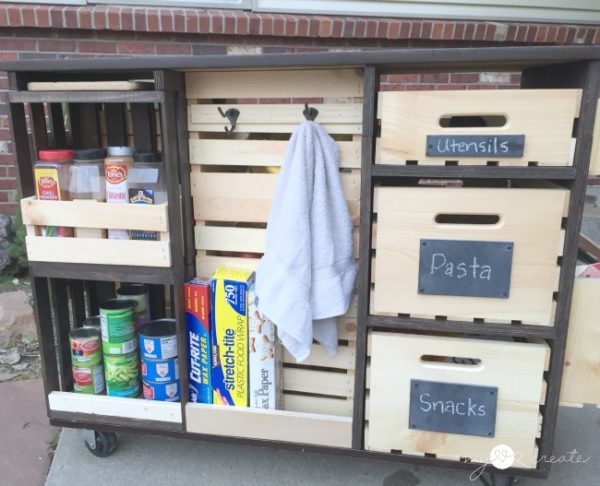
Back to making things multi-functional, this incredible DIY kitchen island takes the shape of a half-open pantry. This idea is simply genius, allowing you to not only master a great project ahead but also organize your kitchen like never before.
Executing this piece right will require several elements and bits, such as pre-made crates, casters which can be pulled from both sides, and a great play of colors. Of course, the kitchen island itself is very detailed and even has a cutting board incorporated in the finished piece. Follow the tutorial to carry out this design properly, and let’s get creative!
Cabinet Tilt-Out
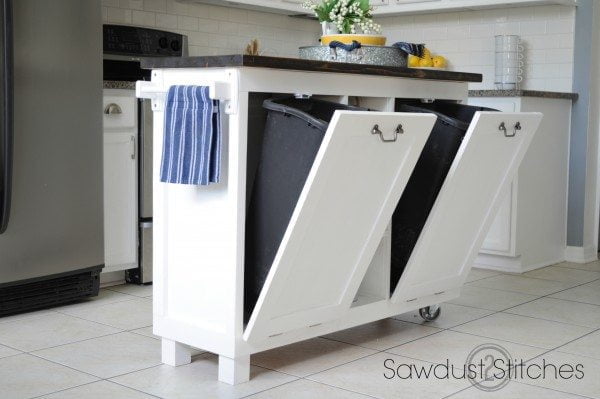
Heavy and timely furniture can be quite boring and dated, so why not follow this great DIY example of turning your office desk into a practical and beautiful kitchen island?
Find a cabinet that has two vertical doors and several drawers in the middle, and use the largest cabinets to incorporate garbage cans in it – it’s great, right? The kitchen island should also be empowered with a new and kitchen-appropriate top, made entirely of wood. What you might find a tad more detailed are the pull-down cabinet doors, but the tutorial is very easy to follow and will definitely make the effort worth it!
Rustic Farmhouse
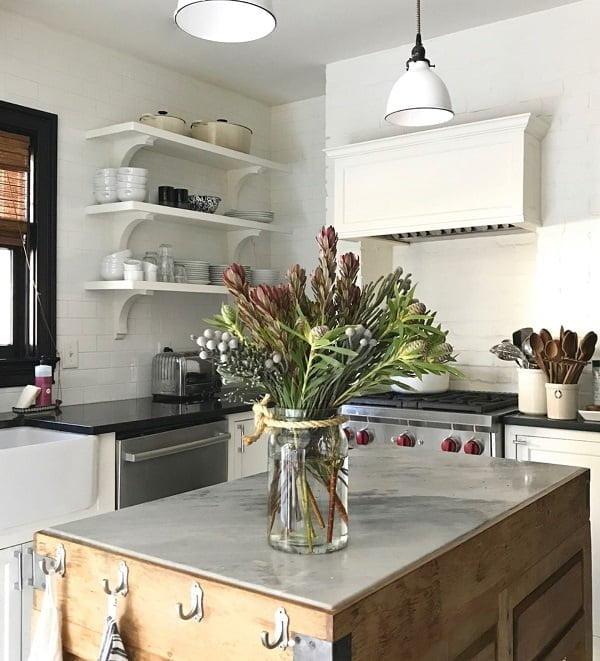
Inspiration comes from simple things. This rustic farmhouse kitchen is truly stunning and the kitchen island brings the whole decor together nicely. And while there’s no tutorial for this particular design, we’re including this image at the end of our list to kindle your imagination. Let’s get inspired and let’s get crafting!
Recap
