Last updated on
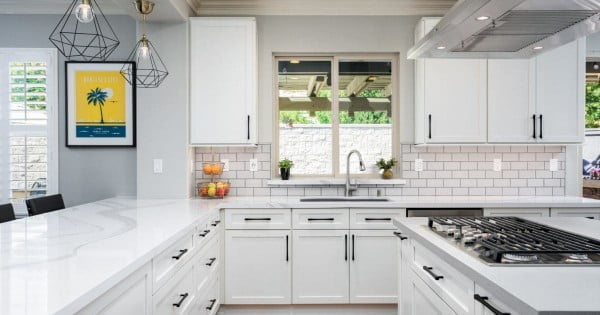
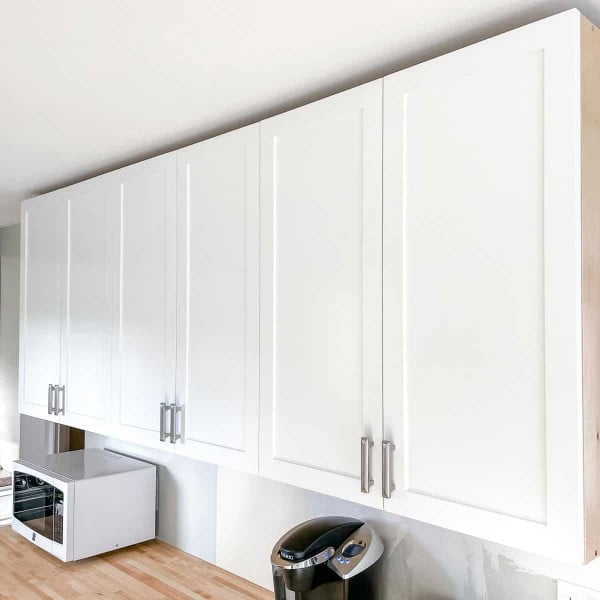
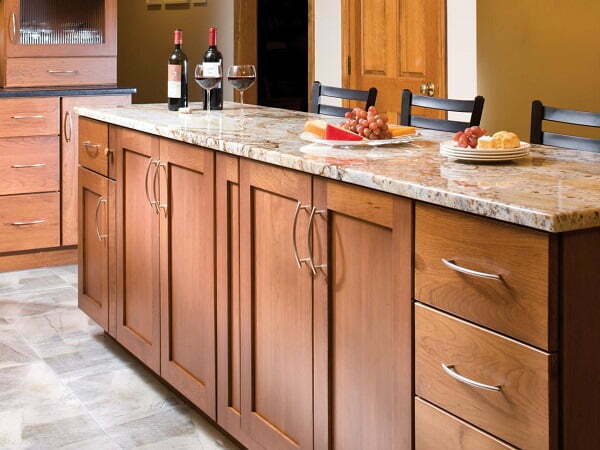
Here are 38 tutorials for making shaker cabinet doors, a popular style of door for kitchens and bathrooms. Read on!
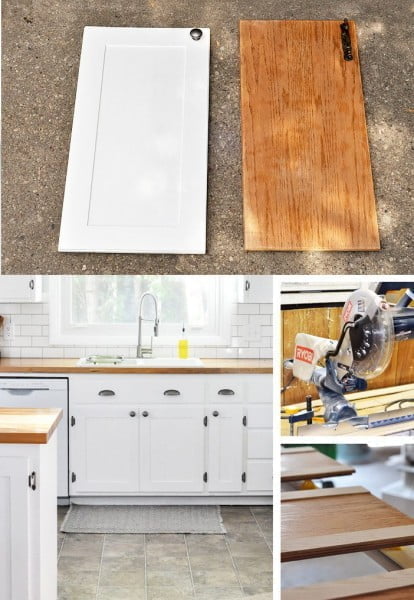
These doors are easy to make with some basic woodworking skills and tools. There are two ways to make them: build from scratch or transform old cabinet doors.
You will need to be precise when measuring and cutting the wood in order to create a door that fits well and looks good.
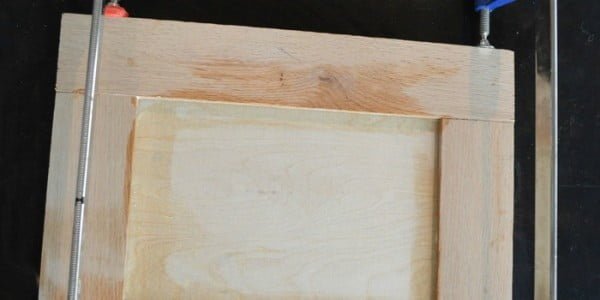
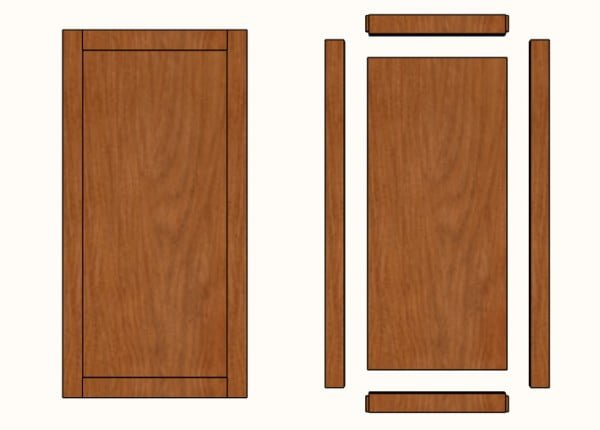
This project is a bit time-consuming, but it is not difficult to do. You will need to cut the frame boards and the panel for the door, then glue or screw them together.
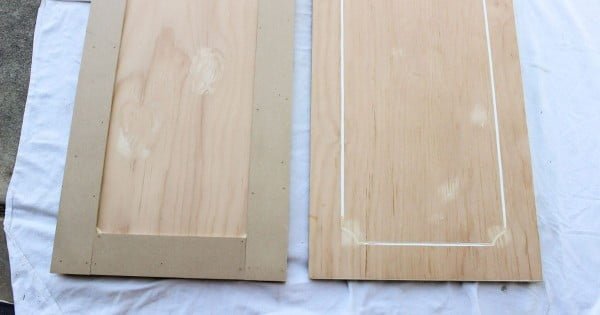
Once the door is assembled, you will need to sand and putty any joints or pocket holes. If you are painting the door, you may also want to run a bead of caulk along the inside corners of the front of the door where the plywood goes in the grooves.
These tutorials will help you through every step of this project so that you end up with beautiful shaker cabinet doors.
You may expect to pay $20-$30 per door.
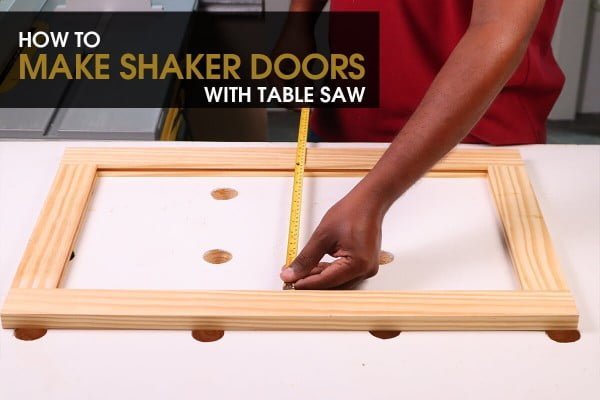
How to Make Shaker Cabinet Doors
Tutorial: familyhandyman.com
Expected cost: $20-$30
Supplies:
- 1×4 lumber
- 1×6 lumber
- table saw
- chop saw
- miter saw
- drill
- screws
- nails
- hammer
- tape measure
- level
- chisel
- ruler or straight edge
- sandpaper
- paint or stain
- latch
- handle
This project is a bit more difficult than some of the others, but it is still doable for someone with intermediate-level carpentry skills. You will need a table saw to complete this project.
The most important thing is to be precise when measuring and cutting the wood in order to create a door that fits well and looks good.
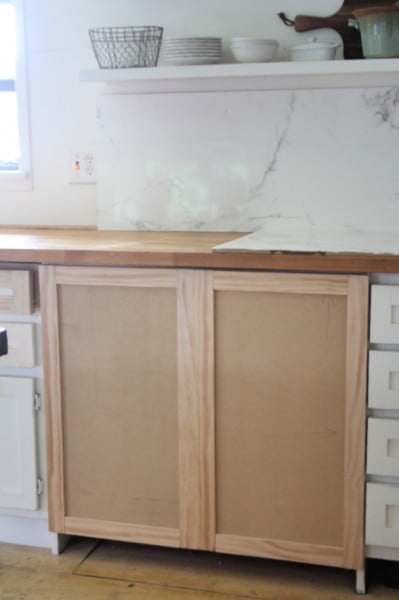
Tutorial: woodshopdiaries.com
Expected cost: $20-$30
Supplies:
- 1/2″ plywood
- 1×4 lumber
- 1×6 lumber
- wood glue
- wood screws
- sandpaper
- putty
- paint (optional)
- caulk (optional)
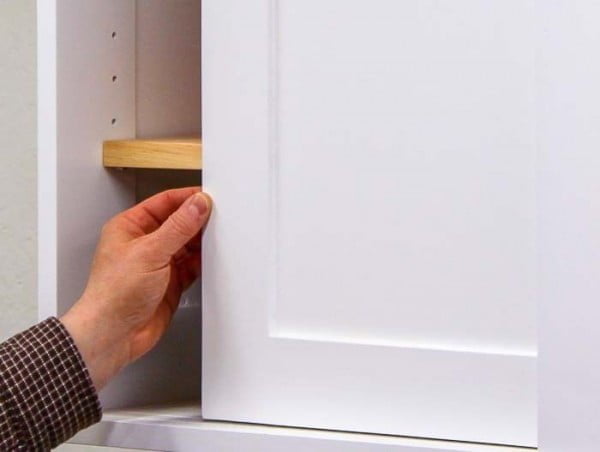
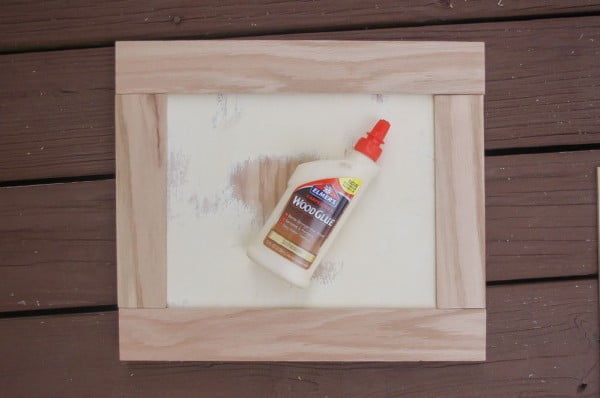
This project is a bit time consuming, but it is not difficult to do. You will need to cut the frame boards and the panel for the door, then glue or screw them together.
Once the door is assembled, you will need to sand and putty any joints or pocket holes. If you are painting the door, you may also want to run a bead of caulk along the inside corners of the front of the door where the plywood goes in the grooves.

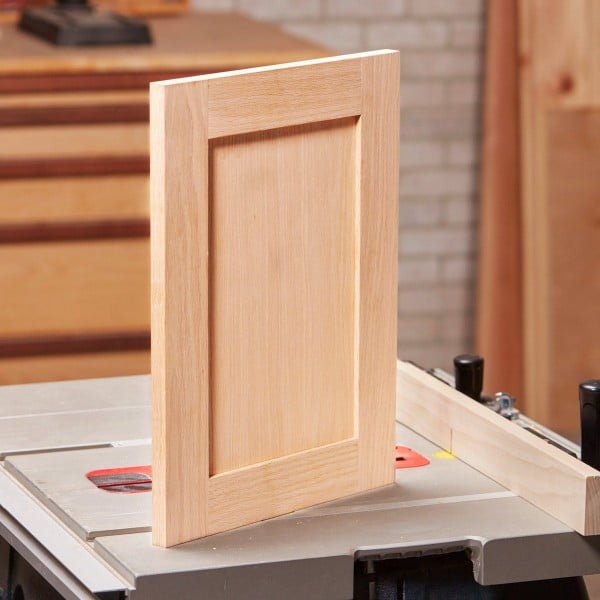
Tutorial: rockler.com
Expected cost: This project may cost around $20 per door.
Supplies:
- Router bit set
- Router
- Tablesaw
- Miter saw
- Chisels
- Hammer
- Pry bar
- Glue
- Clamps
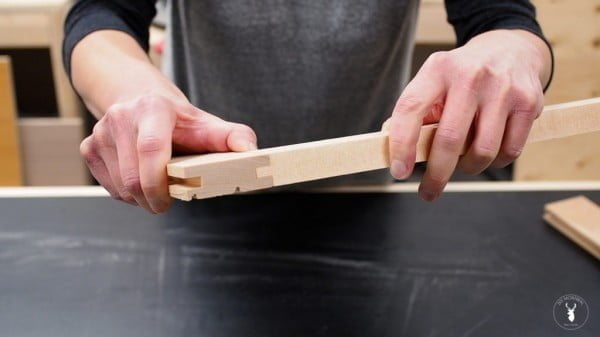
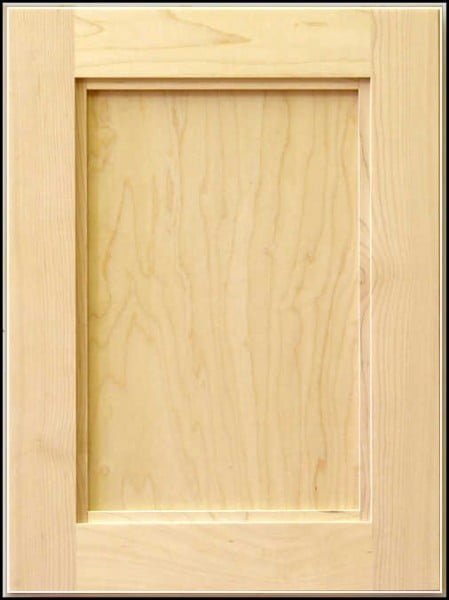
This project entails building frame-and-panel Shaker doors or drawer fronts using a router bit set. It is not difficult to complete, but some experience with using a router may be necessary.

Tutorial: atterraceplace.com
Supplies:
- Router
- Router table
- 1/4″ straight router bit or 1/4″ groove bit
- Miter saw
- Drill
- Kreg pocket hole jig
- 1 1/4″ pocket hole screws
- Tape measure
- Pencil
- Wood glue
- Orbital sander
- Lumber (1x3s and 1/4″ plywood)
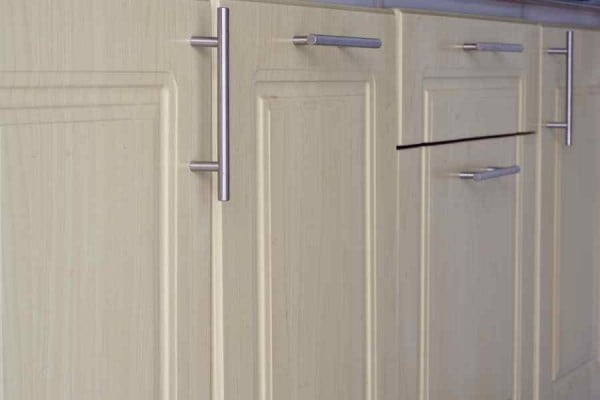
This project is a tutorial on how to build shaker cabinet doors. It is written for ONE 11″ x 21 1/2″ door.
To complete this project, first route a 1/4″ groove along the center of the rails and stiles. Cut a stopped groove about 2″ from the top of the stile to 2″ from the bottom of the stile.
This prevents any unsightly gaps in the top or bottom of the cabinet door once it’s assembled.
Tutorial: thehomewoodworker.com
Expected cost: $20-$30
Supplies:
- Tape measure
- Ruler or straight edge
- Circular saw
- High-grit sandpaper
- Stiles (vertical pieces)
- Rails (horizontal pieces)
- Construction adhesive
- Cordless drill
- 1 inch hole saw
- Paint or stain
- Cabinet pulls
This project is a guide on how to make shaker cabinet doors. It is not overly difficult, but does require some basic woodworking skills and tools.
With the right supplies and some patience, anyone can complete this project.
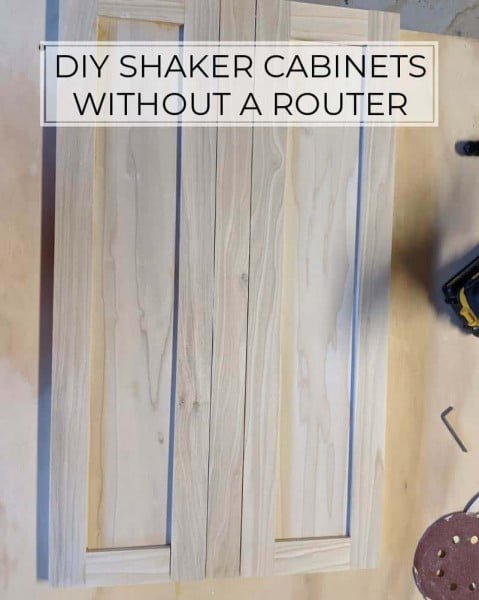
Tutorial: craftedbythehunts.com
Expected cost: $20-$30
Supplies:
- Drill
- Miter saw or circular saw
- Kreg Jig
This project is a tutorial on how to make shaker cabinet doors without a router. It is medium difficulty and will take some time to complete.
You will need a drill, miter saw or circular saw, and a Kreg Jig to complete this project.
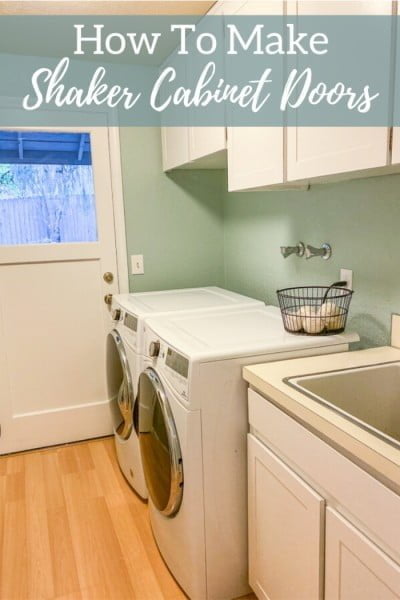
Tutorial: acarriedaffairblog.com
Expected cost: $10-$15 per door
Supplies:
- Tape measure
- Ruler or a straight edge
- Circular saw
- Jigsaw
- Sandpaper
- Stiles (the vertical pieces of wood that make up the frame of the door)
- Rails (the horizontal pieces of wood that make up the frame of the door)
- Construction adhesive
- Cordless drill
- 1 inch hole saw
- Paint or a sealant (optional)
This project is a tutorial on how to make your own shaker cabinet doors. It is a relatively easy project that should take about 15 minutes per door.
You will need some basic woodworking skills and tools, as well as some patience.
Tutorial: instructables.com
Supplies:
- 1×4 lumber
- 1×6 lumber
- 1×8 lumber
- 1×10 lumber
- 1×12 lumber
- Cabinet door hinges
- Cabinet door knobs or handles
- Drill
- Jigsaw
- Miter saw
- Nail gun
- Paint or stain
- Sandpaper
This project is a tutorial on how to make shaker style doors. It is rated at a difficulty level of 3, which means it is considered to be of moderate difficulty.
It should take approximately 3 hours to complete.
Tutorial: worstontheblock.com
Expected cost: $30-$40
Supplies:
- MDF
- Hinges
- Paint
- Measuring tape
- Saw
This project is a bit more difficult than some of the others on this site, but it is still doable for most people. It will require some measuring and cutting of MDF, as well as attaching hinges and painting.
Overall, it should take a few hours to complete.
Tutorial: thehandymansdaughter.com
Expected cost: This project should cost around $50 in materials.
Supplies:
- 1/2″ MDF or plywood
- 1 1/4″ hole saw
- 1/4″ roundover bit
- 1/2″ rabbeting bit
- 1″ Forstner bit
- T-molding
- Cabinet hinges
- Wood glue
- Cabinet screws
- Sandpaper
This project is a tutorial on how to make Shaker cabinet doors using a router table. It is rated as easy to moderate in difficulty, depending on your experience with woodworking and using a router table.
The project should take a few hours to complete, not including drying time for the glue.
Tutorial: diymontreal.com
Expected cost: $10-$20
Supplies:
- Table saw
- Measuring tape
- Wood glue
- Cordless drill
- 1 inch hole saw
- Paint or stain
- Cabinet hardware
This project is a bit more difficult than some of the others we’ve tackled, but it’s still doable for most people. You’ll need to be comfortable using a table saw, and you’ll need to be precise in your measurements.
But other than that, it’s not too bad. The end result is a beautiful shaker door that will add storage and style to your shop or home.
Tutorial: remodelaholic.com
Expected cost: $20
Supplies:
- 1/4″ plywood
- 1×2 lumber
- Construction adhesive
- Cordless drill
- 1″ hole saw
- Paint or stain
- Paintbrush or roller
- Cabinet hardware (knobs or handles)
This project is a tutorial on how to build a shaker cabinet door. It is not difficult to complete, but does require some basic woodworking skills and knowledge.
The project should take about 15 minutes per door, not including the time it takes for the glue to dry. Cost per door is around $20.
Tutorial: sawsonskates.com
Expected cost: $50
Supplies:
- Miter saw
- Pocket hole jig
- Drill
- Router table
- Additional saw to cut center panel
This project is a tutorial on how to make shaker cabinet doors. It is not difficult to complete, but it does require some basic woodworking skills and tools.
You will need a miter saw, pocket hole jig, drill, router table, and an additional saw to cut the center panel. The project should take about 2 hours to complete.
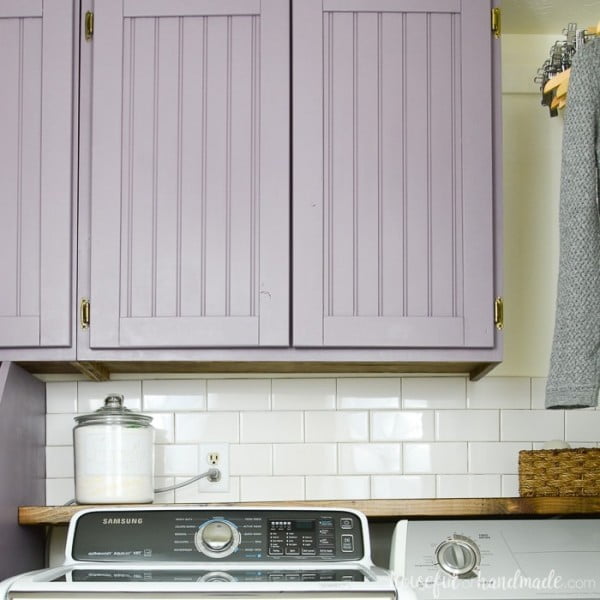
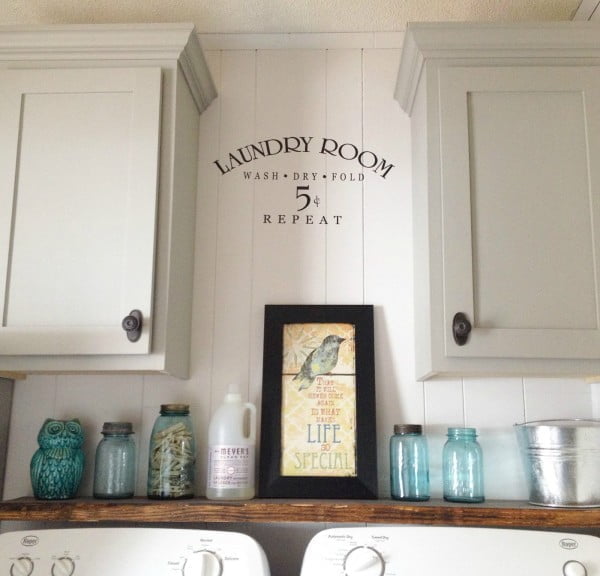
Tutorial: housefulofhandmade.com
Expected cost: $20 – $30
Supplies:
- Cabinet doors
- Paint
- Paintbrush
- Sandpaper
- Wood filler
- Cabinet hardware
This project is a great way to update your old cabinets on the cheap or build new kitchen cabinets. It is easy to build and look amazing.
You can use a few simple woodworking techniques to update your old cabinet doors without spending a fortune.
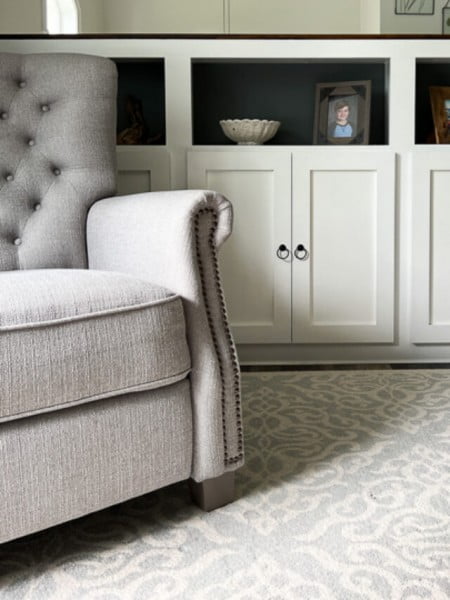
Tutorial: justcallmehomegirl.com
Expected cost: $20-$30
Supplies:
- 1×4 lumber
- 1×6 lumber
- 1×8 lumber
- 1×10 lumber
- 1×12 lumber
- Cabinet hinges
- Cabinet knobs or pulls
- Wood glue
- 1 1/4″ pocket hole screws
- 2″ pocket hole screws
- Sandpaper
- Stain or paint (optional)
This project is a great way to add some extra storage to your kitchen or dining room. It is a relatively easy project that can be completed in a weekend.
The most difficult part of this project is cutting the wood to the correct dimensions and drilling the pocket holes. Other than that, it is just a matter of attaching the doors and hinges.

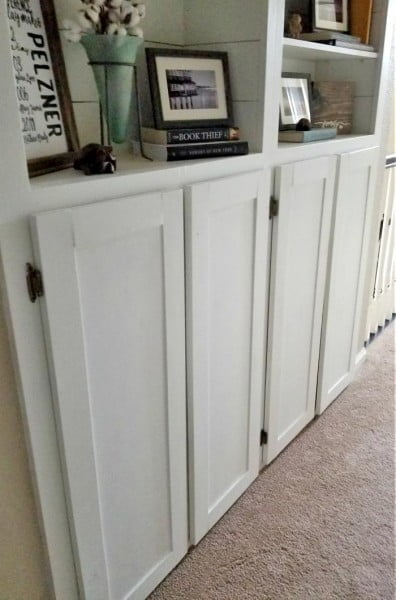
Tutorial: outoftheww.com
Expected cost: $20-$30
Supplies:
- Tape measure
- Circular saw
- Miter saw
- Table saw
- Dado blade
- Router
- 1″x4″x8′ pine boards
- 1″x6″x8′ pine boards
- 1″x8″x8′ pine boards
- 1/4″x4’x8′ plywood
- 1-1/2″ screws
- 2″ screws
- Construction adhesive
- Stain
This project is a bit more difficult than some of the others on this list, but it is still doable for most people. It involves cutting dados and tenons, as well as sanding and finishing the door.
It will take some time to complete, but the end result is worth it.
Tutorial: leapoffaithcrafting.com
Expected cost: This project should cost around $10-$20
Supplies:
- 1/4″ plywood
- 1×2 lumber
- Construction adhesive
- Cordless drill
- 1″ hole saw
- Paint or stain
- Paintbrush or roller
- Cabinet hardware
This project is a tutorial on how to make shaker cabinet doors without using a router. It is a fairly easy project that does not require any special tools, making it perfect for those who do not have a router.
The project should take around 1-2 hours to complete.
Tutorial: comestayawhile.com
Expected cost: $20-$30
Supplies:
- 1/4″ plywood
- 1×2 lumber
- 1×4 lumber
- Cabinet hinges
- Drill
- Miter saw
- Table saw (or circular saw)
This project is a great way to add some shaker style cabinet doors to your kitchen. It is a relatively easy project that requires some basic woodworking skills.
You will need to be able to use a miter saw, drill, and table saw (or circular saw). The most difficult part of this project may be creating the grooves for the plywood, but as long as you take your time and make sure the cuts are straight, it should not be too difficult.
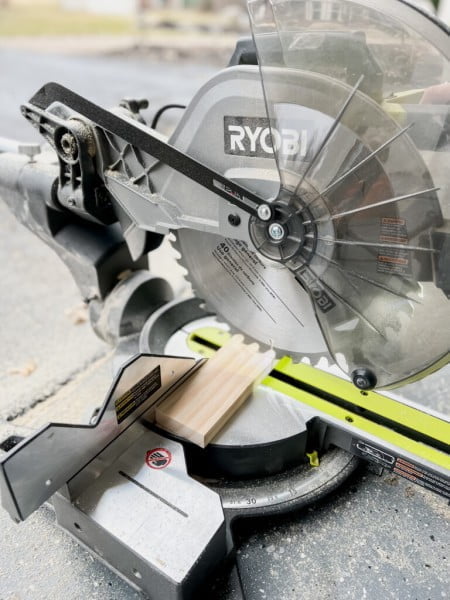
Tutorial: mellowpine.com
Expected cost: This project should cost around $20 per door.
Supplies:
- Table saw
- Plywood
- Ruler or measuring tape
- Pencil
- Circular saw
- High-grit sandpaper
- Stiles
- Construction adhesive
- Cordless drill
- 1 inch hole saw
- Paint or stain
- Knob or handle
This project entails making a shaker cabinet door using a table saw. It is not difficult to complete, but there are many steps involved.
You will need to make sure you have the correct measurements for the door frame and the plywood panel before beginning.
Tutorial: mimzyandcompany.com
Supplies:
- Tape measure
- Ruler or straight edge
- Jigsaw
- Lattice trim moulding
- C clamps
This method is the easiest way to make a set of Shaker Style cabinet doors.
Set a jig, ruler, or 2×4 to use as a straight edge. Use the Kreg Jig for rip cuts, fastened with C clamps.
Then measure and cut the lattice trim molding to the correct size. Butt-join the trim, which is typical for the shaker style.

Tutorial: diy-masters.com
Expected cost: $20-$30
Supplies:
- 1/2 inch MDF
- 1/4 inch MDF
- 1/2 inch plywood
- 1/4 inch plywood
- Router
- Router bit
- Circular saw
- Jigsaw
- Drill
- 1 inch hole saw
- Paint or wood stain
- Polyurethane
This project is a bit more difficult than some of the others, but it’s still doable for most people. You’ll need to have some basic woodworking skills and knowledge of how to use a router.
The project will take a few hours to complete, but the results are definitely worth it!
Tutorial: jennykomenda.com
Expected cost: $30
Supplies:
- Wood trim
- Brad gun
- Sandpaper
- Wood filler
This project is a bit time-consuming, but it’s not too difficult. You’ll need to measure and cut the wood for the trim, then attach it to the cabinets using a brad gun.
You may need to sand and fill in some gaps afterwards.

Tutorial: ana-white.com
Expected cost: $10-$20
Supplies:
- Cabinet doors
- Paint or stain
- Paintbrush or roller
- Sandpaper
- drill
- screws
- hinges
This project is a great way to add some new cabinet doors to your home. It is a fairly easy project that can be completed in a weekend.

Tutorial: mwawoodworks.com
Expected cost: $20-$30
Supplies:
- Milling machine
- Lumber
- Joinery bits
- Panel groove bits
This project is a bit more difficult than some of the others, but it is still manageable for most people. It involves milling your own lumber, cutting joinery, and cutting the panel grooves.
If you have never done any of these things before, I would recommend getting some help or watching some tutorials on how to do them. Other than that, just take your time and be careful and you should be able to complete this project without any problems.
Tutorial: ablossominglife.com
Supplies:
- Tape measure
- Ruler or a straight edge
- Circular saw
- High-grit sandpaper
- Stiles (the vertical pieces of wood that make up the frame of the door)
- Construction adhesive
- Cordless drill
- 1 inch hole saw
- Paint or a sealant (optional)
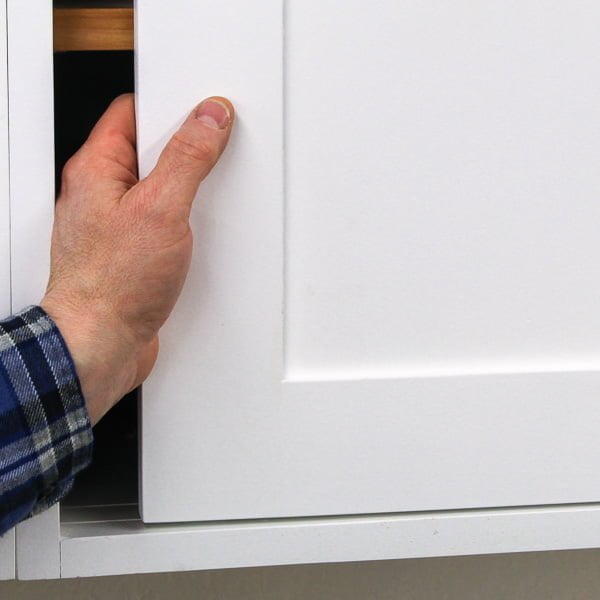
This project is a tutorial on how to make shaker cabinet doors from flat-paneled doors. It is a fairly simple project that does not require too much woodworking experience.
However, it is important to have all the tools and supplies ready before starting the project, as well as working in a well-ventilated area.
Tutorial: medium.com
Expected cost: $20-$30
Supplies:
- Kreg Jig
- Wood glue
- 1 1/4″ pocket hole screws
- 1″ brad nails
- Cordless drill
- Circular saw
- Plywood
- Paint or stain
This project is a tutorial on how to make shaker cabinet doors. It is a relatively easy project that can be completed in a few hours.
You will need a Kreg Jig and some basic woodworking tools to complete it.
Tutorial: homedesignideasplans.com
Expected cost: This project should cost around $50 in total
Supplies:
- Tape measure
- Ruler or a straight edge
- Circular saw
- High-grit sandpaper
- Stiles (the vertical pieces of wood that make up the frame of the door)
- Rails (the horizontal pieces of wood that make up the frame of the door)
- Construction adhesive
- Cordless drill
- 1 inch hole saw
- Paint or a sealant (optional)
This project is a tutorial on how to make shaker cabinet doors. It is not difficult to complete, but it does require some basic woodworking skills and knowledge of measurements.
Tutorial: urbaki.com
Supplies:
- Plywood
- One-by-three plywood
- Table saw
- Drill
This project entails building a shaker cabinet door from scratch. It is a relatively easy project that can be completed in a few hours.
The only tools you will need are a table saw and a drill. The only material you will need is plywood and one-by-three plywood.

Tutorial: queenbeeofhoneydos.com
Supplies:
- Table saw
- Wood glue
- Clamps
This project entails building shaker doors using a table saw, wood glue, and clamps. It is not difficult to complete, but it is important to be familiar with the parts of a door and the measurements needed before beginning.
Tutorial: asecondcoatblog.com
Expected cost: This project will cost you around $30.
Supplies:
- A printer
- Paper
- Scissors
- Tape
- A sharpie or other permanent marker
- A ruler or other straight edge
- A piece of cardboard or other stiff material (optional)
This project is a bit tedious and frustrating, but the end result is worth it! It’s not too difficult to complete, but it does require patience and attention to detail.
Tutorial: greatpros.com
Supplies:
- Tape measure
- Plywood
- Ruler or a straight edge
- Circular saw
- High-grit sandpaper
- Stiles
- Construction adhesive
- Cordless drill
- 1 inch hole saw
- Paint or a sealant (optional)
This project entails building shaker cabinet doors from scratch or updating existing flat cabinet doors. It is not difficult to complete, but it does require some precision in measuring and cutting the wood for the frame and door panel.
Tutorial: famousartisan.com
Supplies:
- Tape measure
- Ruler or a straight edge
- Miter saw
- Table saw
- Chisels
- Hammer
- Drill
- 1/4″ drill bit
- Plywood
- Wood glue
- Sandpaper
This project entails building a shaker cabinet door using mortise and tenon joinery. It is not difficult to complete, but it does require some precision in measuring and cutting the pieces.
How to Makeover Cabinet Doors Into Shaker Style
Tutorial: twofeetfirst.net
Expected cost: $20-$30
Supplies:
- MDF strips
- Construction adhesive
- Cordless drill
- 1/8″ drill bit
- Circular saw
- Fine-grit sandpaper
- Stain or paint
- Polyurethane
This project is a bit more difficult than some of the others, but it is still manageable for most people. It will take some time to prep the doors and drawer fronts, but the actual process of adding the MDF trim is relatively simple.
Just be careful when handling the MDF strips, as they can dent easily.
Tutorial: cherishedbliss.com
Supplies:
- Miter saw
- Nail gun
- Orbital sander
- Detail sander
- Wood filler
- Putty knife
This project is a tutorial on how to turn flat doors into shaker style cabinets by adding trim to the doors. It is time consuming, but not difficult.
You will need some supplies, including a miter saw, nail gun, orbital sander, detail sander, wood filler, and putty knife.
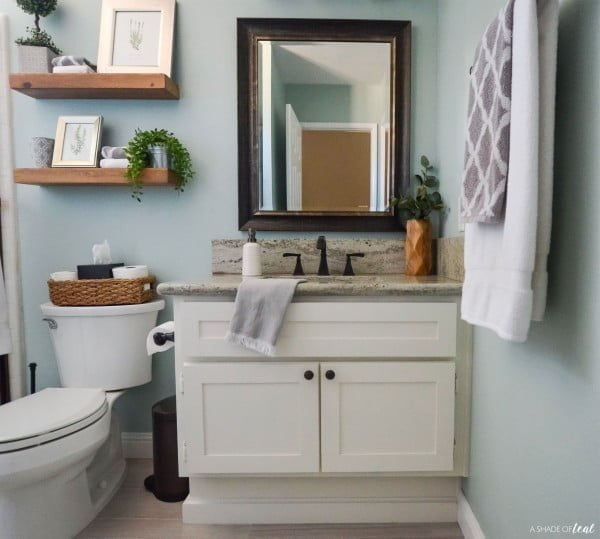
Tutorial: ashadeofteal.com
Expected cost: $10-$20
Supplies:
- Wood
- Nails
- Power drill
- Saw
This project is a bit more difficult than some of the others on this list, but it is still doable for most people. You will need to be able to use a power drill and nail gun, as well as have some experience with woodworking.
The project will take a weekend to complete, but it is worth it for the end result!
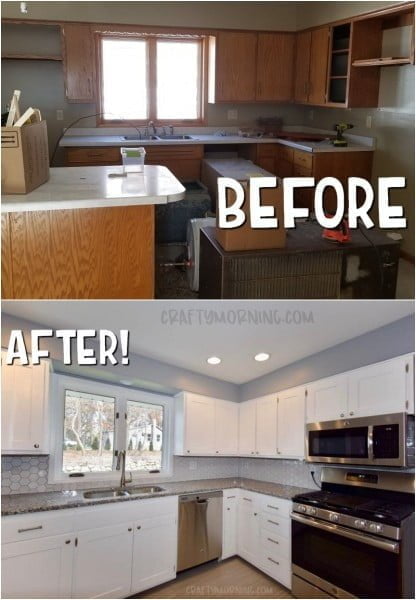
Tutorial: craftymorning.com
Expected cost: $20-$30 per door.
Supplies:
- Cabinet doors
- MDF boards
- Sandpaper
- Primer
- Paint
- Hardware
This project is a bit time-consuming, but it is not overly difficult. You will need to sand the cabinet doors, clean them, and then prime and paint them.
You will also need to cut and attach the MDF boards to the doors. Finally, you will need to add the hardware.
Overall, this project should take a few hours to complete.
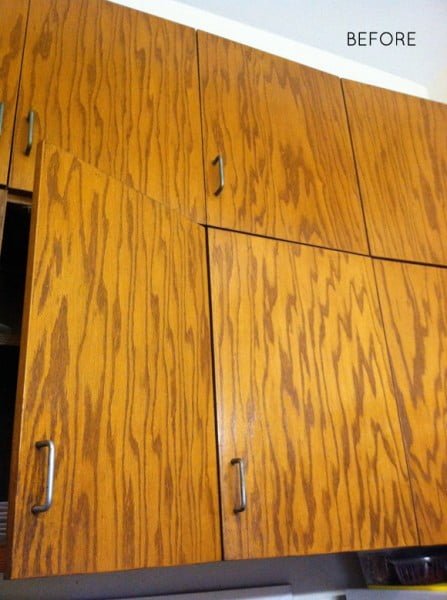
Tutorial: cabinetscity.com
Expected cost: $20-$30
Supplies:
- Sandpaper
- Plywood strips
- Wood filler
- Paint
This project entails turning your flat wooden cabinets into shaker style cabinets. It is not difficult to do, but it does take some time and effort to complete.
You will need to sand the cabinet doors, trim the edges of the plywood strips, and then nail them down. Once you have done this, you can fill in any gaps with wood filler and then paint the cabinets in the color of your choice.
Tutorial: crazylifewithlittles.com
Expected cost: $20-$30
Supplies:
- Paint
- Paint brushes
- Sandpaper
- Primer
- Cabinet doors
- Cabinet hardware
This project is a great way to update your kitchen or bathroom on a budget. It is a relatively easy project that only requires some basic tools and supplies.
The most difficult part of this project may be painting the cabinets, but if you follow the steps in the tutorial, it should be a fairly easy process.
More Like This
 18 Thanksgiving Wreaths to Wow Your Door for the Festivities
 13 Thanksgiving Trees to Spruce Up Your Holiday Decor
 21 Thanksgiving Party Decorations That Gobble Up the Festivities
 25 Thanksgiving Centerpiece Ideas That Steal the Show
 25 Thanksgiving Tablescapes That Wow
Recap