Last updated on
Here are 12 great tutorials for building your own floor-to-ceiling cabinets. Read on to find instructions for any DIY level!
Building a DIY floor-to-ceiling cabinet is a great way to add extra storage to your home without breaking the bank. These tutorials will walk you through the process step-by-step, from measuring and cutting the wood to trimming and painting the finished product.
With careful planning and execution, anyone can build a beautiful built-in cabinet that will add function and style to their home.
Here’s what else you need to know:
- This project is similar to building custom built-in cabinets.
- The cost varies on the wall area you want to cover with cabinets and may run you $500+.
How to Build a Floor-to-Ceiling Kitchen Cabinet
Tutorial: blog.mykukun.com
Supplies:
- Tape measure
- Plywood
- 1×2 lumber
- Construction adhesive
- Cordless drill
- Circular saw
- Hammer
- Nail Gun
- Paint or Stain
- Cabinet hardware
This project entails building a floor to ceiling kitchen cabinet. It is not a difficult project, but it does require some basic carpentry skills.
How to Build a Floor-to-Ceiling Storage Cabinet
Tutorial: homesteady.com
Supplies:
- Carpentry skills
- Stud finder
- Nail gun
- Wood
- Plywood
- Nails
- Screws
- Sandpaper
- Paint or stain
This project involves building a storage cabinet that is built-in to the wall. It requires some carpentry skills and knowledge of how to use a stud finder and nail gun.
The project is not too difficult to complete, but it may take some time depending on the size of the cabinet you are planning to build.
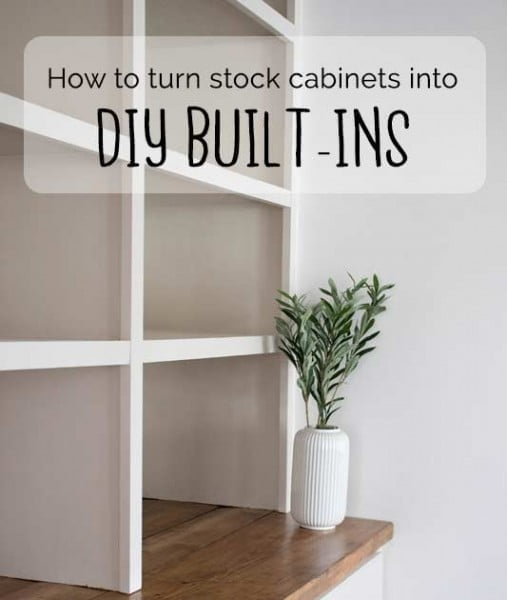
Tutorial: morelikehome.net
Supplies:
- Stock cabinets
- Plywood
- Construction adhesive
- Cordless drill
- 1 inch hole saw
- Circular saw
- Jigsaw
- Sander
- Paint or stain
- Cabinet hardware
This project is a tutorial on how to turn stock cabinets into built-in’s. It is a moderate difficulty project that requires some basic woodworking skills.
Tutorial: addicted2decorating.com
Supplies:
- Tape measure
- Carpenter’s square
- Circular saw
- Hammer
- Nails
- Plywood
- Sandpaper
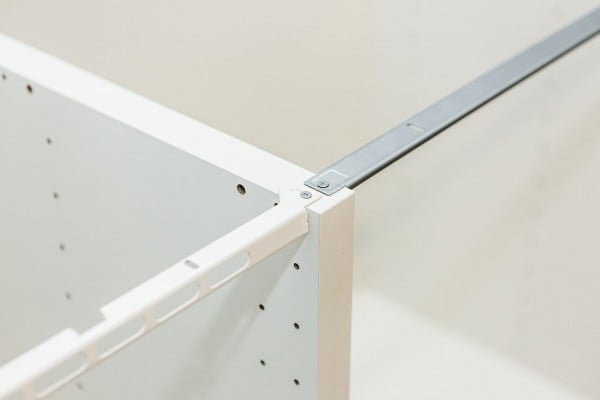
This project involves building three open-faced boxes and stacking them in the configuration desired. It is not difficult to complete, but does require some basic carpentry skills.
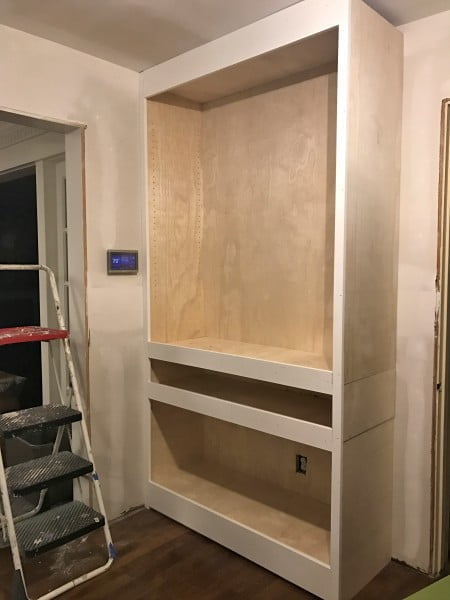
How to Build a Custom DIY Built In Cabinet
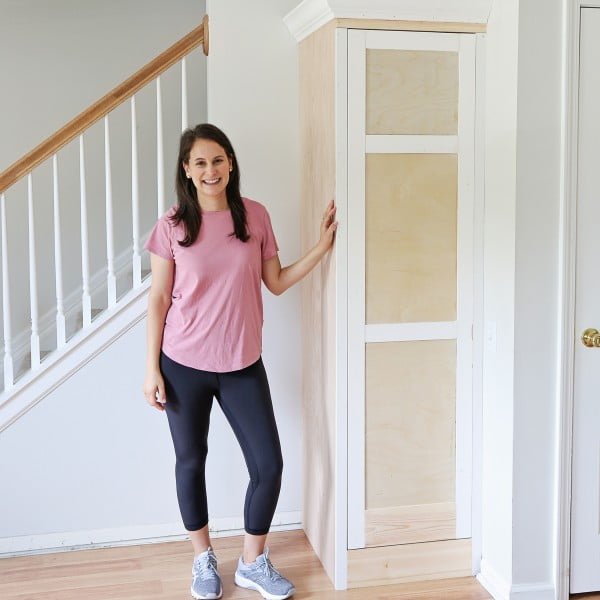
Tutorial: angelamariemade.com
Supplies:
- Plywood
- 1” screws or brad nails
- Trim pieces
- Finishing nails or brad nails
- Wood filler or spackle
- Sandpaper
- Caulk
- Paint or stain
This project is a bit more challenging than the average woodworking project as it involves DIY built-in cabinets, but it is still doable for most people with some patience and attention to detail. The most important thing is to take accurate measurements and make sure everything is level and square before proceeding.
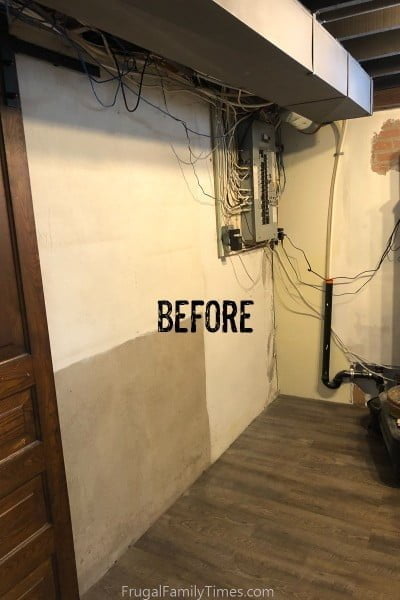
Tutorial: frugalfamilytimes.com
Supplies:
- Tape measure
- Plywood
- Circular saw
- Hammer
- Nails
- Paint
- Cabinet hardware
This is a moderate difficulty project that will take a few hours to complete. You will need some basic woodworking skills and knowledge of how to use power tools.
The finished product will be a custom built-in cabinet that is both functional and attractive.
Tutorial: jennasuedesign.com
Expected cost: This project will cost around $200-$300
Supplies:
- Tape measure
- Circular saw
- Miter saw
- Cordless drill
- 1/2″ drill bit
- Countersink bit
- Plywood
- 1×4 lumber
- Cabinet screws
- Construction adhesive
- Cabinet hinges
- Cabinet pulls
- Paint or stain
This project is a bit challenging, but can be completed with some patience and attention to detail. It requires building a base for the cabinets to sit on, as well as trimming and installing filler panels.
Some experience with woodworking and measuring/cutting would be helpful.
Tutorial: thisoldhouse.com
Supplies:
- 1×4 lumber
- 1×6 lumber
- 1×8 lumber
- 2×4 lumber
- Plywood
- Construction adhesive
- Crown molding
- Baseboard molding
- Chair rail molding
- Paint or stain
- High-gloss polyurethane
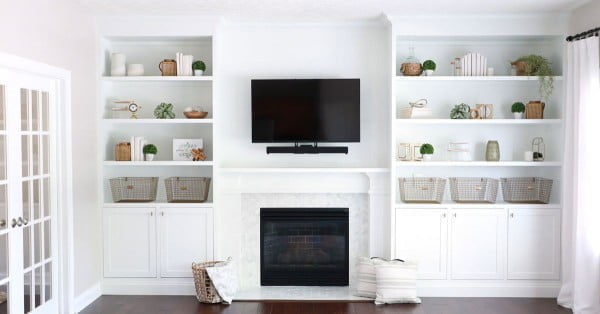
This project involves building custom shelving units around an existing fireplace mantel. It is a relatively simple project that should only take a few hours to complete.
Extending Cabinets Up to the Ceiling
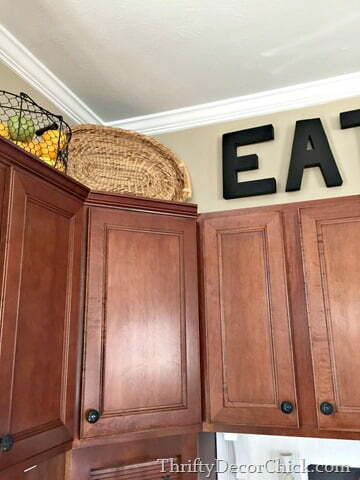
Tutorial: thriftydecorchick.com
Expected cost: $200 – $500
Supplies:
- Cabinet boxes
- Cabinet doors
- Trim
- Paint
- Primer
This project is a bit more difficult than some of the others, but it’s still doable for most people. It involves building new boxes for the upper cabinets, installing them, and then adding trim and doors to give them a custom look.
You’ll also need to prime and paint the cabinets.
Tutorial: atterraceplace.com
Supplies:
- Drywall
- 2×2 blocks
- Crown molding
- Drill
- Drywall screws
- Drywall mud
- Drywall sander
This project is a great way to add some height to your kitchen cabinets without spending a lot of money. It’s not too difficult, but there are a few things you need to know before you get started.
You’ll need some drywall, extra blocks of 2×2, and crown molding. You’ll also need a drill, drywall screws, drywall mud, and a drywall sander.
Tutorial: wildfireinteriors.com
Supplies:
- 4 screws
- level
- moulding
- wood strip
- MDF
- hardware
- skins
- plywood
- paint
- caulk
This project is relatively easy to complete and only requires four screws to be removed in order to remove the cabinets. Once the cabinets are removed, they can be placed back on the wall and screwed in using a level to ensure they are even.
A gap should be left between the top of the cabinets and the ceiling in order to accommodate for moulding. In order to add a shelf below the cabinets, a wood strip is hung up as a support for the back of the shelves.
The shelves themselves are made out of two pieces of MDF glued together for strength. Hardware is then added before daisy chaining them to the top cabinets.
Finally, skins are added to the bottom of the cabinets using thin sheets of plywood cut to size. The skins are then painted and caulked for a finished look.
How to Build a Floor-to-Ceiling Media Cabinet
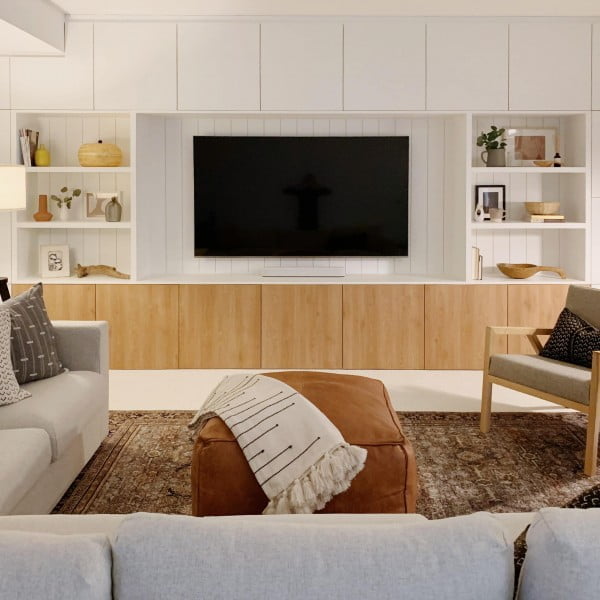
Tutorial: semistories.semihandmade.com
Expected cost: This project will cost around $200 to complete
Supplies:
- IKEA BESTA media units
- Suspension rails
- Trim
- Tongue and groove paneling
- Paint
- Doors
This project is on the advanced side, so it is not recommended for beginners. It will take some time to complete, but the end result will be worth it.
You will need to assemble the IKEA BESTA media units, attach suspension rails to the wall, add trim to the cabinets, and install tongue and groove paneling. Once you have completed these steps, you can then paint and add doors to the cabinet.
More Like This
 18 Thanksgiving Wreaths to Wow Your Door for the Festivities
 13 Thanksgiving Trees to Spruce Up Your Holiday Decor
 21 Thanksgiving Party Decorations That Gobble Up the Festivities
 25 Thanksgiving Centerpiece Ideas That Steal the Show
 25 Thanksgiving Tablescapes That Wow
Recap