Last updated on
Looking to make your own DIY chandelier? Check out these easy and lovely ideas with tutorials that you can try at home.
If you want to perk up your home but don’t want to spend a lot of money on it, the solution is obvious. You have to do it yourself – make your decor accessories.
A DIY chandelier is a great way to light up your home (literally and figuratively) and feel good about it afterward, especially if you can involve reused eco-friendly materials in your project.
And while there are hundreds of ideas out there, here we have our favorite DIY chandelier ideas that you can craft from just about any material available.
How to Make a Chandelier Light Cover
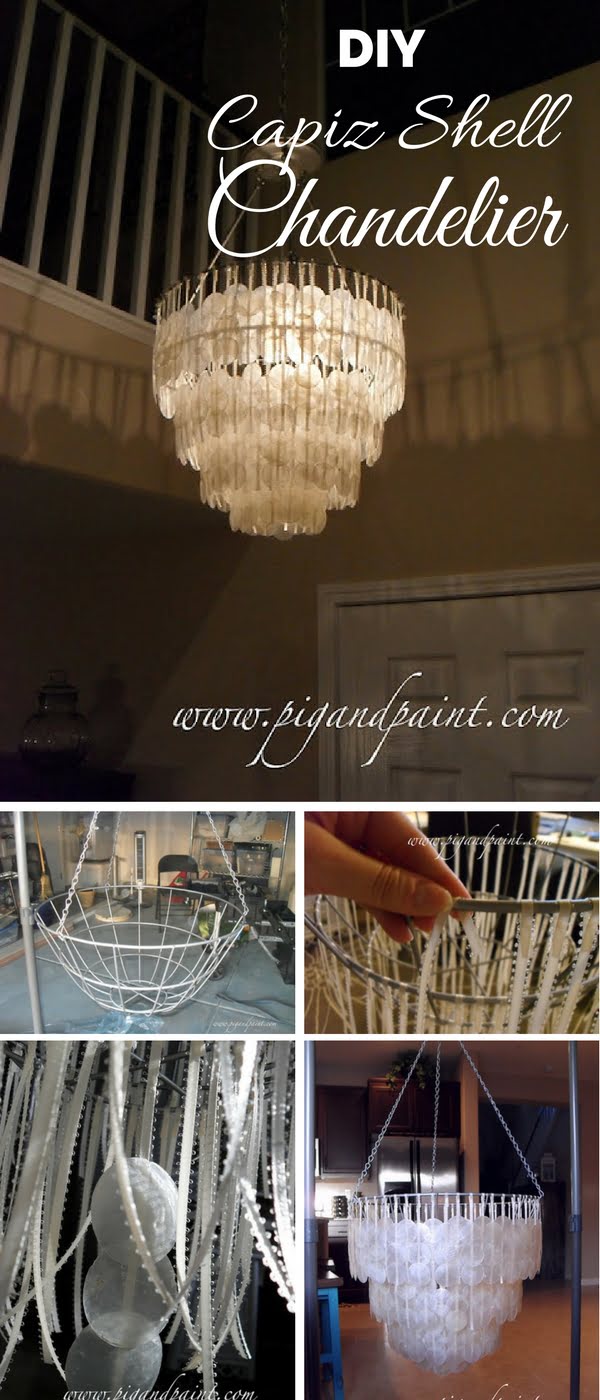
This chandelier is made using real capiz shells that have a translucent quality (unlike other kinds of seashells) which are great for a light fixture. If you can get to buy the shells, you can transform any builder grade chandelier into a beautiful decor statement.
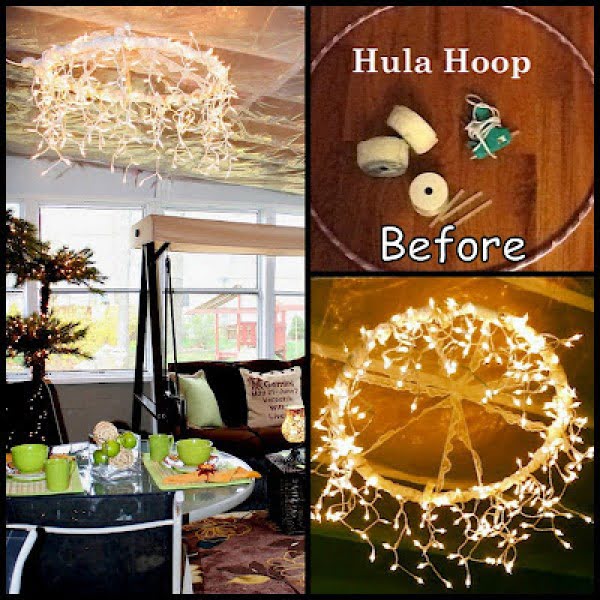
This is what we call a fake chandelier. A Hoola Hoop has the perfect shape for it so no wonder that’s an easy craft project. Combined with string lights it makes an excellent accent light fixture.
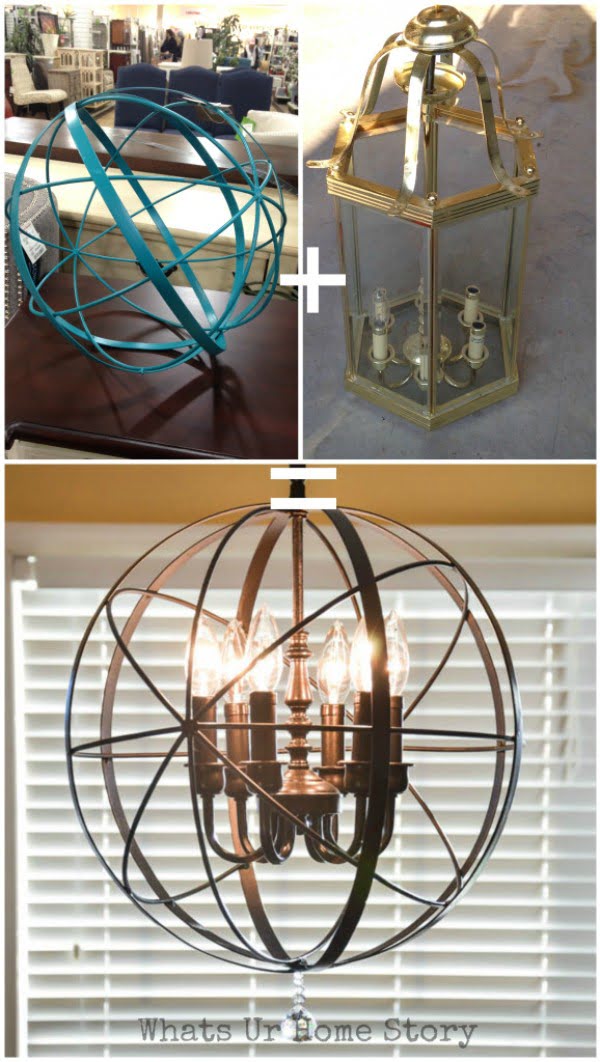
An orb chandelier is an excellent decorative option because it adds architectural interest by becoming an instant focal point in a room. Be prepared for it to take over and dictate your entire decor.

We’ve already had a capiz shell chandelier, but in case you don’t wish to buy real shells, you can make a very similar one with wax paper. Granted it’s not as impressive yet still has a lot of decor value.

Twigs make great rustic accents, and you can use them to build a very interesting chandelier for your home. It takes just an old chandelier that you can use for the frame and a lot of twigs. Make sure you understand the underlying fire hazards in the choice of light bulbs though – in most cases, you’ll need to go with LED.
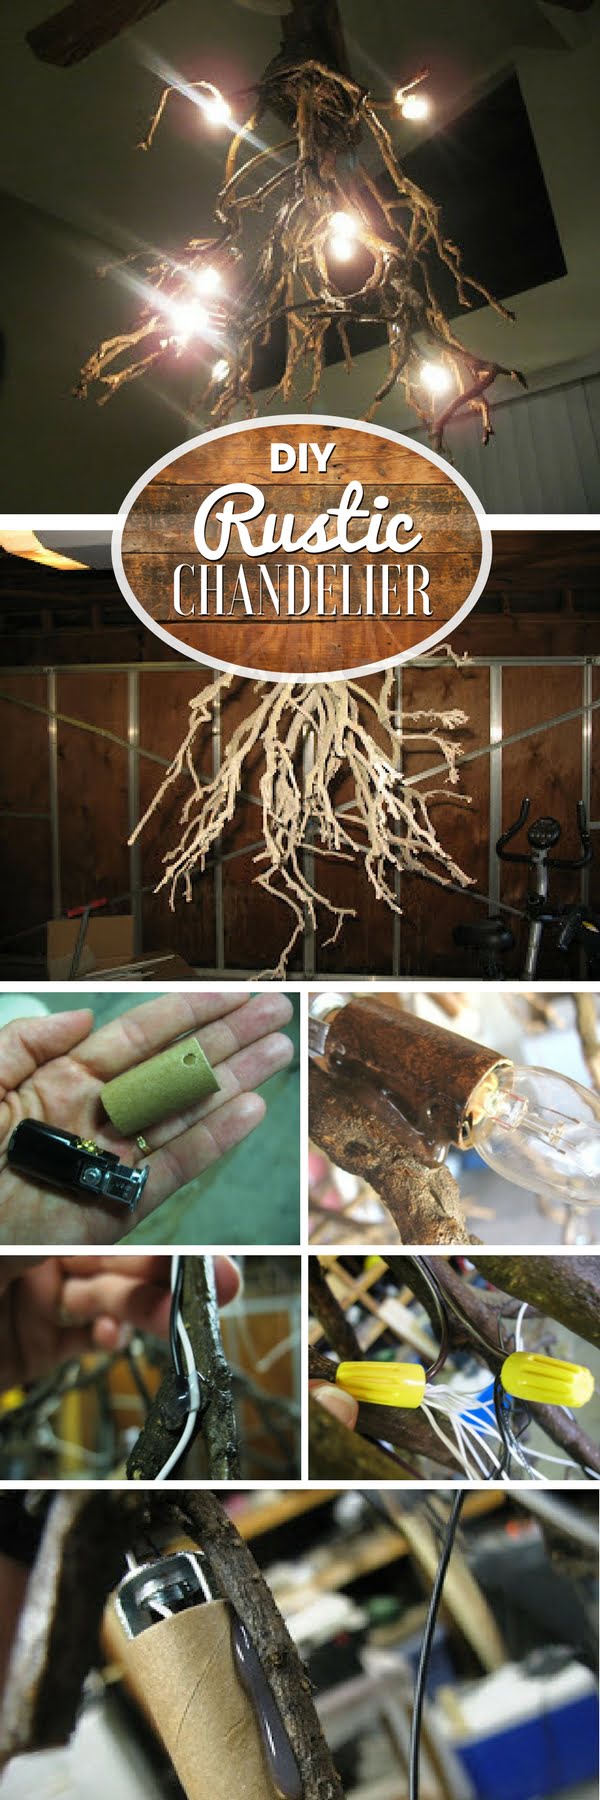
You’ve probably seen a tree root chandelier on Pinterest. It looks whimsical and refreshing – the ultimate rustic accent for your home. Now you can make one yourself by following this tutorial. You only need to find the right tree roots, to begin with.
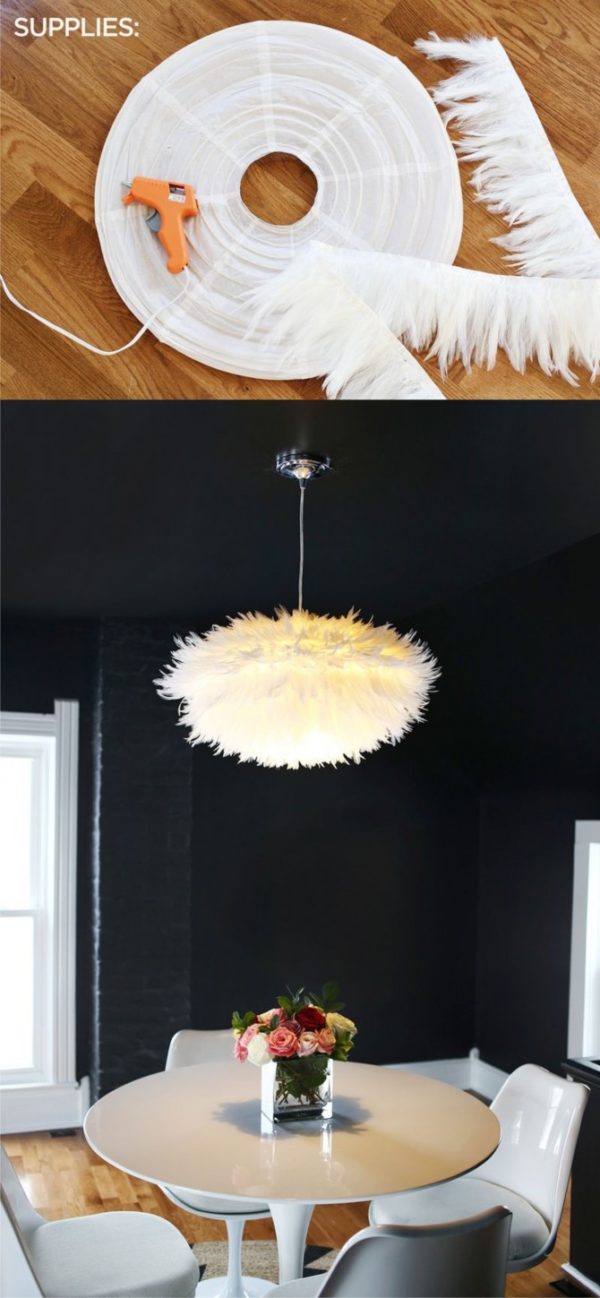
A majestic chandelier project is coming your way, and if you are keen on vibrant and unconventional lights, it’s to get busy!
This spectacular and feathery chandelier is built from a few simple elements, such as a wired hoop, rice paper and of course, wiring and a bright light bulb and a handful of feathers, which can be found in any nearby convenient or fabric store.
Once you start the hoop-wrapping process, it is all down to gluing the feather segments well and connecting the wiring accordingly.
Again, this is not a demanding project, but one able to create a dynamic setting in any room of the house.
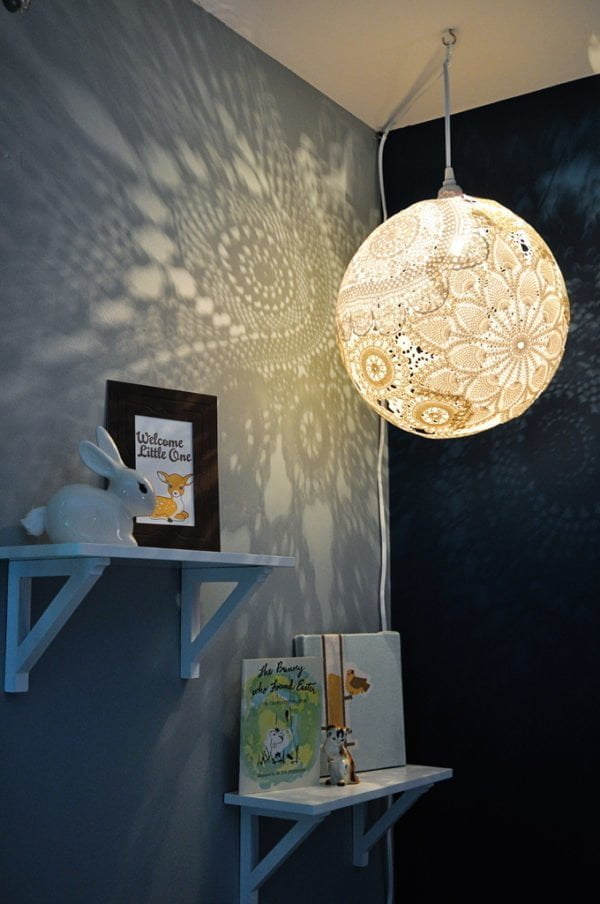
Give alternative materials the chance to shine, and get ready to create this unique chandelier, made of doilies. Now, what you’ll need is a handful of doilies, a punching bag balloon (which is more resistant than the traditional kind), some glue and of course, light installment elements.
It is essential to paint the doilies with glue more than once, to make sure the frame of the chandelier stays in place. Then, let the balloon dry off completely, after which it’s ready to pop. With a budget of 10 dollars, this project is deserving of your time.
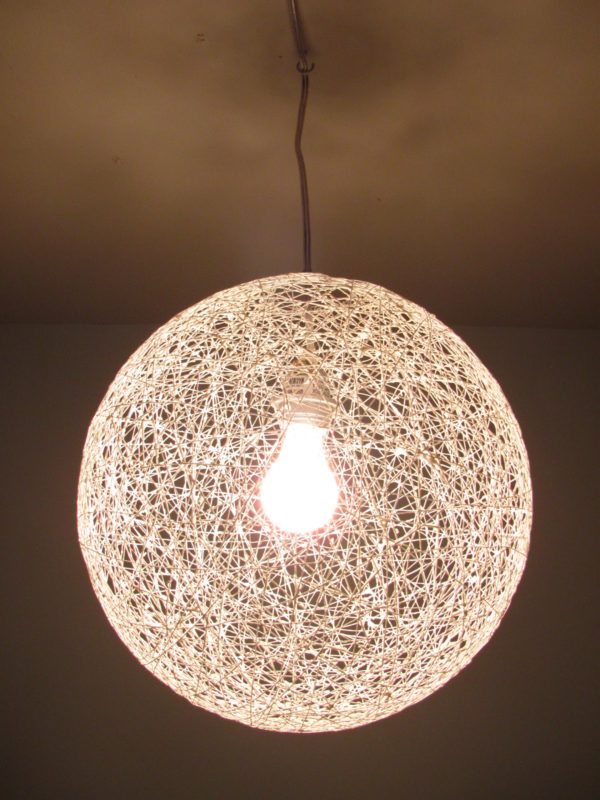
Having in mind how popular yarn chandeliers are nowadays, this excellent and affordable project is just right for your day off! This hanging lamp is easy to do, and you’ll need various elements to get the final look, including a bouncing ball, a handful of string or yarn, lighting kit and everyday handyman necessities such as glue and a sharpie and scissors.
Begin gluing the yarn around the bouncing ball, and let it dry off for several days. Secure the lighting kit well, using a few wires, and finally, pop the balloon open and allow your brand new chandelier to shine!
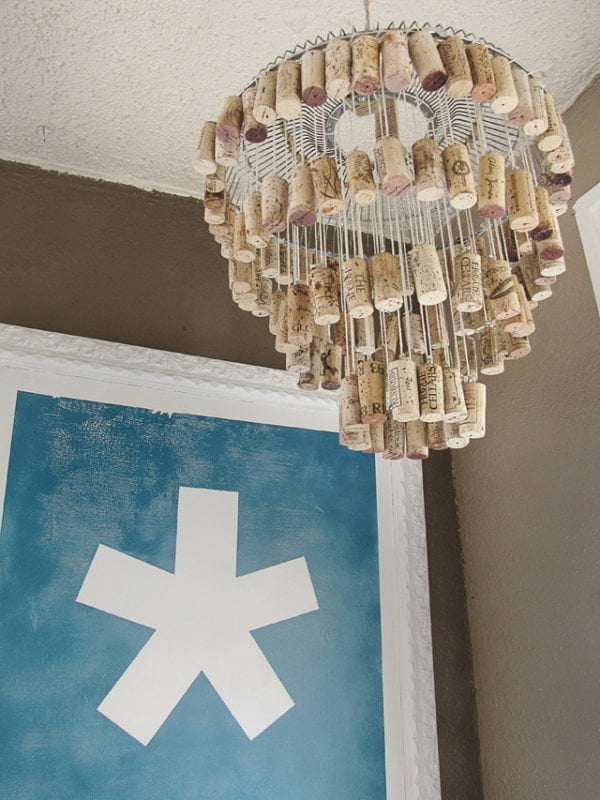
If you ever had your doubts about wine corks practicality, let this chandelier convince you of the opposite! This simple and affordable project will make any room explode with innovation and zest.
What you’ll need to create this chandelier is around 100 wine corks and eye hooks, fan grate, a string, and some rope. Each wine cork is assigned a hook, so make sure you install these well. Choose a length that fits you and use the string to secure the chandelier top once installed.
Keep in mind this chandelier doesn’t use lighting, but feel free to choose a low-wattage bulb to create an additional pop.
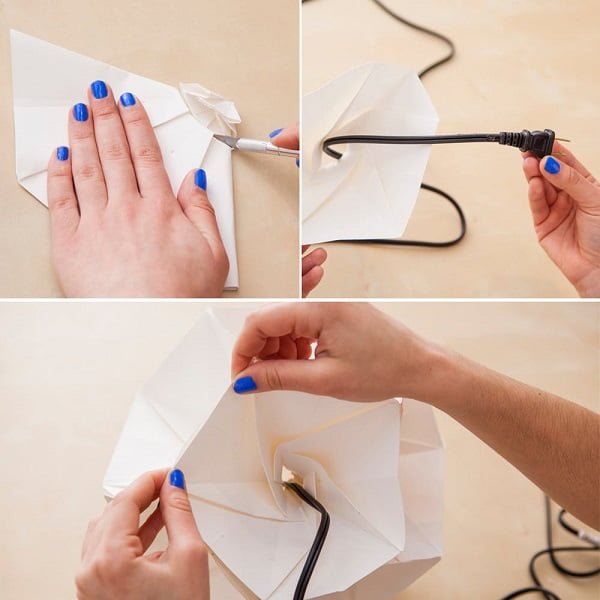
If you are interested in accomplishing a beyond easy and affordable chandelier project, this origami idea might be the thing for you. The elements needed to create this chandelier include drawing paper, a hanging light cord, and bulb, as well as your ‘Jack of all trades’ bits, such as a knife and glue.
For origami rookies, it might come as tricky to create the paper bulbs in the first place, but with plenty of tutorial instructions, the task is quite achievable. Drag the cord through each paper lamp and make sure to attach a bulb at each bulb’s end. Voila!
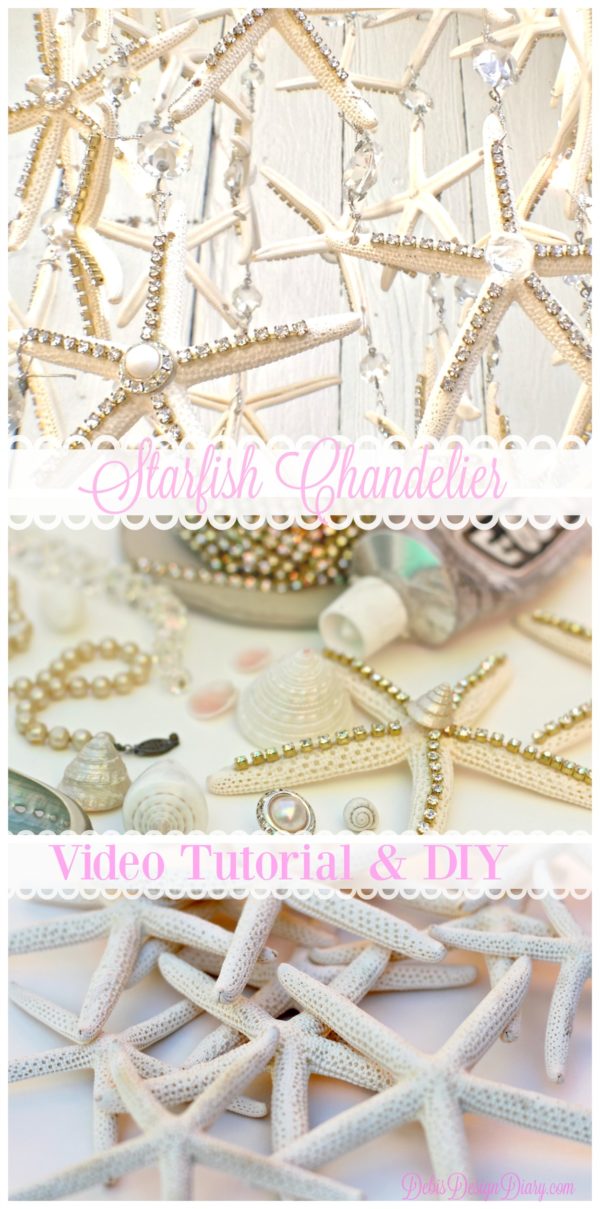
Sometimes, creating a fabulous chandelier is not about money at all. This incredible shellfish chandelier project will show you how you can think intelligently and deliver a staggering piece to make any room in your house burst with style.
Creating this chandelier will require a bunch of shellfish stars, a rhinestone chain, as well as crystal bling and buttons to deliver extra-brightness. The base is a given, meaning if you have it- you’re halfway done. Make sure your stars have one or more holes so you can bead them accordingly to the chain. Glue your stars using all available crystals and buttons, and you’re done!
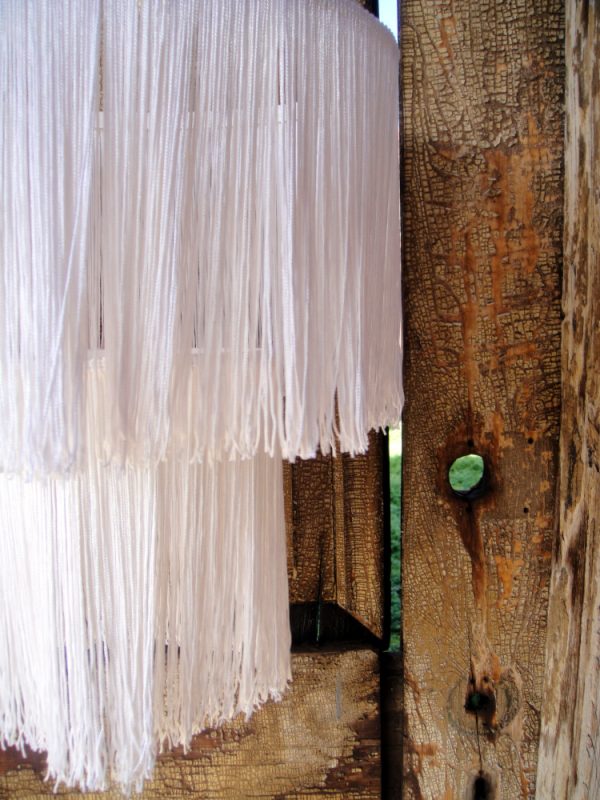
Looking at this insane fringe chandelier, you might think it’s quite the task to complete, but it’s quite the opposite! To redo this look in your own home, you will need a few key bits, including a few yards of fringe, a set of embroidery hoops, and some acrylic paint.
Start by joining the hoops together, in a manner that most fits your setting. Use fishing line to attach the fringe sections onto the wood rings. Use glue to secure all fringes in place at the top. What you can expect by the end is a two-layered and gorgeous chandelier, whose ruffles are bold and adorable!
DIY Crystal Chandelier

A crystal chandelier is one of the most sought after kinds of DIY chandelier ideas and for a good reason. Making one is an easy way to add some elegance and class to your decor without spending much money at all.
How to make a crystal chandelier like this? Start with an old chandelier (using an existing frame is much easier than actually building one). Paint it white. Then get crystals of your desired size (these can be big, small, or mini crystals) and string them together. Old jewelry might do the trick.
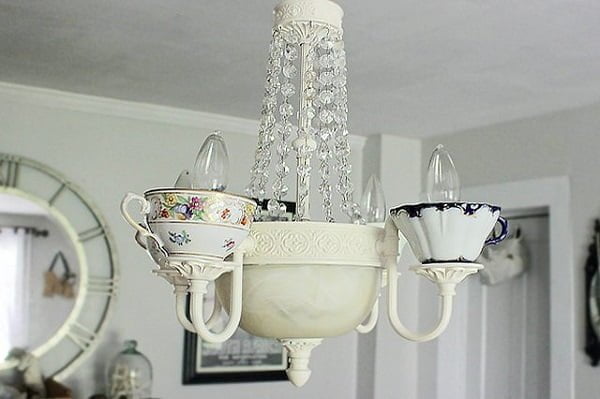
An exceptional chandelier design that is bound to introduce some charm and romanticism to your household, and is not that complicated to make. Preferably, an existing chandelier would be beautiful, and you’ll also need teacups (as much as your chandelier allows) for each side of the piece, as well as bulbs, a cord and perhaps some paint.
Paint your chandelier to match your cups and ambient, and secure the teacups with the glue. Use a ceramic drill to make teacups holes deep enough to fit the cord. And you are done! Hang your new chandelier and enjoy its poshness!
How to Make a Pendant Chandelier
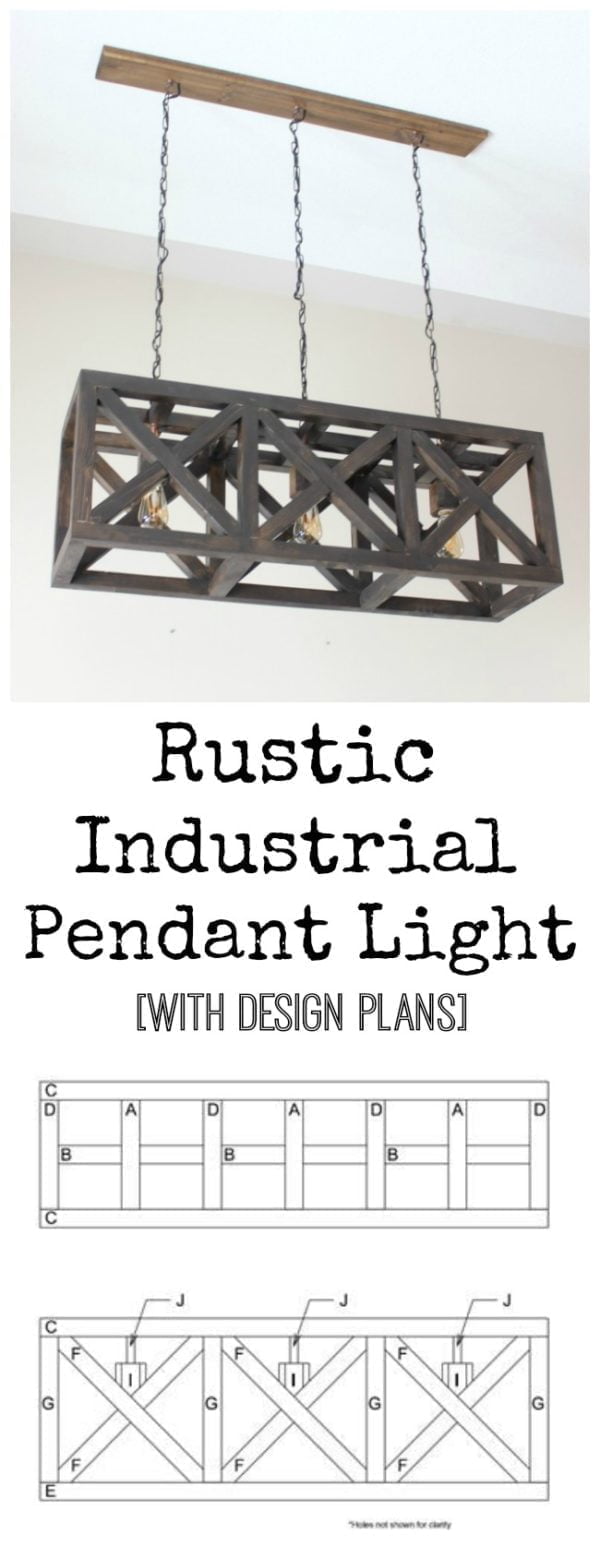
If you are bored with your current ceiling lamp, you can get to use your creativity and compose a retro chandelier, which resembles the Middle Ages in a very stylish, yet approachable manner.
To accomplish this DIY task, you will need to buy several key elements, including chain kits, sockets, light bulbs, and wiring. Creating the wood frame is not a handful, but does require a particular skill.
Assembling the wood can be an interesting aspect, as you’ll get to experiment with layouts. Some segments may be pricier to buy, but this chandelier promises a lighter and more sophisticated ambient in no time.

A bentwood pendant chandelier inspired by West Elm is an excellent project for one of the most attractive DIY chandelier ideas that you can make for your home. Try this project, especially if you like the knock-off home decor.
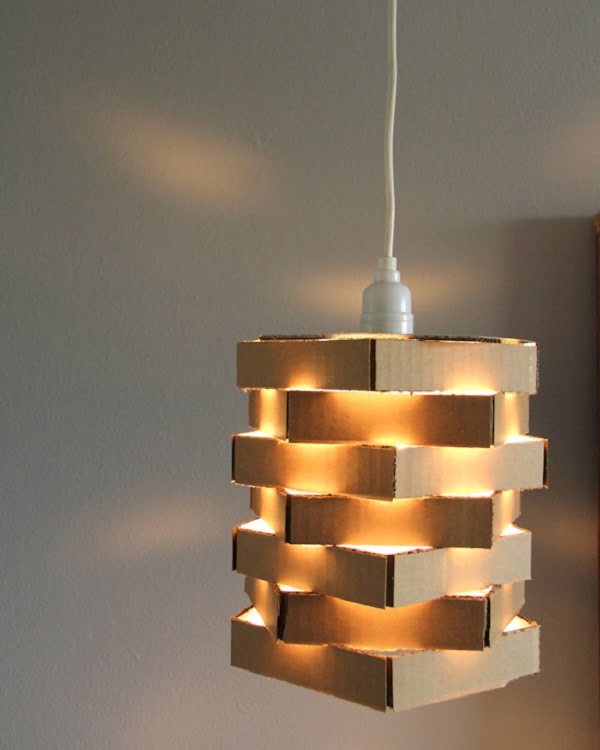
Get inspired by this magnificent pendant chandelier, which doesn’t take up much time to complete, but still adds chicness to the room itself.
To recreate this design, you will need to buy corrugated cardboard, some spray paint, glue, and a pre-purchased pendant light cord. From there onwards, it’s all about cutting pentagrams and laying them on top of each other, glued accordingly.
Finally, use the last cardboard piece in the shape of a square, to cover the chandelier and drop the light cord inside. Paint the cardboard to your preference and enjoy the bright design, which will have people asking questions.
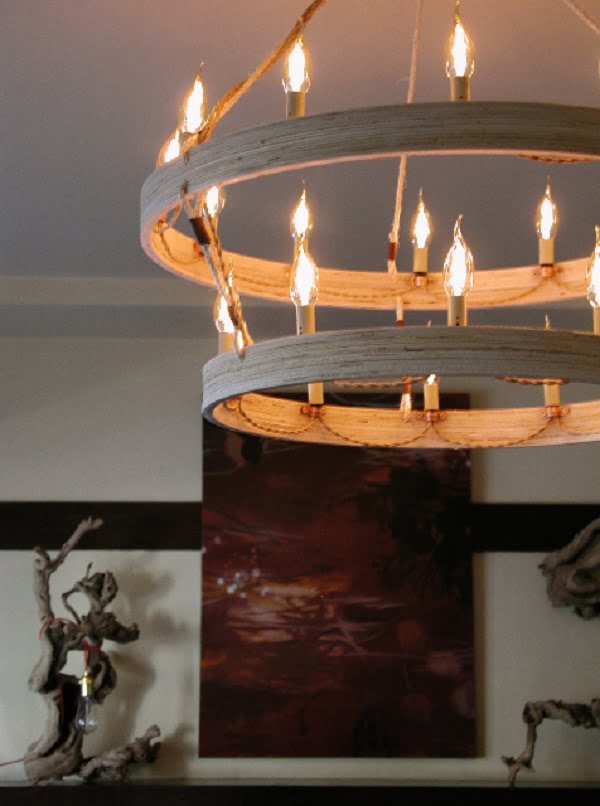
Have a look at this glorious double-ring farmhouse chandelier. As majestic as it is, it is also easy to do! The elements necessary to accomplish this grand chandelier include two wood rings, copper or steel pipe clamps and screws to secure it all in place, candelabra sockets, a secure wire, and a few other elements.
Of course, the tutorial includes it all, so by following through all steps, you’ll learn all about this project. While the chandelier is not difficult to execute, there is technical work involved, and it could cost more than other projects, so keep these aspects in mind.
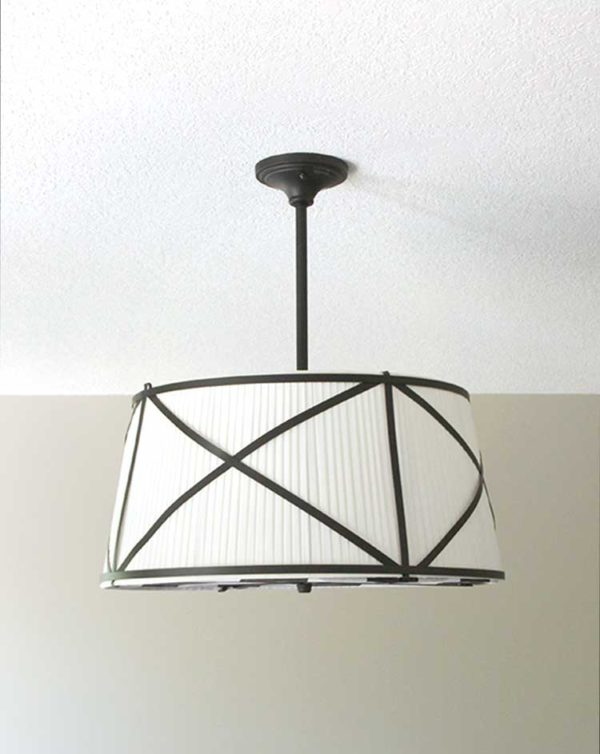
This creative and fashionable drum-like chandelier is both fancy and easy to do. The metal structure itself should come pre-purchased, and it’s easy to find as well. While you might need to make a few adjustments, the concept is half-way done.
Use white, fire-proof fabric to wrap the metallic structure on the inside, while padding the shade with a printed fabric, to serve as the chandelier’s bottom. There is an array of fabrics to choose from, but this black-and-white plaid fabric just got us good.
Finally, choose a suitable ceiling hanger, and there you have it – a real handyman’s dream!
Unique Bubble Chandelier
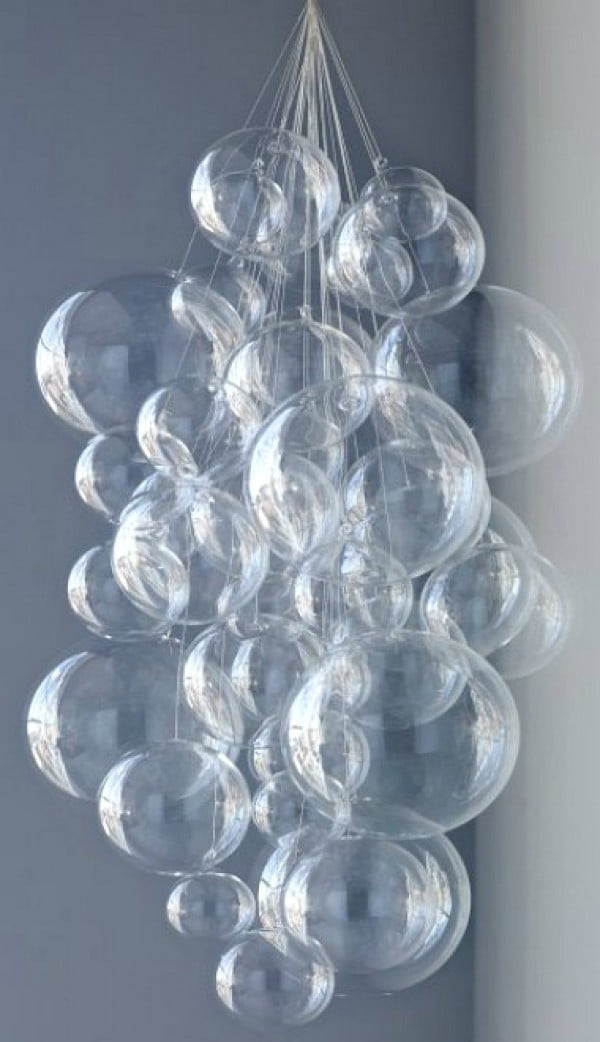
Bubble chandelier is genuinely whimsical so if you like to add some wonder to your decor, make this adorable project. It will undoubtedly be unique.

And smart interior designers said: Let there be gold! This outstanding chandelier is relatively easy to do and is a budget-saver as well.
To execute the project right, you’ll need a set of light bulbs, golden spray paint, key rings, a fishing line, and decorative hooks. Each light bulb needs to have a hook attached inside it, so be careful while handling the glass.
Other than that, you’ll need to paint and hang the light bulbs together, and leave a few transparent ones for dynamics. While this chandelier uses no actual light, you can introduce some by making a light socket and installing a cord.
DIY Rope Chandelier

Using a rope to create your custom chandelier will add a rustic, industrial or even nautical element to your home. And while you can argue about the style, there’s no arguing about its charm.
The easiest way to make this Restoration Hardware copy is to use an old chandelier and revamp it. So you can take the wireframe and wrap it around with rope while securing it with hot glue.
DIY Beaded Chandelier
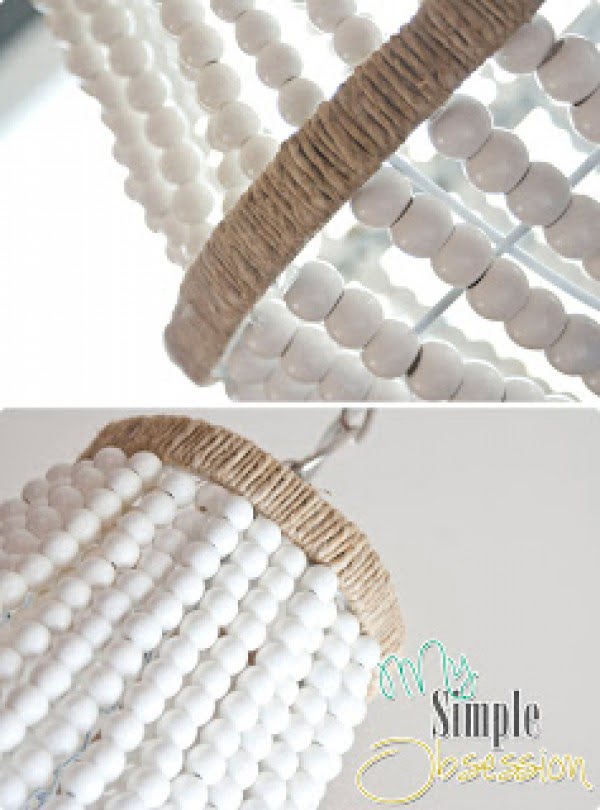
Much like crystal, beaded DIY chandelier ideas also add a lot of class to your decor, but they maintain that cozy quality as well. Check out how you can make one yourself.

Wood is a great material to add to your decor accents, and naturally, we love to see it in an attractive chandelier. Adding beads is one of the easiest and cute ways to embellish a light fixture.
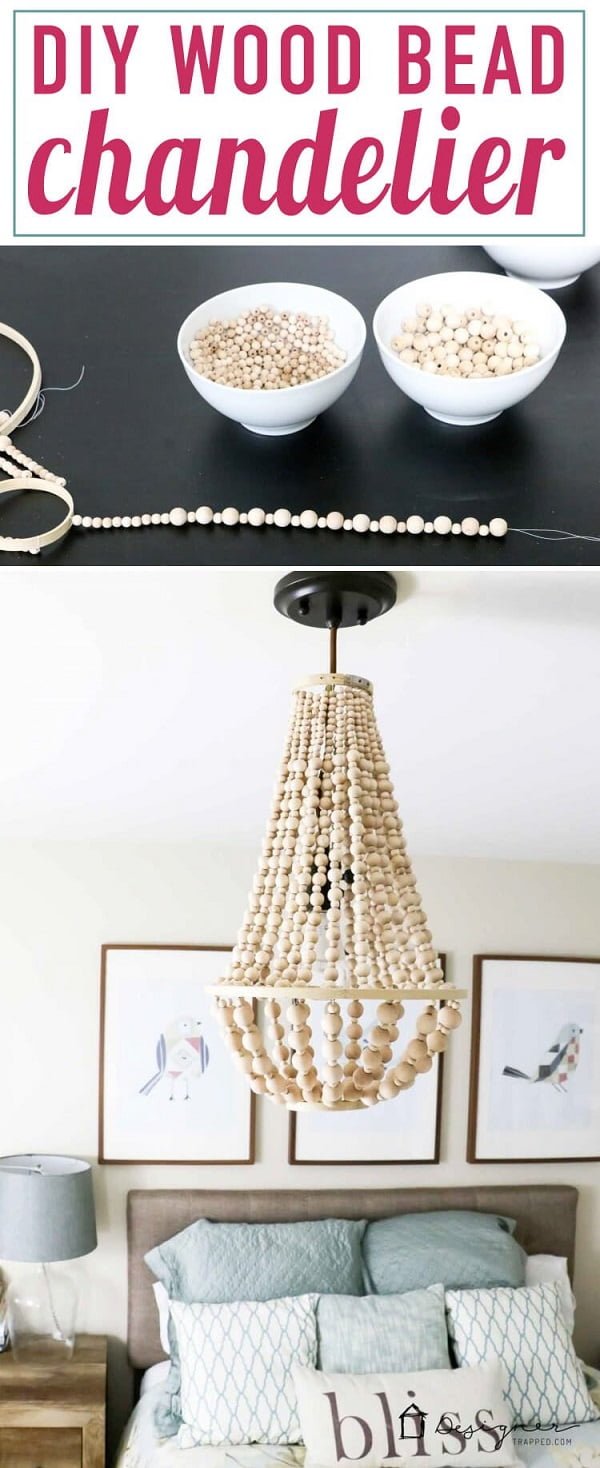
This great take on a wood bead chandelier is a project you can look forward to executing. Using beads of all sizes, as well as quilting hoops and thread, will help you knit and arrange the chandelier layout of your dreams.
While practical, a proper beading technique us necessary, but nothing too difficult for your average handyman. Gluing and drilling skills are required to achieve this chandelier project successfully.
Following the installation of electric wires and lights, you will be able to create a dynamic chandelier piece that is both elegant and affordable at the same time.
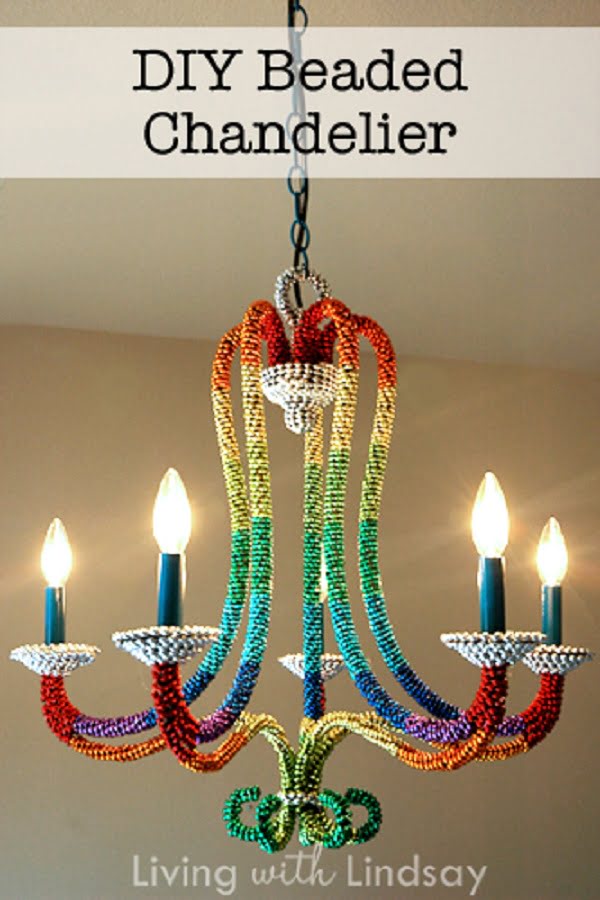
Craving a hippie vibe is understandable, and this chandelier project is the best example of it. Recreating an old chandelier into a masterpiece doesn’t require plenty of technique, other than gluing. All it takes is a handful of multi-colored bead necklaces, whose string you’d want to keep to cover the entire surface.
Assemble the beads accordingly, glue them right and mix colors until you are satisfied with your final piece. You’ll get to keep the chandelier layout, but adding a little zest to the design will drastically change the feel of your room. With a budget of under 20 dollars, this idea is a real knockout.
Recap
