Last updated on
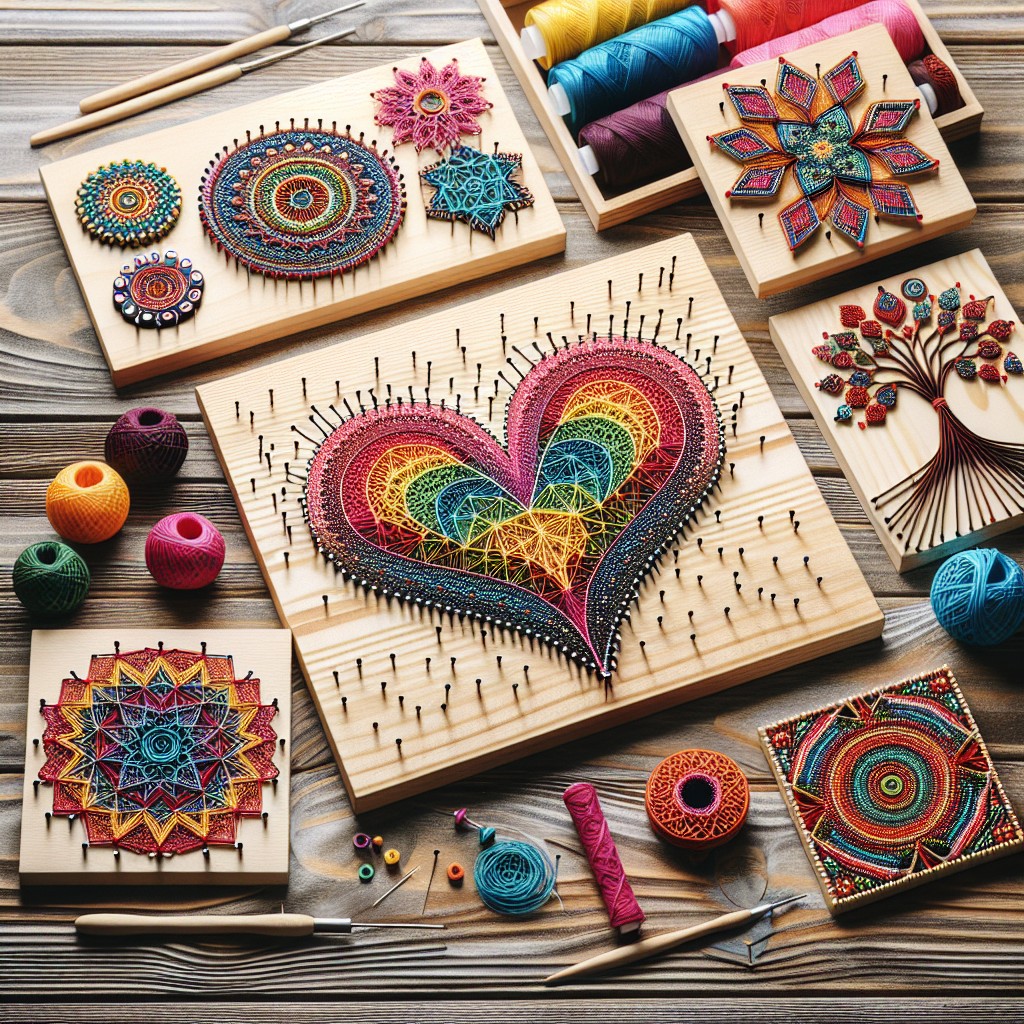
Explore DIY string art ideas and patterns because it’s an exciting and low-cost way to personalize your space with vibrant, intricate designs.
This article includes my original designs. Some of them may be exaggerated to make a point — that’s my style. Enjoy them for your inspiration!
Dive into the world of DIY decorating with string art – an intriguing blend of creativity, geometry, and a bit of patience.
Sure, you may have seen countless ideas swirling around the internet, but this article aims to intrigue with fresh, unique takes on this enjoyable craft.
Courting the line between the known and the unexplored, expect to find a collection of novel patterns that challenge the norm and spark joy.
Of course, esteemed classics won’t be neglected – a selection of top resources for tried-and-true designs await at the end.
Set out on this aesthetic journey, acquire fresh inspiration, and watch how string art can transform your space!
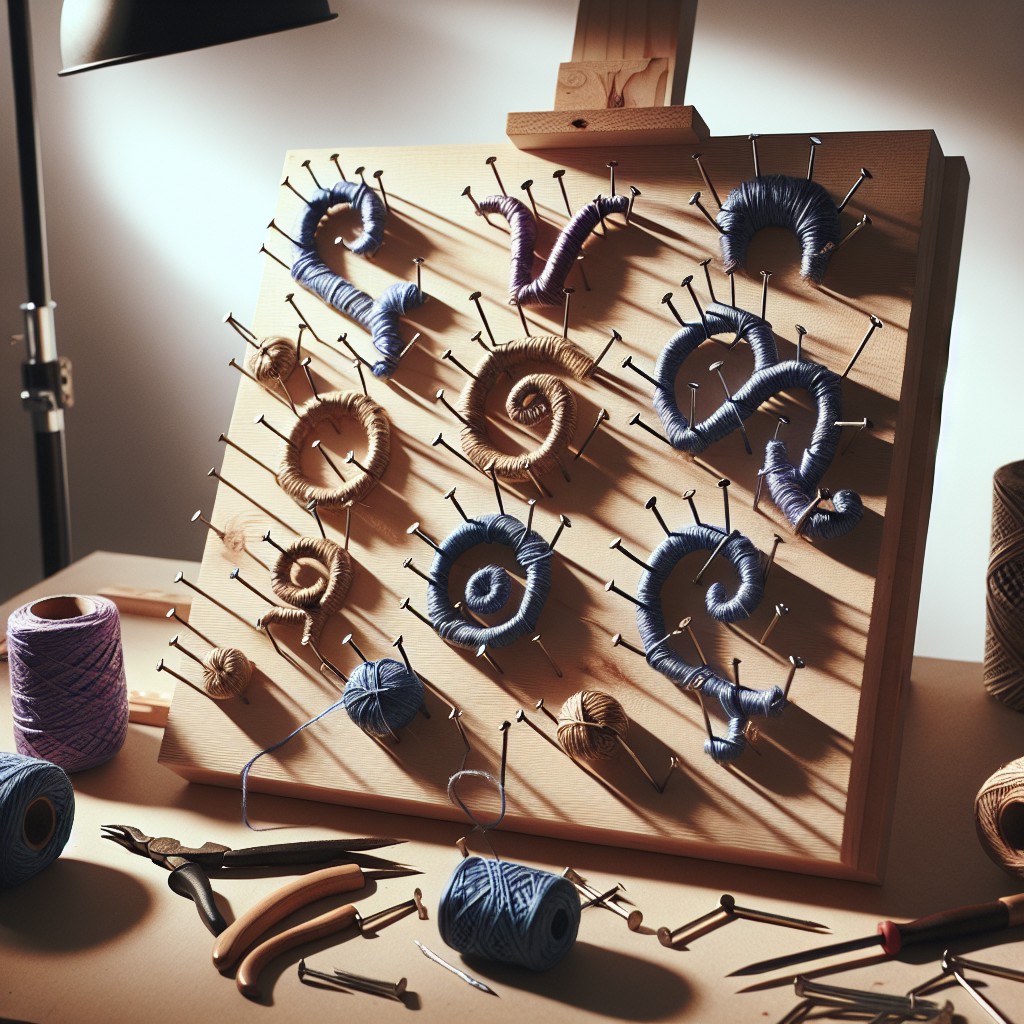
DIY Monogram String Art
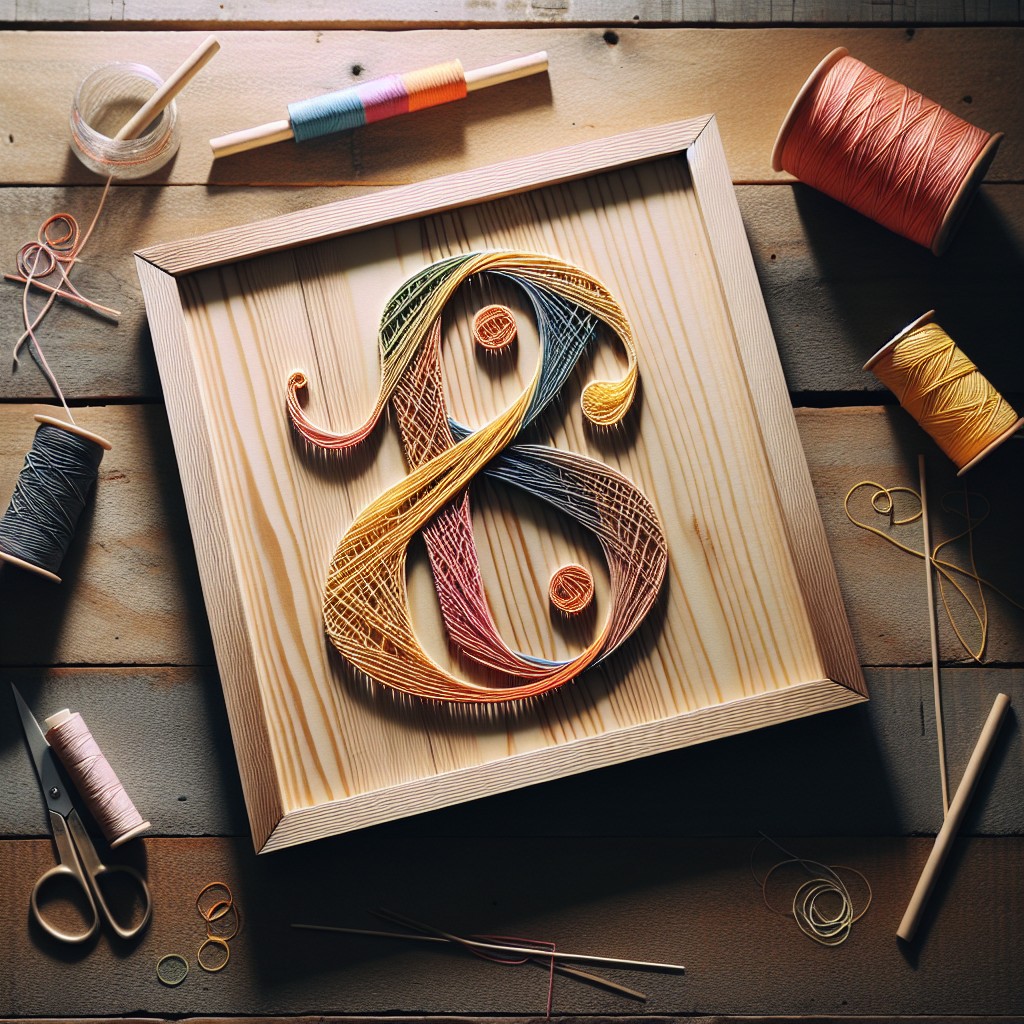
Creating a personalized monogram string art piece adds a charming touch to any room. Choose the initial of your first or last name to serve as the central design element.
Begin by selecting a sturdy wooden board as the base. Sand and stain it for a polished look or leave it raw for a rustic vibe.
Print out a large letter in your desired font, placing it on the board. Hammer small nails along the outline of the letter, ensuring they are evenly spaced.
Knot one end of the string to a starting nail, and begin wrapping the string around the other nails to fill your letter’s shape. Experiment with different wrapping techniques—crisscrossing, looping, or simple outlines—to add texture and depth.
Opt for thread colors that complement your existing decor or use a bold hue for a statement piece. This project not only adds a bespoke flair to your space but also makes for an excellent housewarming or wedding gift.
Sunflower String Art Tutorial
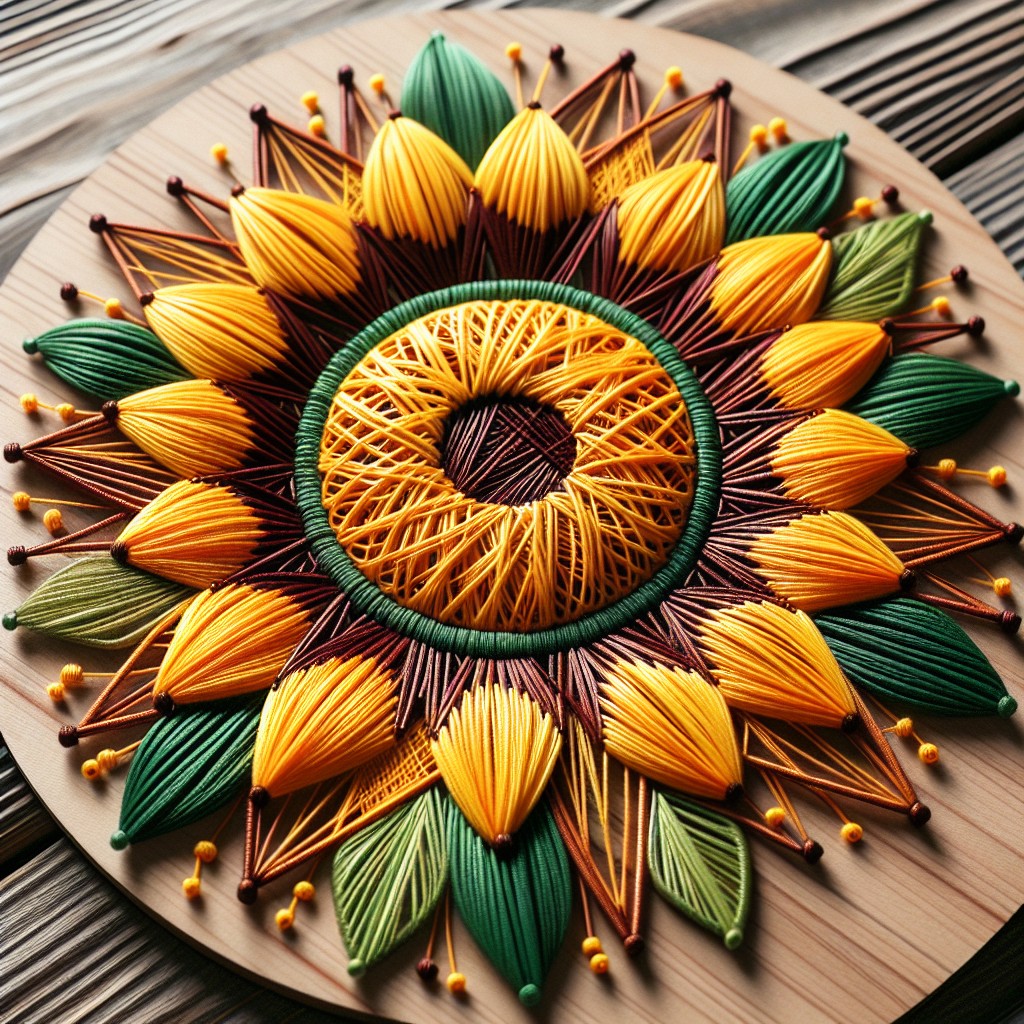
Capture the warmth of a sunny day by bringing a floral touch to your home with this charming project. Select a piece of wood as your canvas; pine or reclaimed barn wood can add a rustic feel to the piece. Sand the surface lightly if needed to ensure a smooth working area.
Begin by sketching or tracing a circle in the center of your wood — this will serve as the face of your sunflower. Radiate out from the circle with petal shapes, keeping them uniform to mimic the flower’s natural pattern. Secure small nails along the sketched lines of both the circle and petals with even spacing, leaving the heads of the nails slightly raised to catch the string.
Choose a vibrant yellow for the petals and a rich brown for the flower’s center. Tie one end of the string securely to a starting nail and extend it across to the opposite side, wrapping it around another nail, then bringing it back to a neighboring nail to establish a base for your sunflower pattern.
Weave and wrap the string around the petals’ nails, crisscrossing as you go to create a full, layered look. For the center, use a random wrapping technique to fill in the space, which will give the impression of the sunflower’s textured heart.
Throughout the project, maintain tension on the string, and periodically push down any loose loops along the nails for a neat appearance. After covering all nails and achieving the desired fullness, trim any excess string and tie off the end. Secure the final string end with a small drop of glue if necessary for added stability.
This piece can brighten any space, making it an ideal welcoming addition to a gallery wall or a standalone feature in a sunroom or kitchen. Enjoy the delightful burst of nature’s beauty in your décor with minimal expense and a splash of creativity.
String Art Tips for Beginners
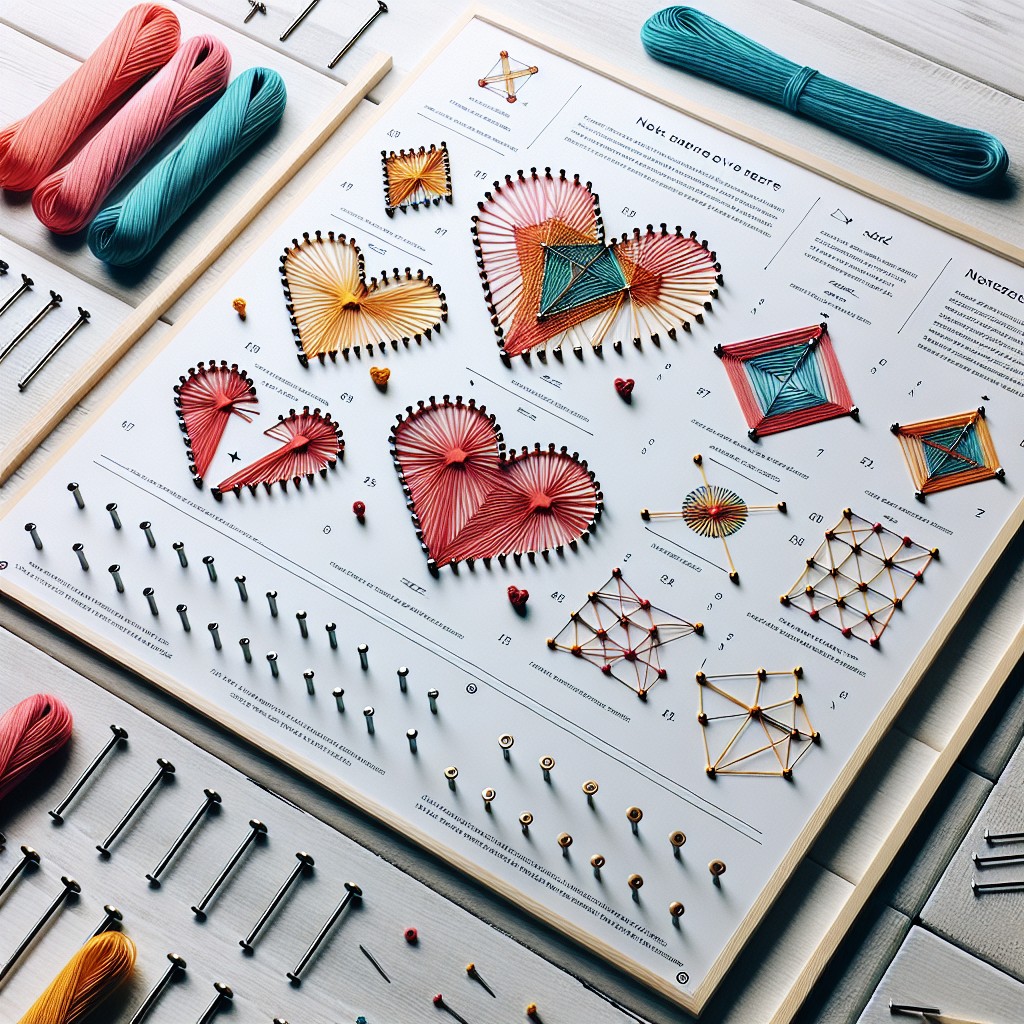
Embarking on your first string art project is exciting, but knowing a few tricks can make the process smoother and more enjoyable:
- Select the right materials. Use a sturdy board as a base and high-quality embroidery floss or thin yarn for durability.
- A clear pattern is key. Before you start, either draw your design directly onto the board or use a printed template that can be removed after hammering in the nails.
- Space nails evenly. Consistent spacing between nails (about 1/2 inch) creates a more uniform look and better control over the string pattern.
- Start with simple shapes. Begin with basic forms like hearts or stars to build confidence before moving on to complex designs.
- Secure the string. Tie the end of your string to the starting nail with a strong knot and apply a small dab of glue to prevent unraveling.
- Maintain tension. Keep the string taut as you wrap it around the nails to help define the pattern’s edges.
- Experiment with color. Don’t hesitate to mix colors or create gradients for a more dynamic effect.
- Be patient. Take your time, especially with wrapping the string, to ensure accuracy and evenness in your pattern.
- Embrace imperfections. Slight variations add character to your creation and underscore the handcrafted nature of string art.
Remember, practice leads to improvement. Each project hones your skills and boosts your confidence in tackling complex patterns.
Making Your Own String Art Patterns
Unlock your creative potential by crafting custom string art patterns that reflect your personal style. Begin with a simple sketch on paper, considering symmetry and balance to ensure an aesthetically pleasing design.
Select a base material, such as wood or cork, and size it according to your intended location and visual impact.
Translate your sketch onto the base by marking nail placement points; a grid system can help maintain even spacing and proportions. Keep in mind that complexity increases with the number of nails used, affecting the project’s difficulty level.
Choose a color scheme for your string that complements your decor, and consider varying thread thickness for added texture.
For a unique touch, integrate elements from nature, use geometric shapes, or draw inspiration from typography by creating letter forms.
As you wrap and weave, allow for adjustments to maintain tension and coverage, ensuring your final pattern is both robust and beautiful.
Remember, the key is to enjoy the process of bringing your own patterns to life, allowing for experimentation and learning as you go.
With practice, your custom string art patterns will evolve, becoming intricate works of art that showcase your individuality.
Dreamcatcher String Art

Transform a piece of wood into a mystical and colorful addition to your home with just nails, a hammer, and some thread.
Start by tracing a circular pattern—your canvas for weaving the dreamcatcher’s web.
With evenly spaced nails hammered along the circumference, you’ll have the structure ready to weave your dreamy design.
Experiment with different colors to create gradients or a vibrant burst in the center, mimicking the ethereal appeal of a dreamcatcher.
As you cross the string from nail to nail, pay attention to tension; this will ensure a tight and neat pattern.
Don’t forget to add hanging feathers at the bottom using either string or actual feathers to complete the look.
This piece offers not just visual intrigue but an air of peacefulness to any room.
Bohemian Themed String Art
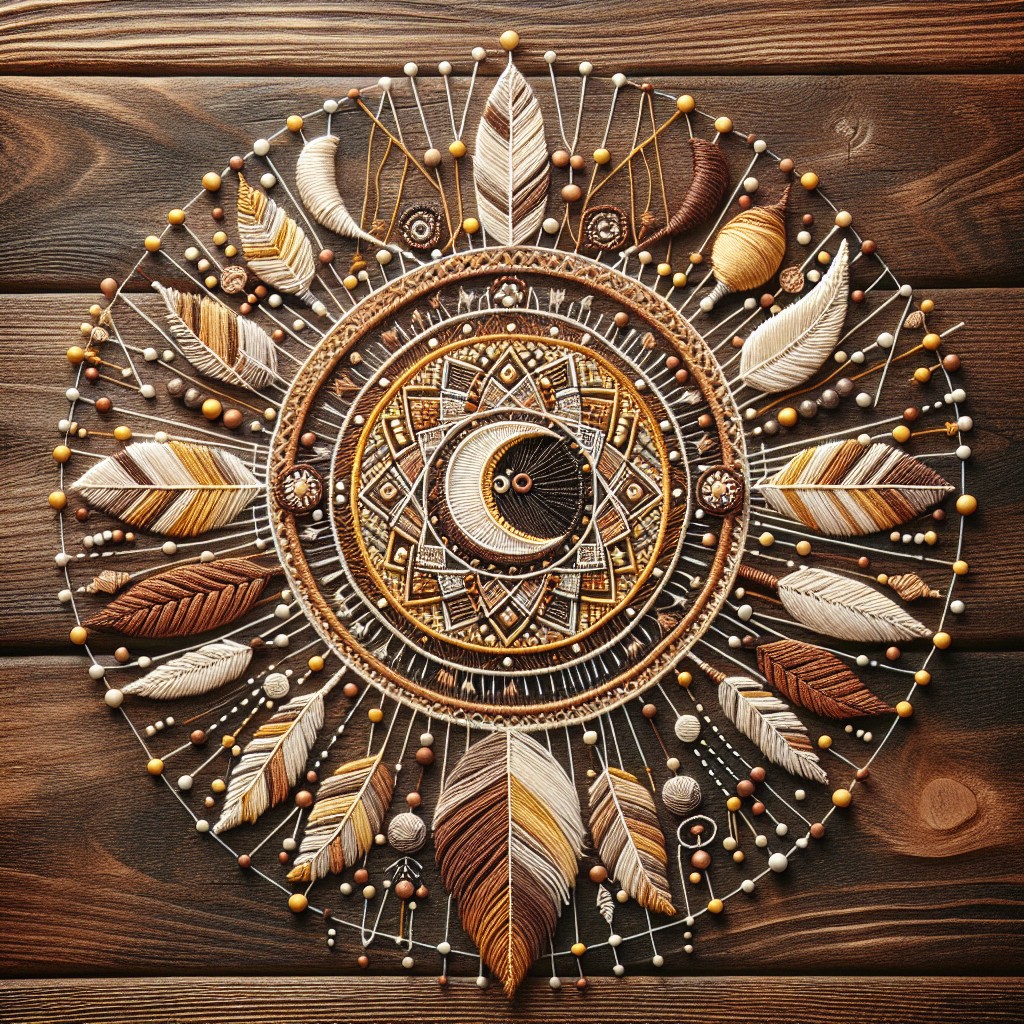
Capture the free-spirited beauty of boho decor with intricate designs and an eclectic mix of colors. Opt for patterns that incorporate feathers, arrows, or mandalas—a nod to the natural and spiritual elements commonly found in bohemian styling.
For a warm and earthy feel, choose a color palette that reflects boho tones; think deep purples, rich reds, and vibrant teals, contrasting against a natural wooden backdrop.
Materials like brass nails and multi-textured strings in varying thicknesses can add depth to your piece. Consider incorporating beads or small gemstones into your string paths for a hint of whimsy and texture.
Remember, asymmetry is your friend—embrace imperfections and uneven lines as they contribute to the authentic, handcrafted vibe perfect for a boho-themed space.
Nautical Anchor String Art
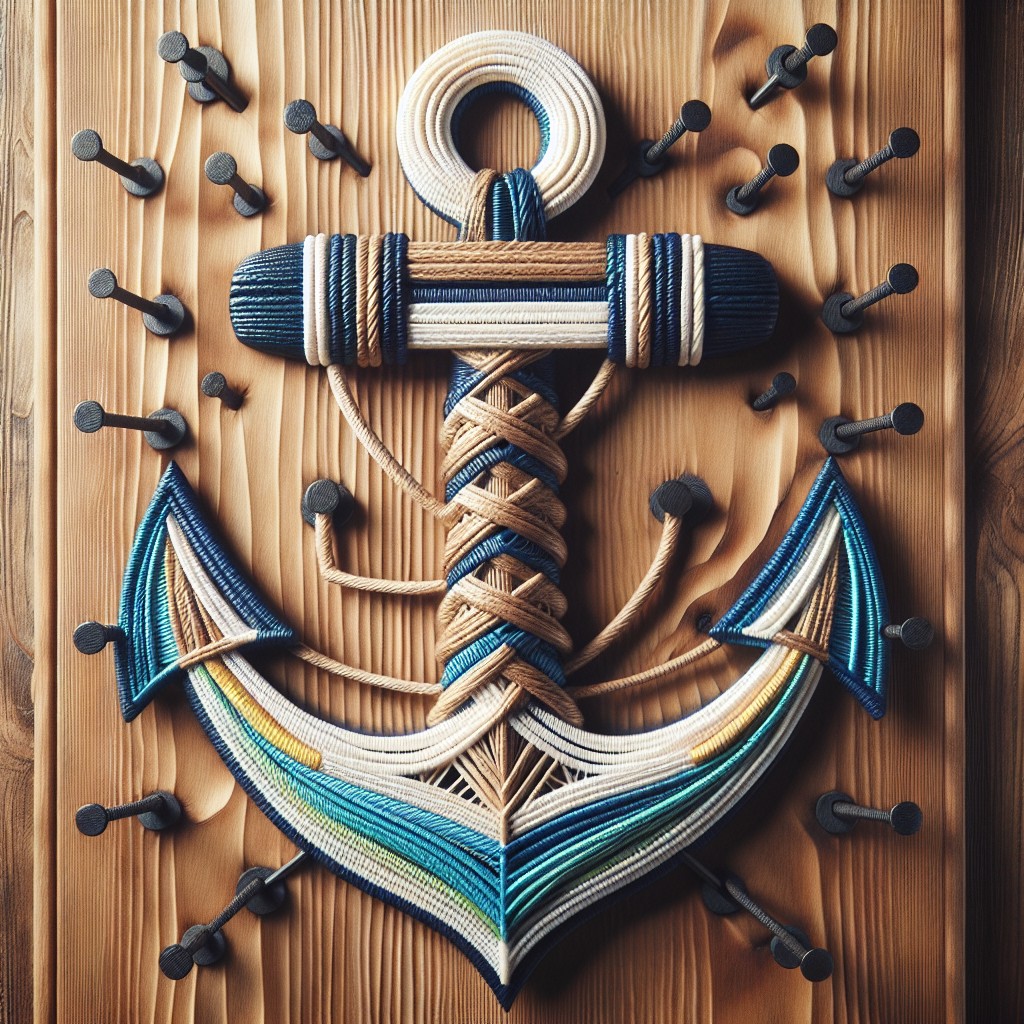
Capture the essence of the sea with this coastal-inspired project. You’ll need a wooden board, nails, hammer, string in colors of your choice, and an anchor pattern.
Begin by sanding your board to prevent splinters. Once smooth, paint or stain it to fit your nautical theme.
Print out the anchor template and place it on the board. Secure it with tape to prevent slippage.
Next, outline the pattern with nails, spacing them evenly about a half inch apart. Once all nails are in place, remove the paper pattern.
Tie the string to a starting nail and outline the shape of the anchor. After outlining, fill in the shape using a zig-zag pattern between nails to achieve density and texture, switching colors if desired.
For a splash of creativity, integrate shades of blue or incorporate maritime elements like a tiny ship’s wheel or starfish at the corners of your board.
This string art not only makes a vibrant addition to your home but also serves as a perfect handmade gift for anyone who loves the ocean.
Crafty Cat String Art
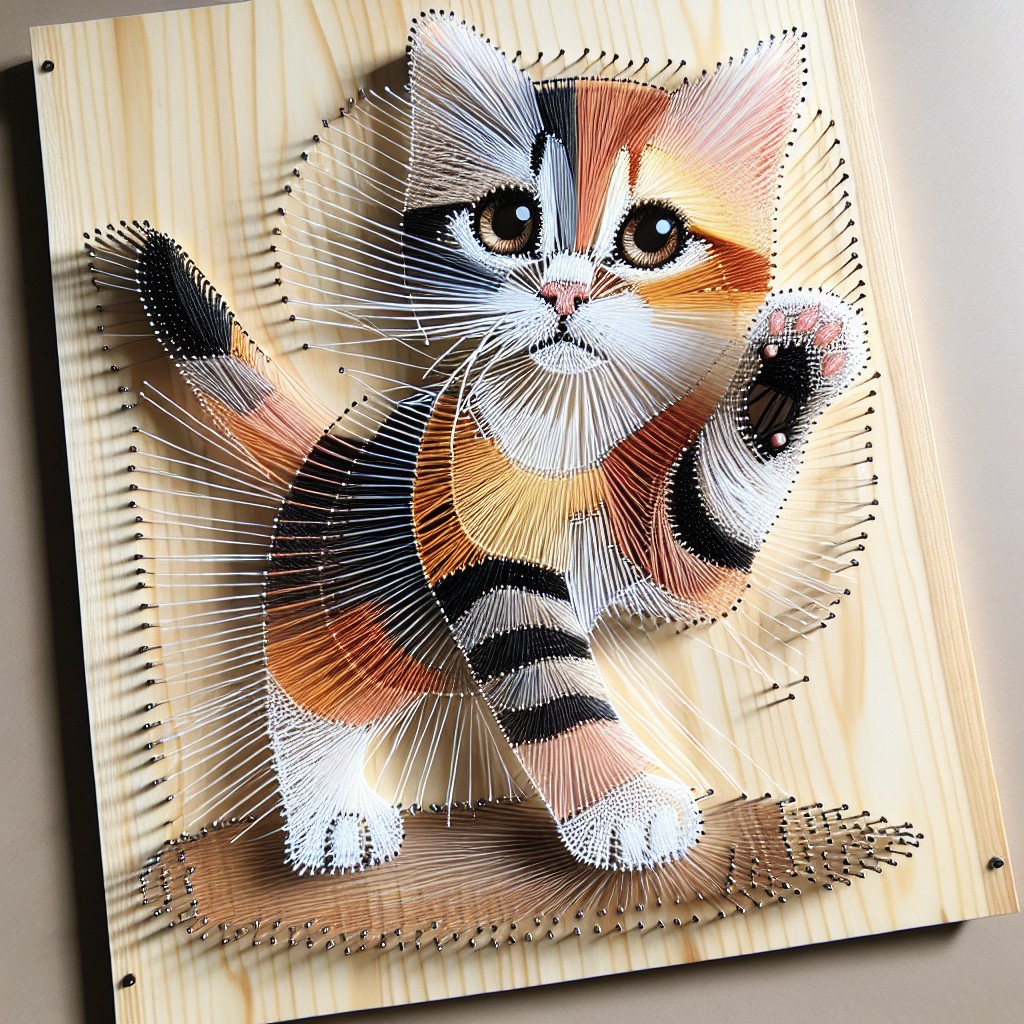
For pet enthusiasts looking to add a feline touch to their home decor, this project offers the purr-fect opportunity to express creativity.
Begin with a simple silhouette outline of a cat, which serves as the template. Use a wooden base for a natural, rustic appeal, or go sleek with a painted canvas background for a modern vibe.
Choose a mix of string colors to mimic the various shades in a cat’s coat. Experiment with different textures, varying from standard embroidery floss to thin metallic threads, to add depth to your artwork. The eyes are the focal point, so consider using a contrasting hue or even beads to make them stand out.
When stringing, employ different patterns – straight lines for precision or a freehand approach to resemble fur’s softness. The intricacy lies in the layering; start from the outside, working inward to construct the density of the fur.
This craft not only celebrates the beauty of cats but also serves as an engaging activity that can be tailored to any skill level, from children crafting with parental guidance to seasoned DIY enthusiasts looking for a novel challenge.
Rainbow Pattern String Art
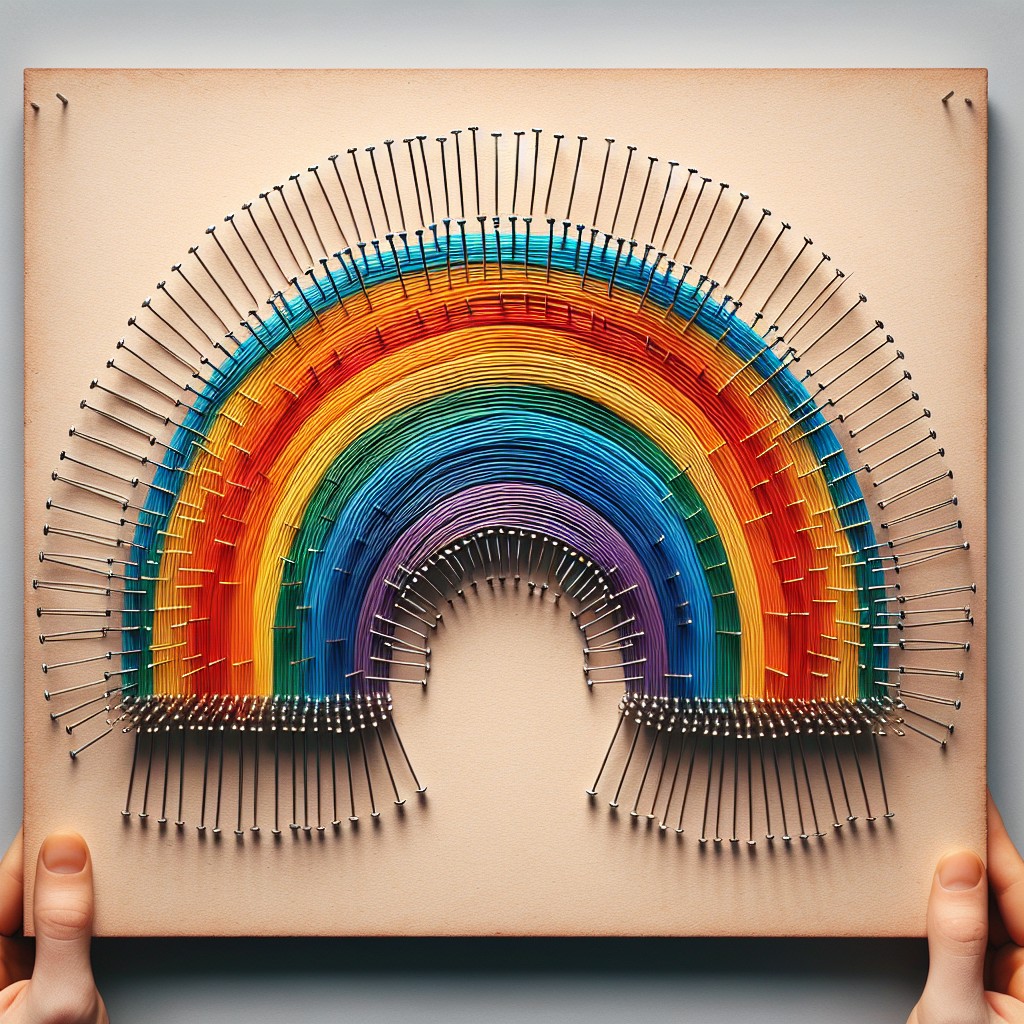
Bring a burst of color to any room with this vivid project, perfect for those who love a touch of whimsy. Start by outlining the shape of an arch or the classic multicurve silhouette on your base. Hammer in nails along the outline at even intervals, ensuring they’re secure but not fully driven into the wood.
Select strings or yarns in colors that match the traditional rainbow sequence—red, orange, yellow, green, blue, indigo, and violet. Begin with red at the outermost edge, tying a knot around the first nail, and weave in and out across the nails to fill the arch’s section. As you transition between hues, overlap slightly to blend the colors naturally, mimicking a true rainbow’s gradation.
For added texture and depth, vary the string density in each colored section; denser areas will make certain colors pop, creating a more dynamic display. If you desire a more modern twist, opt for pastel or neon strings to suit your room’s color scheme.
Remember to preserve the arc’s integrity by keeping the strings taut and not over-occupying space reserved for adjacent color bands. Secure each string end with a firm knot before moving on to the next color. This creative piece will be a cheerful reminder of clear skies after the rain and a fantastic way to add a spectrum of color to your DIY decor collection.
Magical Unicorn String Art
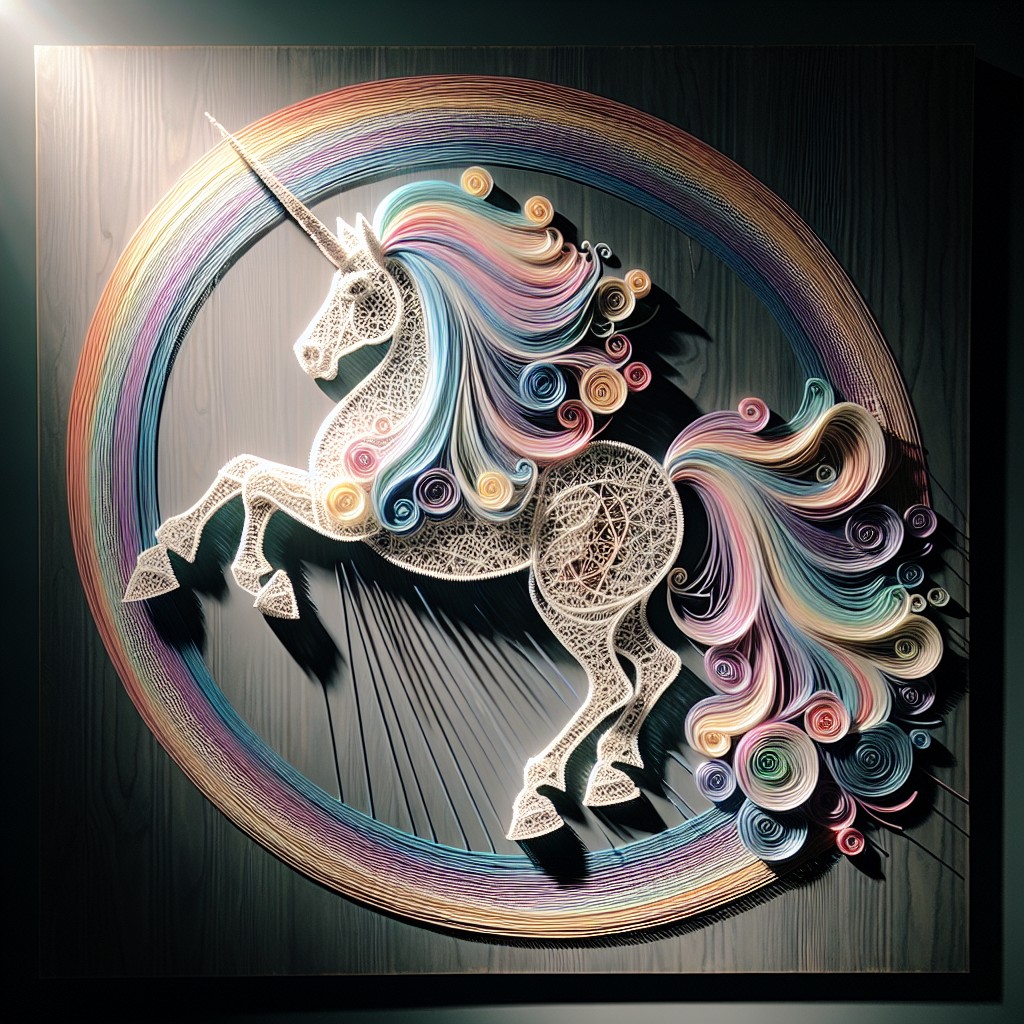
Transform your space into a fantasy-inspired haven with enchanting unicorn string art. This delightful project lets you bring a touch of magic into any room with a few simple supplies:
- Choose a unicorn silhouette template that captures the ethereal grace of these mythical creatures. A rearing unicorn or a profile with a flowing mane works wonderfully.
- Select a sizeable wooden board as your base and paint it if desired. Pastel colors or a stained wood finish provide an excellent backdrop for the vibrant string colors.
- With small nails, outline the unicorn shape onto the wood, paying special attention to intricate areas like the horn and mane.
- Wind and weave colorful embroidery floss or specialty string around the nails, layering hues to build depth and dimension. Incorporate metallic or glittery string for that characteristic unicorn shimmer.
- Fill in the outline with string, creating contrasts and adding volume to the mane and tail for a dynamic effect.
- Consider adding embellishments, such as sequins or beads, for eyes or to accent the horn and lend your piece a personalized sparkle.
This project can be easily adapted for all skill levels, offering a whimsical touch to any room or as a handmade gift for unicorn aficionados.
String Art Theme for Baby Shower
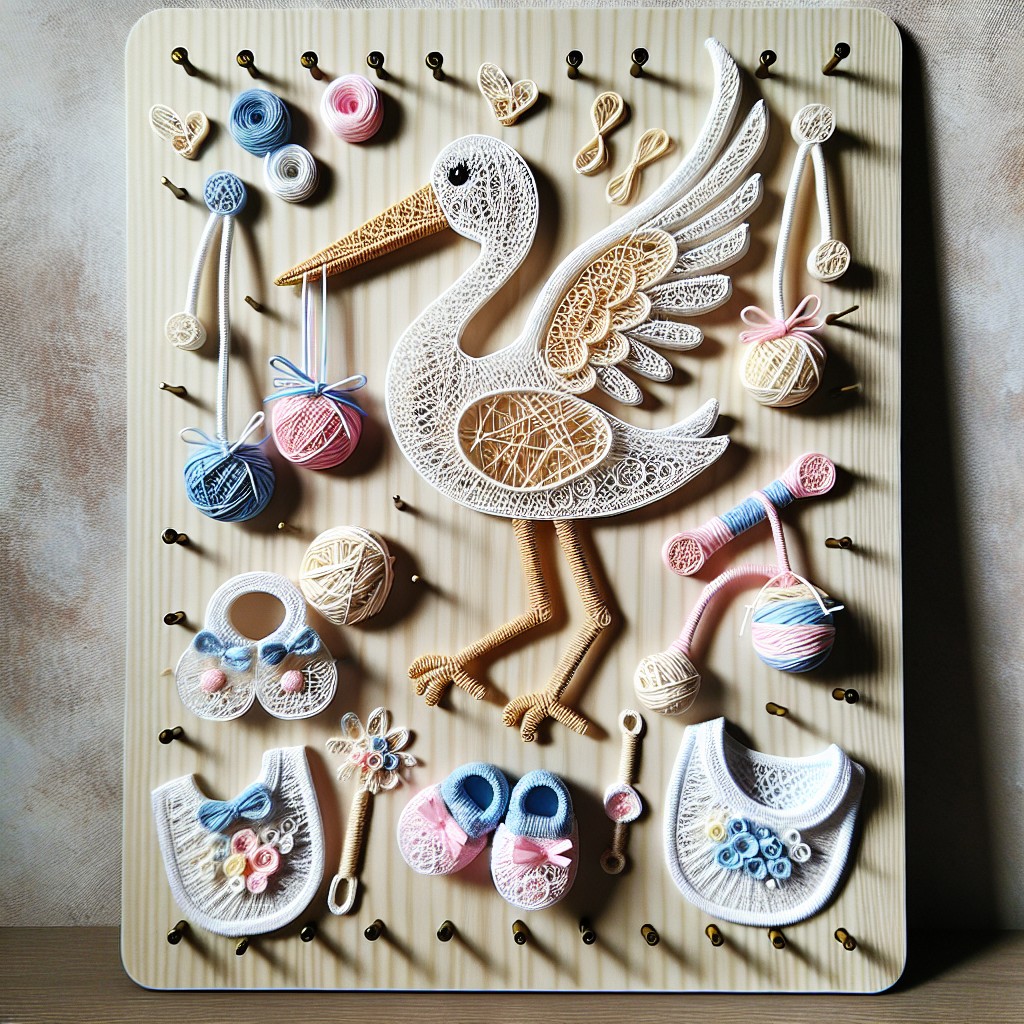
Transform a baby shower into an endearing event with a handmade touch. Opt for soft color palettes to match the nursery or gender-specific shades.
Create silhouettes of classic baby icons like bottles, booties, or a stork carrying a bundle. Embellish with tiny heart strings around the baby’s initials, or fashion a large heart as the focal point with the baby’s name intricately woven in. This craft not only serves as delightful decor; it can become a treasured keepsake for the parents.
To add a whimsical touch, consider a string art rendition of the moon and stars, or dainty animals such as lambs, bunnies, or elephants. Lastly, adding the due date in string art elevates the personalization and serves as a countdown to the exciting arrival.
DIY Birthday Number String Art
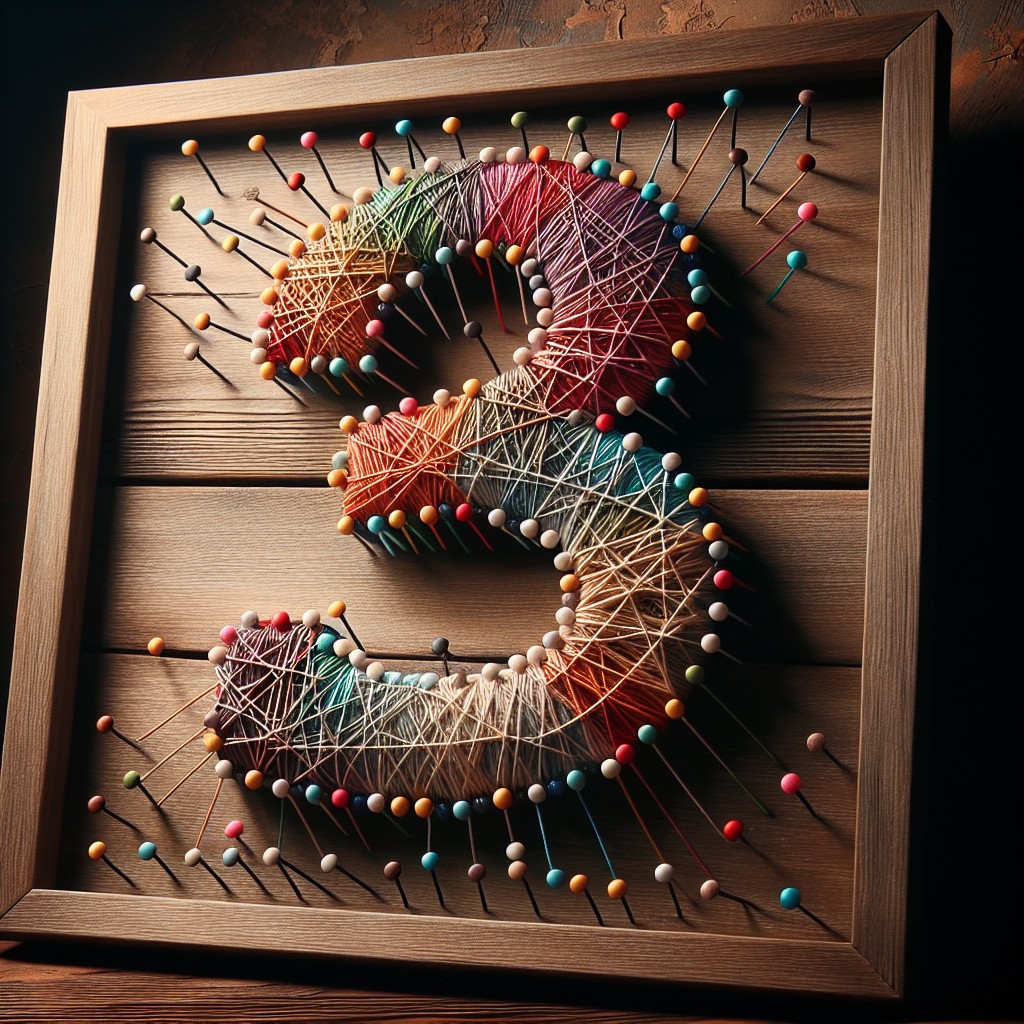
Creating a personalized birthday number string art piece adds a bespoke touch to celebrations. Choose a sturdy base like reclaimed wood to provide a rustic backdrop for your design.
Draw or print out the birthday age as a template, ensuring it’s scaled to fit the board. Hammer nails around the template’s edge, spacing them evenly to outline your number.
Select string or yarn in the celebrant’s favorite color to weave an intricate web inside the number. Start by outlining the shape with the string, tying it securely at a starting nail, and then crisscross between nails to fill in.
For added pizzazz, integrate beads or sequins onto the string as you work, and consider creating a multicolored effect by using different shades. This project isn’t only decorative – it doubles as a heartfelt keepsake to remember special milestones.
Whimsical Star String Art
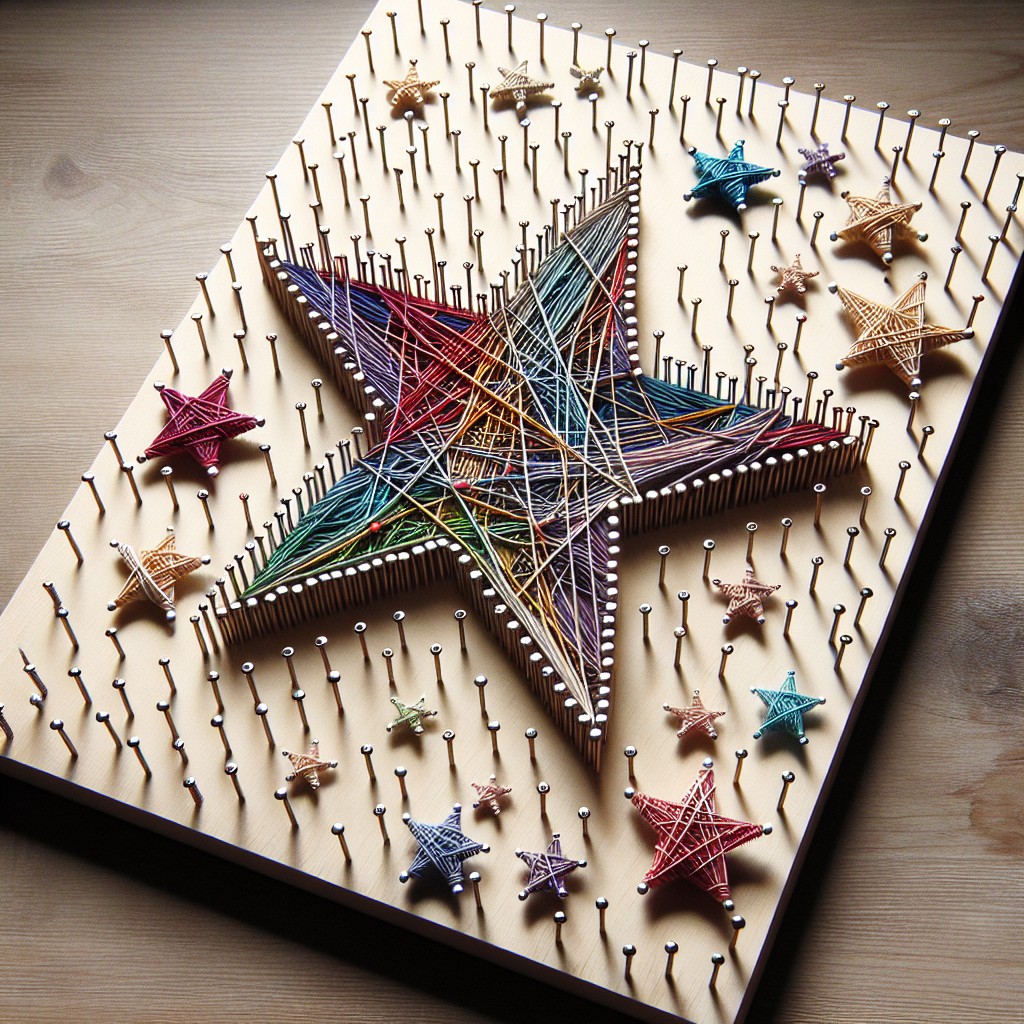
Ignite a spark in your space with a celestial touch. Choose a base material like a wooden plank or canvas and sketch the star pattern, ensuring points are evenly spaced.
Hammer nails along the outline, maintaining consistent spacing. Select string or yarn in colors that complement your existing decor – think metallics for a touch of glamour, or calming blues for a soothing effect.
Begin by outlining the star’s shape, securing the string around each nail head. Once the outline is set, crisscross the string from point to point to fill in the star, varying the tension to create depth and interest.
The beauty of this project lies in its versatility; adjust the star’s size to fit any wall or opt for a constellation design to represent a special date or zodiac sign. This celestial craft serves as both a personalized piece and a conversation starter.
Minimalist Mountain Range String Art

To achieve a serene minimalist mountain range piece, opt for a simple color palette. Stick to soft, natural hues or monochrome strings for an understated effect.
When selecting your board, consider a piece of unstained wood to maintain the earthy aesthetic.
Your pattern should feature clean lines to represent the peaks and valleys. Instead of complex layering, focus on one to three mountain outlines for clarity and impact.
Create a sense of depth by using varying shades of the same color, with darker tones suggesting shadows and lighter ones indicating highlights.
Use nails sparingly to keep the design sleek; position them to outline the mountains without excessive internal detail.
When stringing, maintain uniform tension to present a crisp, calm landscape that draws the eye without overwhelming the senses.
Remember, the key to minimalist string art is less is more. Every element should contribute to a cohesive whole that embodies tranquility and the beauty of simplicity.
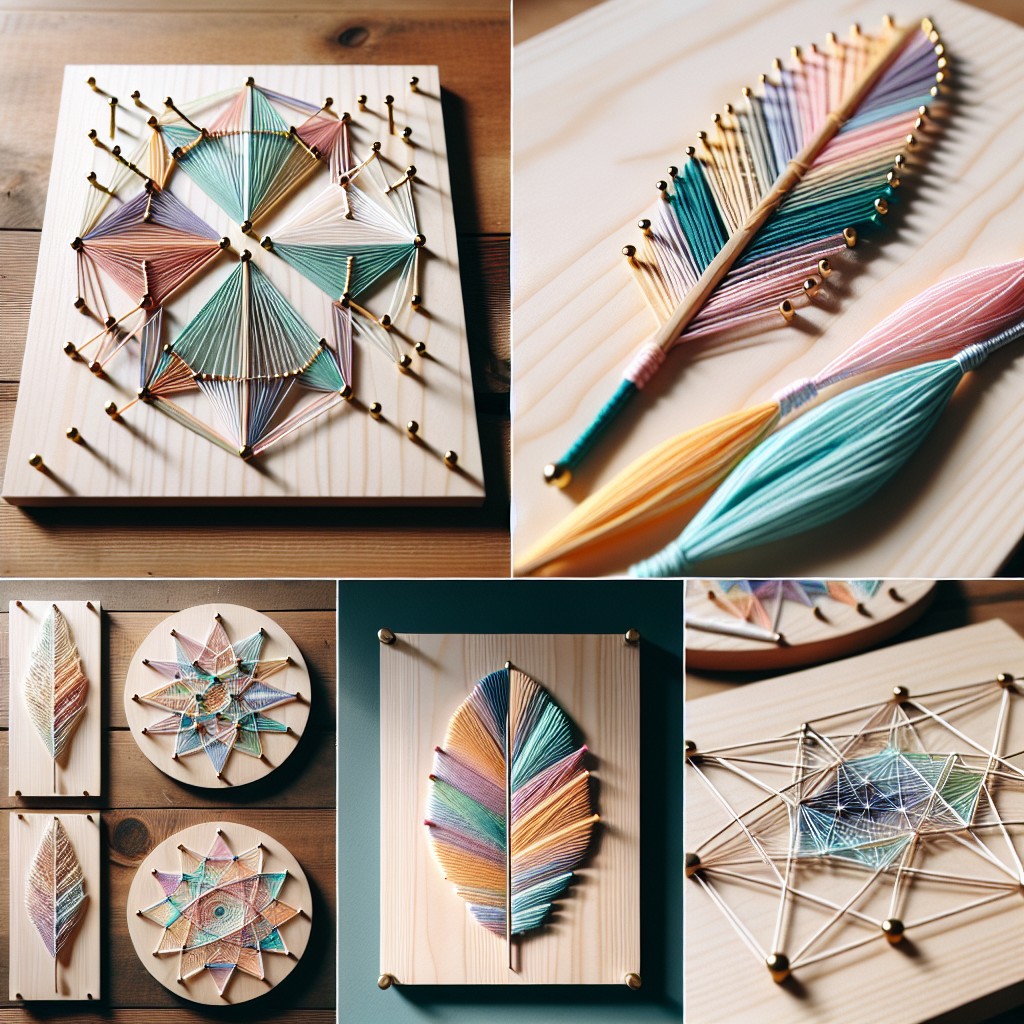
Making a Feather String Art
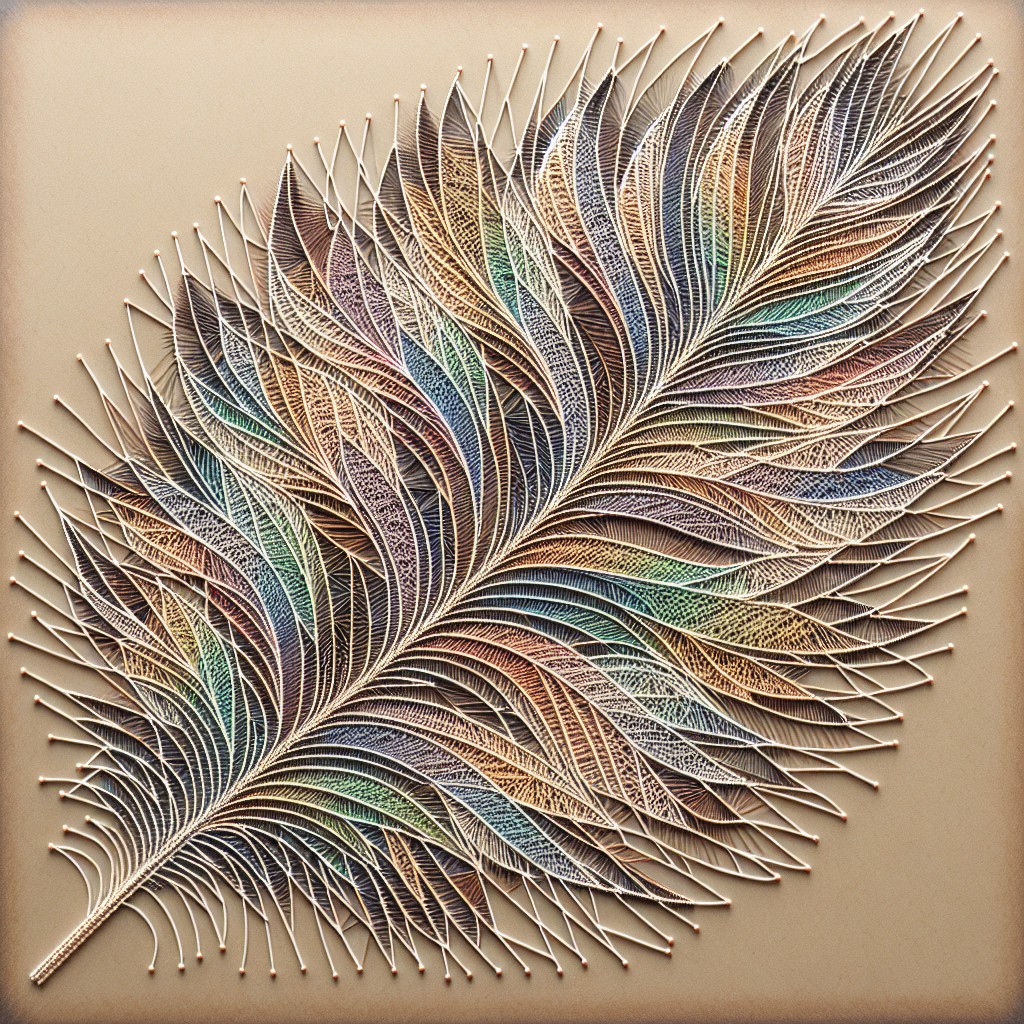
Embarking on the feather string art project is not only a soothing craft experience but also a way to infuse a touch of nature’s elegance into your space.
Start with a simple feather silhouette on a wooden board for a clean outline.
For added aesthetic, consider using a mix of soft and vibrant string colors that mimic the natural gradients found in bird feathers.
When threading, incorporate varying tensions in your strings to give the feather’s vanes a more realistic texture.
Remember, the beauty lies in the slight imperfections, so let your lines flow naturally like the ruffled edges of a feather.
Use small nails to define the quill and barbs, ensuring they’re spaced closely enough to provide the necessary detail without cluttering the design.
The creative process here allows for a personalized take on color schemes and string layering, making each piece truly one-of-a-kind.
This craft not only captures the feather’s delicate form but also channels a serene, bohemian vibe suitable for a multitude of interior decors.
Make Your Own Zodiac String Art
Creating a personalized piece that reflects a zodiac sign infuses your space with a touch of the cosmos and adds a meaningful accent to your decor.
– Choose your zodiac constellation pattern from an astronomy book or online source.
– On a wooden board, after painting or staining it to your desired finish, lightly sketch the constellation using a template.
– Hammer small nails along the outline of the constellation, ensuring they’re evenly spaced and protrude evenly.
– Select a string or embroidery floss in a color that contrasts well with your board for visual impact.
– Begin by tying the string to a starting nail, and then stretch and wrap it from nail to nail to outline the constellation.
– Fill in the constellation by crisscrossing the string between nails, creating a web-like pattern that represents the stars.
– To highlight major stars, loop the string around designated nails a few extra times.
– Secure the string with a knot when your constellation is complete.
– Optionally, add small tags or beads at significant points to represent planets or larger stars.
This method allows a hint of astronomy to meld with the warmth of handicraft, bringing a personalized celestial touch to your living space.
DIY Abstract String Art
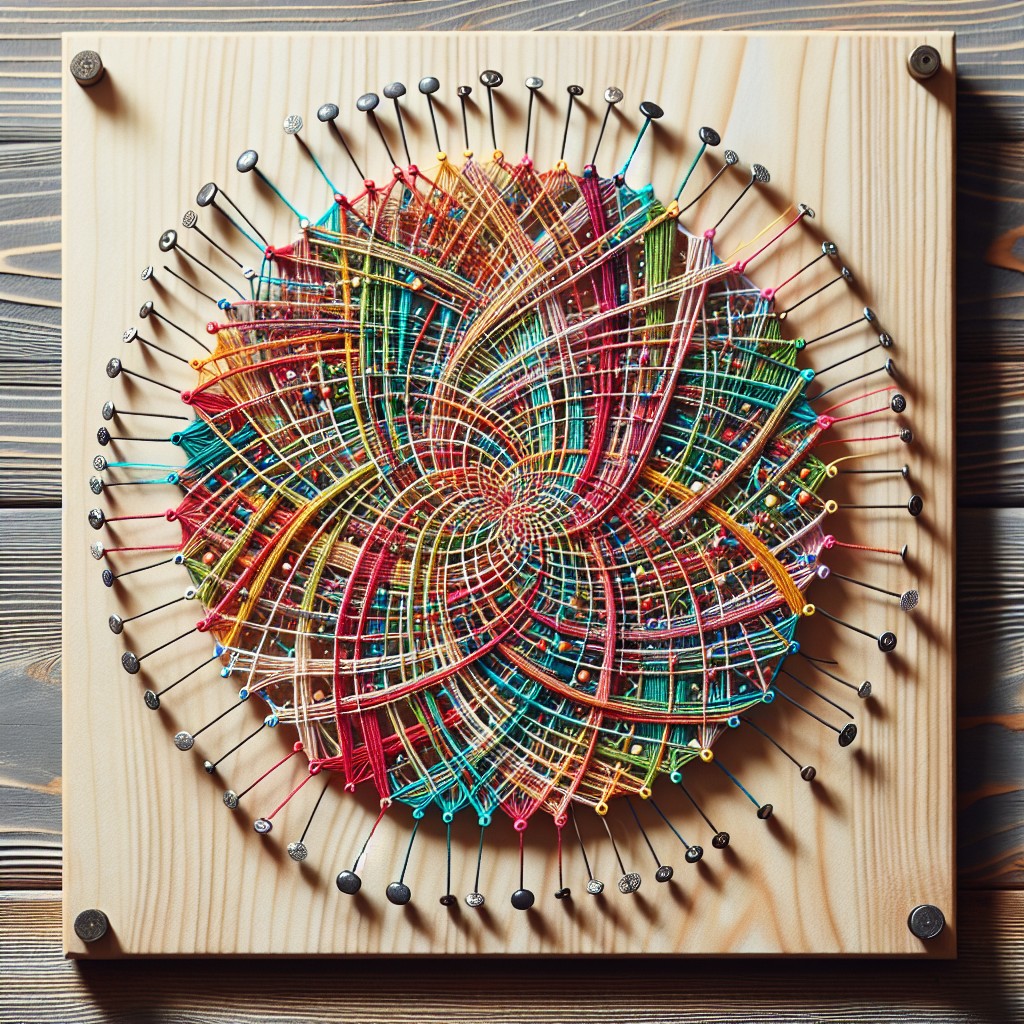
Unlock your inner artist with an abstract string art project. Abstract patterns allow for creative freedom and interpretation; the end result doesn’t have to resemble anything specific, which is part of the charm.
Consider these points as you embark on your abstract string art journey:
- Begin with a color palette that speaks to you – vibrant, pastel, or monochrome shades can set the mood for your piece.
- Choose a base material; wooden boards are a solid choice and offer a great backdrop for your design.
- Map out a random geometric pattern or let your instincts guide the placement of nails on the board.
- Tie the string to a starting nail and weave a web without a plan, allowing the strings to overlap and criss-cross at will.
- The beauty is in the unpredictability, so don’t hesitate to mix string thicknesses and textures.
- Step back from time to time to see the overall composition, adjust as you see fit, and ensure visual balance.
- Embrace imperfections—they add character and uniqueness to your artwork.
Remember, there’s no right or wrong here. Each string art piece is a reflection of your personal aesthetic, a one-of-a-kind expression ready to enhance your space.
Creating Nature Scene String Art
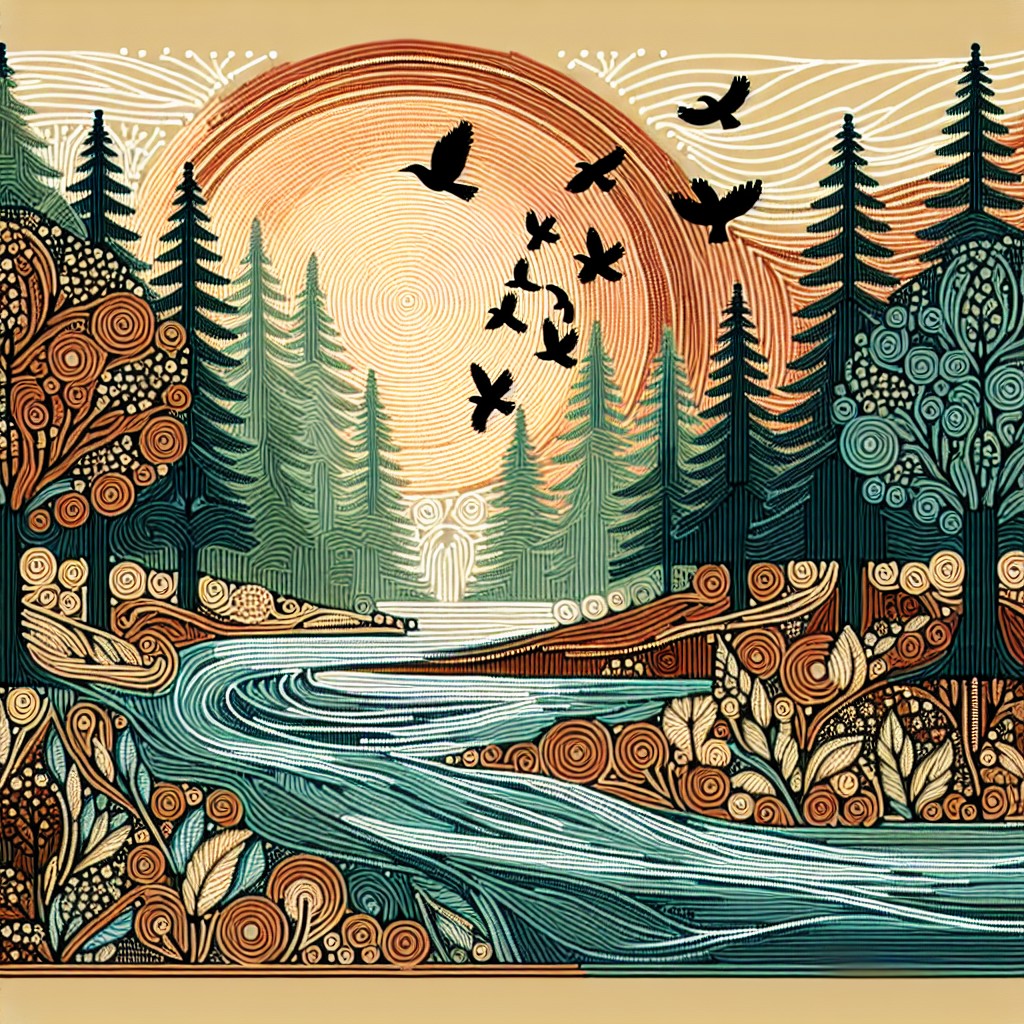
Embarking on a nature scene string art project allows you to bring a touch of the outdoors into your home. To craft a serene nature-inspired piece, consider these points:
- Choose natural and earthy tones for your strings to mimic the colors found in nature, such as greens, browns, and blues.
- Opt for a wooden base that complements the natural theme, like a slice of unprocessed wood or reclaimed barn wood.
- When selecting a pattern, think about incorporating elements such as trees, mountains, or rivers to create depth and interest.
- Use varying thicknesses of string to differentiate between foreground and background, creating a sense of realism.
- Consider adding a textured element such as actual stones or moss to enhance the tactile quality of your art.
- If you’re feeling ambitious, incorporate lighting behind or within your string art to mimic the glimmer of stars or the soft glow of fireflies.
With these concepts in mind, you’ll be on your way to designing a breathtaking nature scene that captivates the tranquil essence of the great outdoors.
Music Note String Art for Music Lovers

Transform your passion for melodies into a visual symphony with a creative project that hits all the right notes. Select a recognizable motif – perhaps a treble clef, a beamed eighth note set, or the bass clef for a bass-centric touch.
Start by sketching your musical symbol onto a wooden board as your canvas. Hammer nails along the outline of your design. The spacing between nails is key; keep it even to ensure a harmonious final look.
Choose a color palette that sings to you. Black and white strings evoke printed sheet music, while vibrant colors add a pop of energy reminiscent of a live concert. Weave your string meticulously from nail to nail, crisscrossing and looping to fill the shape. The density of the string placement can influence the piece’s dynamism – a sparse approach for a minimalistic vibe or densely strung for a rich, textured effect.
Incorporate this piece into your space to showcase your musical affinity. Whether it’s a personal studio, a cozy living room corner, or as an inspiring piece in a music classroom, it becomes not just decoration but a conversation starter.
DIY Pumpkin String Art for Halloween

Transform your space for Halloween with the warm glow of a pumpkin string art piece. This project is not only seasonally appropriate but also adds a handmade charm to your spooky decor.
Here are some key pointers to guide you through the process:
- Choose your base: A wooden board painted black or dark orange will make your design pop.
- Create your template: Draw or print a pumpkin shape that fits your board.
- Hammer time: Evenly space nails along the outline of the pumpkin template, hammering them in about half an inch deep.
- String selection: Opt for orange, green, and brown embroidery thread or yarn to mimic the colors of a pumpkin.
- Weaving magic: Start by outlining the pumpkin with orange string, then fill it in with a crisscross pattern, securing the string by wrapping it around the nails.
- Adding details: Use green thread to give life to the stem; brown can outline for a shadow effect.
- Enhancing contrast: Consider adding a moon or bat shapes in the background using white or purple string for an eerie touch.
Utilize these steps to craft a unique decoration that embodies the Halloween spirit and showcases your creativity on a shoestring budget.
DIY String Art Gift Ideas
Transform your string art into personalized presents that will touch the hearts of friends and family. Consider these concepts:
- Customize with names or initials for a bespoke touch.
- Recreate meaningful symbols or images, such as a special location or hobby.
- Choose colors that resonate with the recipient’s style or home decor.
- Frame your string art for added sophistication and protection.
- Accompany your gift with a handwritten note explaining the thought behind your creation.
These ideas ensure your string art gifts are cherished for their thoughtfulness and originality.
Plants and Flower String Art Patterns
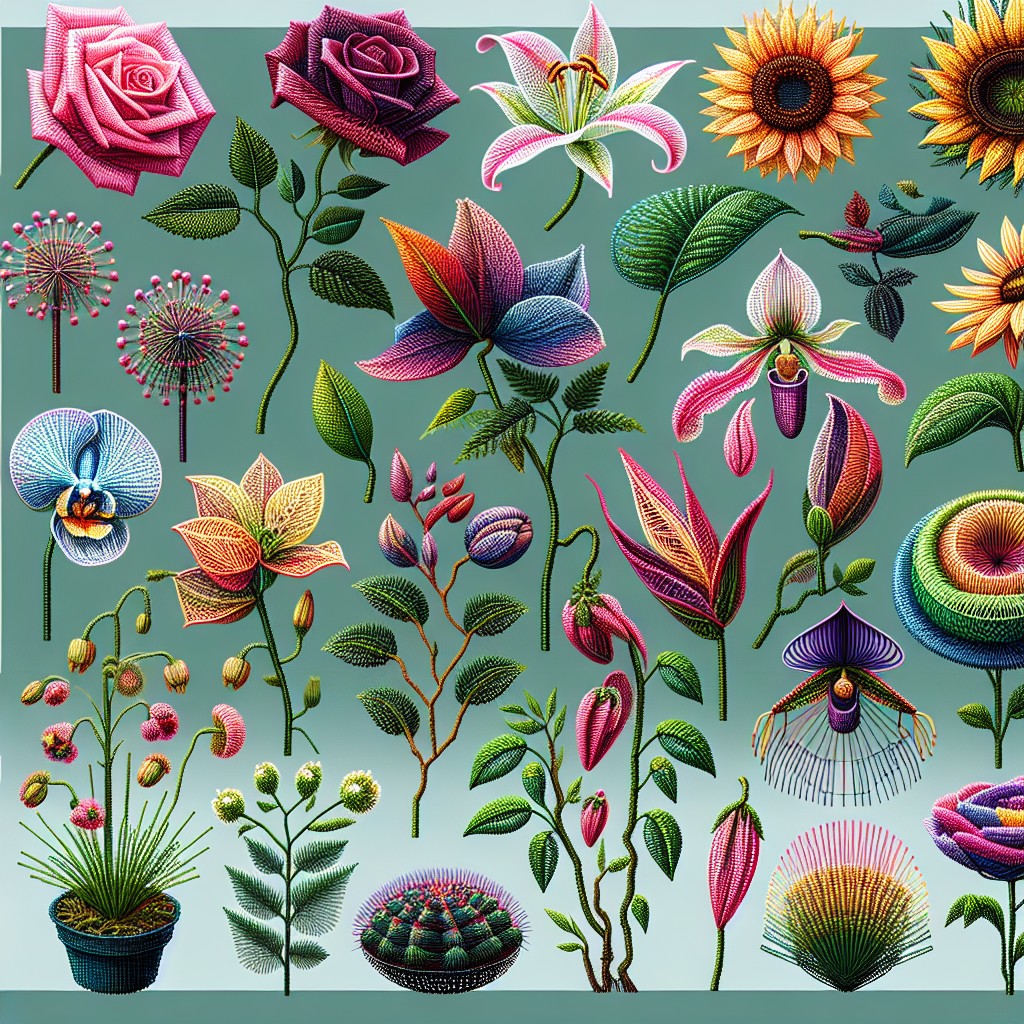
Capture nature’s everlasting beauty with plants and flower patterns in string art. Select a simple leaf or a complex rose design depending on your skill level.
Use a variety of green shades to add depth to foliage designs. Incorporate bright hues like yellows, pinks, and purples for a vibrant floral effect.
Experiment with gradients to mimic natural petal transitions. Consider using metallic strings for a modern twist on dandelions or daisies.
Incorporate beads or tiny nails to add texture or represent flower centers. Vary nail placement distances to create different petal shapes and plant sizes.
Mix and match florals with geometric shapes for contemporary wall art. Remember to secure strings tightly to maintain the integrity of delicate designs over time.
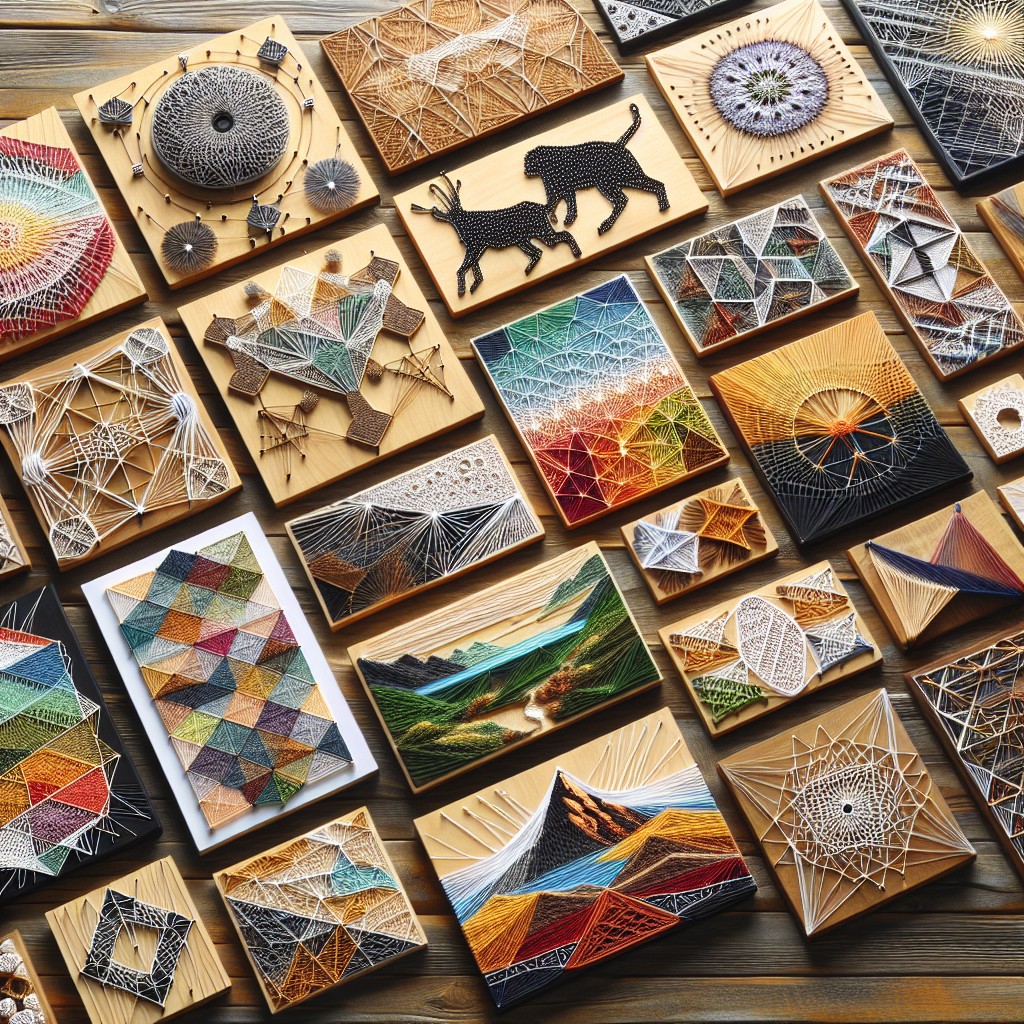
String Art for Wall Decor
Transform your living spaces with personalized artwork by incorporating string art into your wall decor.
Choose wood or foam board as your canvas and select a color scheme that complements your existing room palette for a harmonious effect.
Opt for simple geometric shapes or intricate mandalas depending on your skill level.
To create a focal point, consider a large central piece, or for added visual interest, arrange a gallery of smaller pieces in a cohesive theme.
Use varying thread thicknesses to add texture and depth.
Whether you’re aiming for a contemporary look with clean lines or a rustic vibe with reclaimed wood, this art form adapts seamlessly to your desired aesthetic.
Remember to balance the visual weight of your string art with the surrounding space, ensuring it stands out without overwhelming the room.
String Art Patterns for Coffee Lovers

Fuel your creativity along with your love for java by incorporating coffee-inspired elements into your string art projects.
Choose familiar patterns like steaming mugs, elegant coffee pots, or detailed espresso machines to bring the cozy vibe of your favorite café into your home.
Consider using coffee-colored strings, ranging from light beige for lattes to deep brown for espressos, to add authenticity to your artwork.
For a more abstract approach, represent the aroma of coffee with swirling lines or create a pattern out of coffee beans themselves.
Whether you hang your finished piece in the kitchen or a home office, it’ll serve as a delightful reminder of your passion for coffee with every glance.
Galaxy-Inspired String Art

Capture the vastness of the cosmos with a galaxy-themed creation that’s out of this world. Using a palette of dark blues, purples, and blacks, mimic the deep hues of outer space.
Incorporate specks of white and silver to represent twinkling stars and consider adding a hint of glitter for extra sparkle.
Choose a circular or spiral pattern to symbolize swirling galaxies. This project allows for creativity and abstraction, as no two galaxies look exactly alike.
With each nail and string, you’re emulating the ethereal beauty of the night sky, bringing a cosmic touch to your decor.
To enhance the celestial effect, opt for a backlit setup or strategically place battery-operated fairy lights behind your masterpiece.
Step-by-Step Beach Inspired String Art
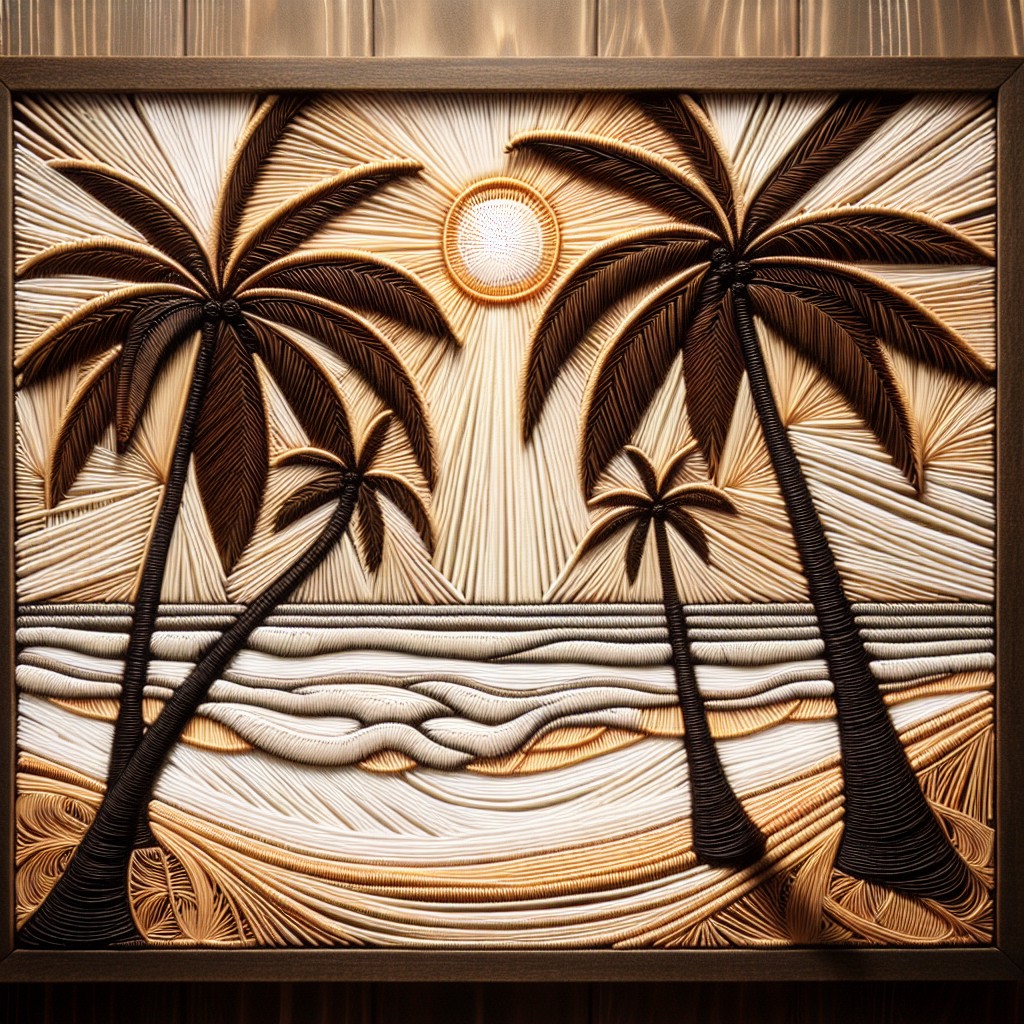
Begin by selecting a piece of wood as the base; sand and stain it for a worn, driftwood aesthetic. Choose a simple silhouette such as a starfish, seashell, or palm tree as your design focal point. Print or draw the outline on paper, then fix it to the wooden base. Hammer nails along the outline of your beach motif, ensuring they’re evenly spaced and only partially driven in to secure the structure.
Next, remove the paper, and start stringing by tying a knot around one of the nails. With careful precision, crisscross the string from nail to nail, maintaining tension to outline the shape. For a more dynamic effect, layer different shades of blue and sandy tones to mimic water and shore. To finish, tie off the end securely and snip excess string. Consider adding a small detail, like a tiny seagull or sailboat in the distance, for a touch of whimsy. This step-by-step process allows for personalization and creative expression, crafting a coastal escape in string art form.
Fun Party Balloon String Art

Add a playful touch to any celebration with party balloon string art, which captures the lightness and joy of real balloons without the risk of them popping. To create this cheerful art piece, select a sturdy base like wood or corkboard and trace out a balloon shape. Hammer in nails along the outline and choose a vibrant color palette of embroidery floss or yarn that complements the festive vibe you’re aiming for.
Begin by tying your chosen string to a starting nail, then crisscross the string from nail to nail within the balloon outline, making sure to spread out to the edges to fully define the shape. For added dimension, incorporate different shades of one color by layering them as you go, creating a gradient effect mimicking the way light reflects on a balloon.
Don’t forget the details that bring your balloon to life – a simple “string” dangling from the bottom of your balloon shape can be created by letting a single line of string hang down and securing it with a small nail at the bottom. Experiment with multiple balloons on one board, playing with various sizes and overlapping them for a dynamic, three-dimensional look that makes a perfect backdrop for a party photo booth or as a permanent installation in a child’s bedroom.
Remember to secure your final string with a knot, and if desired, seal the piece with a clear spray to prevent dust accumulation. Party balloon string art not only serves as a fun party decoration but also as a lovely keepsake that holds the festive spirit for years to come.
DIY String Art Cars for Kids
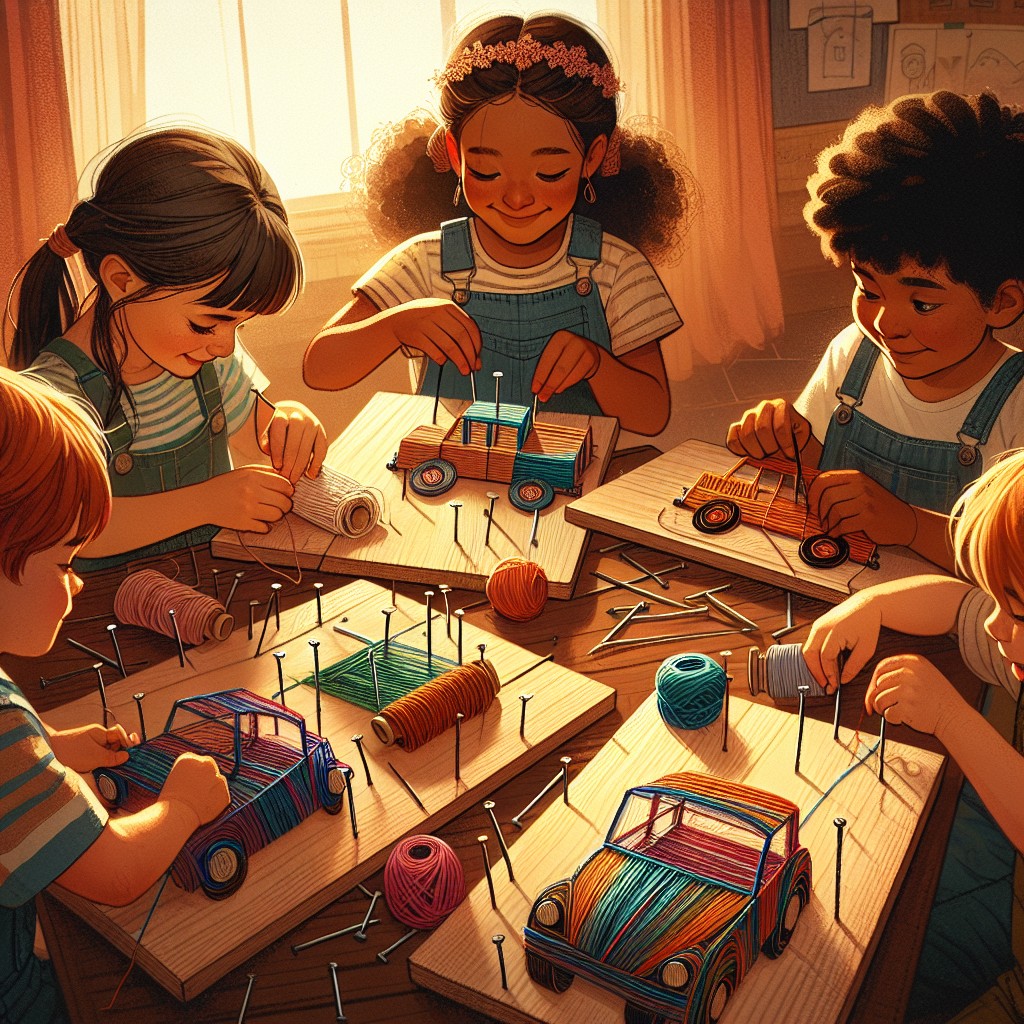
Transforming a child’s passion for cars into a creative string art piece can be a delightful project. The key is selecting a simple car silhouette that is easy enough for children to work with while still capturing the essence of their favorite vehicle.
- Begin with a piece of wood, pre-painted in a color that contrasts well with your string choice.
- Sketch or print out your car pattern and secure it to the wood with tape.
- Hammer nails along the outline of the car pattern, ensuring even spacing for a cleaner look.
- Choose durable, colorful string and begin by tying a knot onto one of the nails to anchor your design.
- Encourage kids to wrap and weave the string around each nail, creating the body of the car first and then moving onto the details.
- Kids can personalize their pieces by adding the string in patterns or filling in certain areas to mimic windows and wheels.
This activity not only fosters creativity but also helps children develop fine motor skills and patience as they work to complete their automotive masterpiece.
City Skyline String Art Tutorial
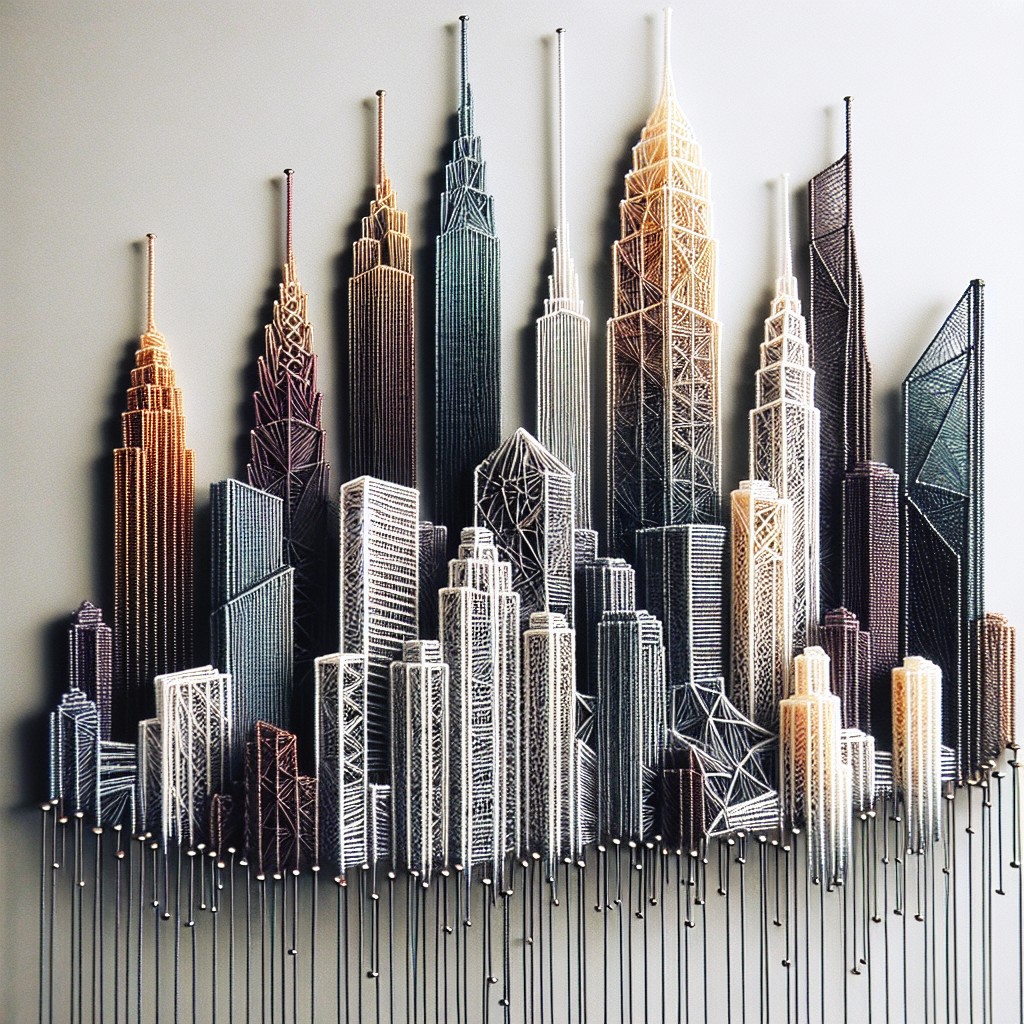
Capture the essence of urban beauty with this City Skyline String Art project. Perfect for metropolitan enthusiasts or to add a contemporary touch to any room, this piece highlights silhouettes of iconic buildings and structures.
Materials: Gather a wooden board, nails, a hammer, embroidery floss in your preferred colors, and a printed template of the skyline you wish to feature.
Design Transfer: Secure the skyline template onto the wood, then evenly space and hammer nails along the outline of the buildings. Remove the paper carefully to reveal the pattern.
String Technique: Tie the floss to a starting nail and weave the string from nail to nail, outlining the buildings first to define the skyline. Continue filling in the spaces in a crisscross pattern to add density and texture.
Color Choices: Stick to a monochrome palette for a modern look or integrate various shades to represent different times of the day or the city’s vibrant life.
Final Touches: Pay attention to the tension in the string to prevent sagging and ensure a neat, crisp outline. Snip off any excess string after knotting securely.
Display Ideas: Mount your city skyline art prominently with sufficient lighting to cast a soft shadow and amplify the three-dimensional effect.
This project is an engaging way to pay tribute to your favorite city and bring a piece of it into your home.
Stunning Butterfly String Art Design
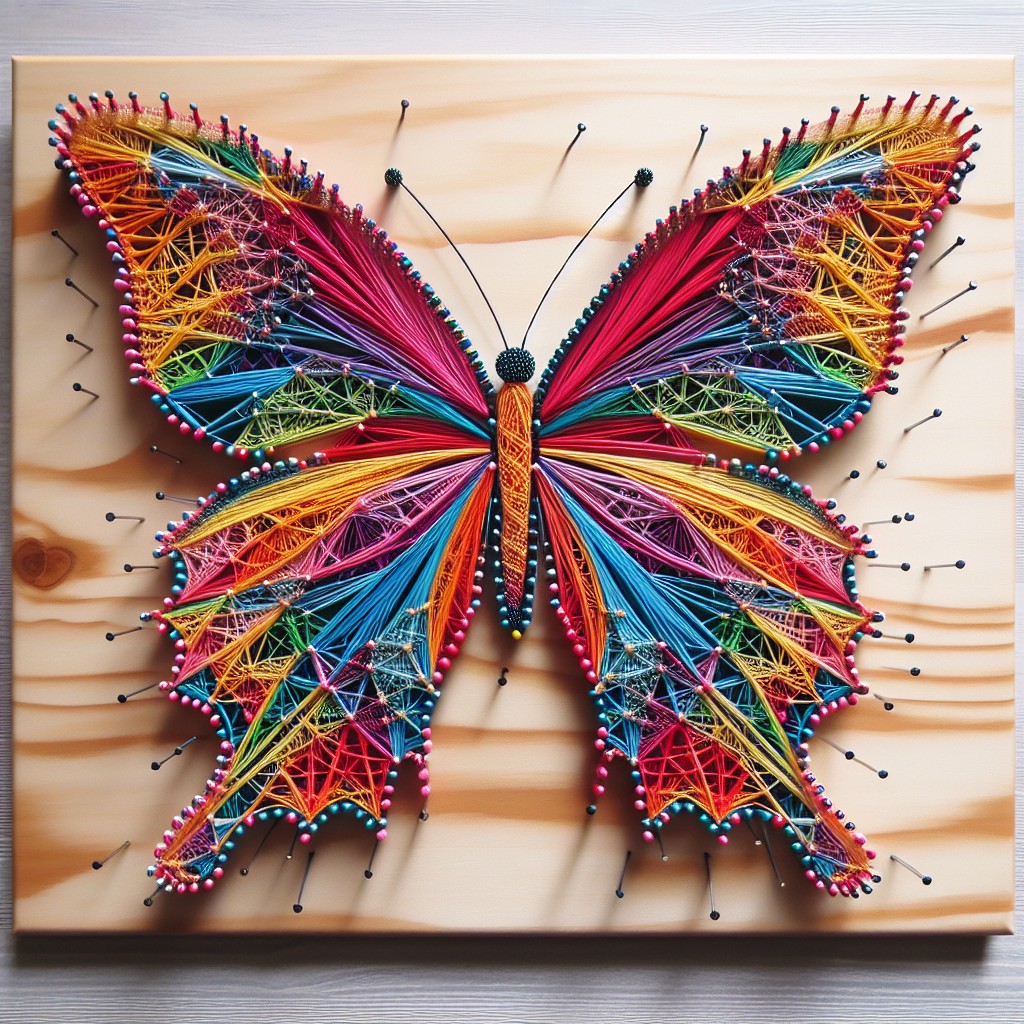
Embarking on this project will have you fluttering with excitement as you bring the grace and beauty of butterflies into your space—perfect for nurseries, living rooms, or as a heartfelt gift.
Select your Canvas Size: Begin with pinpointing the right canvas size that suits the area you plan to decorate. A moderate-sized canvas is ideal for detailed work without overwhelming the space.
Create or Print a Template: Source a butterfly silhouette that speaks to your style. Print it out, ensuring it fits within your chosen canvas. Attach the template to the wood board using masking tape.
Hammer in the Nails: Outline the butterfly silhouette by hammering small nails into the wood along the edge of the design. A small gap between each nail ensures a detailed pattern, while greater spacing gives a more abstract look.
Choose Your Colors: Select thread or string colors that complement your room decor or go wild with a vibrant palette to make a statement. Embroidery floss or thin yarn are excellent options.
String Your Design: Starting from the center, tie your string onto one nail, and begin weaving in and out across the pattern to create the butterfly’s wings. Gradually fill in the design to your desired density.
Secure the String: Once you’ve completed the stringing, tie off the end securely and snip any excess. This prevents the design from unraveling and maintains its pristine look over time.
Remember, the symmetry of the butterfly’s wings offers a pleasing aesthetic, so take care to balance the string tension and color distribution for a design that truly takes flight.
Ideas Elsewhere
- https://kidsactivitiesblog.com/191877/string-art-2/
- https://www.makingjoyandprettythings.com/rustic-string-art/
- https://www.gathered.how/arts-crafts/string-art-patterns/
- https://jennifermaker.com/string-art-patterns/
- https://www.pillarboxblue.com/34-string-art-ideas/
- https://www.burlapandblue.com/string-art-patterns-and-templates/
More Like This
 20 Fairy Houses With Natural Materials That Will Make You Believe In Magic
 20 Cheap Walkway Ideas DIY Benefits
 15 Ingenious DIY Pantry Cabinet Ideas
 15 Creative DIY Buffet Table Ideas for Your Next Gathering
 15 Genius Office Supply Storage Ideas to Boost Your Productivity
Recap