Last updated on
Creating DIY raised garden beds becomes a gratifying and fruitful endeavor because it simultaneously adds charm to your outdoor space and caters to your gardening needs with minimal expenditure.
This article includes my original designs. Some of them may be exaggerated to make a point — that’s my style. Enjoy them for your inspiration!
Riding the wave of DIY trends, raised garden beds have become quite an online sensation. While there are plenty of known ideas floating around cyberspace, this piece aims to shine a spotlight on entirely new and unique perspectives.
As we delve into creating stunning yet affordable garden additions, hang tight for fresh takes that’ll transform your space like never before. Fear not, traditionalists! We’ll also feature a curated list of the best existing ideas and resources for your convenience.
With a focus on versatility and cost-effectiveness, let’s redefine what it means to have impeccable green spaces right at our homes. Buckle up; we’re about to sprout some inspiring gardening ideas!
Key takeaways:
- Repurpose existing materials for budget-friendly expansion.
- Create a mini-greenhouse by repurposing old windows or glass panels.
- Use shaped blocks for unique and playful raised bed designs.
- Design multi-level raised beds with proper drainage and sunlight.
- Coordinate raised beds with your home’s aesthetics for a cohesive look.
Expand On a Budget: How to Enlarge Your Raised Garden Bed Area
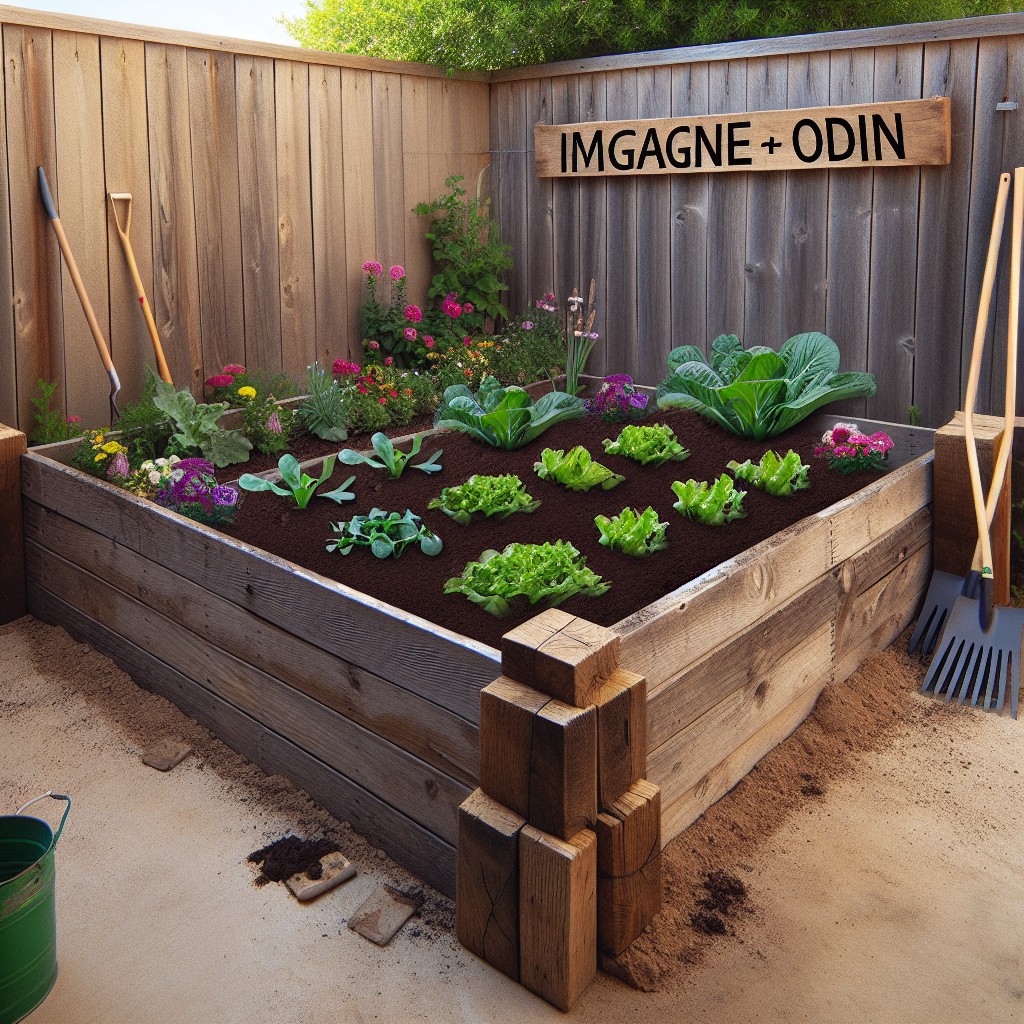
Maximizing your garden’s potential doesn’t have to come with a hefty price tag. By using cost-effective materials like repurposed wood, cinder blocks, or even inexpensive pine boards, you can extend your growing space significantly.
Here are a few key points to consider:
- Repurpose Existing Materials: Before buying new, see what materials you have on hand. Old decking, unused bricks, or even large containers can serve as great starting points for expansion.
- Scale Gradually: Rather than a complete overhaul, add one section at a time. This way, you can budget better and make adjustments as your garden grows.
- Connectivity: When adding sections, ensure they integrate well with the existing structure, both for aesthetic and functional purposes. Proper alignment and connection will maintain stability.
- Sourcing Materials: Keep an eye out for discounted or free materials through local listings, community groups, or sales. Many times, you can acquire quality supplies just by asking around or keeping an eye on neighborhood developments.
- Soil Building: As you expand, focus on soil health. Composting and mulching with organic matter can be done inexpensively and will enrich the new sections of your garden bed.
By implementing these strategies, you can efficiently and economically enhance your garden’s footprint, allowing you to grow more of what you love.
Build With Glass: Create a Mini-Greenhouse Raised Bed
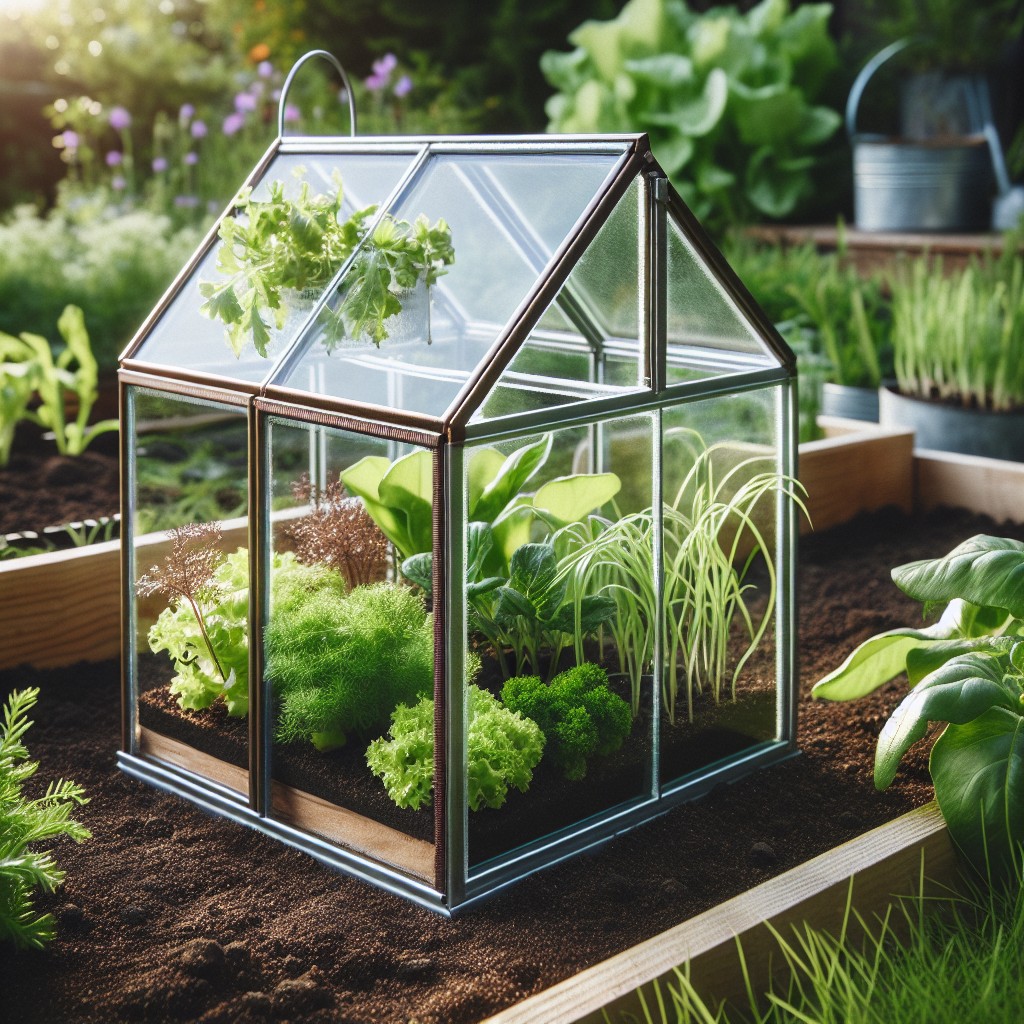
Constructing a mini-greenhouse atop your raised bed extends the growing season and protects delicate plants from harsh weather. Follow these simple steps to repurpose old windows or glass panels for this project:
- Frame It Up: Measure and build a wooden frame to fit the size of your existing raised bed.
- Hinge It: Attach hinges to one side of the frame, allowing you to lift the glass for easy plant access and ventilation.
- Seal the Deal: Use weather stripping along the edges to create a snug fit and prevent heat from escaping.
- Support System: Install sturdy support arms or chains to safely hold the glass top open when tending to plants.
- Let There Be Light: Choose a south-facing location for maximal sunlight exposure, ensuring your plants thrive.
By utilizing glass panels, you not only recycle materials but also create an optimal microclimate for a variety of plants.
Unique Designs: Making Raised Beds Out of Shaped Blocks
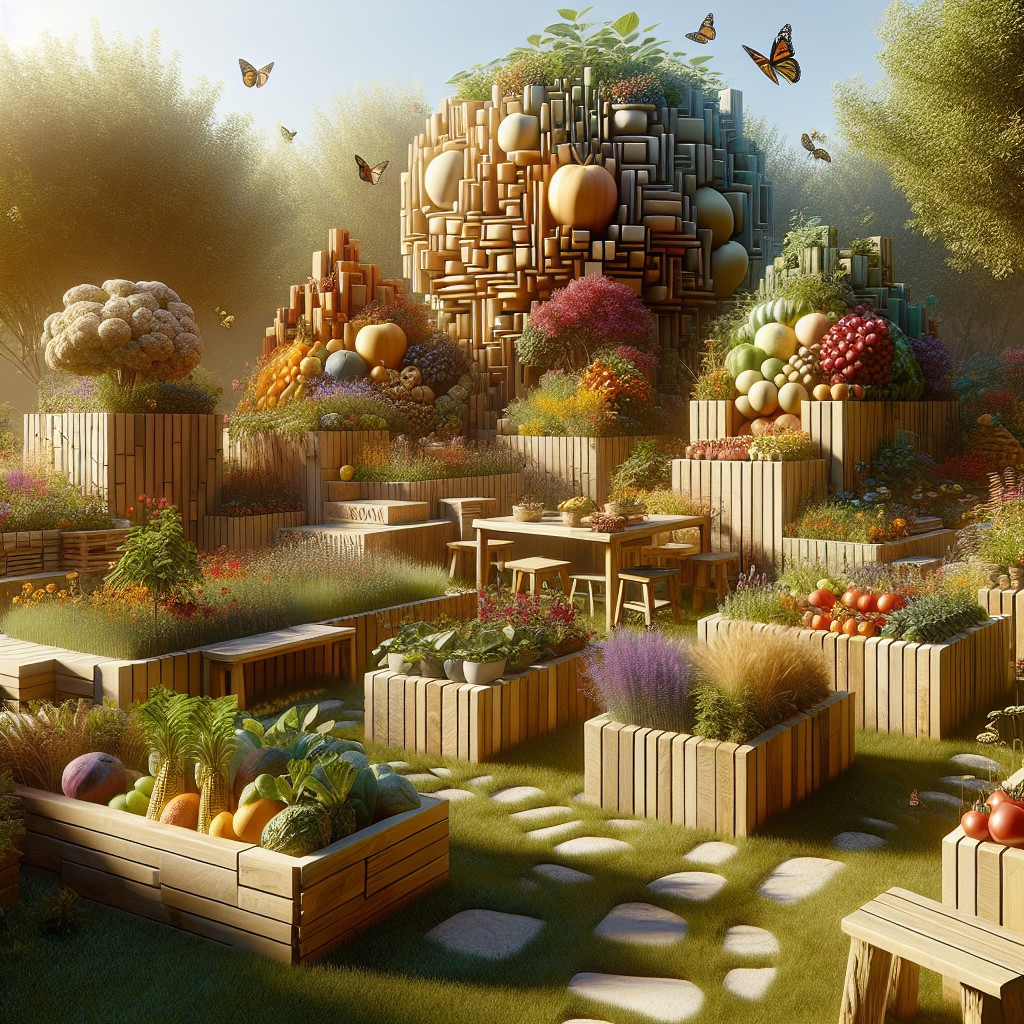
Shaped blocks, such as interlocking bricks or custom-designed cinder blocks, bring personality to garden spaces. These blocks, often available in various sizes and colors, allow you to design intricate patterns or playful outlines.
Consider selecting blocks that complement your home’s exterior, creating a seamless flow between architecture and nature. You can set blocks to form geometric patterns, like circles or zigzags, for an eye-catching display. For a touch of whimsy, opt for blocks with embossed designs or those that can be painted to add pops of color amidst the greenery.
When using shaped blocks, ensure they are securely fitted together to prevent soil from escaping and to offer adequate support for plant life. The innate modularity of these blocks also means you can easily expand or modify the bed over time, adjusting to your garden’s growing needs. Remember to select materials suited to outdoor use, resistant to weather and decay, to ensure your raised bed remains a focal point for seasons to come.
Multi-Level: Creating a Raised Bed With Steps
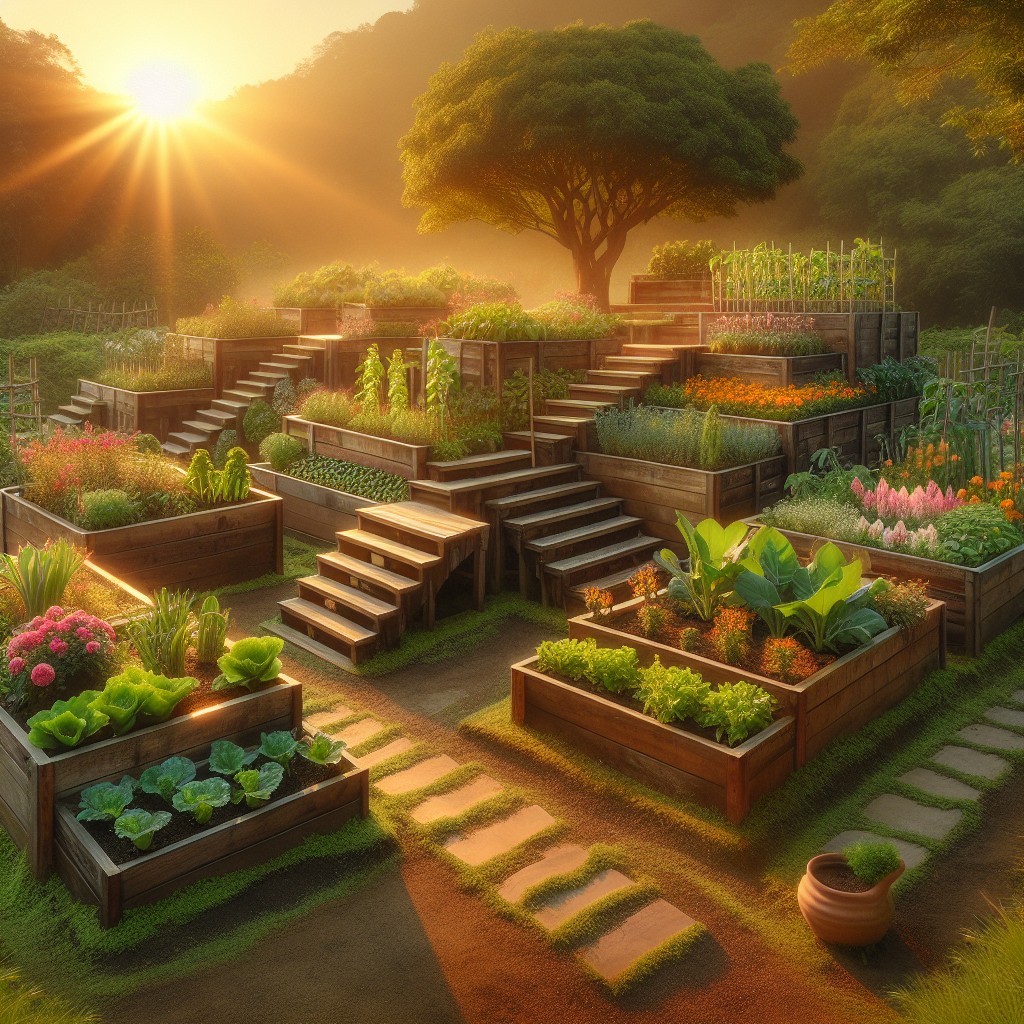
Designing multi-level raised beds with steps optimizes vertical space, allowing you to grow a variety of plants with different depth needs. Start by establishing a sturdy base using larger blocks or lumber at the bottom.
The upper tiers should be progressively smaller, creating a natural stair effect for both visual appeal and functional accessibility.
Consider the sun exposure and plant accordingly; taller plants should be placed on the upper levels to prevent shading of smaller varieties below. Ensure proper drainage for each level by incorporating gravel or hardware cloth at the base, as water can easily become trapped in a tiered structure.
Select materials that complement your garden’s aesthetic: consider untreated cedar for a rustic look or painted pallet wood for a more modern touch. Create a blueprint that includes each tier’s dimensions to help visualize the completed project and guide your construction process.
These steps in your garden not only elevate the plants for easier tending but also introduce dynamic lines, making your space a focal point of both productivity and beauty.
Stylish Designs: Raised Beds That Match Your Home’s Aesthetics
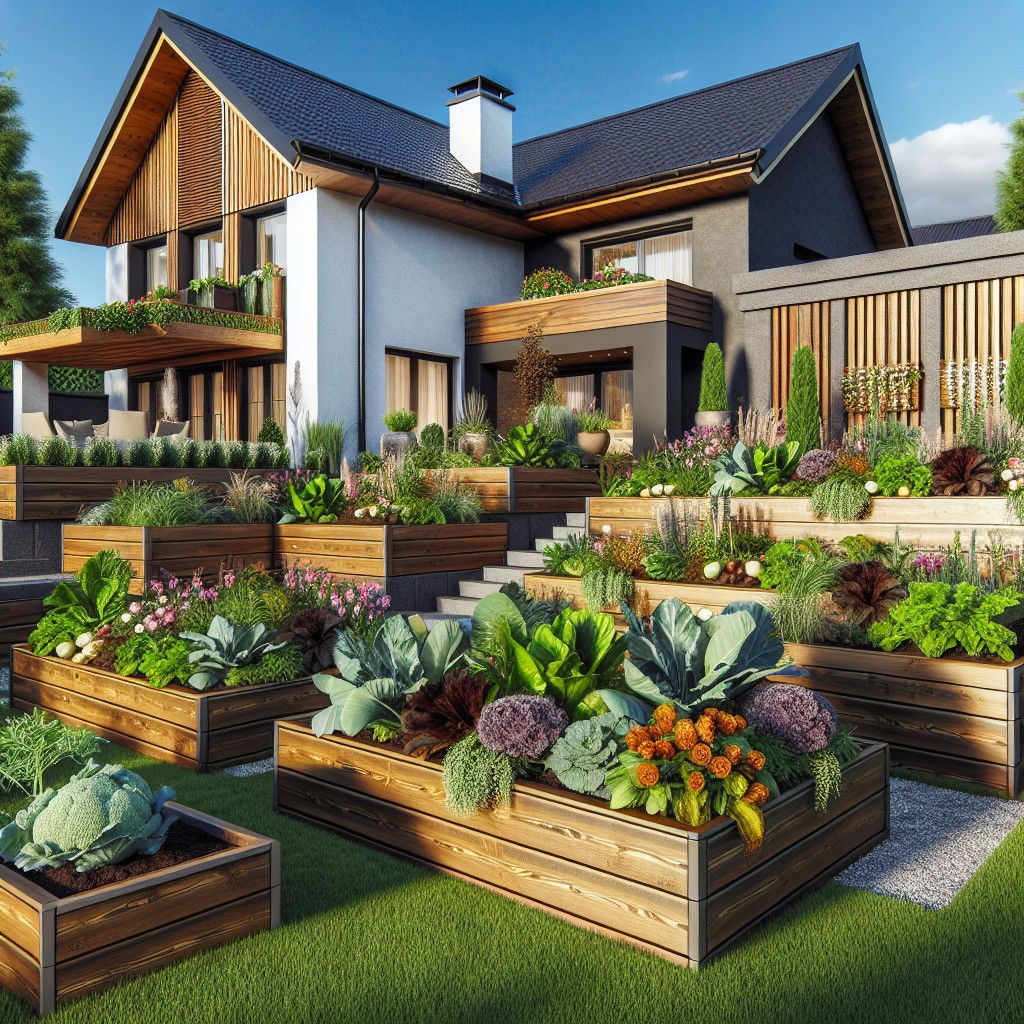
Elevate your outdoor space by harmonizing the look of your raised garden beds with the architectural style and color scheme of your home. Consider these points to ensure a cohesive aesthetic:
- Material Selection: Choose materials that complement your home’s exterior. For instance, if you have a brick house, red-toned stone or brick for your garden beds can tie the look together.
- Color Coordination: Paint or stain wood to match your home’s trim or shutters. This creates a deliberate and polished effect that catches the eye.
- Architectural Details: Mimic the lines and shapes found in your home’s design. If your home has a modern, clean look, opt for garden beds with sleek, straight lines. For a traditional home, consider raised beds with ornate woodwork or curving edges.
- Thematic Continuity: If your home has specific design elements such as nautical, rustic, or Mediterranean themes, carry these into your garden bed design to create a seamless transition from home to garden.
By considering these design principles, you create not just a garden, but an extension of your home’s personality.
Old Becomes New: Building Garden Beds Out of Pallets
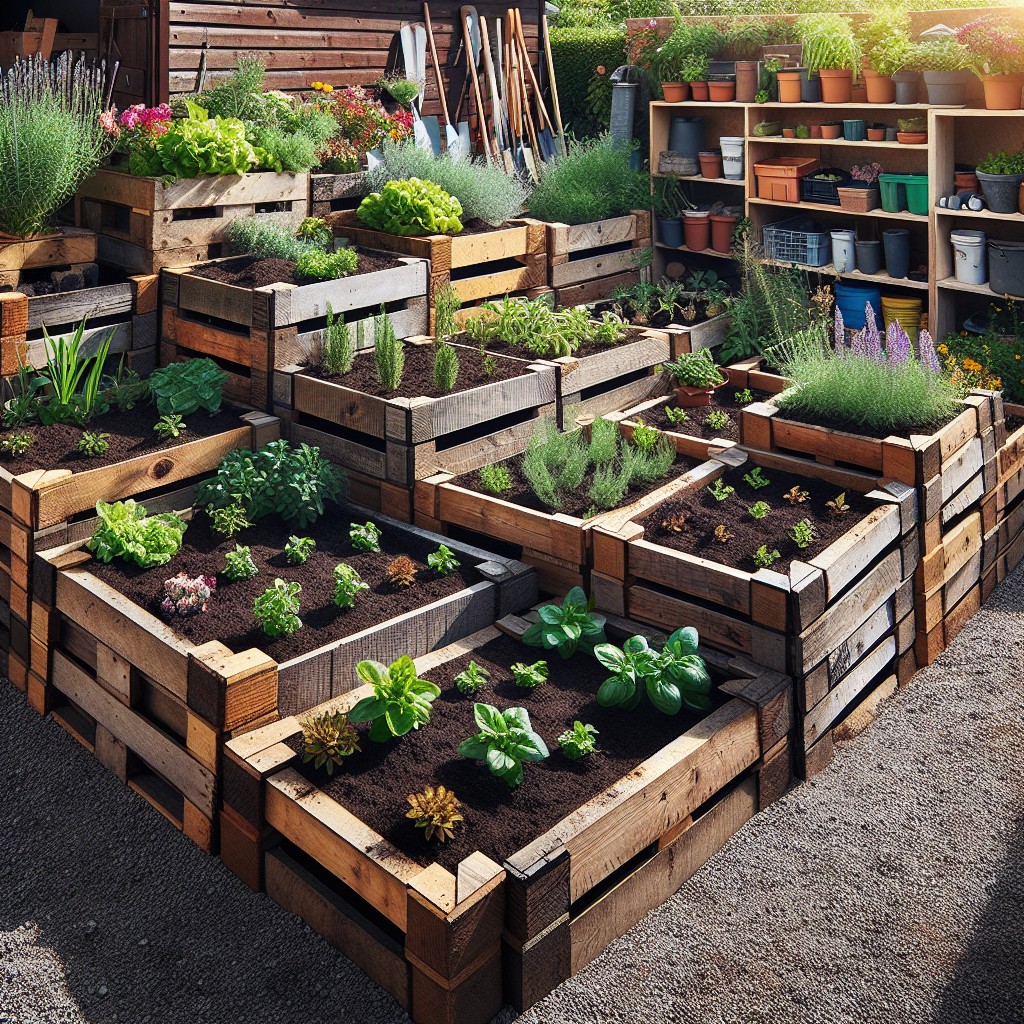
Transforming discarded pallets into garden beds is not only cost-effective but also environmentally beneficial. Ensure you’re using heat-treated (HT stamped) pallets, which are safe for growing edibles.
Begin by disassembling the pallets with a pry bar and hammer, setting aside undamaged boards. Form the box shape by connecting the boards at their edges using screws and a drill. Lining the interior with landscape fabric keeps soil in and pests out.
Elevate the bed on blocks or additional pallet sections to improve drainage and deter pests. Lastly, fill with a rich soil mix tailored to your plants’ needs, and your pallet garden bed is ready to flourish.
Incorporate a Garden Path: Raised Beds With Built-In Walkways
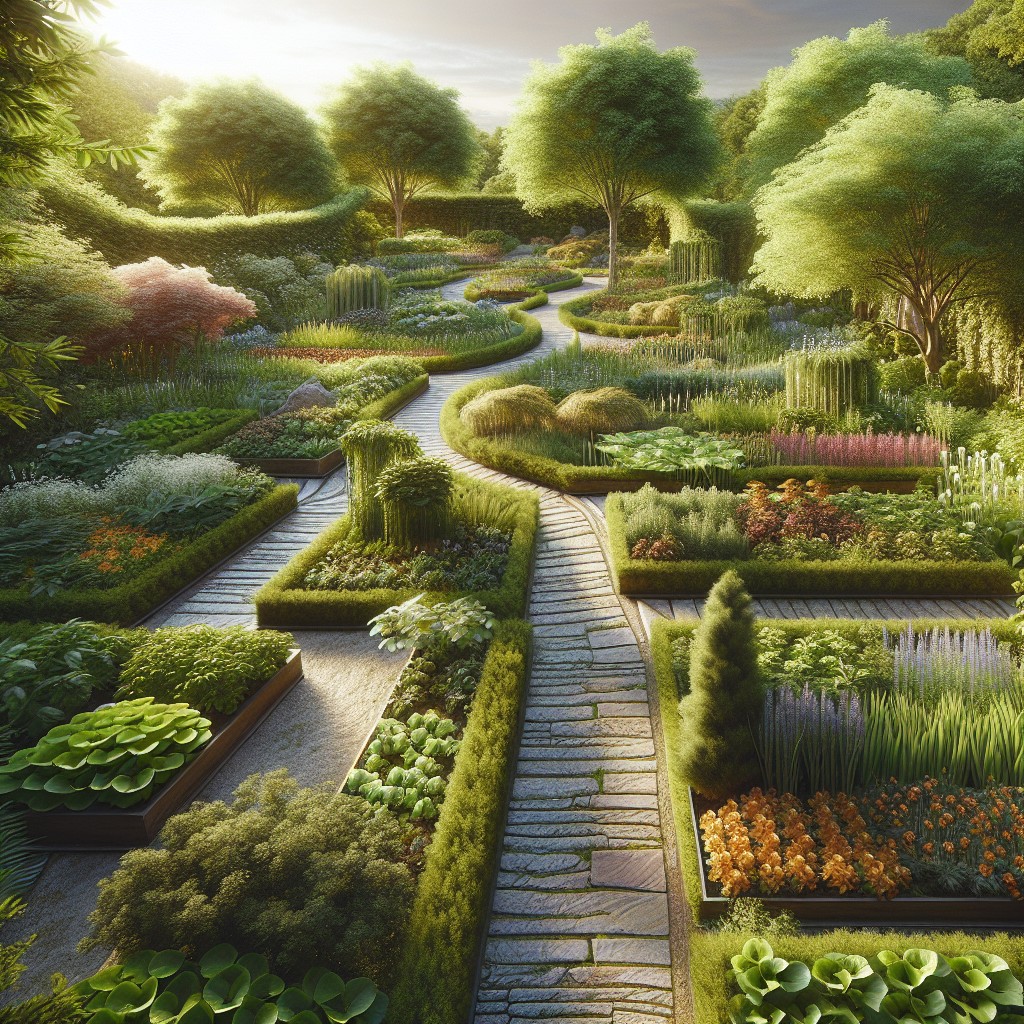
Creating a harmonious blend of functionality and beauty, integrating walkways within your raised beds allows for easy access and maintenance. This approach not only gives your garden structure but also saves valuable space, making gardening a pleasure rather than a chore.
- Utilize materials like flat stones, pavers, or bricks that match or complement your bed materials for a cohesive look.
- Place walkways wide enough to comfortably kneel or crouch alongside your plants, usually at least 18 inches.
- For a non-permanent option, consider mulch or pea gravel, which can be easily adjusted or removed as needed.
- Ensure the walkway material provides stability and is leveled to prevent tripping hazards.
- Add landscape fabric beneath the path material to suppress weeds and keep your walkways clean.
- Consider how rainwater flows in your garden, and design paths to improve drainage rather than impede it.
Incorporating walkways effectively increases the efficiency of tending to plants, minimizes soil compaction, and enhances the overall visual appeal of your garden space.
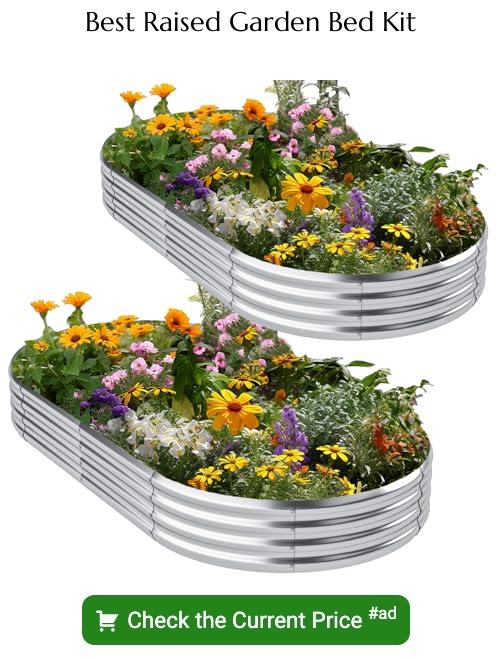
Out of the Box: Round Raised Garden Beds
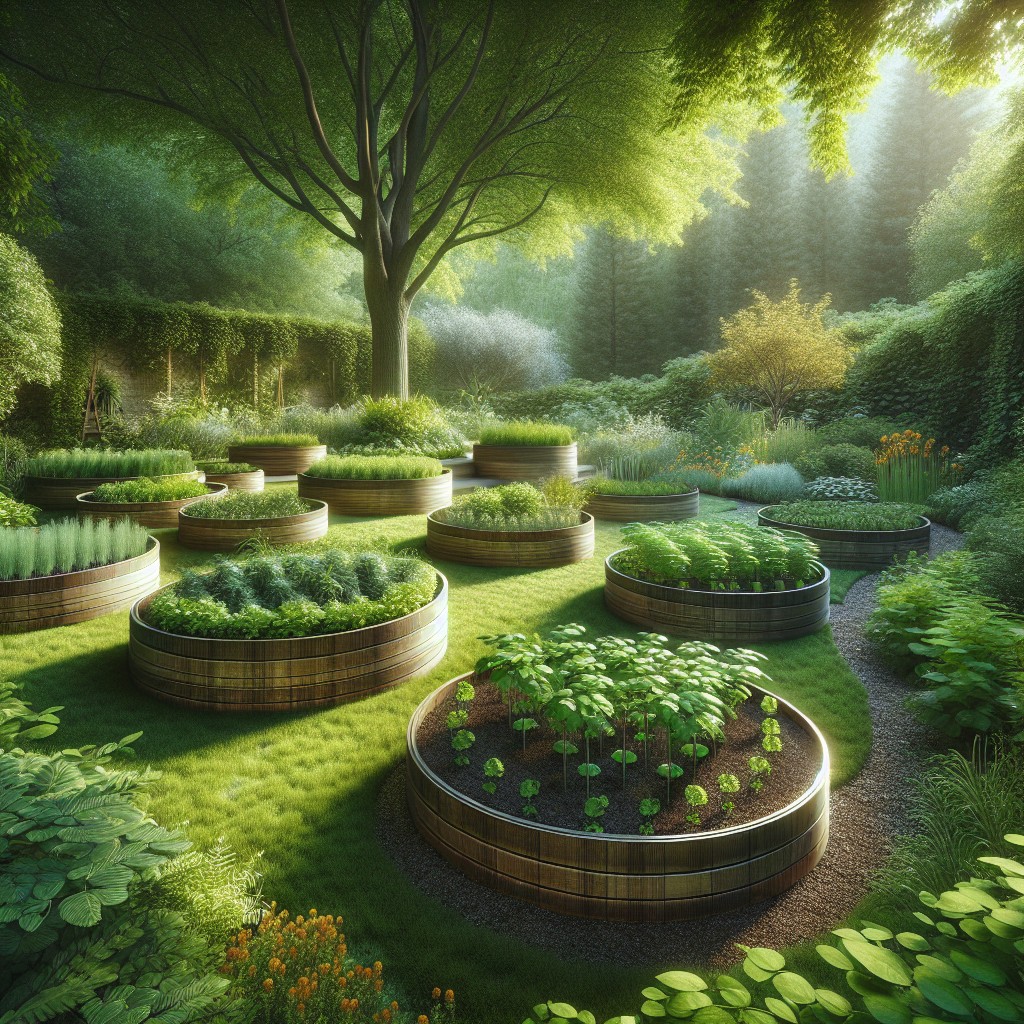
Embrace the curvature of round raised garden beds to soften the look of your outdoor space and add visual interest. Circular designs not only look aesthetically pleasing but also allow for easier access to plants from any angle, promoting efficient use of space and maintenance.
To construct, use flexible materials such as metal edging or pre-cut curved blocks that can conform to the desired radius. Incorporate these rounded beds into your landscape as standalone features or group them together to create a flowing garden layout.
Additionally, their shape naturally directs irrigation towards the center, providing uniform water distribution for your plants. Consider planting complementary flowers or herbs in concentric circles to further enhance the garden’s appeal and biodiversity.
Add Seating: Raised Beds With Attached Benches
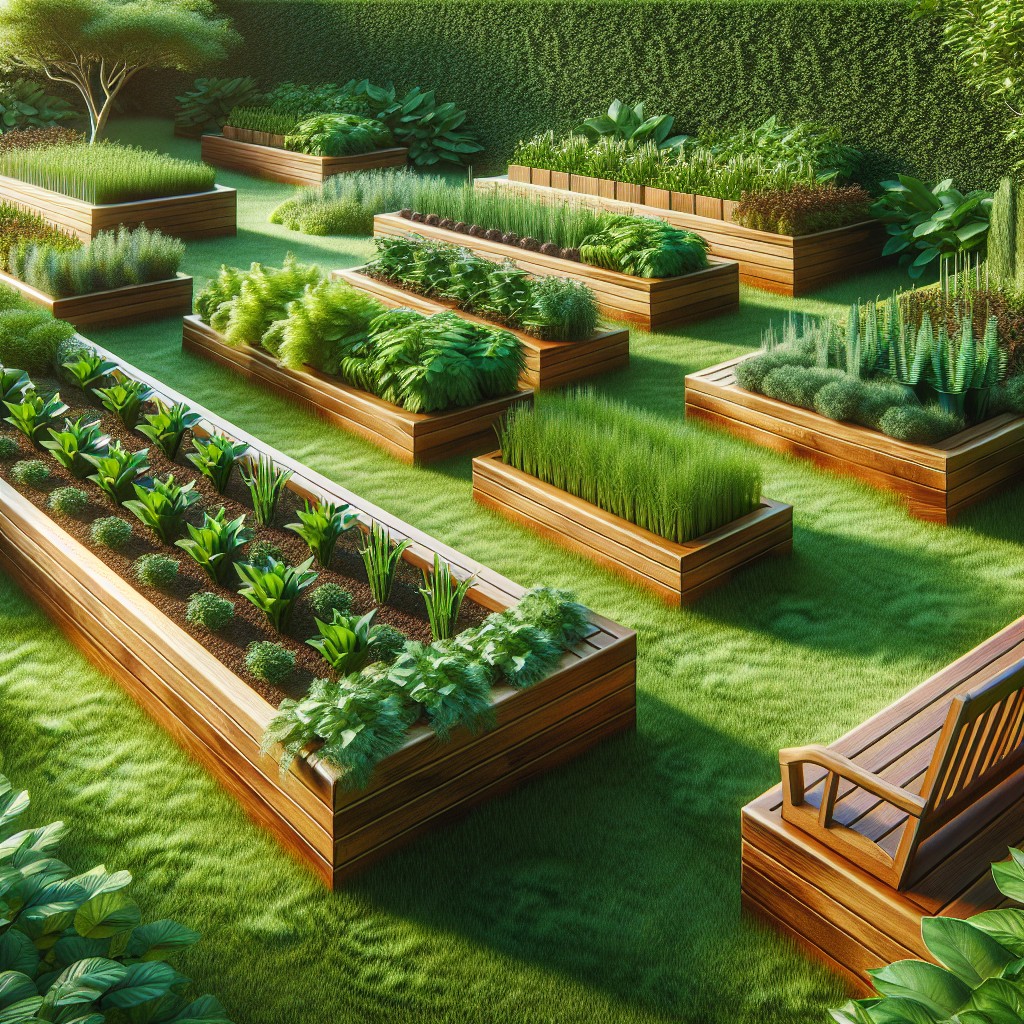
Integrating seating into your raised garden bed design is not only a clever way to save space but also invites you to spend more time amongst your plants. Here’s a condensed guide to get you started:
1. Dual Functionality: Benches provide a place to rest while doubling as an edge for your garden bed, making the most of your outdoor space.
2. Material Choices: Use durable materials like cedar or redwood that withstand the elements and match your garden’s aesthetic. Consider using the same materials from your bed for a seamless look.
3. Comfort Considerations: Ensure the seating width is ample for comfort, typically at least 12 inches. Slightly slanted backrests and rounded edges can enhance the sitting experience.
4. Height and Depth: The bench should be at a comfortable height, generally between 18-20 inches from the ground, and should not impede the ability to reach your plants easily.
5. Built-in Storage: Utilize the space beneath the bench for garden tools or additional soil, making your gardening tasks more convenient.
6. Simple Add-on: For existing raised beds, you can attach a bench by securing it to the bed’s side with sturdy brackets—no need for a complete rebuild.
By thoughtfully integrating a bench into your raised bed design, you create a relaxing garden nook that invites leisure and hands-on gardening.
Edible Aesthetics: Patterned Planting in Raised Beds
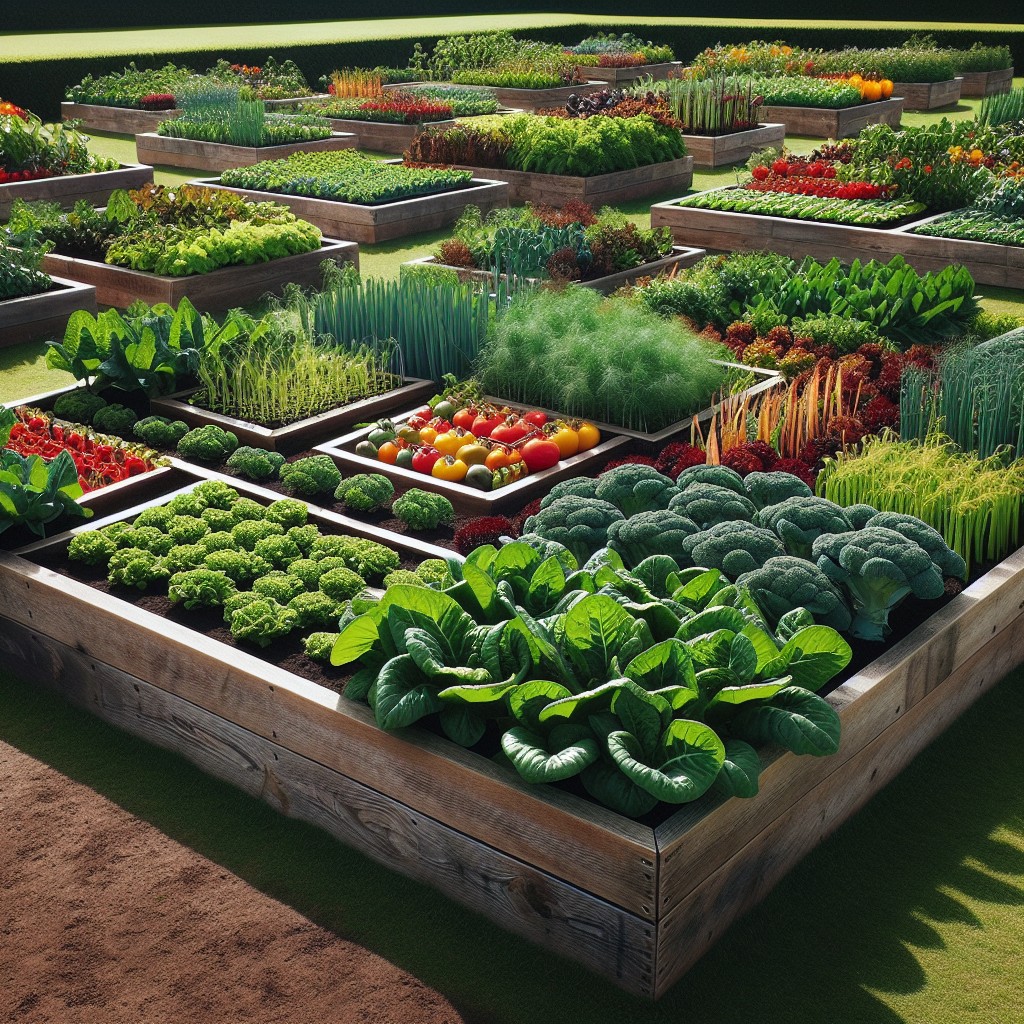
Creating a visually appealing edible garden requires a bit of imagination and planning. Begin by selecting a variety of plants that differ in height, color, and texture to create an interesting and dynamic display. Contrast is key: tall, leafy greens like kale can backdrop lower-growing, colorful lettuces or vibrant edible flowers like nasturtiums and marigolds.
To achieve patterned planting, consider using vegetables with distinctive leaf shapes, such as the feathery fronds of carrots or the broad leaves of chard. Plant in groupings or rows, alternating types to establish a rhythm in the garden’s visual flow.
For a formal look, geometrical patterns using different herbs can be both functional and ornamental. Think of creating a living checkerboard with alternating squares of thyme and oregano. Companion planting is also a strategic approach that can aid in plant health and yield, like pairing basil with tomatoes, enhancing the visual appeal while boosting growth.
Remember, a structured plan based on the growth habits and cycles of your plants will ensure the garden remains attractive throughout the seasons. Choose plants that mature at different times to maintain a continuous, harmonious pattern. Enjoy the creative process as you design a garden that’s pleasing to the eye and the palate.
Maintain Moisture: Raised Vegetable Garden Beds With Water Reservoirs
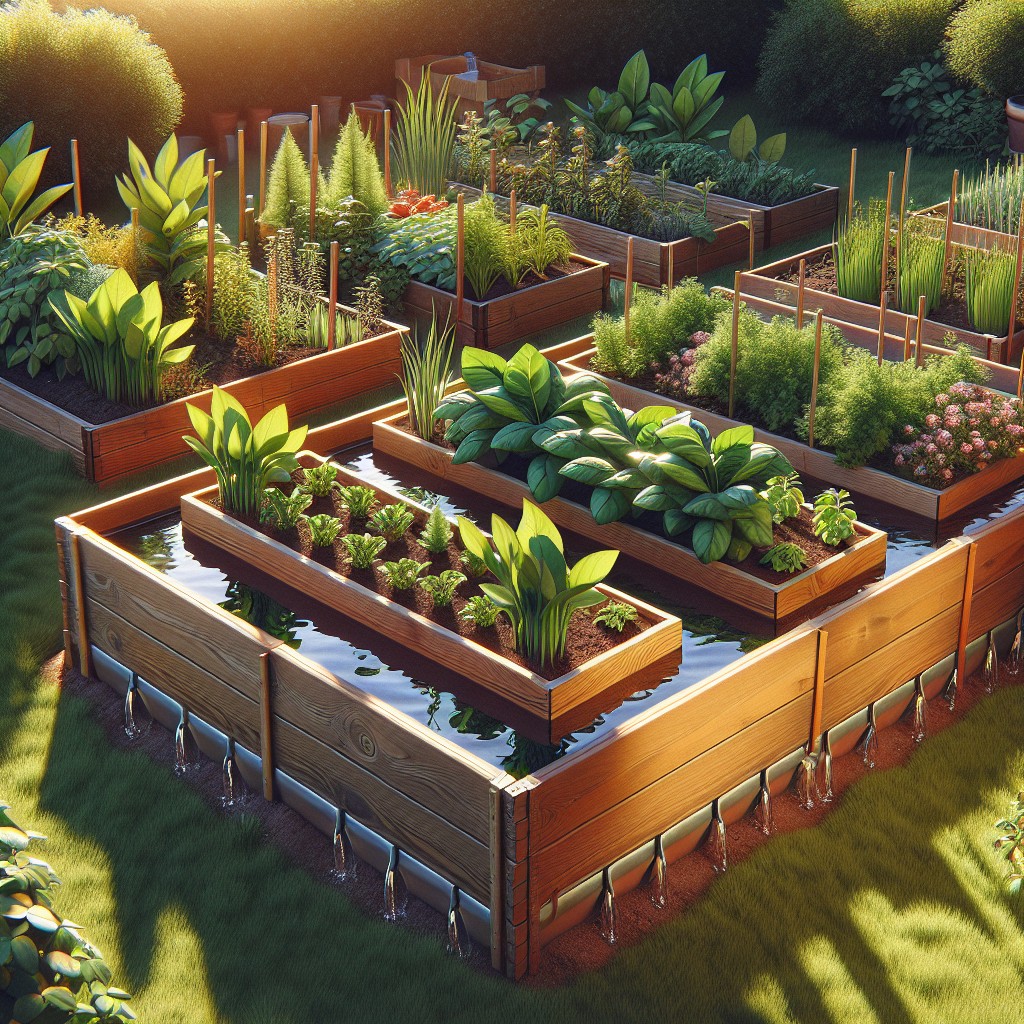
Efficient watering is key to a thriving vegetable garden. Incorporating water reservoirs into raised garden beds ensures consistent moisture levels, even in the heat of summer. Here’s how to achieve this:
Firstly, a simple method involves burying a porous irrigation hose beneath the soil, connected to a water source with a timer for regular, automated watering.
Alternatively, upcycle plastic bottles by poking holes in their caps and burying them upside-down in the soil near plant roots. Fill them with water, and they’ll slowly release moisture directly to the root zone.
For a more sophisticated setup, consider a wicking bed system. This consists of a water reservoir at the bottom of the bed, covered by a layer of fabric that allows water to wick upwards into the soil as plants require it. This system conserves water and is excellent for areas with water restrictions.
Lastly, for an aesthetically pleasing option, use self-watering planters. These double-layered containers have a built-in reservoir at the bottom and a soil container above. They’re perfect for small-scale gardens and can be placed on patios or balconies.
Implementing water reservoirs not only saves time and resources but also ensures vegetables receive a steady supply of water, minimizing stress and promoting healthy growth.
Versatile Gardening: Raised Beds With Adjustable Heights
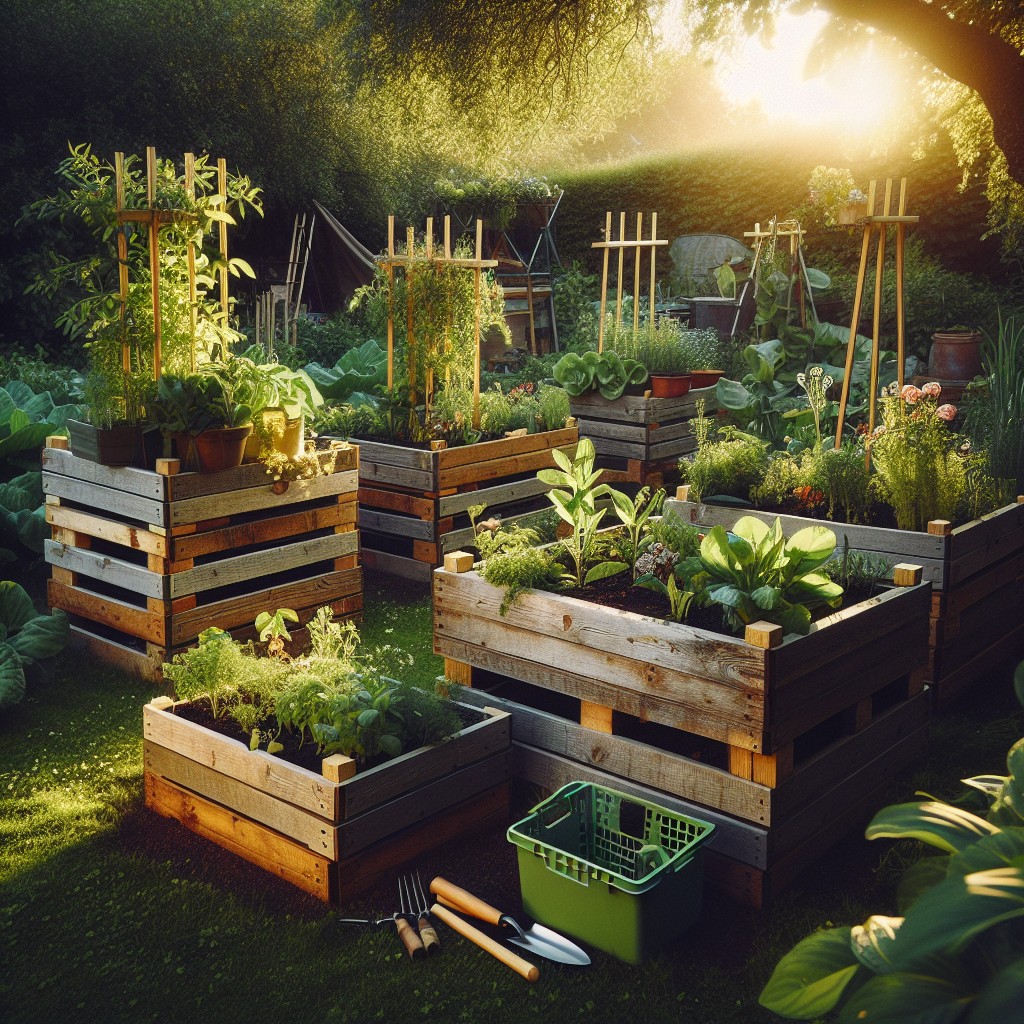
Gardening is an evolving hobby, and having the flexibility to adjust the height of your raised garden beds can be a game-changer. This feature allows you to tailor the depth of soil based on the specific needs of your plants, providing optimal growing conditions.
Whether you’re nurturing deep-rooted vegetables or shallow-rooted herbs, an adjustable raised bed gives you the ability to easily modify your garden setup.
Achieving adjustable height is often done through stacking modular units or panels that can be added or removed as necessary. This design is particularly beneficial for gardeners with back problems or mobility issues, as it makes reaching for plants less of a strain.
Another practical method involves using a system of strong, durable corner brackets that allow for various tiers of lumber to be slotted in and secured as needed, offering both stability and flexibility.
Incorporating this adaptability not only caters to the growth cycles of different crops—if starting with leafy greens and transitioning to root crops, for example—but also extends the range of plant varieties you can successfully cultivate. With this approach, you can adjust the soil volume to accommodate perennials or annuals and can even cater to your evolving design preferences over time.
Mix and Match: Combining Different Materials in Raised Beds
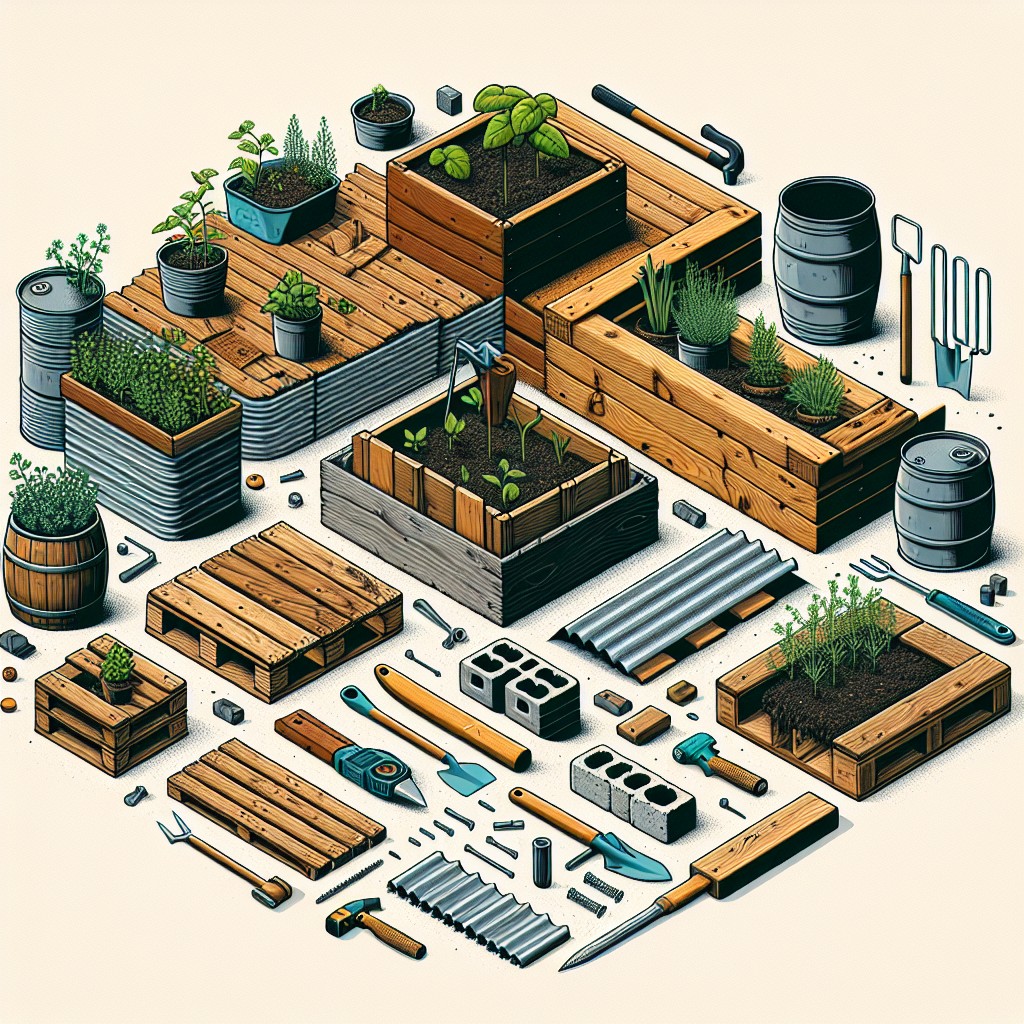
Combining materials in constructing raised beds not only adds visual interest but can increase durability and functionality. Here are some points to help you get started:
1. Aesthetics and Budget: A blend of expensive and cost-effective materials can keep expenses down while achieving a high-end look. For instance, use stone or decorative tiles on visible corners with less expensive wood for the sides.
2. Strength and Flexibility: Pair sturdy materials like cinder blocks or bricks for the base with lighter, more affordable wood or metal for the bed walls. This provides a strong foundation and a customizable upper structure.
3. Drainage and Sustainability: Integrating materials that offer excellent drainage, such as gravel or sand, with solid materials like wood or metal ensures healthy root growth without waterlogging.
4. Repurposing and Upcycling: Use what you have on hand, combining old bricks, spare lumber, or even terracotta pipes to create a bed that’s eco-friendly and unique.
5. Functionality on Display: Incorporate functional materials like chicken wire or hardware cloth to deter pests where needed, and combine with decorative elements where security is less of a concern.
By mixing materials, you can create a raised garden bed that’s durable, cost-efficient, and ties neatly into your garden’s design theme.
Movable Feast: Raised Beds On Wheels for Easy Relocation
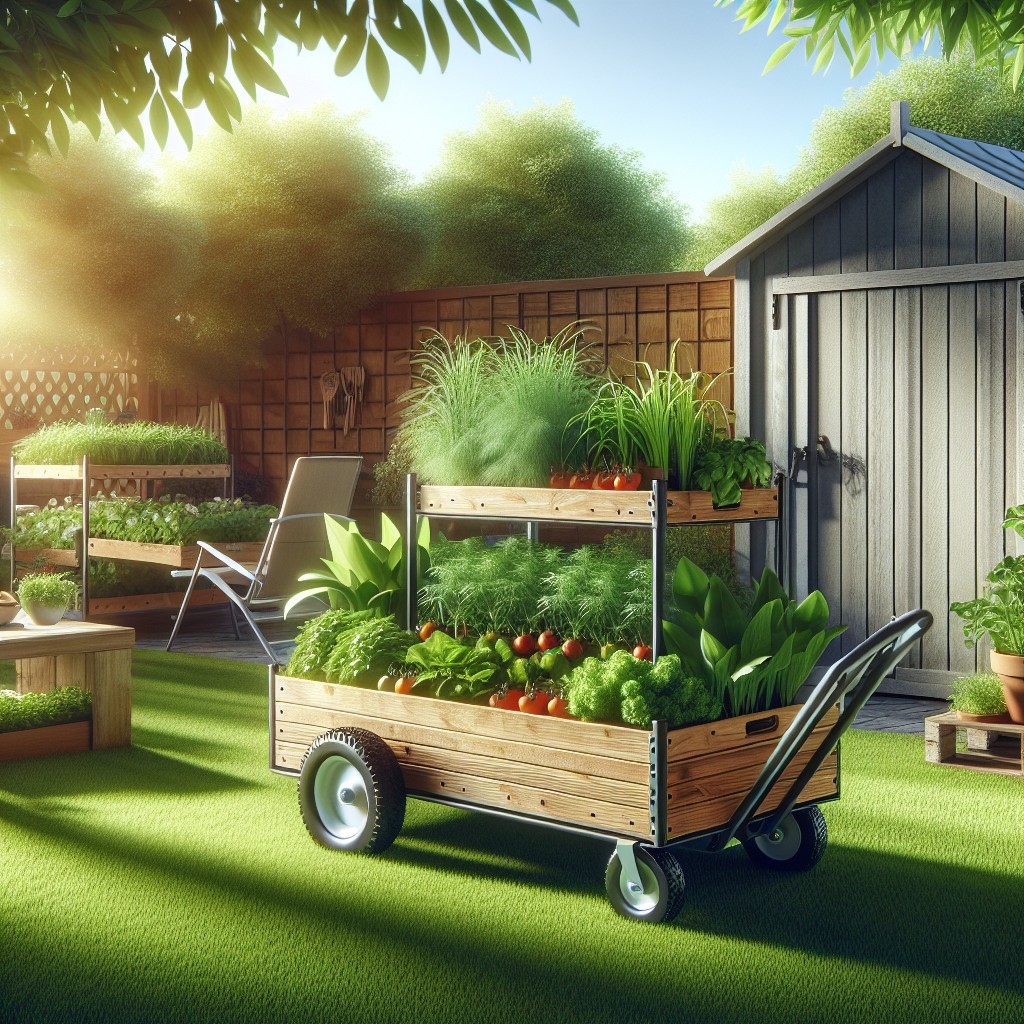
Creating a portable garden haven is simpler than you might think, and adding wheels is the secret trick. Opt for heavy-duty casters capable of handling soil and plant weight; locking mechanisms are a bonus for stability.
Ensure your bed’s base is sturdy – treated wood or metal frames are ideal. Drill holes to attach the wheels at each corner, reinforcing with metal braces if needed.
This mobile garden bed design allows you to chase the sun or shade as seasons change, offering your plants optimal growing conditions. Not only that, but it also eases the strain of yard work, bringing the garden to you when it’s time for planting, pruning, or harvesting.
Just remember to water your plants carefully; mobility means being mindful of potential water runoff during your gardening pursuits.
Transforming Your Old Bookcase Into a Raised Flower Bed
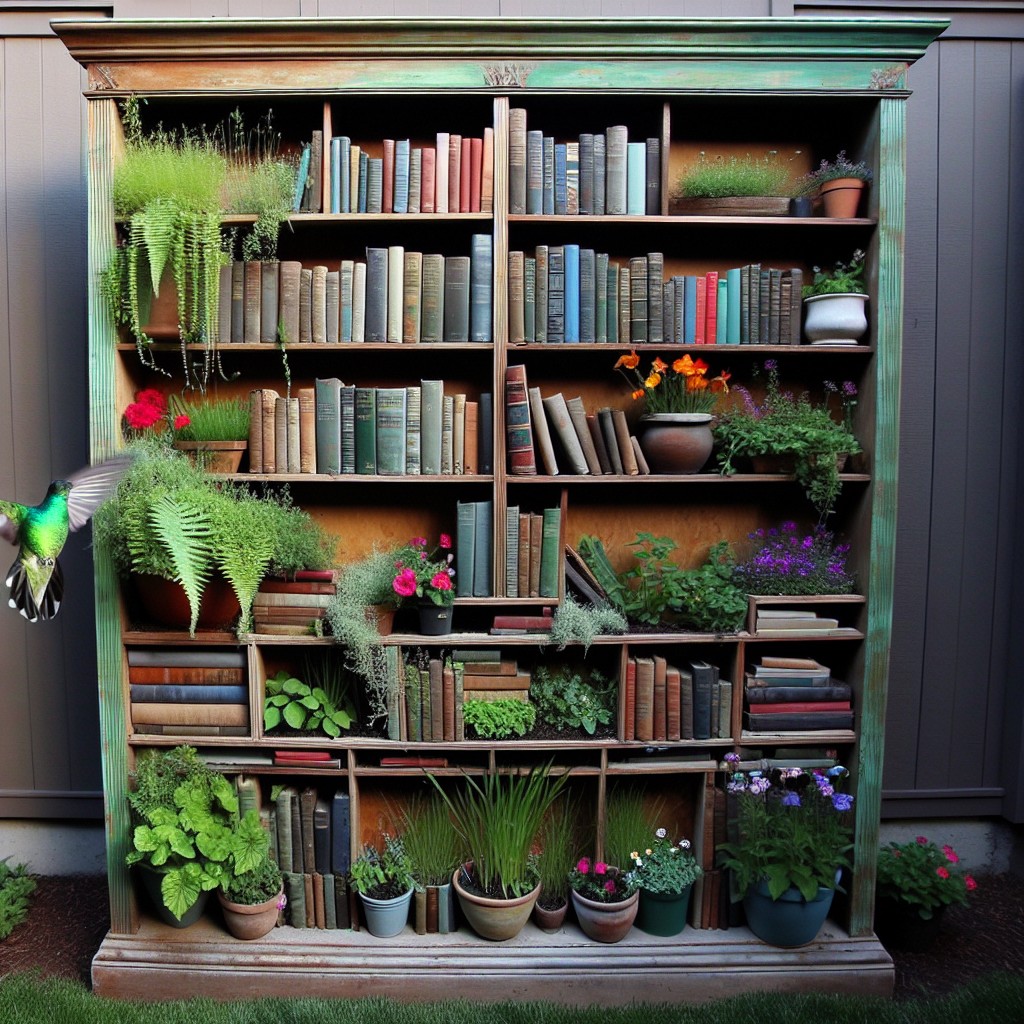
Breathe new life into an old bookcase by turning it into a chic raised flower bed. Follow these steps to ensure your repurposed planter is both durable and attractive:
1. Preparation: Strip the bookcase of any paint or varnish. This will help the new protective coatings adhere better.
2. Weatherproofing: Apply a weather-resistant stain or sealant. This helps protect the wood from moisture and rot.
3. Lining: Line the shelves with landscaping fabric, securing it with a staple gun. This creates a barrier, preventing soil from spilling and helping with drainage.
4. Drainage: Drill holes in the back of the bookcase for excess water to escape. Good drainage is key for plant health.
5. Soil & Plants: Fill with a mix of potting soil and compost. Choose flowers that match your lighting conditions and aesthetic desires.
6. Stabilization: If needed, add supporting stakes or brackets to ensure the structure can hold the weight of the soil when wet.
7. Optional Add-ons: Consider adding wheels for mobility or additional wood trim for a finished look.
With these touch-ups, you can transform a disregarded bookcase into an eye-catching garden centerpiece that’s both functional and stylish.
Using Rain Gutters As Unique DIY Raised Beds
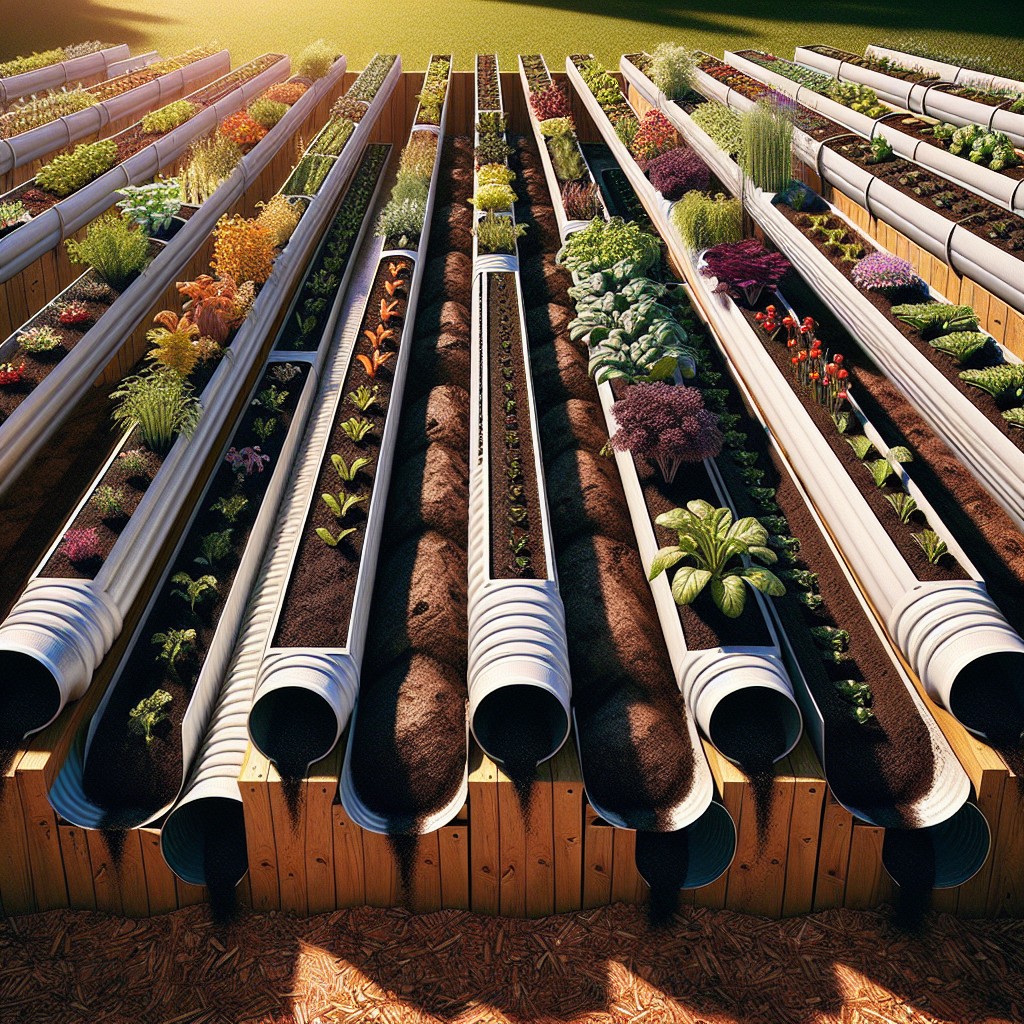
Repurpose old rain gutters to create sleek, space-saving planters, perfect for a variety of plants like strawberries, herbs, and flowers.
Gutters can be mounted on fences, walls, or even hung from balconies, turning underused spaces into lush vertical gardens. Ensure adequate drainage by drilling holes in the bottom at regular intervals.
To set up, cut the gutters to your desired length and cap the ends with gutter end caps to contain the soil. Choose a sunny spot for your edible plants or a shaded area for ferns and succulents. When attaching to a vertical surface, secure the gutters with metal brackets, spacing them close enough to support the full weight of the soil when wet. Use lightweight potting mix to avoid unnecessary strain on the structure.
For watering, drip irrigation or a simple manual watering routine works well. Keep an eye on soil moisture, as gutter planters can dry out faster than traditional garden beds. Regular feeding with a balanced fertilizer will keep your plants thriving in their unique setting.
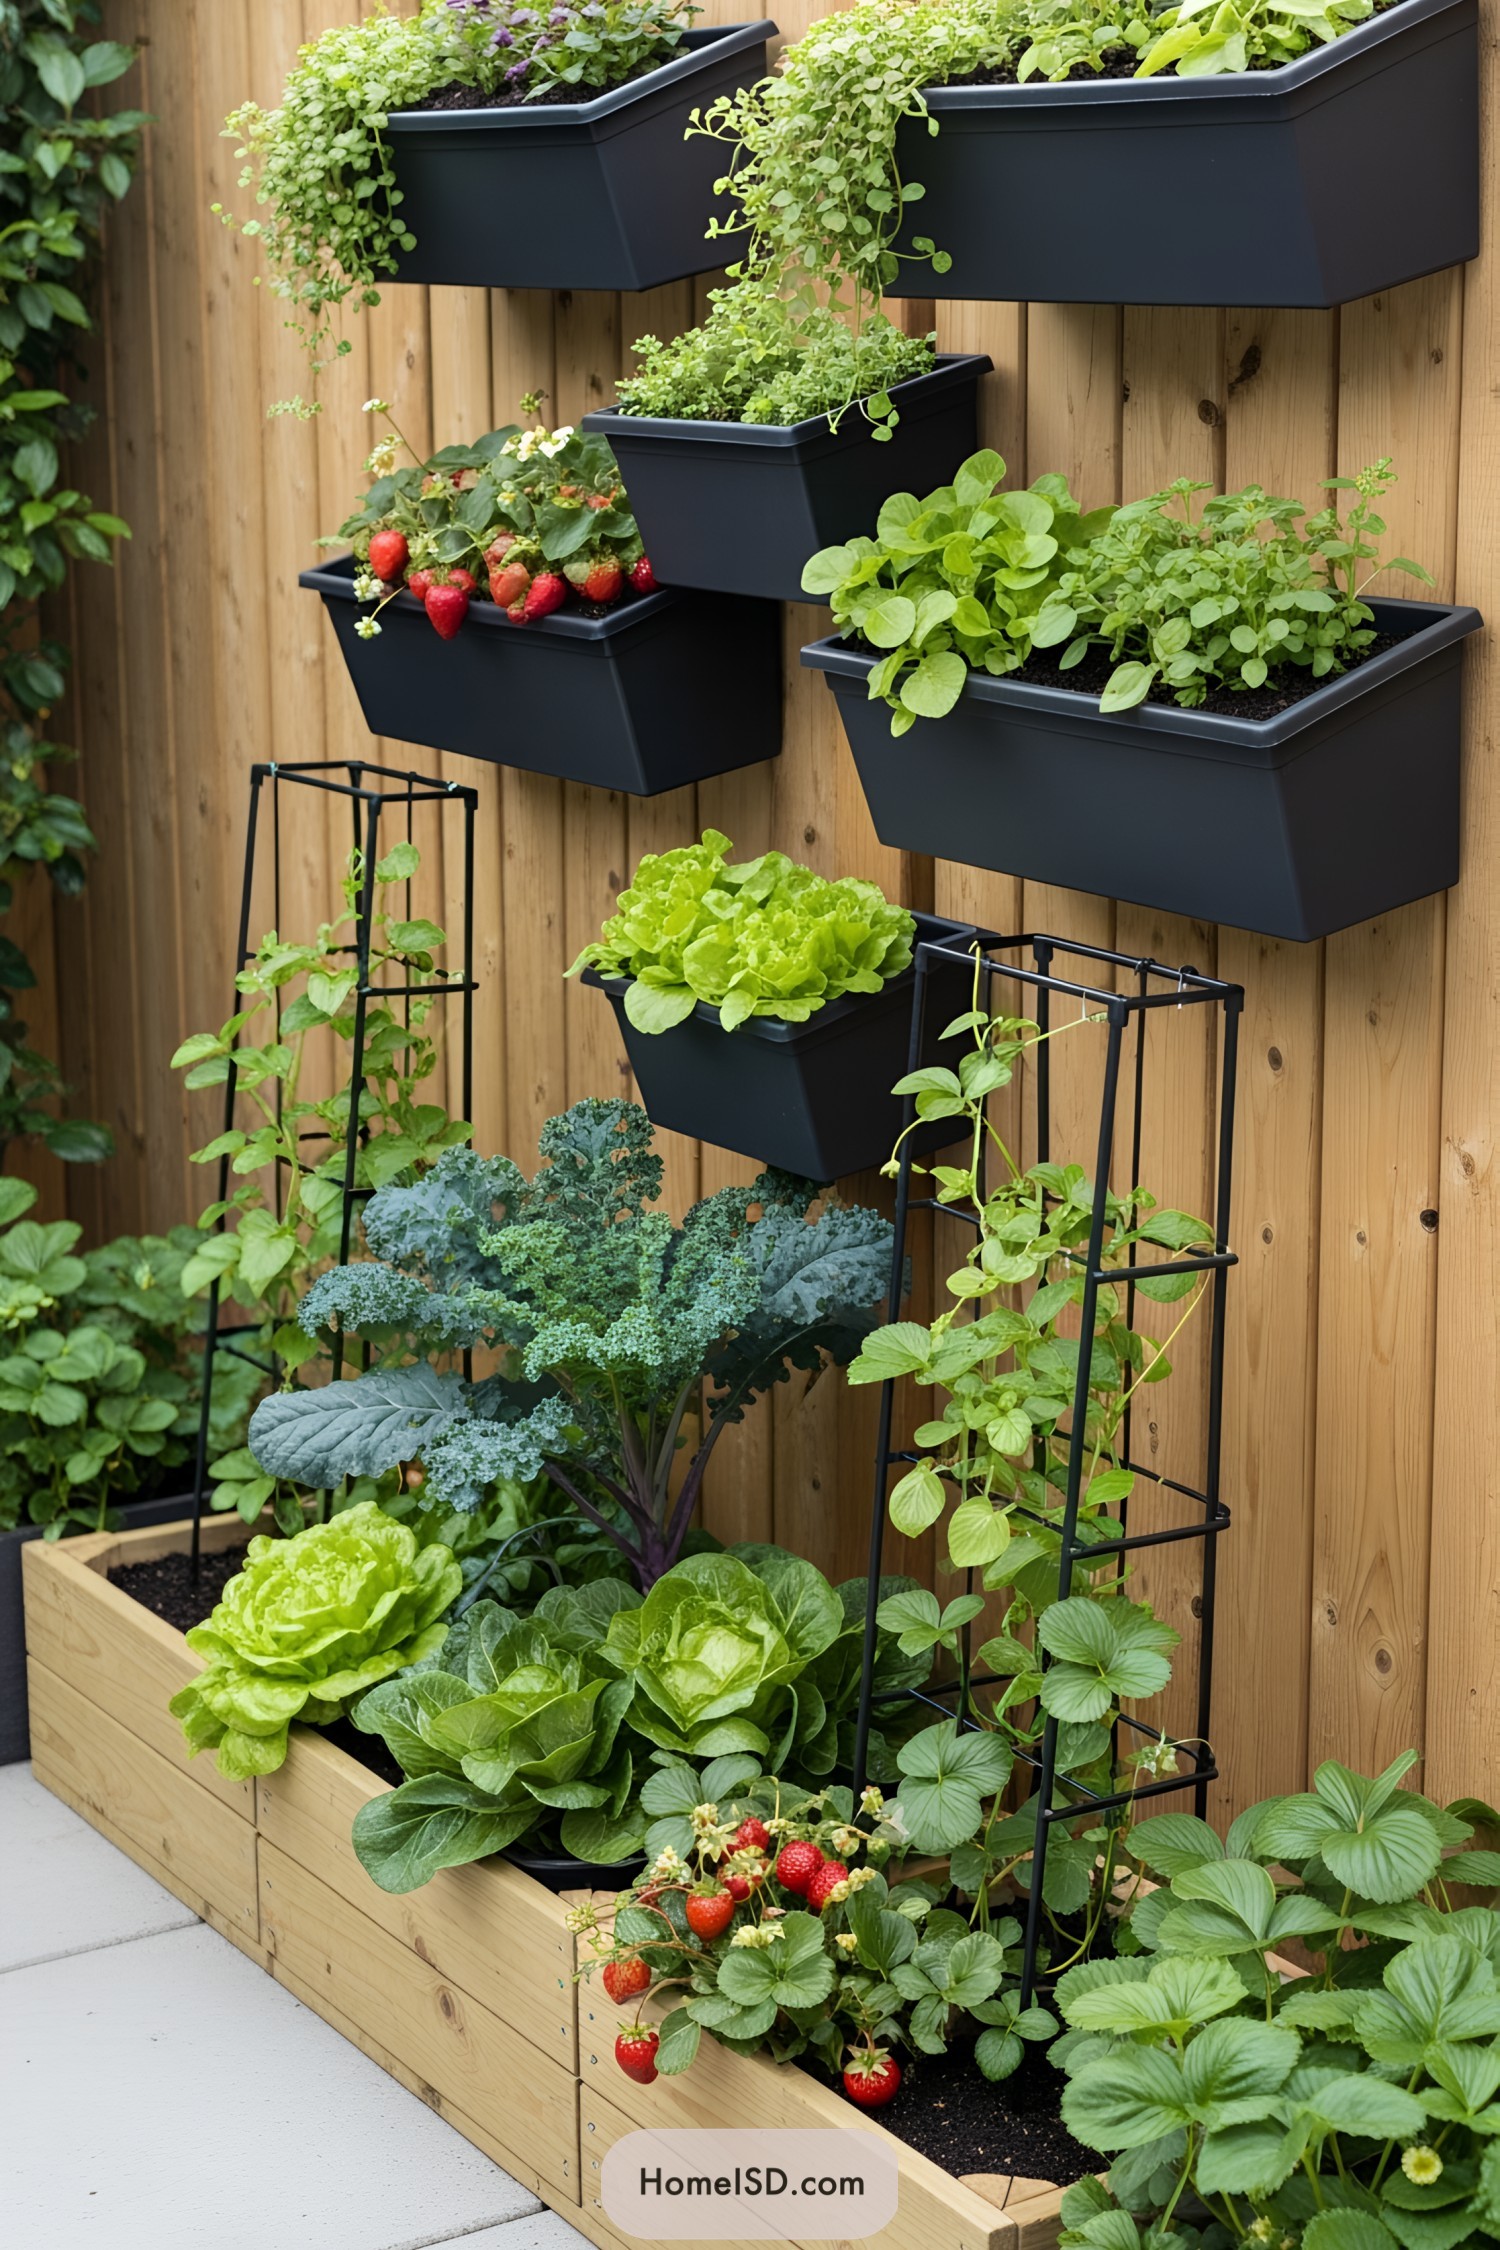
Vertical Ecstasy: Making the Most of Small Spaces With Vertical Raised Beds
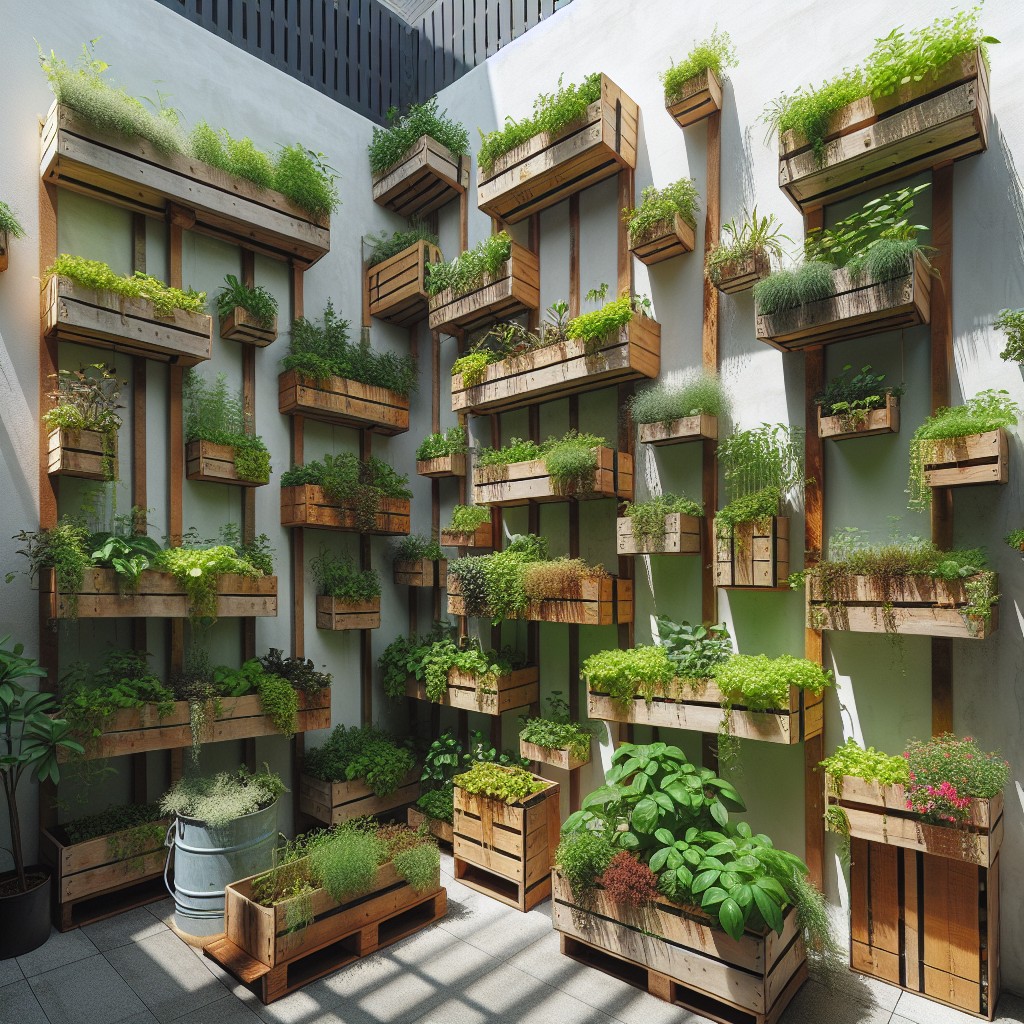
Maximizing vertical space is a creative solution for garden enthusiasts with limited ground area. By stacking planters or using trellises, you can cultivate a variety of plants in a confined space.
Consider old bookshelves or tiered plant stands as frameworks for your vertical garden, and repurpose hanging organizers or shoe holders for small herbs and flowers.
When selecting plants, choose those with a natural tendency to climb or that require minimal soil depth. Strawberries, peas, and certain types of tomatoes thrive in this environment.
Ensure each level receives adequate sunlight and water; drip irrigation can be an efficient system for vertical gardens. With the right structure, plants, and care, a vertical raised bed turns small spaces into lush, productive garden areas.
Maximize Space: Utilize Corners With L-shaped Raised Garden Beds
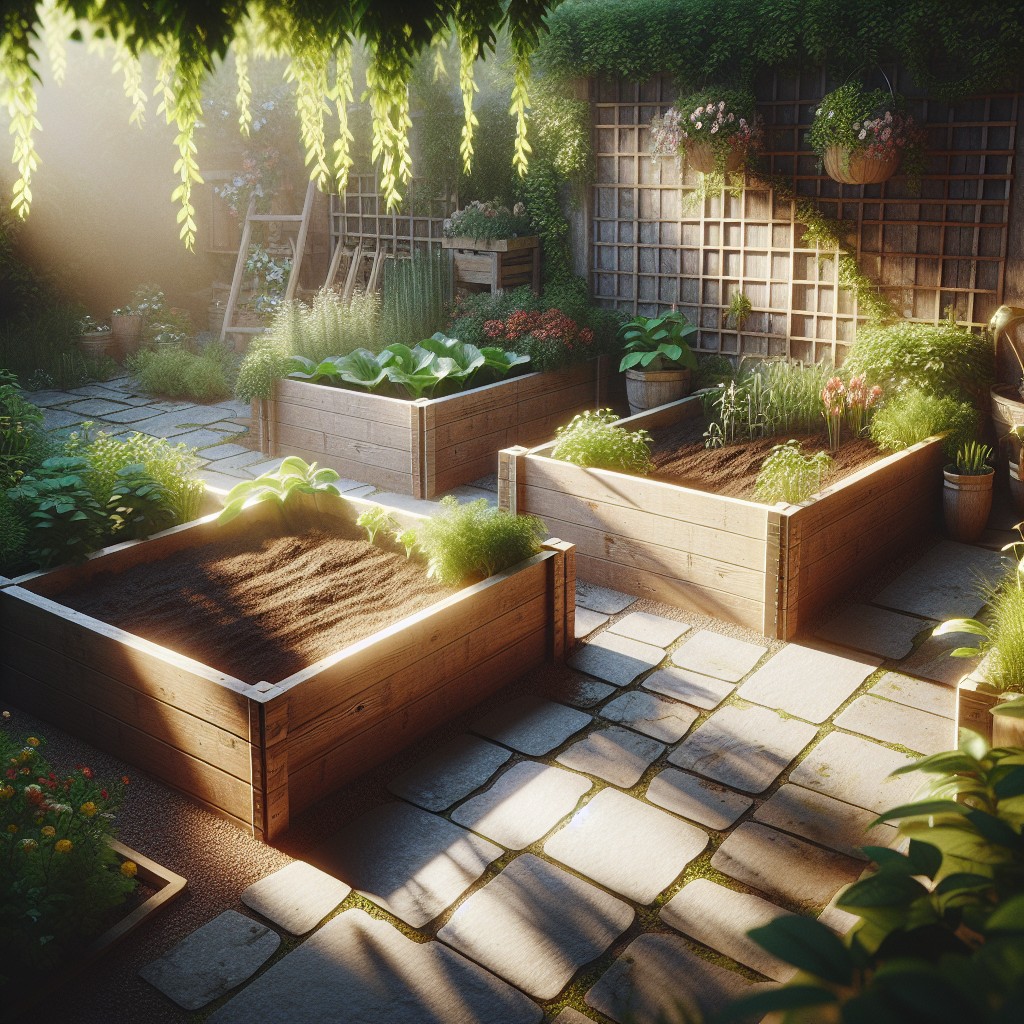
Optimizing unused corners in your yard can drastically increase your gardening space. An L-shaped raised bed fits snugly into these often-overlooked areas, offering a generous planting zone without encroaching on the central lawn or patio.
Maximize Growing Conditions: The unique shape allows for distinct microclimates on either side, perfect for growing a variety of plants with different sunlight or shade needs.
Accessibility: The two arms of the ‘L’ make all parts of the garden bed easily reachable without stepping into the soil, preserving soil structure and health.
Versatile Planting: Use one arm for deep-rooted vegetables and the other for shallow-rooted herbs and flowers, capitalizing on the varying depth.
Integrated Pathways: Design the layout to naturally include pathways for easy access and maintenance without sacrificing planting area.
Structural Interest: An L-shaped design can act as a pleasing visual anchor in your garden, adding dimension and aesthetic interest.
By employing the L-shaped design, you effectively turn a dormant corner into a productive and attractive feature.
Transform Your Old Dresser Into a Raised Bed Garden
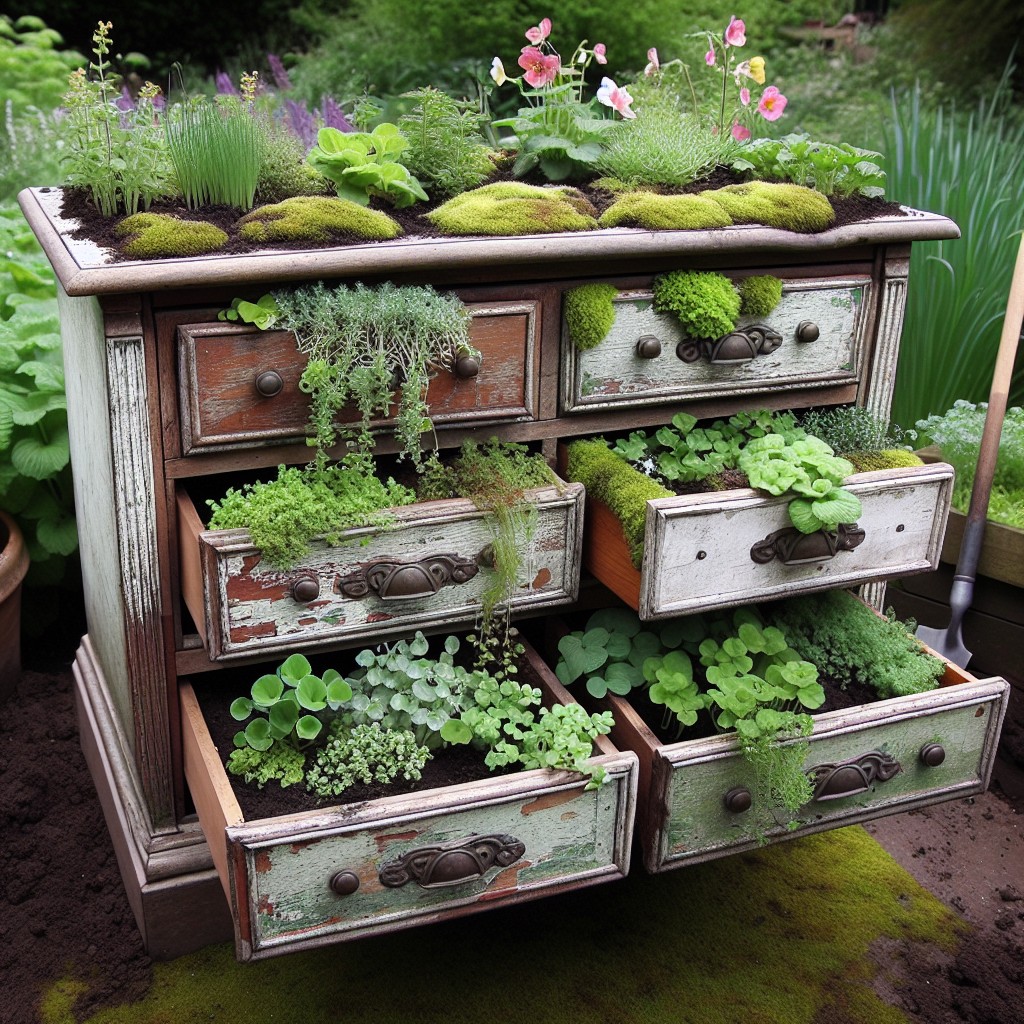
Revitalizing an outdated dresser into a raised bed garden offers a blend of practicality and whimsy to your outdoor space.
To begin, remove the drawers and reinforce the frame with screws for added stability.
Next, line the drawer cavities with landscape fabric to prevent soil from escaping and help with water drainage.
Drill a few holes at the bottom for extra drainage if needed.
Select a location that receives ample sunlight and position the dresser.
Fill each drawer space with a mix of potting soil and compost, ensuring nutrient-rich conditions for your plants.
When planting, consider height and sunlight requirements, placing taller plants towards the back.
This repurposed piece now serves as an eye-catching, multi-tiered display for herbs, flowers, or small vegetables, providing an excellent use of vertical space in compact gardens.
Composter and Bed in One: DIY Raised Garden Bed With Built-In Compost Bin
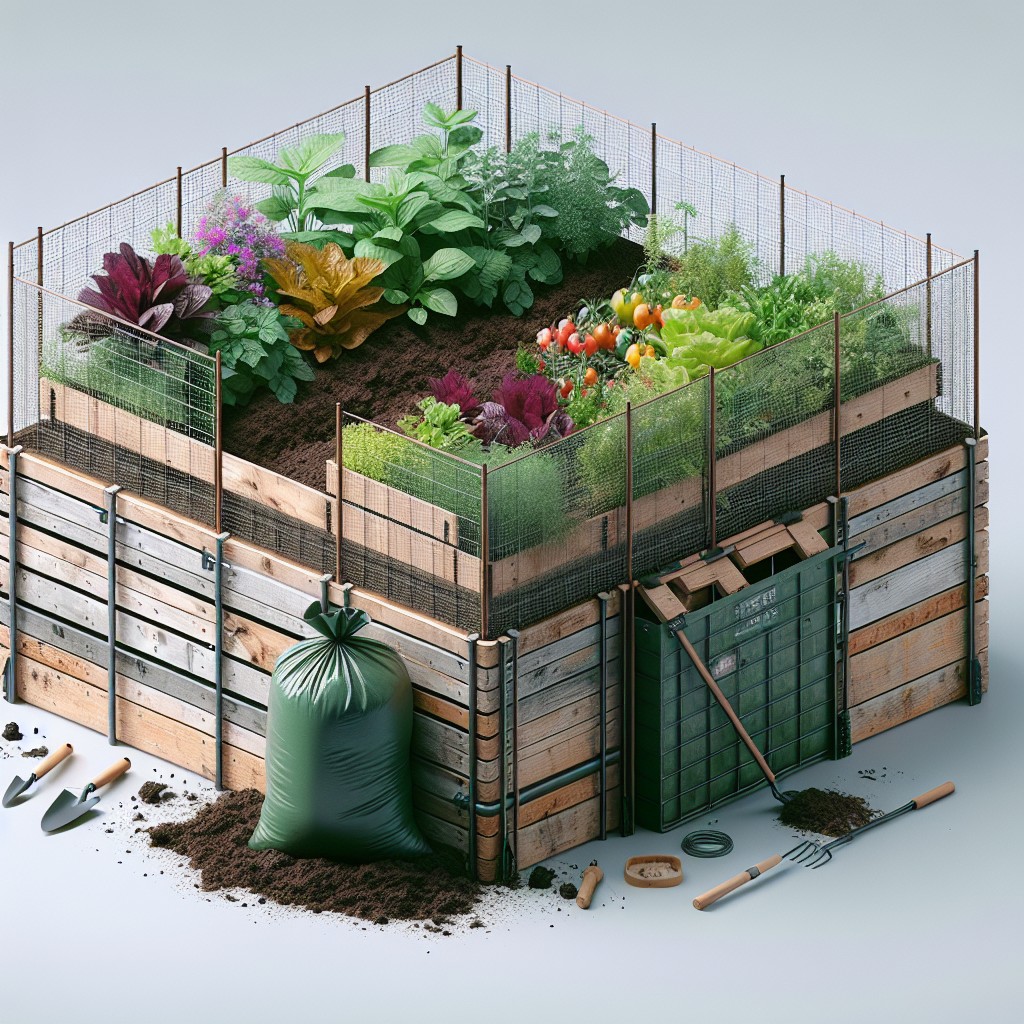
Integrate sustainability directly into your garden bed by constructing a dual-function garden structure. This design saves space and enriches your soil as it combines a compost bin with a raised bed. As kitchen scraps and yard waste decompose, they provide nutrient-rich compost that naturally fertilizes your plants.
Key points include:
- 1. In the center of the bed, situate a compost bin with ample holes to allow earthworms to enter and to facilitate aeration, enhancing decomposition.
- 2. Surround the bin with your chosen building materials—wood, stone, or recycled plastics—to form the raised bed, ensuring a snug fit that prevents compost from spilling into the planting area.
- 3. Fill the surrounding bed with a mixture of topsoil and compost from your integrated bin, creating an ideal growing environment.
- 4. As you add organic materials to the compost bin throughout the season, nutrient transfer occurs passively, with no need for additional fertilization.
- 5. Consider a removable lid or panel to aid in easy compost turning and harvesting, keeping maintenance hassle-free.
Mesh Magic: Building a Raised Bed Garden Using Wire Mesh
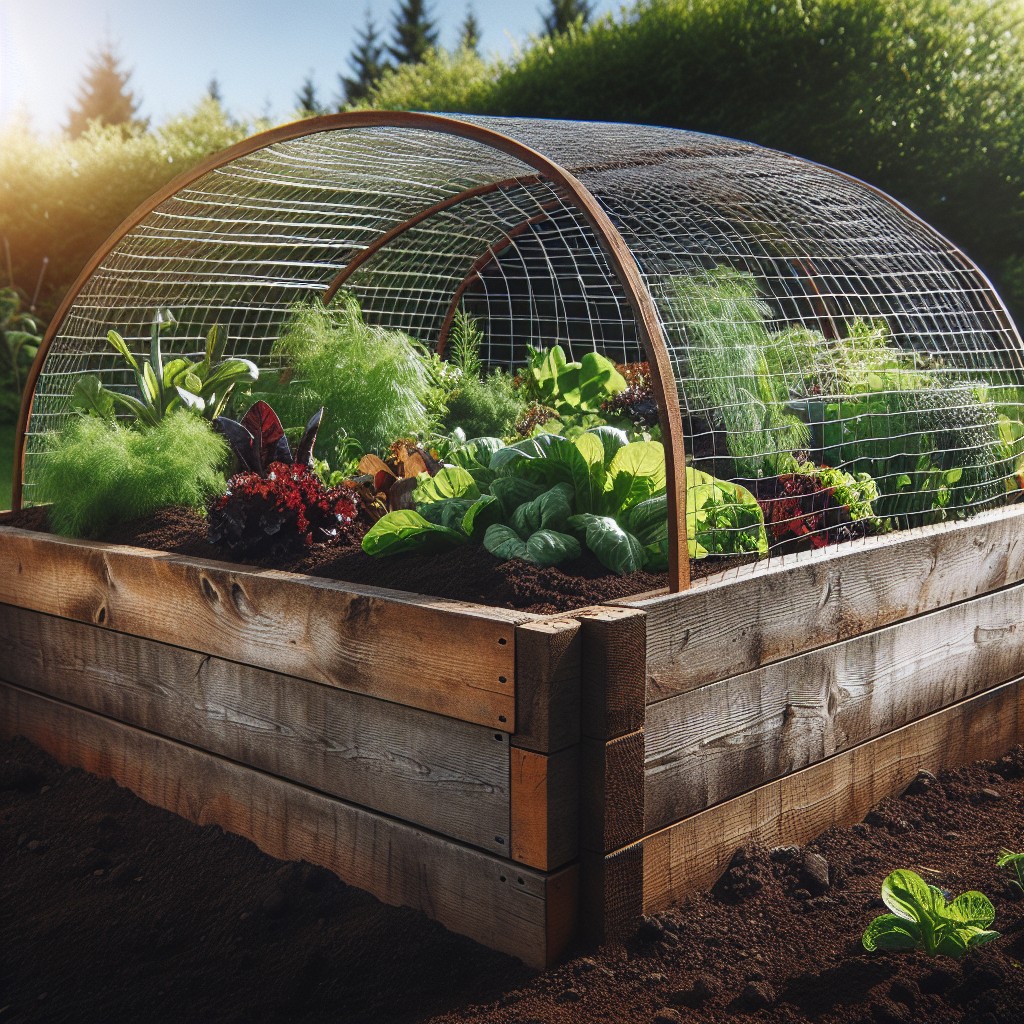
Wire mesh is a versatile material that offers durability and permeability, making it an excellent choice for constructing raised garden beds. When using mesh, consider the following:
- Size and Gauge: Select a mesh with small enough openings to deter pests but large enough to allow for proper drainage. A heavier gauge mesh ensures longevity.
- Support Structure: Pair the mesh with a sturdy frame. Use wood, metal, or thick plastic to create a frame that can support the weight of the soil.
- Lining: To retain soil and prevent erosion, line the inside of the mesh with landscape fabric. This allows water to drain while keeping the soil in place.
- Accessibility: Ensure the height and width of the bed are manageable. You should easily reach the center without stepping into the bed, maintaining soil structure.
- Soil Health: Fill the bed with a rich, well-draining soil mixture tailored to the needs of the plants you intend to grow.
- Climbing Plants: Take advantage of the wire mesh by growing climbing plants like beans or cucumbers, which can use the sides as a trellis.
Incorporating these points leads to a functional and striking raised bed design that benefits both plant health and garden aesthetics.
Holidays in Your Backyard: Christmas Tree Shaped Raised Garden Bed
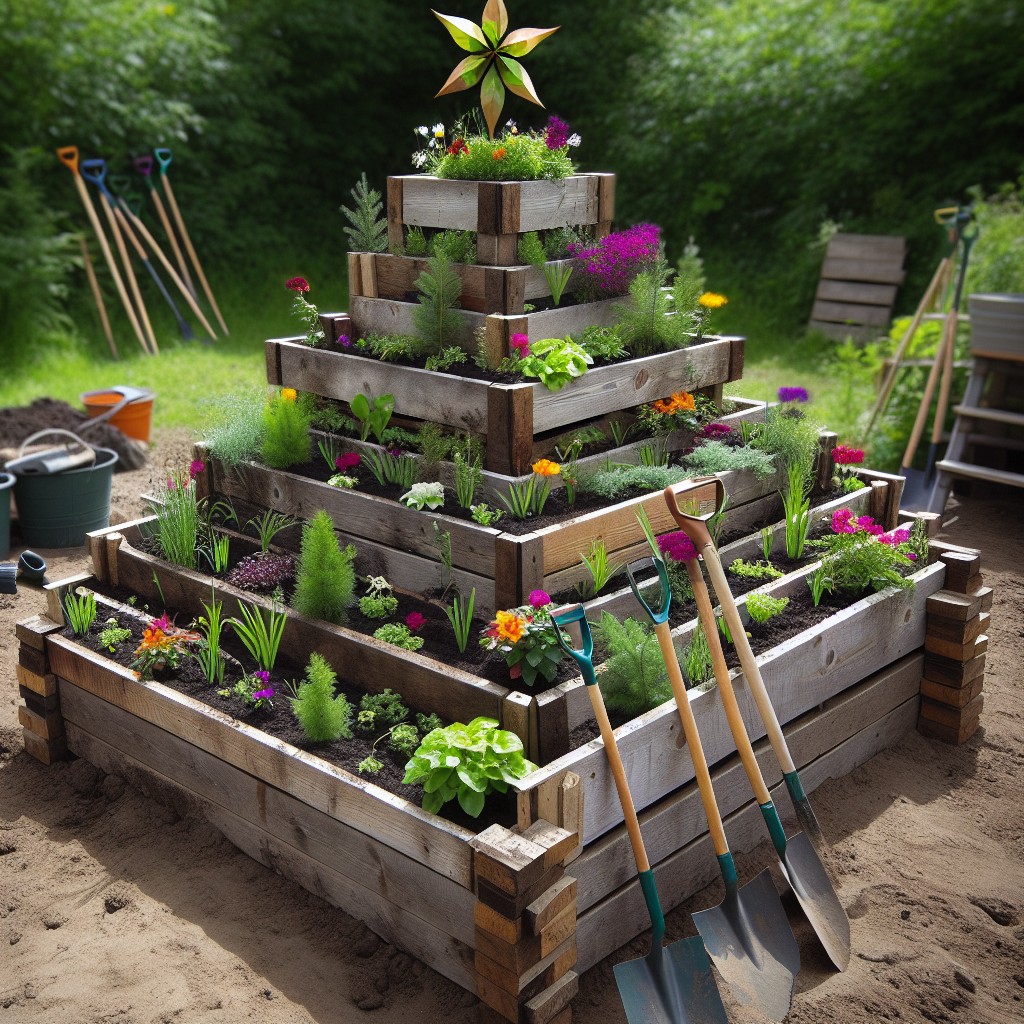
Transform your garden into a festive delight by constructing a raised bed in the shape of a Christmas tree.
The triangular design not only adds a whimsical touch but also allows you to segregate plants according to sun and shade needs.
Start by laying out your structure with longer boards at the base, tapering to shorter lengths towards the top.
Use sturdy corner braces to secure each tier, ensuring that each level is smaller than the last to create the tree silhouette.
Opt for festive plants like red and green lettuces or flowers for the holiday season.
Intersperse with strings of LED lights or small decorations for extra cheer.
This eye-catching feature serves both as a conversation piece and a practical growing space.
Making the Most of Your Balcony: Raised Bed Ideas for Apartment Living
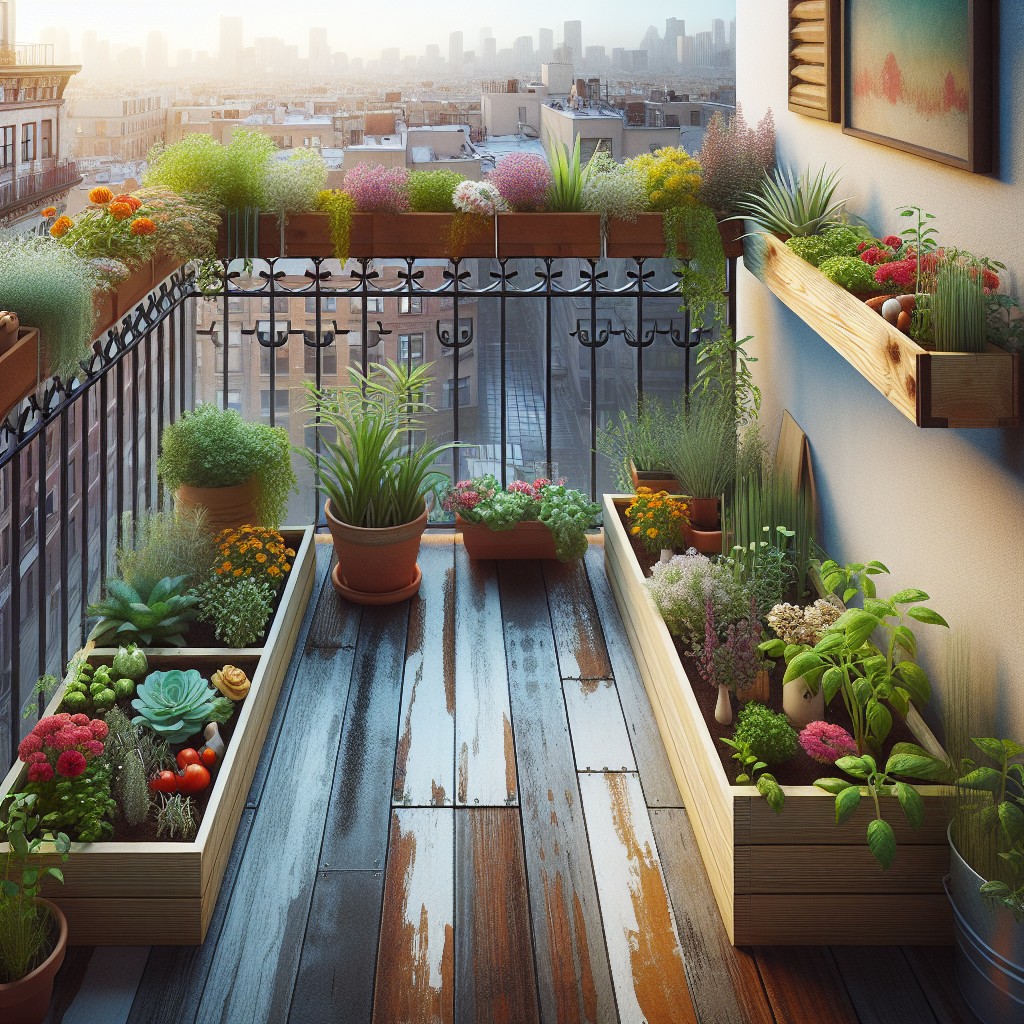
Transform your balcony into a flourishing garden space with cleverly designed raised beds that cater to compact areas.
Select lightweight materials like plastic, resin, or fabric grow bags to ensure your structure doesn’t exceed weight limits.
Opt for vertical planters or tiered designs to maximize growing space vertically, capitalizing on limited square footage.
Integrate a drip irrigation system or self-watering planters to maintain consistent moisture levels without daily attention, crucial for balcony gardens exposed to the elements.
Always ensure the beds feature drainage holes to prevent waterlogging, and add caster wheels for mobility, making it easier to shift your garden for sunlight exposure or during inclement weather.
From Eaters to Planters: Turning an Old Dining Table Into a Raised Garden Bed
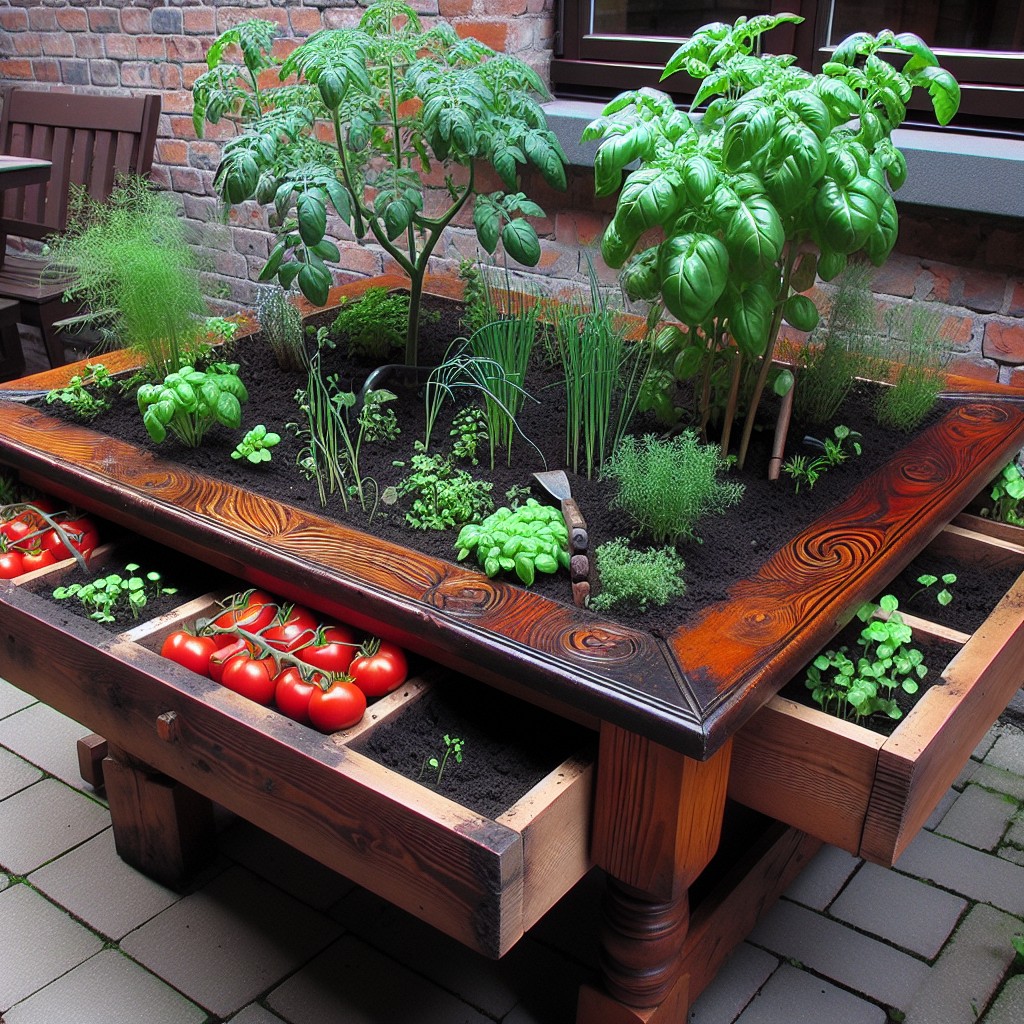
Transforming an outdated dining table into a raised garden bed merges sustainability with style. Start by removing any varnish or paint to avoid chemical leaching. Next, seal the wood with a food-safe, water-based sealant for longevity.
Drill drainage holes into the tabletop, ensuring they’re amply spaced for water flow.
Consider reinforcing the table’s structure with additional wood planks to support the soil weight. Line the table with landscape fabric to prevent soil from escaping through the holes.
Fill the table with a mix of topsoil and compost, creating a nutrient-rich environment for your plants. Finally, select and plant your desired herbs, flowers, or small vegetables.
This approach not only recycles furniture but also elevates your green space, literally and figuratively, making for an enticing, conversation-starting centerpiece in your garden.
Multi-Purpose: Build a Raised Garden Bed With Storage Underneath
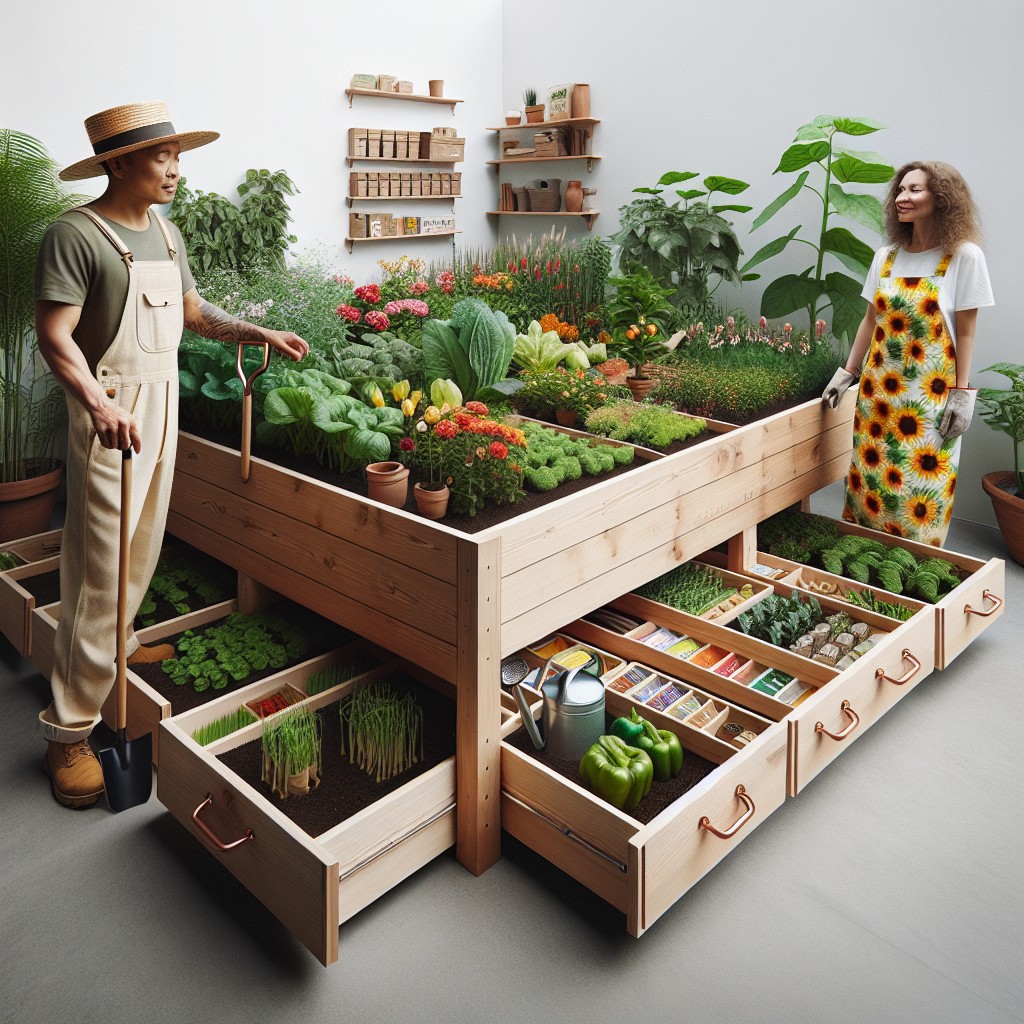
Maximize the utility of your gardened space by integrating storage under your raised beds. This innovative approach not only elevates your plantings but also cleverly conceals garden tools and supplies, ensuring they’re handy yet out of sight.
To implement this idea:
- Choose weather-resistant materials for the bed and storage to prevent decay and rust.
- Design the storage to be easily accessible, with doors or drawers that can be pulled out from the side of the bed.
- Ensure the storage compartment is raised off the ground to protect contents from pests and moisture.
- Consider adding a liner inside the storage area to protect wood and tools from soil and water.
- Use the space for storing pots, soil, gardening tools, and even outdoor cushions or accessories during the off-season.
By combining planters with storage, enjoy both a productive garden and a tidy outdoor space.
Getting Creative With Log Slices: Wood Slices Raised Garden Bed
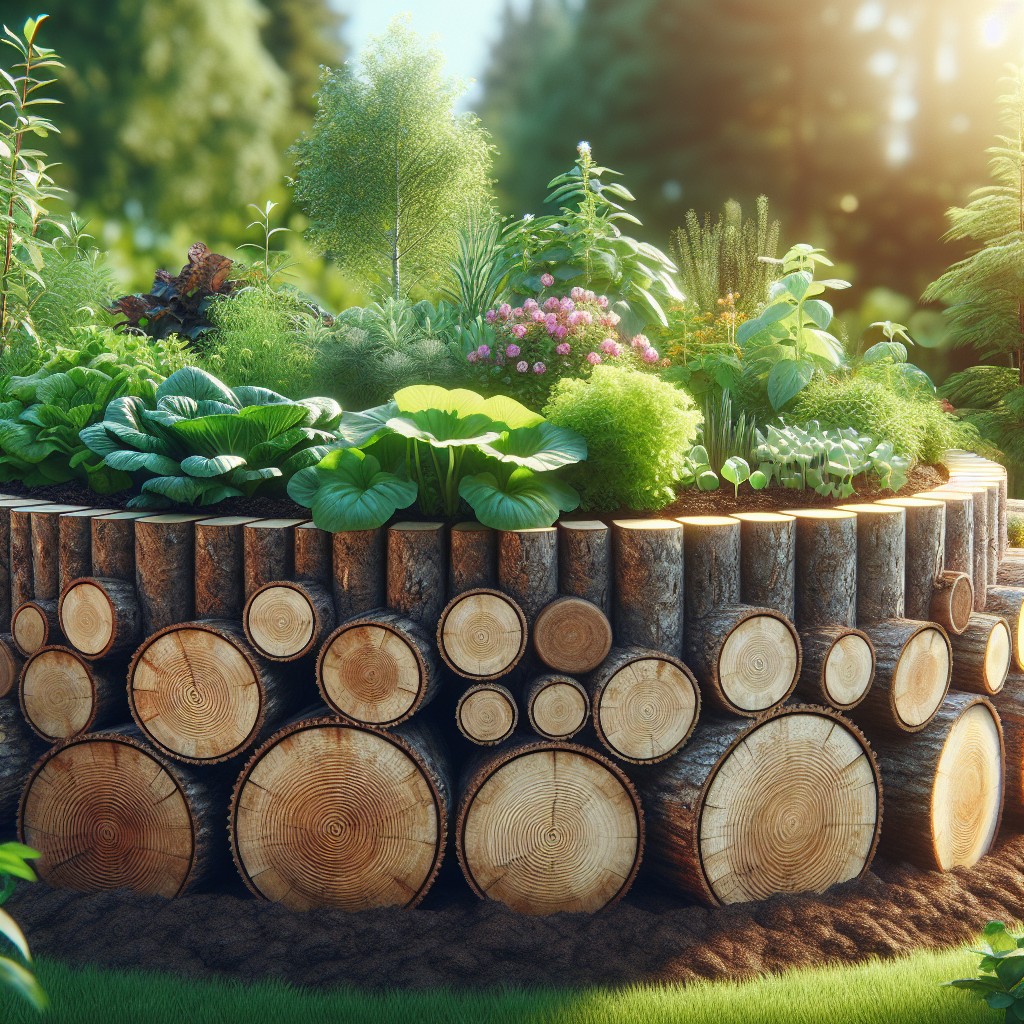
Select the Right Logs: Opt for hardwood varieties like oak or maple for durability. Ensure they are cut into even slices to create a stable wall for your bed.
Plan the Layout: Lay the wood slices out in your desired shape, flat sides facing down, to provide a visual before assembly.
Prepare the Ground: Level the area where your bed will sit. A stable foundation prevents logs from shifting and enhances the longevity of your garden bed.
Assemble with Care: Place the wood slices side by side, securing them together using exterior wood adhesive and garden stakes for added support.
Soil Considerations: Fill your new log slice bed with a rich mix of compost, garden soil, and other organic materials to foster plant growth.
Plant Thoughtfully: Choose plants that complement the natural aesthetic, such as lush greens and wildflowers, to create a seamless blend with the woodsy borders.
Regular Maintenance: Inspect wood slices periodically for signs of decay or pest infestations and address promptly to maintain the integrity of your garden bed.
Herb Heaven in an Old Wine Box: DIY Raised Bed
Transforming an old wine box into a quaint herb garden is a simple and chic way to repurpose materials.
Begin by ensuring the wooden box is sturdy and drill a few drainage holes in the bottom to prevent waterlogging.
Line the interior with landscaping fabric to protect the wood and retain soil while still allowing drainage.
Fill the box with a mix of potting soil and compost, creating a fertile environment for your herbs to flourish.
Choose a mix of your favorite culinary herbs such as basil, thyme, and mint.
Plant them with adequate space for growth and ensure the box is situated in a spot that receives plenty of sunlight.
Water regularly, and soon you’ll have a convenient supply of fresh herbs right at your fingertips.
This compact garden solution adds a rustic touch to balconies, patios, or even kitchen windowsills.
Using Old Blinds to Create a Wattle Raised Garden Bed
Give a second life to old window blinds by weaving them into an attractive wattle for your garden bed. The flexibility of the blinds allows for easy manipulation, and their material can offer durability through the seasons.
Here’s how to transform blinds into a functional and visually appealing garden wattle:
1. Measure: Determine the perimeter of your garden bed and cut the blinds to the desired length, ensuring they’re tall enough to serve as an effective barrier.
2. Design: Decide on a weave pattern – a simple over-and-under will suffice for beginners. More intricate designs can be used for added aesthetic appeal.
3. Structure: Install sturdy stakes around the garden perimeter at intervals that match the width of your blinds. These will act as your wattle’s framework.
4. Weave: Start at one end and weave the blinds around the stakes. Keep tension even to maintain structure and aesthetics. Secure the ends to the stakes with wire or ties.
5. Reinforce: For additional support, add a horizontal piece across the top of the woven blinds, creating a neat, finished edge, and further stabilizing the structure.
6. Cover: Optionally, line the inner wall with landscape fabric to prevent soil from spilling out through the weave.
By reusing materials you already have, you’re cutting down on costs and reducing waste, all while adding a bespoke touch to your raised garden beds.
Garden in the Sky: Rooftop Raised Vegetable Garden Beds
Maximizing urban space means looking up – to the rooftops. A rooftop raised vegetable garden can transform a bare, underutilized area into a lush, productive oasis. Here’s how to achieve it:
- Assess Weight Limits: Before starting, check your roof’s structural integrity. Raised beds and soil are heavy, and your roof must support the weight.
- Choose Lightweight Materials: Opt for lighter materials like fiberglass, metal, or plastic for the bed frames to minimize load.
- Protect Your Roof: Avoid leaks by placing a protective barrier between the bed and the roofing material.
- Drainage is Key: Ensure your design includes proper drainage to prevent water pooling. Incorporate gravel layers and drainage holes.
- Select the Right Soil: Lightweight, fertile potting mix aids in maintaining a manageable weight and promotes healthy plant growth.
- Plan for Water Access: Consider how you will water the plants. A drip irrigation system could be an efficient option.
- Seasonal Considerations: Factor in the exposure elements—wind can be stronger, and the sun can be hotter on the roof.
- Safety First: Set up a secure perimeter around your rooftop garden to prevent accidents.
Transforming your rooftop is not only a smart way to garden but also contributes to city greening efforts and ecological benefits. Enjoy the skyline views as your vegetables thrive in the sky.
Build a Raised Garden Bed With Landscape Timbers
Landscape timbers offer a natural and sturdy material for constructing raised garden beds. Here are some key points to consider when utilizing them for your garden project:
- Opt for untreated timbers to prevent chemicals from leaching into the soil.
- Measure and cut timbers to the desired length for bed size, using a handsaw or chainsaw.
- Join corners with sturdy outdoor screws or corner brackets to maintain structure.
- For longevity, line the inner walls with a protective barrier like landscape fabric.
- Arrange the timbers in at least two layers to provide adequate depth for plant roots.
- Secure each timber layer to the one below it to create a cohesive, lasting build.
- Fill with nutrient-rich soil and compost mixture optimized for the plants you wish to grow.
This approach grants the flexibility to customize the height and shape of the bed, creating an optimal growing environment for your gardening needs.
Ideas Elsewhere
- https://www.lowes.com/n/how-to/how-to-build-a-raised-garden-bed
- https://abeautifulmess.com/make-your-own-raised-garden-bed-in-4-easy-steps/
- https://www.thespruce.com/inexpensive-raised-garden-bed-ideas-7197886
- https://www.apieceofrainbow.com/20-diy-raised-bed-gardens/
- https://www.homedepot.com/c/ah/how-to-build-raised-garden-beds/9ba683603be9fa5395fab90b41bb0da
- https://handmadefarmhouse.com/affordable-diy-garden-beds/
- https://www.gardenary.com/blog/how-to-build-a-raised-garden-bed-for-just-100
Recap
