Last updated on
The cheapest way to extend a patio is by using cost-effective materials such as gravel or crushed rock, and doing the work yourself.

Expanding your outdoor living space doesn’t have to drain your wallet. Whether you’re looking to host larger gatherings or simply enjoy more room to relax, extending your patio can be both economical and transformative.
From the timeless appeal of concrete to the versatility of pavers, the understated elegance of gravel, or the charming reuse of pallet wood, there’s an array of budget-friendly options at your fingertips.
Dive into the world of thrifty patio extensions with us, where we outline the smartest strategies, including precise measurements and essential planning, to ensure your extension is not only cost-efficient but also a stunning addition to your home.
Key takeaways:
- Concrete is a cost-effective option for extending a patio.
- Pavers can be integrated with an existing patio for an affordable extension.
- Gravel is an inexpensive and easy-to-install option for extending a patio.
- Repurposed pallet wood can be used for a rustic and budget-friendly patio extension.
- Proper measurements and planning are crucial for a successful and cost-effective patio extension.
Cheapest Ways to Extend Patio
Expanding an existing patio without spending a fortune is achievable by getting creative with materials and doing some work yourself. One of the most cost-effective methods is using concrete. You can pour a new section directly beside your current patio, which ensures cohesion in design and durability over time. Doing this might require some rudimentary formwork and rebar placement for structural support, and while it can be a DIY project, always consider if you need professional help for mixing and pouring concrete to avoid any mishaps.
Another savvy approach to patio extension is the integration of pavers. These can be laid next to your existing structure to visually and functionally integrate the spaces. They come in a variety of shapes and colors, which can add aesthetic appeal to your outdoor space. The labor involved can be intensive, but pavers are easily handled by DIY enthusiasts with proper guidelines.
Using gravel is another inexpensive option. It’s easy to install and can define a new patio area efficiently. You’ll need to excavate the space slightly and lay down a weed barrier before spreading the gravel. While not as durable as concrete, gravel allows for good drainage and can be an aesthetic choice for a more natural look.
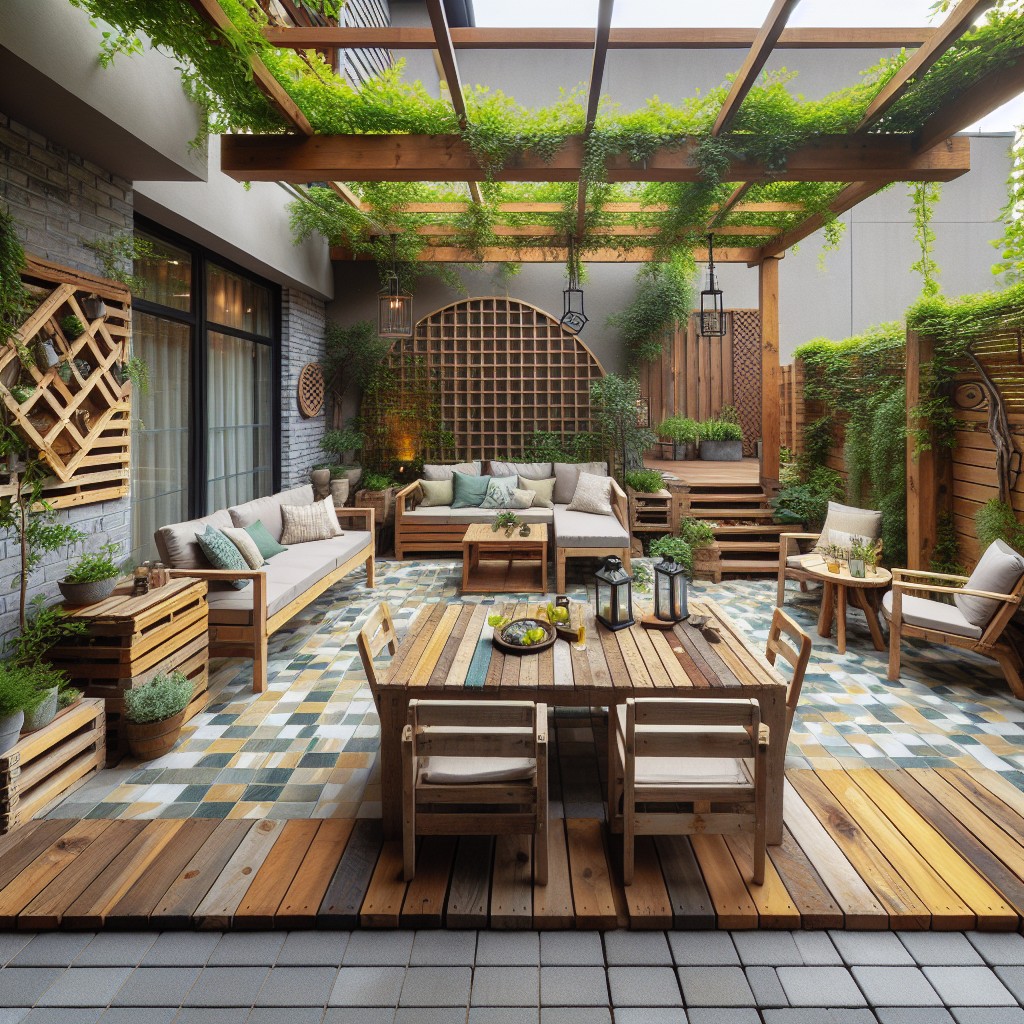
Lastly, going for unconventional materials like repurposed pallet wood can also save you money. Creating a patio extension with wooden pallets can be as simple as laying them out on a solid, flat surface and securing them together. This method adds a rustic charm but might require additional treatments for weather resistance and durability.
Add Concrete
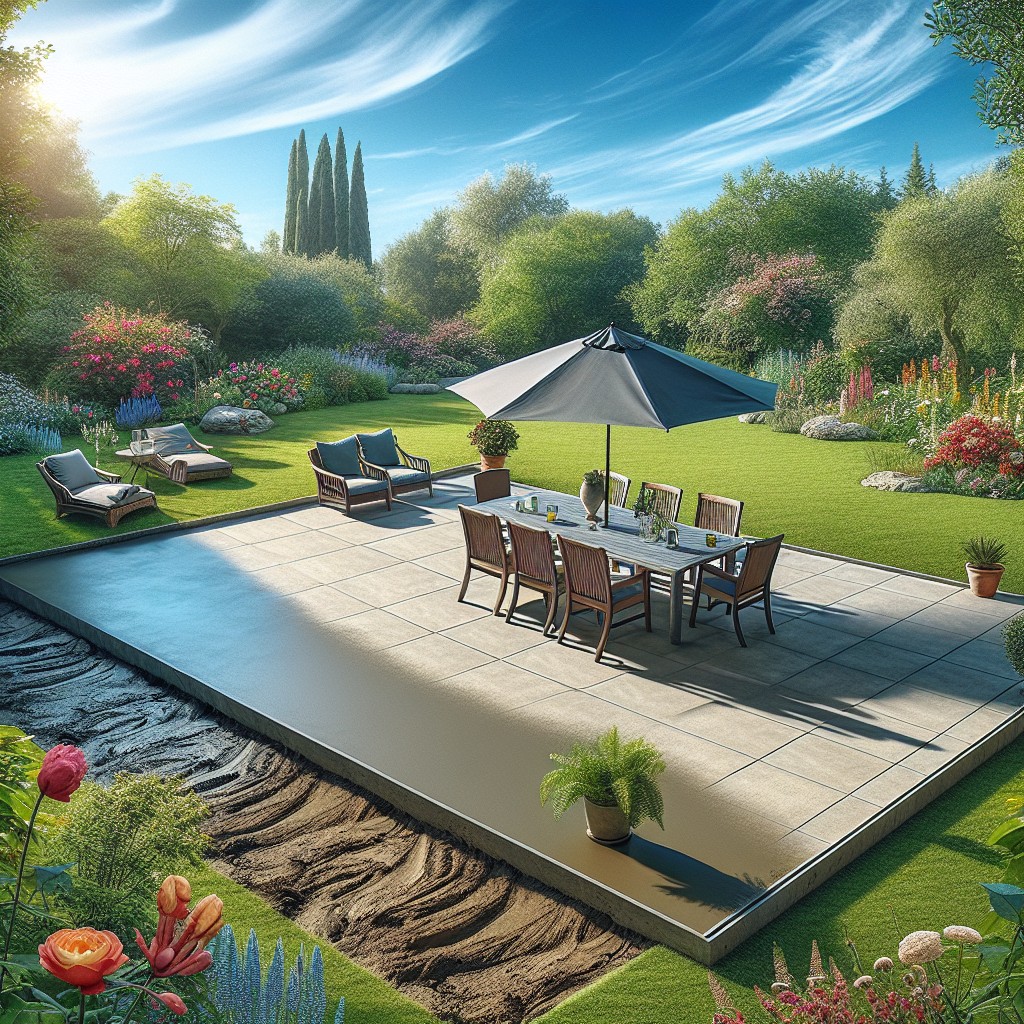
Expanding your outdoor space with concrete is a cost-efficient option that offers a seamless look. Opting for concrete allows you to mold and shape the extension to match the existing patio. By integrating the new section, you maintain a uniform surface, which is not only aesthetically pleasing but also functional for furniture placement and foot traffic.
A DIY approach can be taken by preparing the site, setting up forms, mixing, pouring, and smoothing the concrete. Alternatively, hiring a professional typically provides a more polished finish. Remember to check local building codes before starting your project to ensure compliance and avoid potential issues.
Expand a Damaged Patio
If your current patio has seen better days, don’t hurry to demolish it. It’s possible to breathe new life into a tired space and increase its size, all the while managing costs effectively.
First, assess the damage. Minor cracks and wear can often be covered or integrated into the new design. Resurfacing only the affected areas allows you to save on materials.
Next, consider marrying old and new by creating a seamless transition with a new layer of concrete or complementary pavers. This not only disguises imperfections but can also provide a fresh, updated look. For a more cohesive feel, clean and repaint the existing patio to match the extension, ensuring a uniform finish.
Lastly, if budget allows, repurposing existing materials can contribute to both eco-friendliness and cost savings. Broken pieces of old concrete can be used as a sub-base for the new section or even become part of an attractive mosaic that tells a story of transformation. This approach not only saves money but also adds unique character to your outdoor space.
Extend a Concrete Patio With Pavers
Integrating pavers provides an affordable and aesthetically pleasing method to enlarge your concrete patio. The flexibility of this approach allows you to mix and match different styles, creating a unique and customized look.
Begin by defining the new patio border with garden stakes and string. Ensure a uniform level between the old concrete surface and the new paver area to avoid any tripping hazards or water pooling issues.
Next, prepare the base by excavating the soil to a depth that can accommodate the paver thickness plus the base material. Compact the ground and add a layer of gravel, followed by sand, ensuring each layer is well-compacted. This robust base will prevent pavers from shifting and assist with drainage.
When laying the pavers, start from the edge of the existing concrete patio, keeping them snugly together to form your desired pattern. Finish by spreading sand over the pavers and sweeping it into the joints to lock them in place. This DIY expansion not only increases your outdoor living space but also can significantly enhance your patio’s visual appeal without breaking the bank.
Extend Patio With Gravel
Gravel is a cost-effective choice for those looking to enhance their outdoor space without overspending. It offers a natural, permeable surface that reduces runoff issues and can easily conform to any shape, allowing for creative patio designs. Installation is straightforward: outline your extension area, lay down landscaping fabric to prevent weed growth, and spread the gravel over the top to the desired depth, generally about 2-3 inches.
Selecting pea gravel or crushed stone can affect the feel and look of the patio. Pea gravel is smoother and often more comfortable underfoot, while crushed stone provides more stability due to the interlocking of jagged edges, preventing shifting. Moreover, gravel can be paired with stepping stones or pavers for a more structured look, and it allows for drainage, avoiding puddles after rain. Remember to maintain the gravel by raking it regularly to keep the surface level and replenishing it as necessary.
Project Measurements
Before you dive into extending your patio, correct measurements are crucial for a successful and cost-effective project. Here’s what to keep in mind:
- Define the Extension Area: Outline the new desired patio space using stakes and string for a visual guide.
- Determine Material Quantities: Based on the outlined area, calculate the amount of materials needed, such as concrete mix, pavers, or gravel. This helps avoid wastage and unnecessary expenses.
- Account for Drainage and Slope: Ensure the extended area has a slight slope away from your home to prevent water accumulation.
- Consider Existing Structures: Be mindful of any nearby landscaping or structures that could impact the way you measure and extend your patio.
- Check Local Regulations: Some areas have specific codes regarding property lines and construction, which could influence the size and location of your patio extension.
Use Pallet Wood
Harnessing pallet wood is an eco-friendly and wallet-friendly method to amplify your patio space. Often free or minimally priced, pallets can be acquired from local businesses that are looking to offload unused stock. These wooden platforms can be refinished and laid out to create a rustic, charming extension of your existing patio.
Consider sanding down the pallets to smooth out rough edges and applying a sealant to boost their weather resistance. For a more cohesive look, stain or paint the wood to match or complement your current patio. Installation is straightforward: place the pallets on a bed of sand to ensure level ground and fill any gaps with small stones or plant life for a touch of greenery.
Keep in mind that pallet wood, while cost-effective, may require regular maintenance to prevent rot and may not be as durable as other materials. But with proper care, they can serve as a versatile and aesthetically pleasing expansion, embodying a DIY spirit and sustainability.
Pallet Wood Pros
Opting for pallet wood to extend your patio is a savvy move for the eco-conscious and budget-wise homeowner. These wooden platforms can often be sourced for free from local businesses looking to offload them, making for a cost-effective expansion choice.
With pallet wood, versatility shines—you can arrange the slats horizontally or vertically to suit your design vision, giving your space a rustic, Bohemian vibe. The simplicity of the material also means DIY enthusiasts can easily cut and fit the pieces to custom shapes and sizes.
Plus, if you’re concerned about environmental sustainability, repurposing pallet wood is a tangible step towards reducing waste.
Pallet Wood Cons
While using pallet wood is a budget-friendly solution, it comes with several drawbacks. The wood is often untreated and susceptible to rot when exposed to the elements, which means it won’t last as long as other materials without proper treatment. Additionally, pallets can sometimes harbor pests such as termites or contain harmful chemicals from their previous uses, posing potential health risks.
The surface may be uneven, leading to a less stable foundation for patio furniture. Lastly, it requires a significant amount of prep work, including sanding and possibly cutting, to create a uniform appearance and ensure safety from splinters.
Gravel Pros
Opting for gravel as a patio extension material brings about a myriad of benefits. Its affordability stands out, offering a significant cost savings when compared to concrete or pavers. Installation is remarkably straightforward: homeowners can often undertake this project without professional help, further reducing expenses.
The versatility of gravel allows for creative freedom with shapes and design, accommodating any patio layout. Drainage is another advantage, as gravel naturally allows water to seep through, preventing pooling and potential water damage. Maintenance, although required, is minimal, usually involving occasional raking to keep the surface level.
Additionally, gravel offers an eco-friendly option, promoting natural water runoff without the need for complex drainage systems.
Gravel Cons
While gravel is an affordable and easy-to-install option for patio extension, it does come with a set of drawbacks. It’s important to consider that gravel can shift underfoot, which may lead to an unstable surface and pose a tripping hazard. Over time, it tends to spread outside its designated area, requiring regular maintenance to rake it back into place.
Also, gravel doesn’t offer a flat surface suitable for all types of patio furniture. Additionally, it can be challenging to clear of leaves, snow, and other debris without displacing the stones. Lastly, in terms of aesthetics, gravel provides a more rustic look that may not match everyone’s preference or complement all types of exterior home designs.
Pebbles Pros
Pebbles are an excellent option for those seeking an eco-friendly and drainage-friendly patio extension. They’re inherently permeable, allowing water to filter through and prevent pooling, which can extend the life of your patio by reducing water damage.
The natural, varied aesthetics of pebble surfaces can enhance the look of outdoor spaces, adding texture and organic beauty. Easy to install, they are an ideal do-it-yourself project; you’ll simply spread them over a prepared surface.
Affordability is another benefit, as pebbles often come at a lower cost than other hard materials. They are also low maintenance, requiring only occasional raking to maintain an even surface. This choice provides a balance between utility, appearance, and cost-effectiveness, making it a smart consideration for your patio extension project.
Pebbles Cons
While pebbles can lend a charming, natural feel to your patio extension, there are some downsides to consider. They can be difficult to walk on, especially for those with mobility issues or for placing furniture, potentially creating an unstable base. Also, over time, they tend to migrate out of place, getting scattered into the surrounding areas, which means you might find yourself frequently raking them back into position.
Weeding can become a chore as well, as it’s not unusual for weeds to sprout up through the pebbles unless a robust weed barrier is in place. Lastly, if you’re in an area prone to heavy rains, pebbles can shift significantly, necessitating more regular maintenance to keep your extended patio looking neat and tidy.
Concrete Squares Pros
Utilizing concrete squares is a remarkably budget-friendly approach to patio expansion. Their precast nature simplifies installation, saving both time and labor costs. Uniformity in shape and size contributes to a seamless aesthetic, creating a cohesive look when extending an existing area.
Due to their durability, these squares withstand diverse weather conditions, requiring minimal year-round maintenance. Another advantage is the flexibility they offer for future redesigns or expansions, as individual squares can be easily replaced or reconfigured without disrupting the entire patio structure. Additionally, the ease of sourcing these materials from local home improvement stores makes them an accessible option for a DIY project.
Concrete Squares Cons
While utilizing concrete squares is a straightforward approach to patio extension, several drawbacks merit attention. Firstly, matching the color and texture of existing concrete can be challenging, potentially leading to a patchwork appearance. Additionally, over time, these squares can settle at different rates, causing an uneven surface that may require further attention and expense to rectify.
The installation process itself might require equipment or expertise beyond the average DIY skill set, especially when it comes to ensuring a level patio foundation. This could mean additional costs if professional help is needed. Moreover, in regions with freeze-thaw cycles, improper installation can lead to cracking and heaving, diminishing the longevity of the patio extension and calling for premature repairs.
Lastly, concrete is not permeable, which means it does not allow for natural water drainage. This can lead to runoff issues or even flooding during heavy downpours unless adequate drainage solutions are implemented alongside the expansion.
Paving Pros
Using pavers opens up a wealth of design possibilities for your patio extension, allowing you to create a custom look that complements your existing outdoor space. These interlocking pieces are DIY-friendly, meaning you can save on labor costs by laying them yourself with the right preparation and some elbow grease. They also lend themselves to easy repairs, as individual pavers can be replaced without affecting the whole patio. Moreover, pavers facilitate drainage effectively, reducing the risk of water damage and making them a practical choice for areas prone to rain.
Paving Cons
Paving may require more labor-intensive installation compared to other methods, often needing a level base and possible cutting of stones to fit your space.
The upfront cost of materials like bricks or stones can also be higher.
Over time, these materials can shift if the base isn’t properly prepared, leading to uneven surfaces that may require maintenance.
Additionally, the gaps between pavers need to be filled with sand or another filler that must be topped up occasionally to prevent weed growth and maintain the patio’s aesthetic appeal.
Weather conditions can also affect the durability of paving, as freeze-thaw cycles can cause cracking and shifting.
Options for Elevated Patios
If your patio is above ground level, consider a decking kit or modular decking. These kits often come with all necessary materials pre-cut, making them relatively straightforward to assemble. Pressure-treated lumber is a robust option that stands up to the elements with less upkeep than untreated wood.
Another possibility is interlocking deck tiles, which require less structural support and can be placed directly over an existing flat surface. They’re simple to install and come in various materials, including wood, composite, and rubber, allowing for a customized look.
Additionally, using adjustable deck supports can help level an uneven surface without extensive groundwork. These supports can be tailored to the desired height, providing flexibility in design. Always check local building codes before constructing elevated additions to ensure compliance with safety standards.
Elevated Patio Pros
Elevating a patio offers several benefits, including enhanced drainage and prevention against water damage, especially for homes in rainy climates. It provides a better vantage point, giving you an unobstructed view of your garden or landscape. This option also allows for versatility in design; you can incorporate multilevel areas for different activities, such as dining and lounging. An elevated patio can easily include storage or sheltered space underneath, maximizing functionality while maintaining a stylish outdoor area. Lastly, the elevation adds an element of distinction to your property, potentially increasing its value.
Elevated Patio Cons
While the allure of an elevated patio can add dimension and grandeur to your outdoor space, it’s important to consider a few drawbacks.
The construction of an elevated patio typically requires professional help due to the complexity of the structural elements, which can significantly increase costs.
Additionally, the necessity for railings and potentially stairs for safety and accessibility means additional expenses and permitting requirements that could prolong the project timeline.
The elevation may also limit privacy, as it becomes more visible to neighbors.
Extra maintenance is another factor; the higher exposure to the elements means more wear and tear, necessitating frequent upkeep.
Lastly, this type of structure might not seamlessly integrate with every landscape design, possibly compromising the cohesive aesthetic of your outdoor living space.
FAQ
How can I extend my patio for cheap?
You can extend your patio inexpensively by using gravel, as it’s an affordable material that’s easy to install, permeable, and adds a unique auditory experience when walked upon.
What is the least expensive way to build a patio?
The least expensive way to build a patio is by using gravel, due to its affordable cost, quick installation time, compatibility with diverse gardens or backyards, and excellent drainage capabilities.
What is the cheapest way to build a patio on a budget?
The most economical method to construct a patio within a budget is by using materials such as gravel, block paving, resin, or wooden decking instead of slabs.
Is extending patio worth it?
Extending a patio is worth it as it maximizes outdoor space, increases property value, improves lifestyle, and provides more comfort while enjoying the outdoors.
Are recycled materials a viable option for patio extension?
Yes, recycled materials are a viable option for patio extension, offering environmental sustainability as well as aesthetic versatility.
How can DIY methods contribute to cost-effectiveness in patio expansion?
DIY methods can contribute to cost-effectiveness in patio expansion by eliminating the expenses of hiring professionals while also allowing homeowners to source affordable materials and work at their own pace.
What are some budget-friendly materials recommended for patio extension?
Concrete, repurposed wood pallets, and gravel are budget-friendly materials ideal for a patio extension.
More Like This
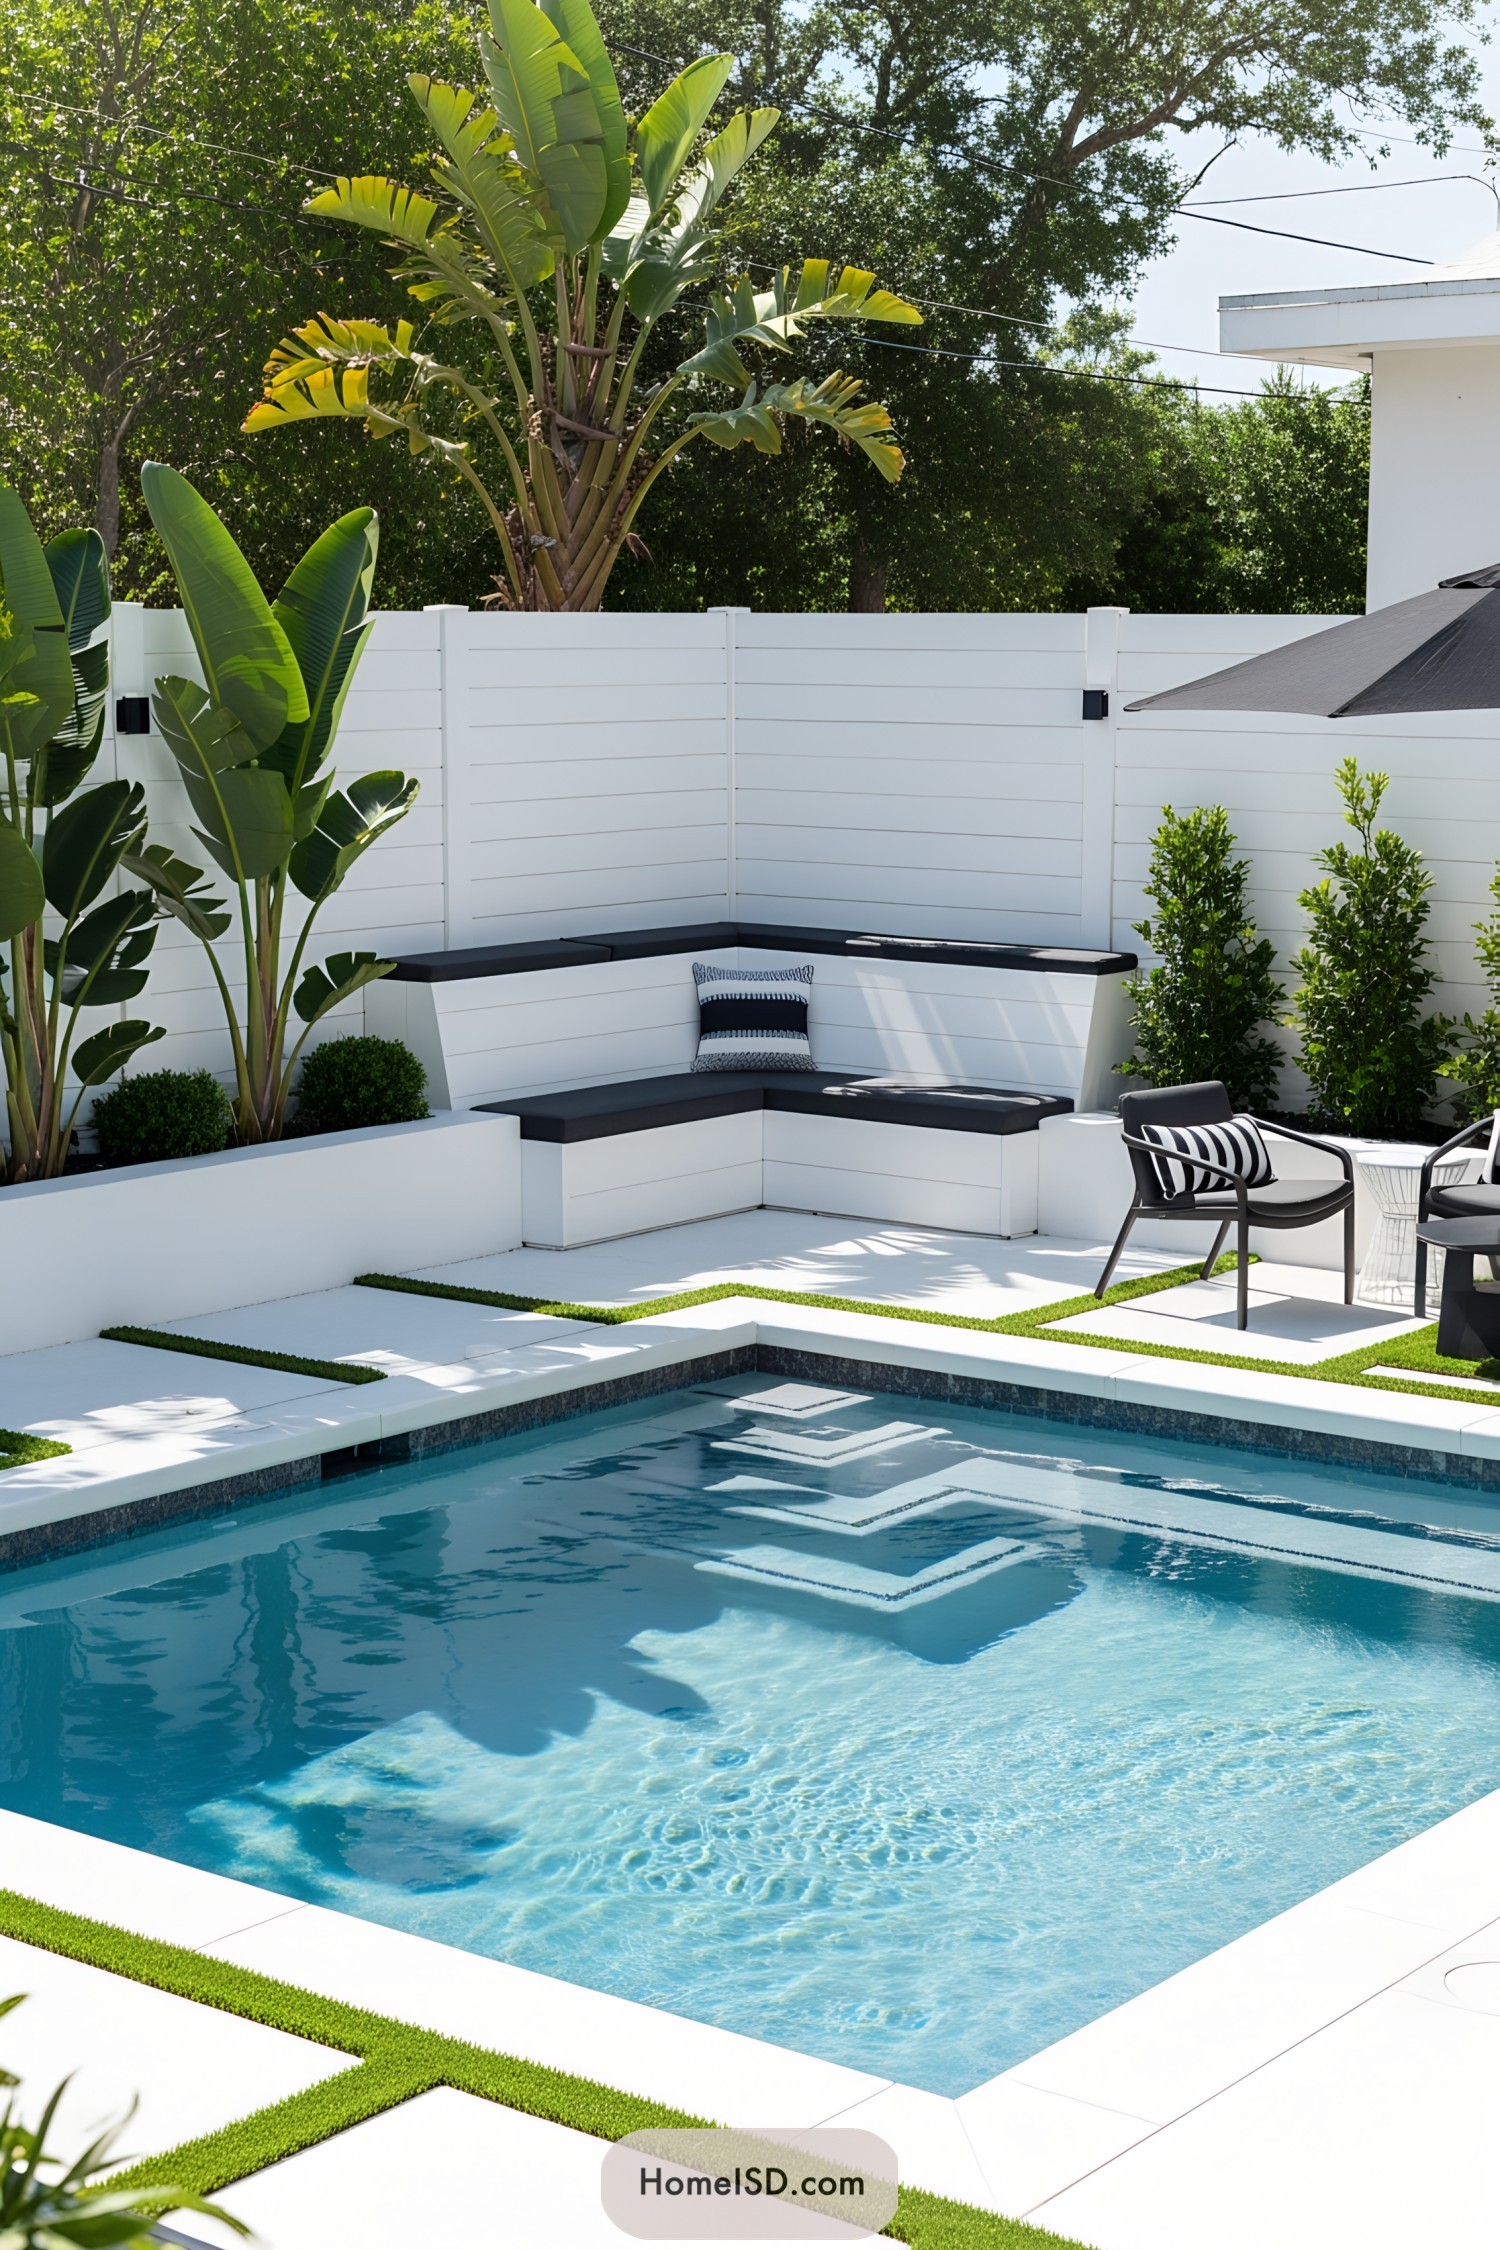 23 Pool Area Design Ideas That Make Waves in Style
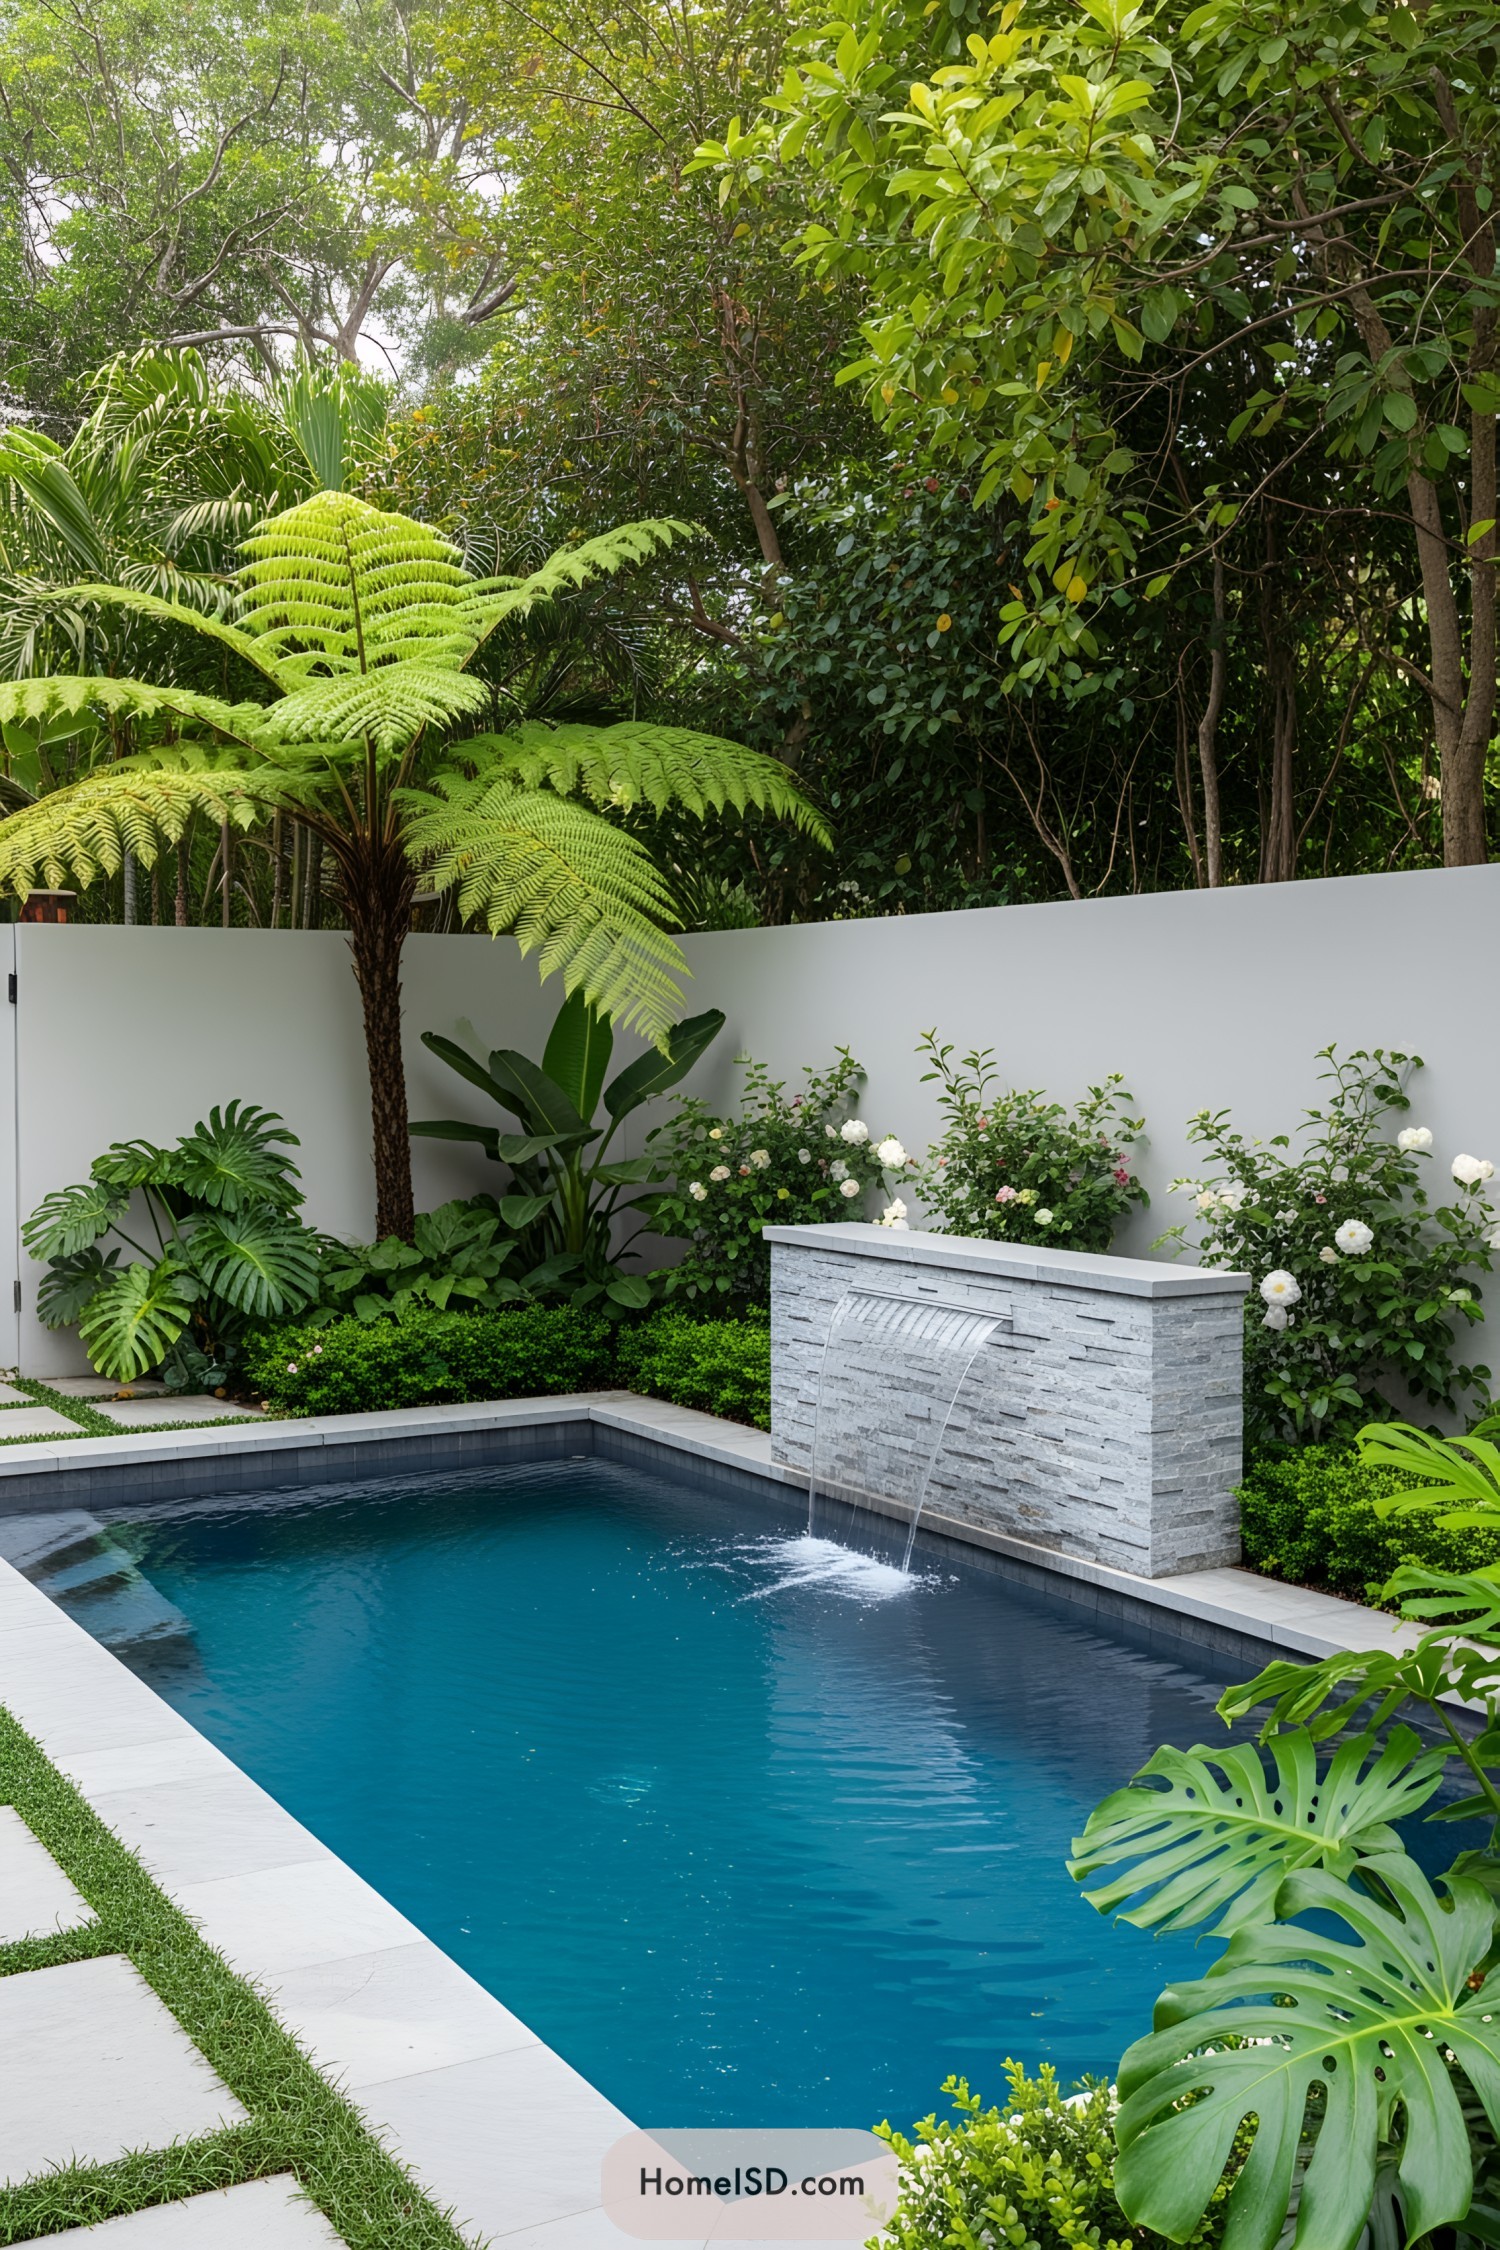 23 Splashy Small Pool Design Ideas
 22 Natural Swimming Pool Ideas to Dip Into
 21 Mini Vegetable Gardens for Any Space
 21 Mini Japanese Gardens That Will Make You Feel Zen-tastic
Recap