Last updated on
Choosing the right paint for terracotta pots can transform your gardening experience because it allows you to create striking, personalized plant holders that stand out in your garden.
The best paint to use for terracotta pots:
Key takeaways:
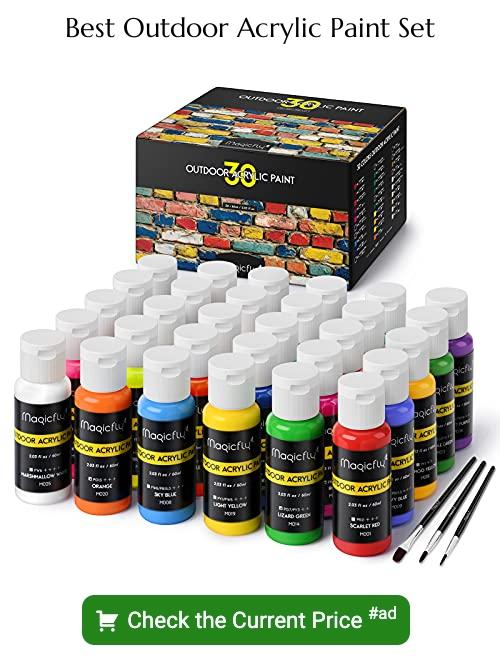
- Acrylic paints: Easy to use, quick-drying, best for indoor pots.
- Enamel paints: Oil-based, water-resistant, ideal for outdoor planters.
- Latex exterior paint: Withstands outdoor conditions, flexible to prevent cracking.
- Proper preparation is crucial for paint adherence and a smooth finish.
- Apply a primer for better paint adhesion and color vibrancy.
Types of Paint Suitable for Terracotta Pots
Selecting the right paint ensures not only aesthetic appeal but also long-term durability for your terracotta pots.
Acrylic paints are a favorite for their ease of use and cleanup. They are water-based, which means they’re non-toxic and quick to dry. Their versatility allows for a matte, gloss, or satin finish depending on the product variety chosen. However, acrylics can peel over time if the pot is exposed to the elements, so they are more suited to indoor pots or require a sealant for outdoor use.
Enamel paints, on the other hand, are oil-based and offer a tougher finish. Once cured, enamel is more resistant to water and wear, making it an excellent choice for outdoor planters. They take longer to dry and might necessitate the use of mineral spirits for cleanup.
For garden pots, consider latex exterior paint. It’s designed to withstand the rigors of outdoor conditions, from UV rays to rain. It’s more flexible than other paints, minimizing the risk of cracking as the terracotta expands and contracts with temperature changes.
Each type of paint requires proper preparation of the pot’s surface to achieve the best adherence and finish. A well-prepared pot can transform into a piece of art with the right choice of paint.
Acrylic Paint: Pros and Cons
Acrylic paint is a popular choice due to its versatility and ease of use. It adheres well to terracotta and offers quick-drying qualities, allowing for layering and blending.
A wide spectrum of colors is available, encouraging creative freedom. However, acrylic might not be as robust as other options when exposed to the elements. It can also vary in quality, with some cheaper options potentially leading to less vibrant colors after drying.
To enhance durability when using outdoors, an appropriate sealant is highly recommended.
Enamel Paint for Durability
For those desiring a hardy finish capable of withstanding the elements, enamel paint emerges as a top choice. With its lustrous sheen and formidable resistance to moisture, it’s excellently suited for terracotta pots that will reside outdoors.
When opting for enamel paint, consider these key factors:
- Surface Preparation: Achieving maximum durability involves meticulous preparation of your terracotta pot. Ensure it’s free of dust and grime for the enamel to adhere properly.
- Application Techniques: Apply enamel paint in thin, even layers, allowing sufficient drying time between coats to avoid drips or a tacky finish.
- Cure Time: Enamel takes longer to cure than acrylic paint, usually around 24 hours. Patience in the curing process ensures a robust, protective shell.
- Top Coat: Although enamel is durable on its own, a top coat can extend the life of your painted pot, especially against UV light and rough weather.
Remember to work in a well-ventilated space or outdoors when using enamel paint, as it often contains solvents that emit strong fumes. With its blend of beauty and brawn, enamel paint provides a resilient color layer that retains its gloss and color over time.
Latex Exterior Paint for Outdoor Use
Latex exterior paint, formulated to withstand the elements, is a stellar choice for terracotta pots you plan to keep outdoors. Its composition resists fading and peeling under the sun’s harsh rays and during bouts of inclement weather.
This type of paint typically includes UV protection and mildew-resistant properties, providing an additional layer of durability. When opting for latex paint, consider applying a base coat of latex exterior primer to ensure better adhesion and a more uniform paint job.
For a smooth application on your terracotta pots, you can use a standard paintbrush or a foam brush, which reduces brush marks. It’s also a good idea to choose a paint with a flat or semi-gloss finish to help hide imperfections in the pot’s surface, while giving your pots a polished look.
Remember to allow sufficient drying time between coats; this is crucial for preventing tackiness and achieving a long-lasting finish.
Preparing Terracotta Pots for Painting
Before diving into the vibrant transformation of your terracotta pots, ensure they’re primed for perfection. A thorough cleaning removes dirt, grime, and any biological growth, allowing the paint to adhere better. Use soapy water for this task and a scrub brush for stubborn areas. Allow the pot to dry completely, which may take up to 24 hours depending on humidity.
Next, a light sanding will create a texture that grips the paint. Employ fine-grit sandpaper, gently scuffing the surface in a circular motion. This step is crucial for creating a surface that the primer and paint can cling to securely.
Finally, the application of a water-based primer sets the stage for even paint coverage and durability. It’s the barrier between the porous clay and your chosen paint, preventing moisture absorption and providing a uniform canvas. Apply a thin, even layer and let it dry as per the manufacturer’s recommendation, ensuring a long-lasting finish for your creative expression.
Cleaning and Sanding the Pot
To ensure paint adheres effectively to your terracotta pot, start with a clean, smooth surface. Dust and grime can act as a barrier between the paint and the clay, leading to peeling and chipping over time.
- Begin by wiping off any surface dirt with a dry cloth.
- Wash the pot using mild dish soap and warm water to remove oils and stubborn dirt.
- After rinsing, let the pot completely dry as moisture trapped in the clay can cause issues later on.
- Lightly sand the exterior with fine-grit sandpaper to create a texture that the paint can grip. This step is especially important if the pot has a glossy finish.
- After sanding, wipe the pot with a damp cloth to remove dust, then allow it to dry thoroughly before applying primer or paint.
Thoroughly prepping the surface will not only ease the painting process but also prolong the life of your beautifully painted terracotta pot.
Applying Primer: Why It’s Necessary
Before you dive into the vivid world of color, it’s essential to lay down a solid foundation. Primer acts as a mediator between the porous surface of your terracotta pot and your paint, ensuring a bond that lasts. It fills in the tiny crevices of the clay, which helps prevent moisture from seeping in and causing the paint to peel or bubble.
Equally critical, primer helps in achieving a uniform color output. Without it, you may find yourself applying multiple coats of paint just to get an even look, as terracotta tends to absorb paint unevenly. This greatly reduces the paint’s vibrancy.
Remember to choose a primer suitable for outdoor use if your pot will grace your garden, and opt for a breathable formula to facilitate the natural air flow of the terracotta material. A thin, even coat of primer applied with a gentle touch will set you up for success. Allow it to fully dry according to the manufacturer’s instructions before pursuing your color story.
Sealing Terracotta Pots: When and How
Sealing is essential for protecting your artwork and extending the life of the pot, especially if it will be used outdoors. Terracotta is naturally porous, so without a proper seal, water can seep through, potentially damaging the paint over time. To ensure a long-lasting finish, follow these steps:
1. Choose the right sealant: A clear acrylic sealer works well for both indoor and outdoor pots, providing a durable layer that can weather the elements.
2. Timing of application: Apply the sealer after the paint has fully dried and cured, which typically takes about 24 hours.
3. Applying the sealant: Use a clean brush or a spray-on sealant for an even coat. Apply in thin layers, allowing each layer to dry before applying the next.
4. Number of coats: Two to three coats should suffice, creating a barrier against moisture and UV rays.
Remember to seal both the inside and outside of the pot to prevent moisture from breaching the terracotta’s porous surface. Regular reapplication of the sealant every few years can help maintain the pot’s integrity and appearance.
The Painting Process
Embarking on the actual painting requires a steady hand and a clear vision for your design. Here’s a streamlined approach to ensure a smooth finish:
1. Start with light colors: Apply lighter hues first, as they are usually more opaque and will be difficult to cover if you start with dark colors and make mistakes.
2. Work in layers: Allow each coat of paint to dry thoroughly before adding another, which can take anywhere from a few minutes to an hour depending on the paint and weather conditions. This prevents colors from blending unintentionally and keeps the design crisp.
3. Use painter’s tape: For designs that require straight lines or clean edges, secure sections with painter’s tape. Ensure the tape is firmly pressed down to prevent paint from bleeding underneath.
4. Embrace imperfections: Slight irregularities can give your pot character. However, if a clean and polished look is desired, have a damp cloth handy to wipe away mistakes quickly before the paint dries.
5. Utilize different brushes: Switch between brushes for various elements of your design – fine tips for detail, flat brushes for broad areas, and sponges for a textured effect.
Remember, the process is meant to be enjoyable, so while precision can be important, the ultimate goal is to create something you love.
Selecting Brushes and Tools for Detailed Work
Choosing the right brushes and tools is essential for bringing your terracotta pot designs to life with precision. Opt for synthetic brushes when working with acrylics, as they hold their shape and don’t swell with water exposure.
For fine lines and detail work, use liner brushes or spotter brushes. A palette knife can help mix custom paint colors or apply textured effects. Meanwhile, sponges offer a way to dab on paint for a stippled look. Consider using stencils for consistent shapes and patterns. For multi-layered designs, masking tape is invaluable in keeping edges crisp.
Keep a clean water container and cloth at hand to promptly clean brushes, avoiding paint drying on the bristles.
Techniques for Even Paint Application
Begin by dipping just the tip of your brush into the paint, wiping off excess to avoid drips. Use long, smooth strokes for larger areas, keeping the brush at a consistent angle. For an evenly distributed coat, overlap each stroke slightly, blending wet into wet paint; this technique, called “working the wet edge,” helps prevent streaks.
Switch to smaller brushes for edges and fine details, always moving from the top of the pot down to avoid smudging. If you’re using a spray paint, maintain a steady back-and-forth motion, keeping the nozzle a consistent distance from the surface—about 6 to 8 inches—to ensure uniform coverage. Apply multiple thin coats rather than one thick coat, allowing adequate drying time between layers. This builds up a strong finish without the risk of drips or texture inconsistencies.
Creating and Transferring Designs Onto Pots
Once your pot is primed and ready, the real creativity begins. You can either hand-draw your design directly onto the pot with a pencil or create a stencil for more precision. If you’re feeling less confident about freehand drawing, consider using carbon paper to transfer a printout of your design onto the surface.
For stenciling, adhere the design onto your pot using painter’s tape. Make sure it’s flat against the surface to prevent paint from bleeding under the edges. Dip a stencil brush into the paint, remove excess paint to avoid drips, and use a dabbing motion over the stencil.
Alternatively, if you’re using a pattern that repeats, like polka dots, items like a round sponge or the end of a pencil can be dipped in paint and pressed onto the pot to create uniform shapes. Remember to let each part of the design dry before moving on to the next, to keep everything crisp and clean.
Drying and Curing Time for Painted Pots
Allowing your painted terracotta pots adequate time to dry and cure is crucial for achieving a long-lasting finish. Here’s what you need to keep in mind:
1. Drying Time: Typically, acrylic and latex paints dry to the touch within an hour. However, don’t be tempted to handle the pot extensively or begin sealing it until it has dried completely, which can take up to 24 hours, depending on the paint’s thickness and environmental factors like humidity and temperature.
2. Curing Time: Curing is different from drying. It refers to the time it takes for paint to fully harden and reach maximum durability. Acrylic paints can take up to three weeks to cure completely. It’s a gradual process where the paint’s molecules cross-link and bind to the terracotta surface.
3. Patience Pays Off: Rushing to display or plant in your terracotta pot before the paint has fully cured may lead to chips or damage. Resist the urge to rush the process for the best results.
4. Safe Stacking: If you’re painting multiple pots, make sure to cure them separately before stacking to prevent them from sticking together.
5. Test Gently: To check if the paint has cured, gently press the surface with your fingernail in a discreet area. If it leaves a mark, give it more time.
By respecting the drying and curing times, you ensure your artwork will last, adorning your space with beauty and color.
Protecting Finished Pots: Varnishes and Sealants
To ensure your beautifully painted terracotta pots stand the test of time and the elements, proper sealing is key. Applying a clear varnish or sealant not only enhances the vibrancy of the paint but also provides a moisture barrier. This is especially important for outdoor pots, which are subject to rain, sunlight, and fluctuating temperatures.
Opt for a water-based varnish for an eco-friendly option that’s low on fumes and quick to dry. For a more robust defense against wear and tear, an oil-based polyurethane can be ideal, though it takes longer to dry and can yellow over time.
Spray sealants are convenient for an even coat and hard-to-reach places, while brush-on versions offer more control over the thickness of the layer. Remember to apply sealant to the inside rim of the pot as well to prevent water seepage.
Two to three thin coats are typically more effective than one thick coat; thicker applications can lead to drips and a cloudy finish. Allow each layer to fully dry before adding the next. With the right sealant, your terracotta masterpiece will retain its beauty through many seasons.
Maintenance Tips for Painted Terracotta Pots
To sustain the vibrancy and longevity of your painted terracotta pots, consider these straightforward maintenance tips:
1. Avoid Harsh Elements: Place the pots under a covered area if possible to protect them from excessive rain or harsh sunlight, which can lead to fading or peeling.
2. Proper Watering Techniques: When watering plants, aim to pour water directly into the soil to prevent moisture from touching the painted exterior, which could cause the paint to deteriorate over time.
3. Regular Cleaning: Gently wipe the surface with a soft, damp cloth to remove dust and dirt. Refrain from using abrasive cleaners that could scratch the paint.
4. Touch-Up Paint: Keep some of the original paint on hand to perform minor touch-ups as needed. This will keep your design looking fresh and can cover up any chips or wear.
5. Re-Seal as Necessary: Depending on exposure, reapply a water-resistant sealant annually to create an extra protective layer against the elements.
6. Rotate Pots Periodically: To ensure even wear and prevent fading on one side, rotate your pots periodically, especially those exposed to direct sunlight.
By following these tips, your beautifully painted terracotta pots will remain a delightful accent in your space for years to come.
Ideas for Personalizing Terracotta Pots
Elevate your terracotta pots with unique customization:
- Stencils and Stamping: Apply stencils or use stamps to add intricate patterns without needing advanced painting skills.
- Ombré Effect: Blend different shades of the same color from top to bottom for a trendy look.
- Chalkboard Paint: Coat a section with chalkboard paint to write plant names or care instructions directly on the pot.
- Decoupage: Glue fabric or printed paper to the pot and seal it for a mixed-media masterpiece.
- Mosaic Designs: Adhere small tiles or broken ceramics to create a mosaic for textures that pop.
- Hand Lettering: Use permanent markers or paint pens to add quotes or personalized messages.
- Nature-Inspired Motifs: Draw inspiration from nature by painting leaves, flowers, or insects.
- Monochrome with a Twist: Stick to one color but play with different finishes – matte, glossy, and satin.
- Seasonal Themes: Reflect the change in seasons with thematic designs, from autumnal leaves to summer fruits.
These ideas can turn a simple pot into a talking point or a treasured gift. Experimenting with different techniques and styles allows for endless creativity and personal expression.
DIY Geometric Flower Pot Design
Dive into the realm of sharp lines and eye-catching patterns with a DIY geometric flower pot design. This modern style adds a sophisticated touch to any space, both indoors and out.
Start by selecting a color palette that complements your home decor. Use painter’s tape to map out your geometric pattern on the pot’s surface after the base coat has dried. Opt for triangles, diamonds, or any angular shapes for a contemporary look.
Get creative by integrating varying shapes sizes or by overlapping designs for added complexity. When painting, work with patience to keep lines crisp and prevent color bleeding. Consider using a fine-tip brush for intricate areas to achieve greater precision.
Once satisfied with the painted design, carefully remove the tape before the paint completely dries to ensure sharp edges. Let the pot fully cure as per the paint’s instructions to solidify your handiwork. This geometric approach transforms an ordinary terracotta pot into a modern piece of art.
Project Supplies List
Before diving into your terracotta pot painting project, ensure you have all the necessary supplies on hand for a smooth creative process. Here’s a rundown of what you’ll need:
- Terracotta Pots: Choose the size and shape that best fit your project.
- Sandpaper: A fine-grit option to lightly sand the surface and remove imperfections.
- Soap and Water: To clean the pots before painting.
- Paint Primer: Helps the paint adhere better and lasts longer.
- Acrylic, Enamel, or Latex Paint: Depending on your desired finish and whether the pot will be indoors or outdoors.
- Paint Brushes: A variety of sizes for base coats and detailed work.
- Palette or Mixing Tray: For mixing paint colors.
- Sealer or Varnish: To protect the paint from water and UV damage.
- Stencils or Painter’s Tape: For creating designs with clean lines.
- Paper Towels or Cloths: Handy for cleaning up any spills or mistakes.
- Drop Cloth or Newspaper: To protect your work surface.
Gathering these items upfront helps ensure you can stay focused on bringing your creative vision to life without any interruptions.
Step-by-Step Painting Instructions
Begin with a clean, dry pot. Remove any dirt or debris to ensure the paint adheres properly.
Apply a coat of primer designed for terracotta to create a smooth, even surface. Allow it to fully dry according to the manufacturer’s instructions.
Choose your base color and apply the first layer of paint. Use a soft-bristled brush for broad strokes or a sponge for a more textured look. Let it dry.
Add additional coats if necessary, allowing ample drying time between each. Remember, multiple thin layers usually yield a better finish than one thick layer.
Once the base is dry, you can add designs using stencils, masking tape, or freehand painting techniques. Use smaller brushes for intricate details.
After the final design layer dries, apply a clear sealer to protect the paint and make the pot weather-resistant. Use a sealant suitable for outdoor exposure if the pot will be kept outside.
Allow the pot to cure for the recommended time before using it or filling it with soil and plants. This will ensure the paint and sealant are fully set and provide longevity to your work.
More Like This
 20 Fairy Houses With Natural Materials That Will Make You Believe In Magic
 20 Cheap Walkway Ideas DIY Benefits
 15 Ingenious DIY Pantry Cabinet Ideas
 15 Creative DIY Buffet Table Ideas for Your Next Gathering
 15 Genius Office Supply Storage Ideas to Boost Your Productivity
Recap