Last updated on
Revamp your home decor with these budget-friendly and creative alternatives to traditional candle holders. Read on!
As a seasoned home decorator, I’ve seen it all when it comes to candle holders. From classic glass hurricanes to intricate metal designs, there are endless options on the market.
However, sometimes these options can be expensive or not quite fit the aesthetic you’re going for. That’s why I’ve put together a list of 20 alternative candle holder ideas that won’t break the bank and will add a unique touch to your decor.
But before we dive in, let’s take a look at some advantages and disadvantages of using alternative candle holders.
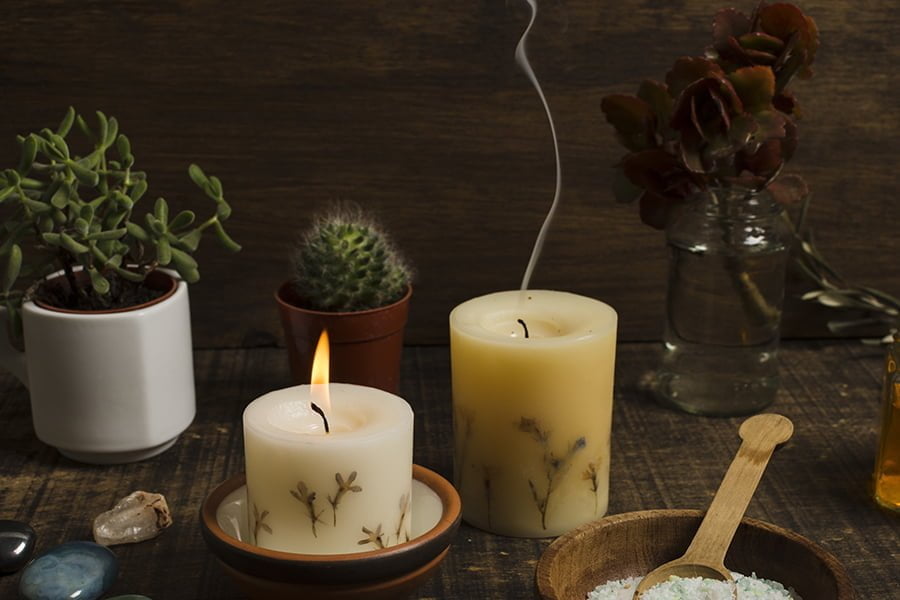
Mason Jars
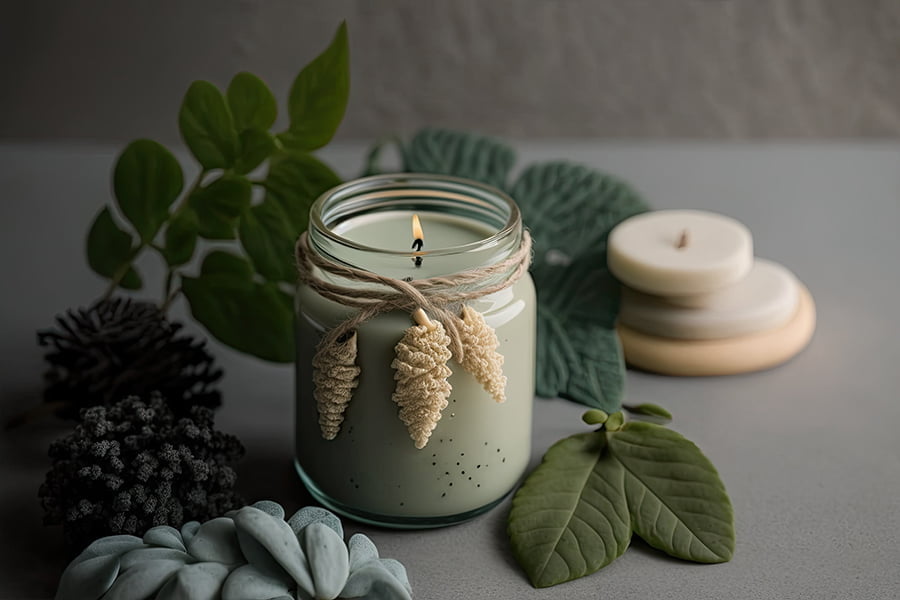
Mason jars are a popular choice for candle holders due to their versatility and affordability. They come in various sizes, shapes, and colors that can fit any decor style.
You can use them as standalone candle holders or create unique arrangements by grouping them together with other decorative items such as flowers or stones.
One of the advantages of using Mason jars is that they are inexpensive compared to traditional candle holders made from glass or metal. You can easily find them at your local craft store, thrift shop, or even online at an affordable price.
However, one disadvantage of using Mason jars is that they are breakable if mishandled. This means you need to be careful when transporting them from one place to another and avoid placing heavy objects on top of them.
If you’re looking for a budget-friendly option for your candles while still maintaining a stylish look in your home decor scheme – then Mason jars might just be the perfect solution!
Wine Bottles
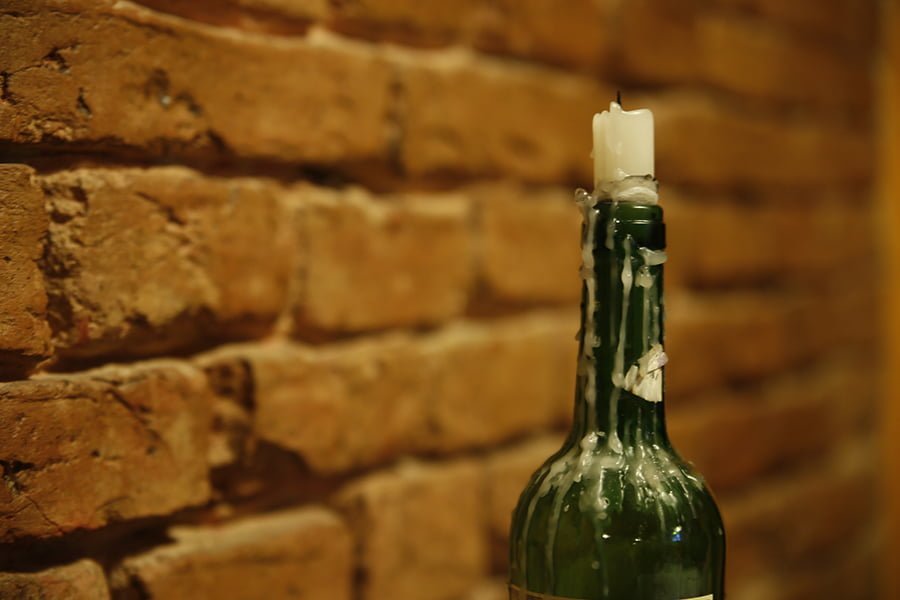
Wine bottles are a popular choice for DIY candle holders. They offer a unique and rustic look to any decor, especially when upcycled from used wine bottles.
However, one disadvantage of using wine bottles as candle holders is the limited size options available. Most wine bottle candles can only hold small tea lights or votive candles due to the narrow opening of the bottle neck.
Despite this limitation, there are still many creative ways to use wine bottles as candle holders such as painting them with metallic colors or wrapping them in twine for added texture and style. Using old wine bottles is an eco-friendly way to add some charm and character into your home decor while also being budget-friendly!
Teacups
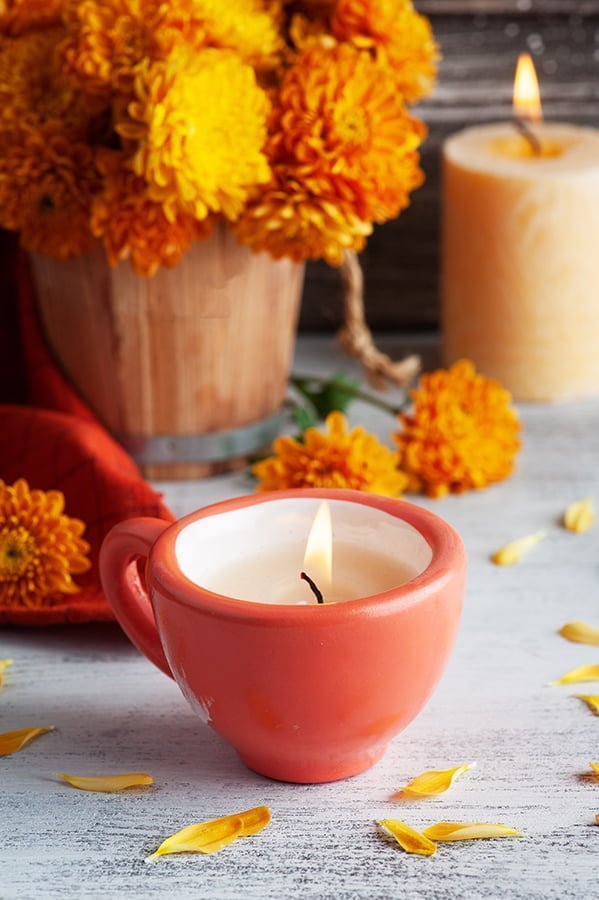
Teacups are a charming and unexpected alternative to traditional candle holders. They add a touch of vintage elegance to any room, especially when paired with delicate floral or lace patterns.
However, teacups can be quite fragile and may not withstand the heat of larger candles for extended periods of time. It’s best to use small tea lights or votive candles in these dainty vessels to avoid any accidents or damage.
It’s important to ensure that the teacup is stable on its base before lighting the candle inside it. Despite their fragility, teacup candle holders make for an adorable addition to your decor collection if handled with care!
Seashells
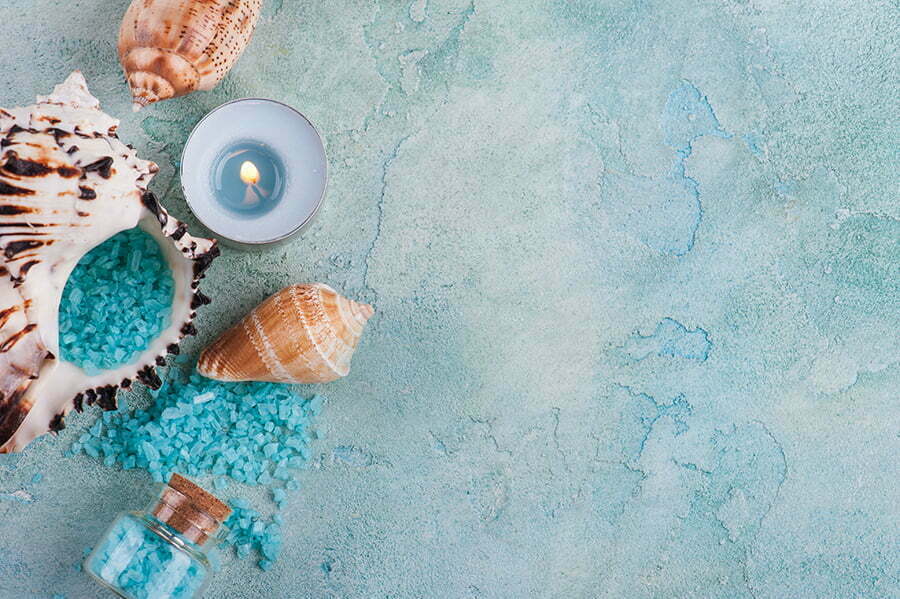
Seashells are a popular choice for creating unique candle holders. They offer natural beauty and can be found in various shapes and sizes, making each piece one-of-a-kind.
However, seashells may not be the most stable option when it comes to flat surfaces. Depending on the size of the shell and how it is positioned, candles may wobble or tip over easily.
To combat this issue, consider using smaller shells as accents around a larger base or securing them with hot glue for added stability. Despite this disadvantage, seashell candle holders can add a touch of beachy charm to any room in your home without breaking the bank!
Clay Pots
Clay pots are a great alternative to traditional candle holders. They are durable and eco-friendly, making them an excellent choice for those who want to reduce their carbon footprint.
Clay pots come in various sizes and shapes, allowing you to create unique designs that match your decor style.
One disadvantage of using clay pots as candle holders is that they can be quite heavy, which may make it difficult for some people to move them around or rearrange their placement. However, this weight also makes them more stable than other materials like glass or plastic.
If you’re looking for a long-lasting and environmentally friendly option for your candles, clay pots could be the perfect solution!
Sand-filled Bowls
Sand-filled bowls are a simple and customizable alternative to traditional candle holders. All you need is a bowl, some sand, and your favorite candles.
The sand can be colored or left natural for an earthy look. You can also add shells, stones or other decorative items to the sand for added texture.
One disadvantage of using sand-filled bowls as candle holders is that they can be messy if not handled carefully. Sand may spill out when moving the bowl around or when lighting the candles inside it.
However, this issue can easily be avoided by placing the bowl on a stable surface before adding in any candles.
Using sand-filled bowls as candle holders is an affordable and creative way to add ambiance to any room in your home while showcasing your personal style through customization options available with different types of sands used in them!
Paper Lanterns
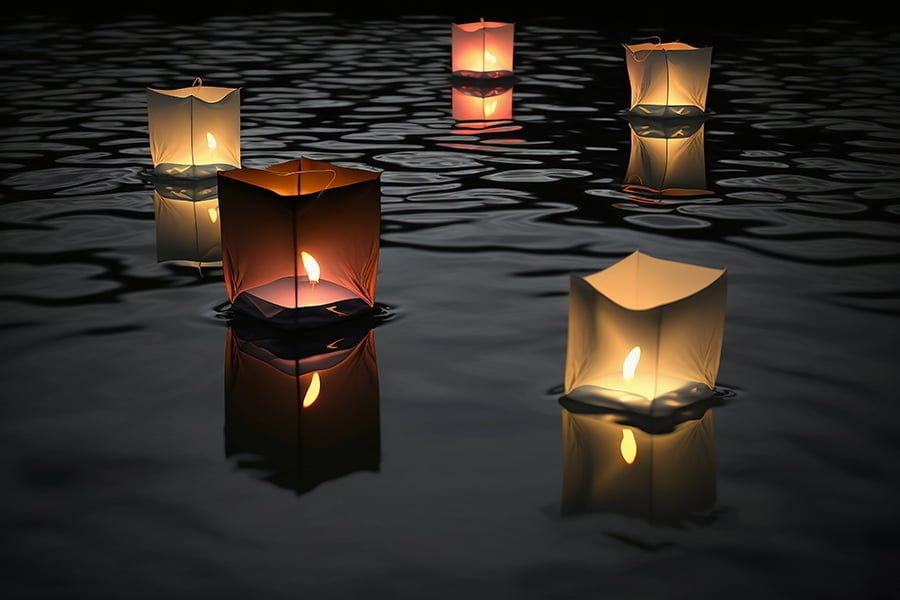
Paper lanterns can be an aesthetically pleasing and cost-effective alternative to traditional candle holders, but they also have potential downsides to consider. If you decide to use paper lanterns, consider using LED candles instead of real ones to mitigate the fire risk.
Pros:
- Aesthetically Pleasing: Paper lanterns can add a touch of elegance and ambiance to any setting. They come in a variety of colors, shapes, and sizes, which can complement any decor.
- Versatility: They can be used indoors and outdoors, and are perfect for parties, weddings, festivals, or any other special occasion. They can also be used as a permanent fixture in rooms for soft, diffused lighting.
- Portability: Paper lanterns are lightweight and easy to set up and take down. This makes them a good option for temporary events or when you want to change your decor often.
- Cost-Effective: Compared to traditional candle holders, paper lanterns are often less expensive. They also have the added benefit of providing more diffused light.
Cons:
- Fire Hazard: Perhaps the most significant disadvantage of using paper lanterns is the potential fire hazard, especially if you’re using real candles. Paper is highly flammable, and an open flame could easily ignite the lantern.
- Durability: Paper lanterns are not as durable as traditional candle holders. They are susceptible to damage from rain, wind, or even rough handling. They can also fade or discolor over time.
- Environmental Impact: If not disposed of properly, paper lanterns can contribute to litter and waste. This is especially true for lanterns that are released into the air, which can also pose a threat to wildlife.
- Lack of Protection: Unlike glass or metal candle holders, paper lanterns don’t offer much protection for the candle. This could be a problem if you’re using them outdoors and it’s windy.
Wooden Blocks
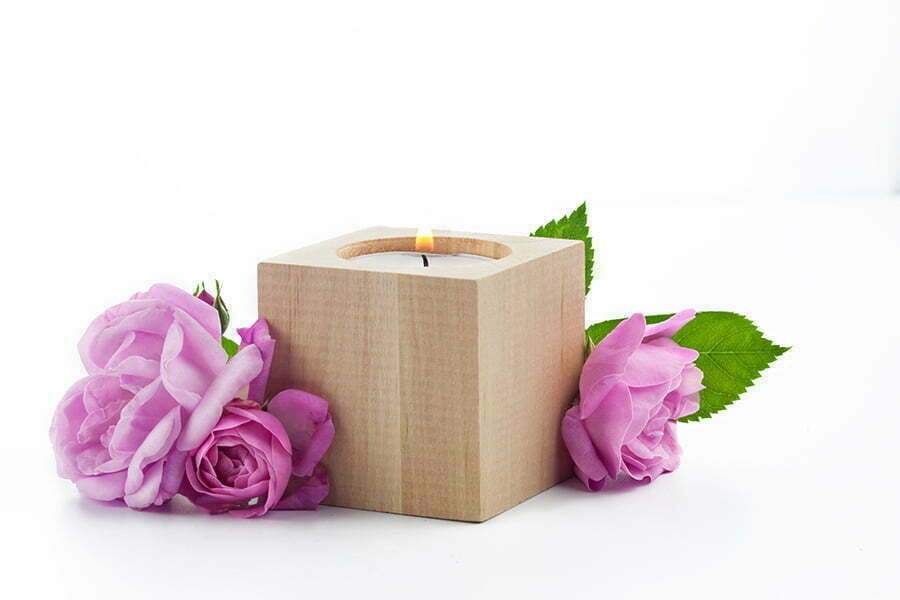
Wooden blocks are a great alternative to traditional candle holders. They offer a rugged appeal that can add warmth and texture to any room.
Wooden blocks come in various sizes, shapes, and finishes, making them versatile for different decor styles.
However, one disadvantage of using wooden blocks as candle holders is their lack of fire resistance. Unlike metal or glass candle holders that can withstand high temperatures without catching fire or melting, wooden blocks are more susceptible to heat damage.
It’s important to use caution when placing candles on wooden block holders and never leave them unattended while lit.
Despite this drawback, the unique look of wooden block candleholders makes them an excellent choice for those looking for an affordable yet stylish way to display candles in their home decor scheme.
Metal Cans
Metal cans are a great alternative to traditional candle holders. They come in various sizes and shapes, making them versatile for different decor styles.
One of the advantages of using metal cans as candle holders is that they are recyclable, which makes them an eco-friendly option. However, it’s important to note that metal cans do not provide any heat insulation and can become hot when candles burn down low.
Therefore, it’s essential to handle them with care or use caution when placing them on surfaces such as wood or fabric where they could cause damage if left unattended for too long. Metal cans make excellent budget-friendly options for creating unique candle displays while being mindful of the environment at the same time!
Glass Votives

Glass votives are a classic choice for candle holders. They offer a sophisticated and elegant look that can complement any decor style.
However, one disadvantage of glass votives is that fingerprints and smudges are easily visible on the surface, which can make them appear dirty or unappealing. To avoid this issue, it’s important to clean them regularly with a soft cloth or use gloves when handling them to prevent leaving marks behind.
Despite this drawback, glass votives remain a popular option due to their timeless appeal and versatility in design options such as etched patterns or colored tints.
Fruit Rinds
One unique and eco-friendly alternative to traditional candle holders is using fruit rinds. Not only are they biodegradable, but they also add a natural touch to your decor.
Simply cut the top off of an orange or grapefruit, scoop out the flesh, and place a tea light inside. The soft glow of the candle will shine through the rind creating a warm ambiance in any room.
However, it’s important to note that fruit rinds are not long-lasting as they can easily become moldy or start decomposing after just one use. If you have pets or small children in your home who may mistake them for food or toys, this option may not be suitable for you.
Overall though, using fruit rinds as candle holders is an inexpensive and creative way to add some natural flair to your home decor while being mindful of our planet’s health!
Ice Candle Holders
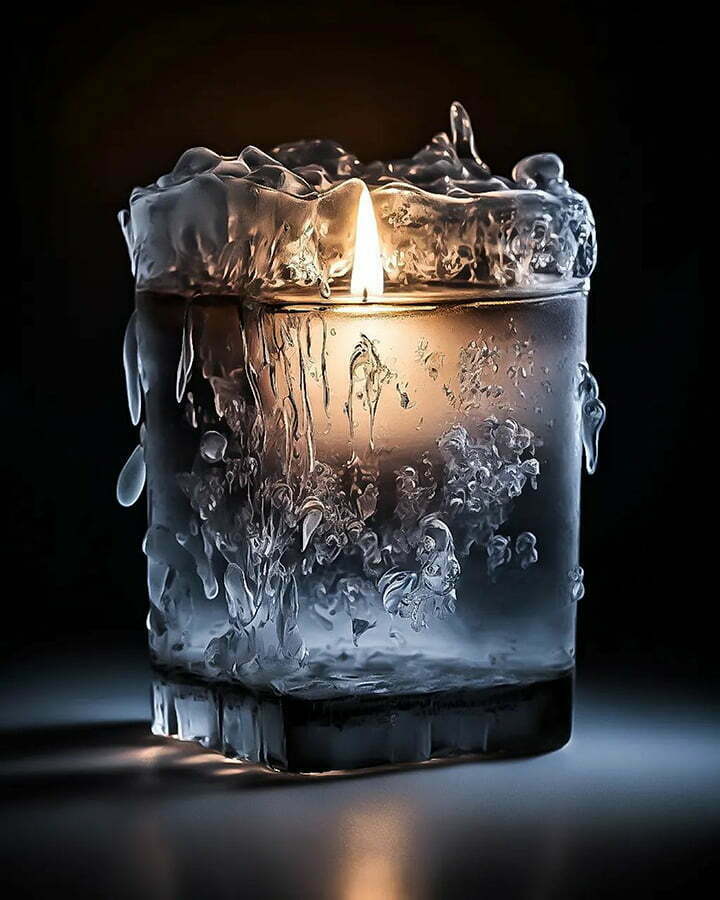
One unique and budget-friendly alternative to traditional candle holders is using ice. Ice candle holders are perfect for winter-themed decor, as they add a touch of elegance and sophistication to any space.
To create an ice candle holder, simply fill a container with water and freeze it overnight. Once the water has frozen solid, remove the container from around the ice block and carve out a small hole in the center for your tea light or votive candle.
While these DIY ice candles may look stunning on your table or mantlepiece during winter months, they do come with one major disadvantage: they melt quickly! As such, it’s important to use them only when you’re ready to light them up – otherwise you’ll be left with nothing but puddles of water on your furniture!
Resin Molds
Resin molds are a great alternative to traditional candle holders as they offer endless design possibilities. With resin, you can create unique shapes and patterns that cannot be achieved with other materials.
However, it’s important to note that creating resin molds takes time and patience. The process involves mixing the resin with a hardener, pouring it into a mold, waiting for it to cure and then removing the mold once set.
This can take several hours or even days depending on the size of your project. Despite this disadvantage, if you’re willing to put in the effort and time required for creating these stunning pieces of decor – they will definitely add an extra touch of elegance in any room!
Rocks or Pebbles
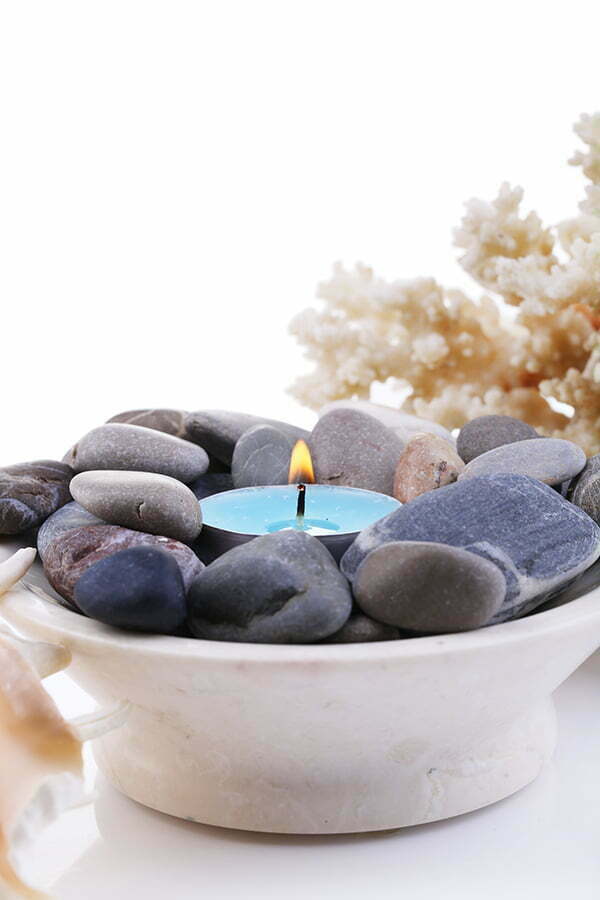
If you’re looking for a natural and long-lasting alternative to traditional candle holders, rocks or pebbles might be the perfect option. These materials are readily available in most outdoor spaces and can add an earthy touch to your decor.
However, one disadvantage of using rocks or pebbles as candle holders is that they can have a boring appearance if not arranged creatively. To make them more visually appealing, consider arranging them in interesting patterns or pairing them with other decorative elements such as plants or shells.
It’s important to ensure that the rocks are stable enough to hold candles securely without tipping over and causing a fire hazard.
Eggshells
Eggshells are a unique and eco-friendly alternative to traditional candle holders. They can be used as individual tea light holders or grouped together for a stunning centerpiece.
Using eggshells as candle holders is not only creative but also helps reduce waste by repurposing something that would otherwise be thrown away.
However, there are some disadvantages to using eggshells as candle holders. First, they are fragile and can easily crack or break if mishandled.
Second, their small capacity means that they may not burn for very long before needing to be replaced.
Despite these drawbacks, the beauty of using eggshell candleholders lies in their delicate appearance and natural texture which adds an organic touch to any decor scheme while being budget-friendly at the same time!
Balloon-dipped Holder
Looking for a fun and inexpensive way to add some color to your candle holders? Look no further than the balloon-dipped holder! This DIY project involves dipping a plain glass or plastic candle holder into melted wax, then immediately dipping it into a bowl of small, colorful balloons. The result is an eye-catching and unique piece that can be customized to match any decor.
One advantage of this method is its affordability – balloons are cheap and readily available at party supply stores. The range of colors available means you can create endless combinations for your candle holders.
However, one major disadvantage is limited durability. Over time, the balloons may start to peel off or lose their vibrant color as they come in contact with heat from the candles inside.
As such, this option may not be ideal for long-term use but rather as a temporary decorative touch for special occasions or events.
Cookie Cutter Shapes
If you’re looking for a festive and fun way to create unique candle holders, using cookie cutter shapes might be just the thing. This method involves pressing cookie cutters into sheets of clay or dough to create various shapes that can hold candles.
The advantages of this technique are that it’s an easy and inexpensive way to make personalized candle holders for holidays or special occasions. Plus, the variety of available cookie cutter designs means there’s no limit to what you can create.
However, one disadvantage is that working with clay or dough can be messy and time-consuming if you’re not used to it. Depending on the type of material used (such as air-dry clay), these candle holders may not last as long as other alternatives like metal or glass options.
Overall though, if you don’t mind getting your hands dirty in exchange for some festive decor pieces – give this option a try!
Old CDs Holder Stacker
If you have a stack of old CDs lying around, don’t throw them away just yet. You can repurpose them into a trendy retro-style candle holder stacker.
Simply glue the CDs together in a vertical position and insert candles into the center hole of each CD. This alternative candle holder is perfect for music lovers or anyone looking to add some unique decor to their home on a budget.
However, it’s important to note that this DIY project has limited stability due to the nature of stacking CDs on top of each other. It’s best used as an accent piece rather than something that will be frequently moved or touched by children or pets.
Tin Foil Cups
Tin foil cups are a popular alternative to traditional candle holders. They are easily shaped by hand, allowing for endless possibilities in terms of design and size.
They can be found at most grocery stores and are very affordable. However, tin foil cups have poor heat resistance which means that they may not be suitable for long-term use or larger candles that emit more heat.
It is important to keep this in mind when using them as candle holders to avoid any potential safety hazards such as melting or catching fire.
Lego Creations
If you’re looking for a fun and flexible way to create candle holders, consider using Lego bricks. With their endless possibilities, you can build unique designs that match any decor style.
Plus, if you get bored with one design, simply take it apart and start again.
However, it’s important to note that Lego creations are not fireproof. So while they may be great for holding LED candles or tea lights, they should never be used with real flames as the plastic could melt or catch fire.
Keep this in mind when deciding where to place your Lego candle holder creations in your home.
More Like This
 16 Great Dresser Alternatives That Make for Better Storage
 12 Cheap Bed Alternatives That You Can Still Use for Sleeping
 8 Alternatives of the Granite Countertop That Are Almost As Good
 7 Cheaper Concrete Floor Alternatives for Your Patio or Garage
 9 Beautiful Shower Pan Alternatives That Put Conventional to Shame
Recap