Last updated on
Here are some great DIY tutorials for creating a butcher block desk without spending a lot of money.
Building a DIY butcher block desk is a great way to add extra desk space to your home office. These tutorials will show you how to cut the butcher block to size, sand it down, apply gel stain, and protect it with a top coat of varnish or polyurethane.
With just a few tools and some basic woodworking knowledge, you can easily put together a desk in less than an hour.
What you need to know before you begin this project:
- You will most likely have to buy the butcher block (look for a cheaper thrift shop or reclaimed option.)
- You can build a butcher block from scratch if you want (it’s cheaper than buying new.)
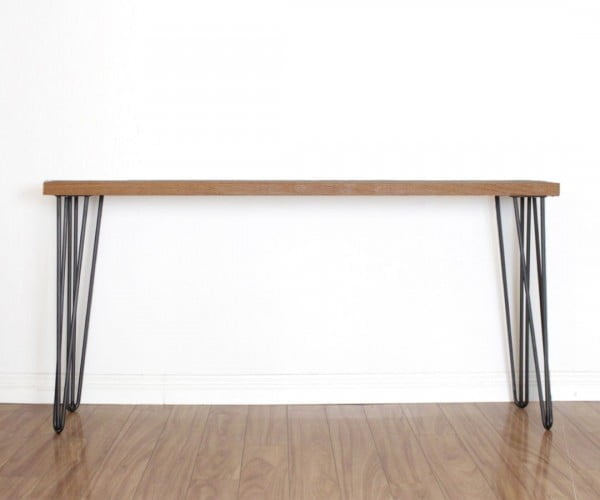
- A simple desk, much like a butcher block table, will only need hairpin legs attached.
- For extra storage space, you can put the top on cabinets.
- Don’t be afraid to experiment with stain colors.
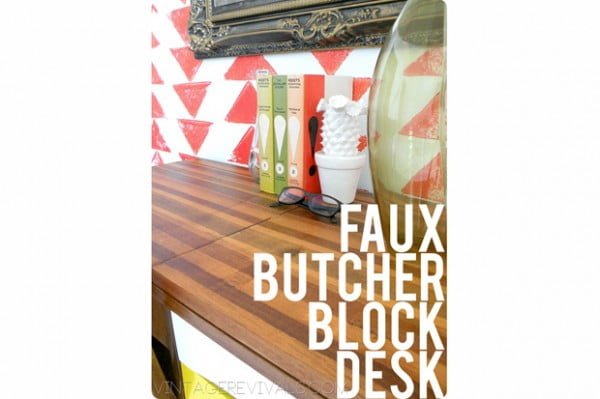
How to Make a Butcher Block Desk
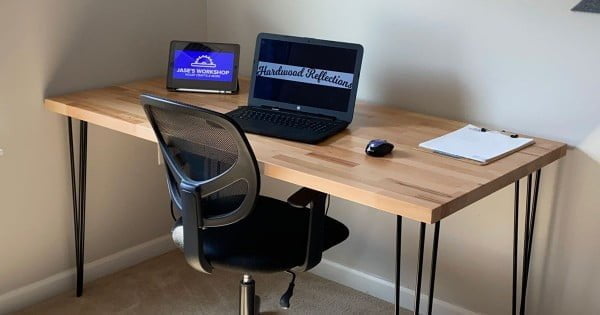
Tutorial: hardwoodreflections.com
Materials:
- Butcher block
- Gel stain
- Varnish or polyurethane
- Tape measure
- Saw
- Sandpaper
After watching the video, you will need to take some measurements and then cut the butcher block to size. Once you have cut the butcher block, you will then need to sand it down and apply the gel stain of your choice.
After applying the stain, you will need to let it dry and then apply a top coat of varnish or polyurethane to protect it. This project is not too difficult to complete, but it does require some basic woodworking skills and knowledge of how to use power tools.
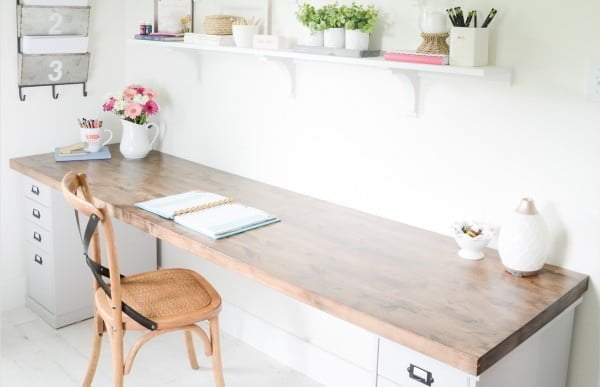
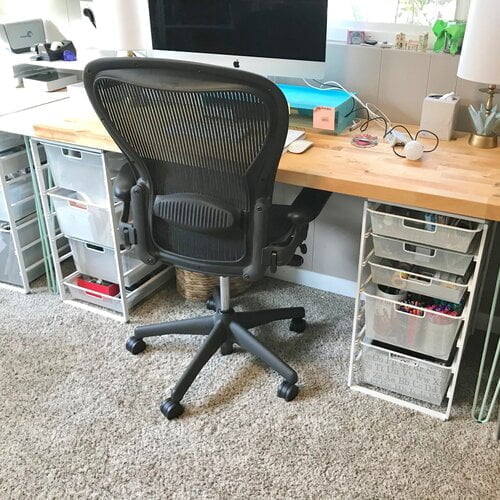
Tutorial: beneathmyheart.net
Expected cost: $50
Materials:
- Butcher block
- File cabinets
- Saw
- Drill
This project is a great way to add a lot of desk space to your home office. It is very easy to put together and only requires a few tools.
You will need a saw to cut the butcher block and a drill to attach the file cabinets. This project should take less than an hour to complete.
Tutorial: instructables.com
Expected cost: This project will cost around $100 to complete
Materials:
- 1×4 lumber
- Plywood
- Circular saw
- Jigsaw
- Drill
- 1 inch hole saw
- Paint or stain
- Polyurethane
This project is a bit more difficult than the average DIY project, but it is still doable for most people. It requires some basic woodworking skills and knowledge of how to use power tools.
The project will take some time to complete, but the end result will be worth it.
Tutorial: midmodernmama.com
Expected cost: $50-$100
Materials:
- 2 x 3 lumber
- Long wood screws
- Butcher block of your choice cut to length
- Storage racks
- Flat metal plates
- Legs for support
- Metal brackets
- Boiled Linseed Oil
This project is a bit more involved than some of the others on this list, but it is still doable for most people. You will need to be able to measure and cut the wood, as well as drill holes and screw in the legs.
The finish can be a bit tricky to apply evenly, but with some practice, it should be possible to get a good result.

Tutorial: repurposeandupcycle.com
Expected cost: This project will cost around $100 to complete.
Materials:
- Acacia butcher block
- Cabinets or Hairpin legs
This project is a bit more difficult than some of the others, but it is still manageable for most people. The difficulty will depend on whether you choose to use hairpin legs or base cabinets.
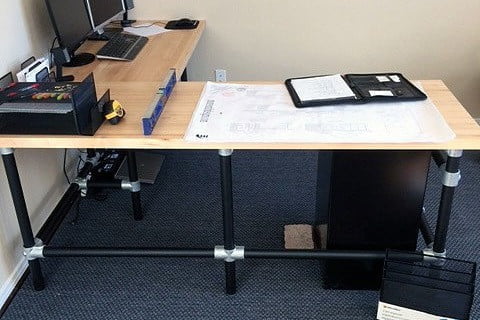
Tutorial: tylergarner.com
Expected cost: This project will cost around $100 to complete
Materials:
- 1 ½” x 25″ x 12’ Maple Butcher Block
- Table saw
- Galvanized steel pipe
This project is a bit more difficult than some of the others, but it is still doable for someone with basic woodworking skills. You will need a table saw to cut the butcher block. The piping legs are also a bit challenging to assemble.
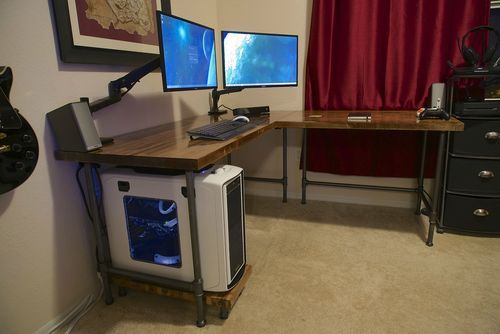
Tutorial: simplifiedbuilding.com
Expected cost: $100-$200
Materials:
- Piping
- Butcher block
- Table saw
This project is a great way to add an ergonomic computer desk to your office or home. It is a bit more difficult than some of the other projects on this site, but with careful planning and execution, it can be completed successfully.
Tutorial: homebyalley.com
Expected cost: $50-$100
Materials:
- 1×8 pine boards
- stain
- paint
- polyurethane
- saw
- tape measure
- chalk line
- hammer
- nail gun
- level
- sandpaper
This project is perfect for anyone looking to create a budget-friendly, durable desk with a wow factor. It can be completed in one weekend and only requires basic tools and materials.
The most important thing to keep in mind when completing this project is how to dispose of staining rags safely, as oil-based products are highly flammable.
Tutorial: californiahomedesign.com
Expected cost: This project should cost less than $50.
Materials:
- Plywood
- Ruler or measuring tape
- Circular saw
- Jigsaw
- Sandpaper
- Stain or paint
- Polyurethane
- Hardware (screws, nails, handles, etc.)
- Tools (drill, screwdriver, hammer, etc.)
This project is perfect for anyone who wants to add a personal touch to their home décor. It is a simple DIY that can be completed in a few hours, and only requires basic supplies and tools.
The end result is a unique and stylish piece of furniture that will add character to any room.
Tutorial: instructables.com
Expected cost: $50
Materials:
- 1×8 pine boards (8 feet long)
- 1×4 pine boards (8 feet long)
- 1×2 pine boards (8 feet long)
- 1×6 pine boards (8 feet long)
- 1×10 pine boards (8 feet long)
- 1×12 pine boards (8 feet long)
- 1 inch wood screws
- 2 inch wood screws
- Construction adhesive
- Wood glue
- Carpenter’s square
This project is a fairly easy one to complete, as it only requires basic woodworking skills and tools. It should take no more than a few hours to complete, and the end result will be a sturdy and stylish desk or workstation.
More Like This
 18 Thanksgiving Wreaths to Wow Your Door for the Festivities
 13 Thanksgiving Trees to Spruce Up Your Holiday Decor
 21 Thanksgiving Party Decorations That Gobble Up the Festivities
 25 Thanksgiving Centerpiece Ideas That Steal the Show
 25 Thanksgiving Tablescapes That Wow
Recap