Last updated on
Creating your very own Zen garden can be more affordable than you think, because there are numerous budget-friendly alternatives that can turn your outdoor space into a serene oasis.
I’m proud to present this collection of 20 affordable Zen garden ideas, each accompanied by my unique designs, and I sincerely hope they inspire you as much as they delighted me in creating them.
Creating a Zen garden on a budget is completely achievable, and the tranquility it brings is priceless.
With a little creativity and some savvy shopping, you can design a peaceful sanctuary in your own backyard.
This article will guide you through simple yet innovative ideas to create a Zen garden without breaking the bank.
From choosing affordable elements like gravel and rocks, to DIY projects like bamboo water features and meditation benches, you’ll find a plethora of budget-friendly options here.
So, if you’re ready to transform your outdoor space into a serene oasis, keep reading for all the details.
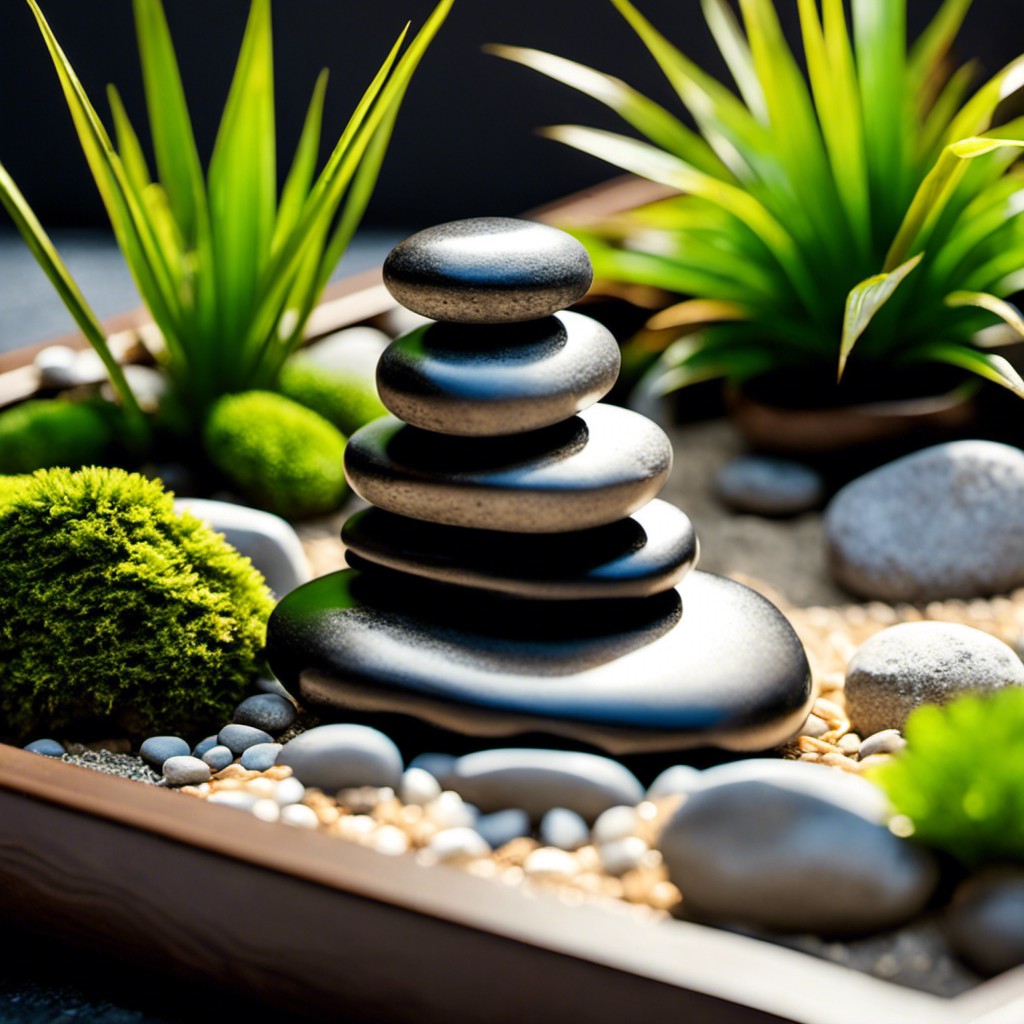
Use Local River Rocks
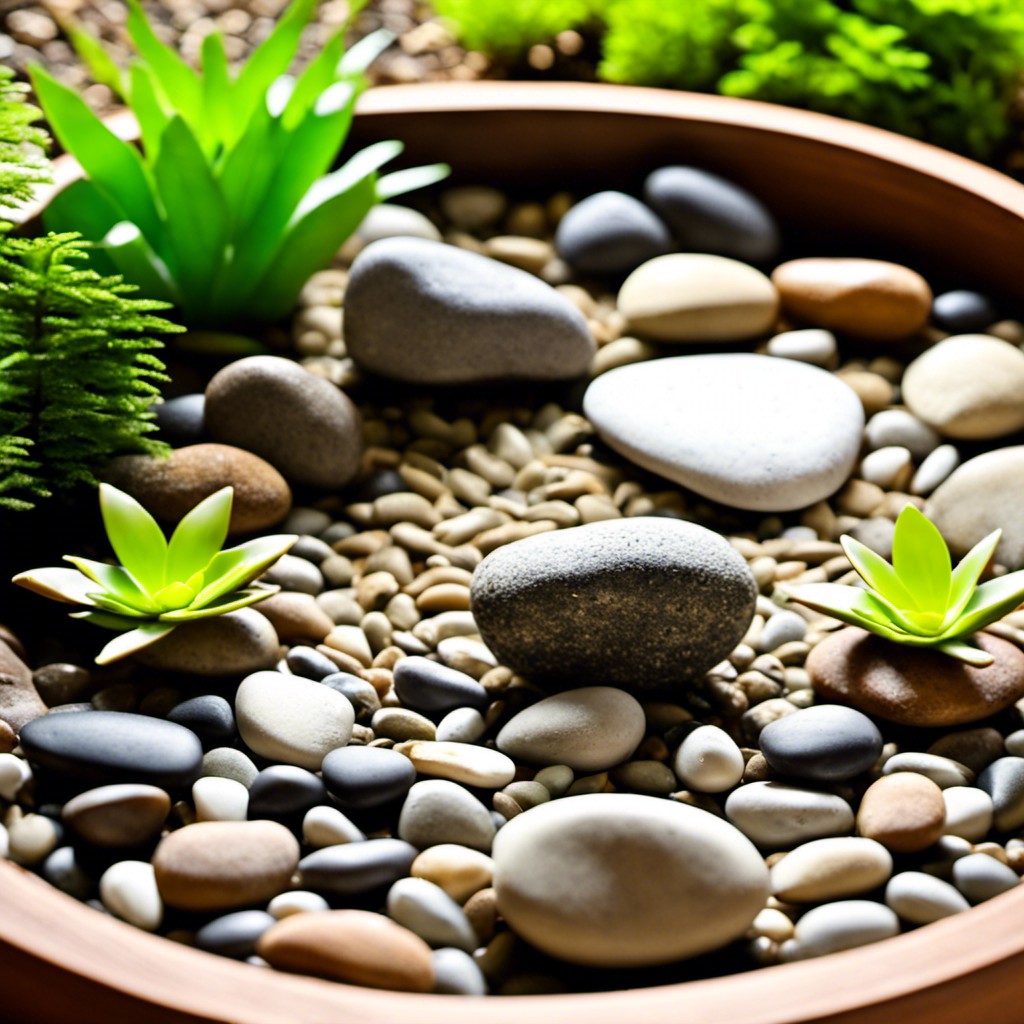
One of the great things about river rocks is their natural beauty. They create a calming, balanced atmosphere, essential for any Zen garden.
However, don’t just scatter them randomly. The art of placement, or ‘Ishi wo taten koto‘, is important in Zen aesthetics.
For a mesmerizing visual effect, group rocks in odd numbers like three, five, or seven.
Also, consider varying their sizes to imitate natural landscapes.
You can source river rocks locally to keep costs down and give the garden a native feel, further enhancing the Zen vibe.
Remember, each rock has a ‘face’. The most aesthetically pleasing side, which should be showcased when placed.
Carefully curated, these local river rocks can form the backbone of your Zen retreat.
Incorporative Native Plants
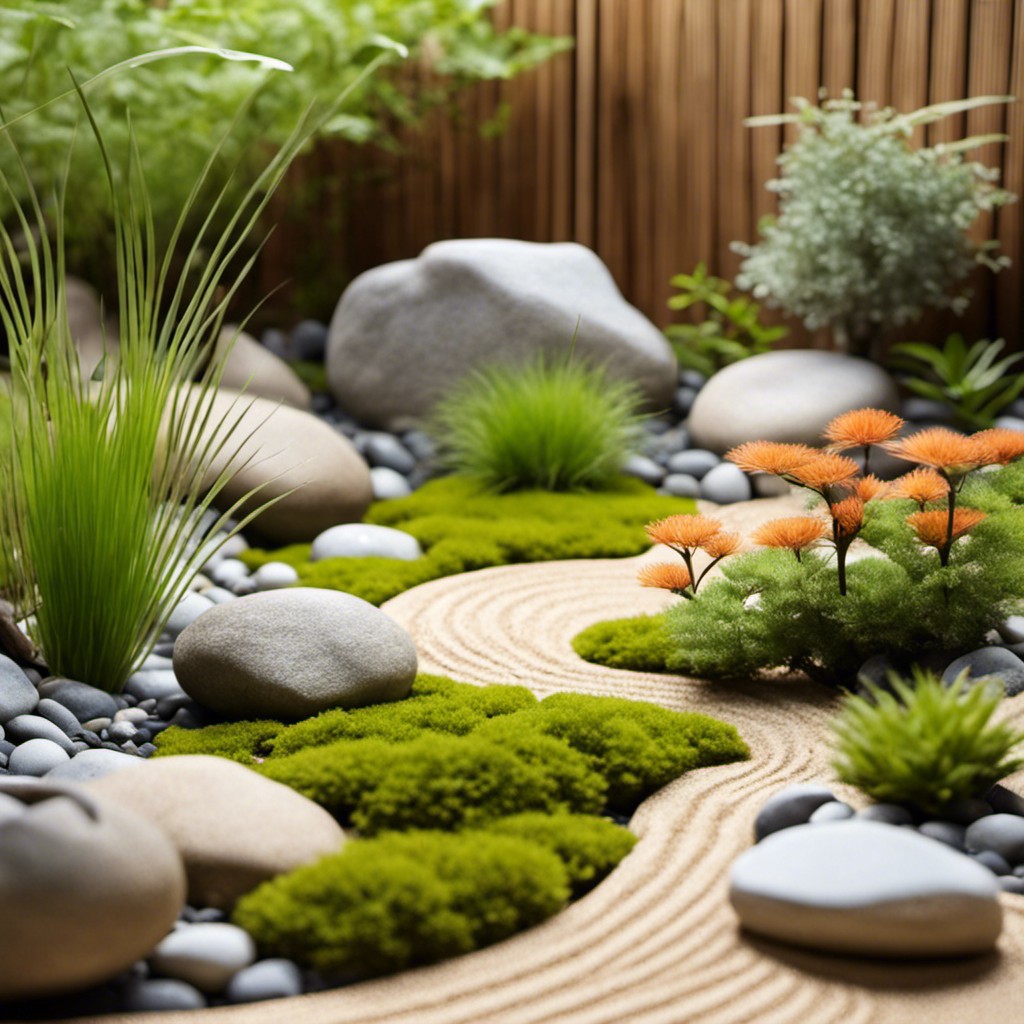
Choosing native plants for your zen garden contributes to both cost-efficiency and low maintenance. They adapt to the local climate and soil conditions better, making them less susceptible to pests and diseases which ultimately reduces the need for expensive chemical treatments.
Plants such as ferns, mosses, or flowering perennials can create a serene setting and are often found in local nurseries or even in your own backyard, saving you the expense of exotic imports.
To create a layered look, arrange them by height and spread, keeping taller ones in the back and smaller or spreading species in the front.
Always remember to group similar plant types together to optimize watering and light needs, further aiding in the conservation of resources, all while adding a fun design element to your garden.
Recycled Lantern As a Centerpiece
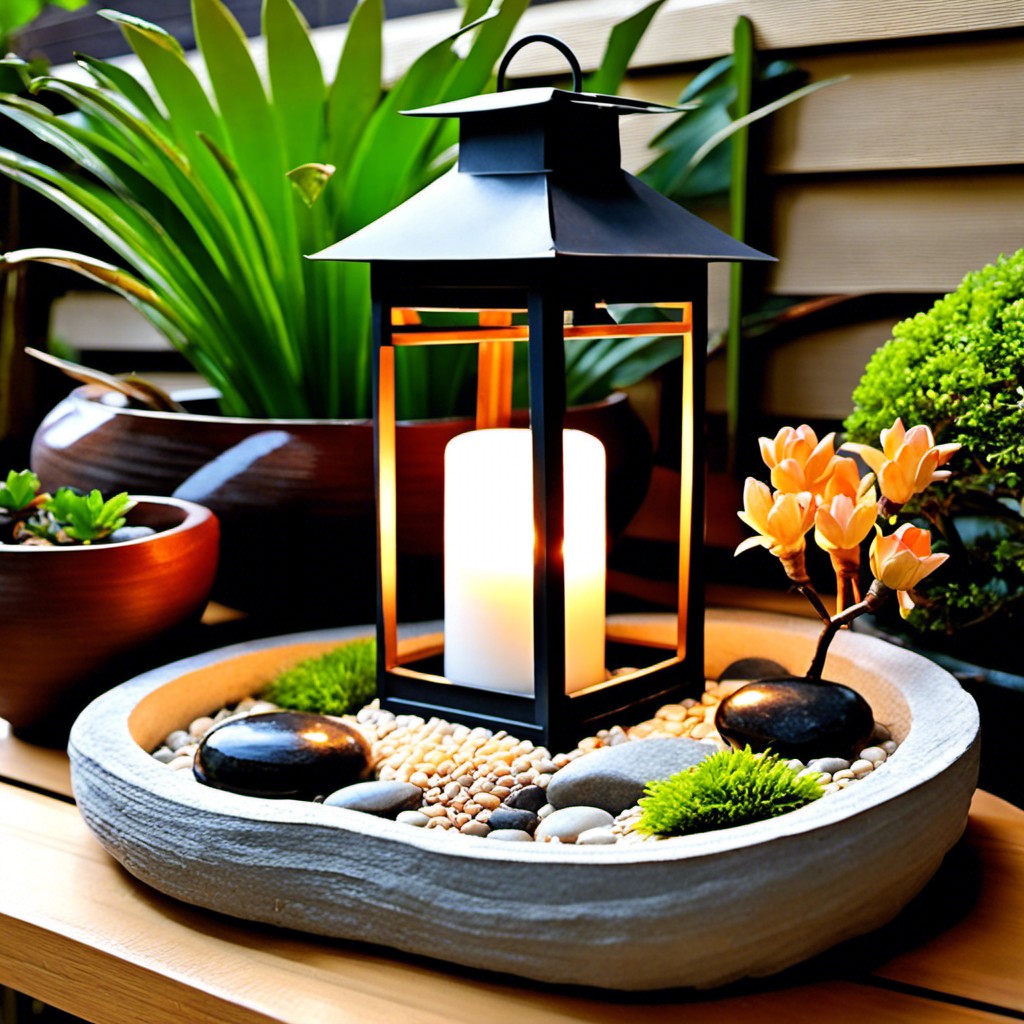
Repurposing an old lantern can significantly enhance your garden’s aesthetic appeal without breaking the bank. Begin by disassembling the lantern to give it a thorough cleaning. You might want to give it a dash of fresh paint or distress it for a rustic effect.
Use LED candles rather than real ones to provide that soft glow without accidentally starting a fire. Decorate around the lantern using small river rocks or sand to blur the boundaries of the centerpiece. Finally, consider adding small succulents, moss, or air plants that can thrive with little to no soil for an extra touch of greener.
This feature won’t require heavy maintenance and has the potential to be a conversation starter. Essentially, your creativity is your only limit!
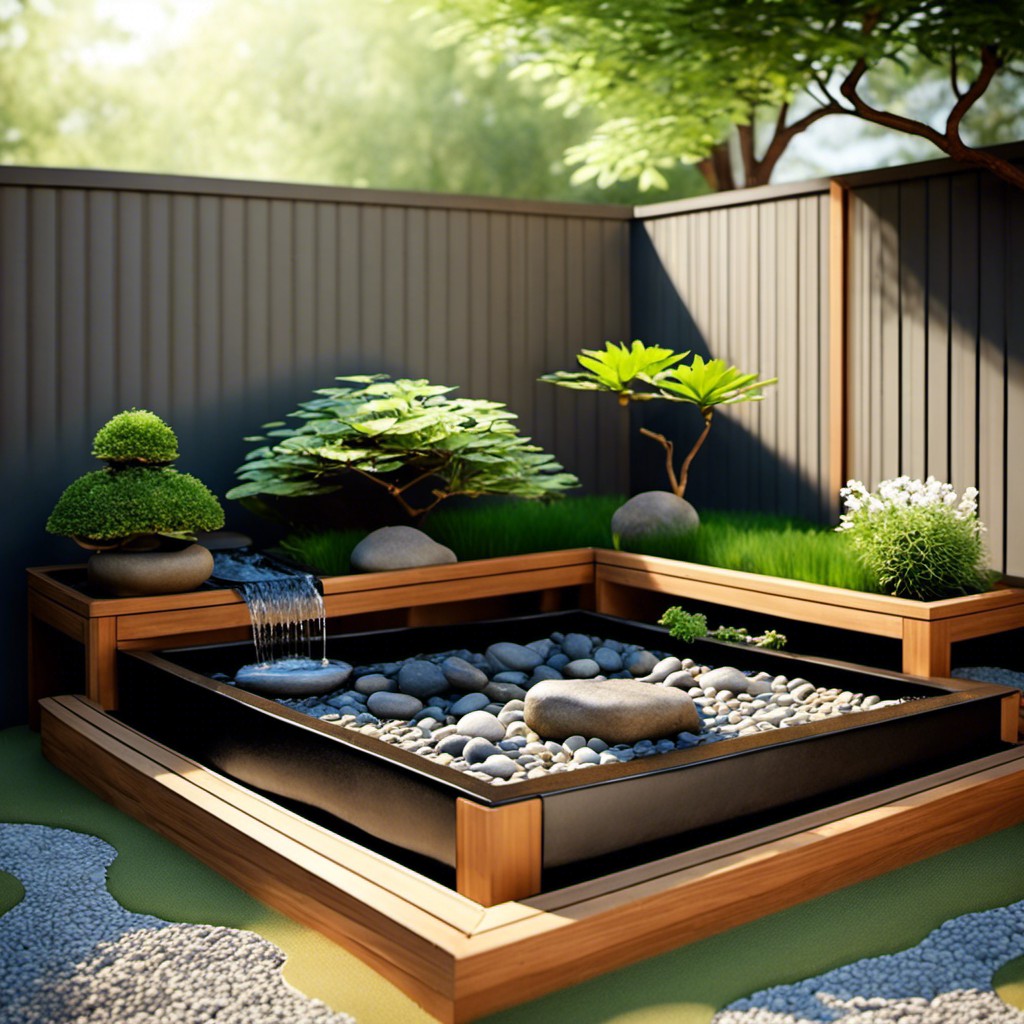
DIY Bamboo Water Feature
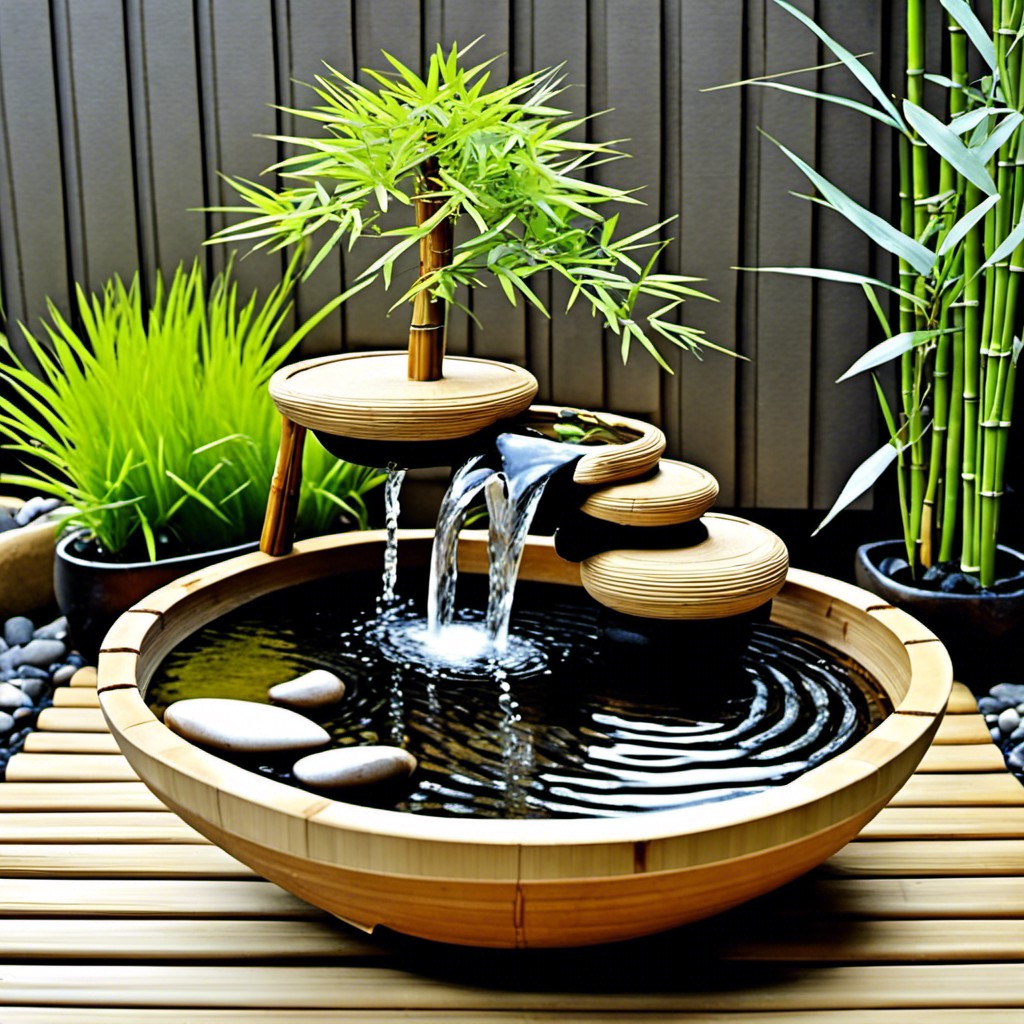
Harnessing the gentle, calming sounds of trickling water is easy with a DIY bamboo water feature. Start by selecting a bamboo cut to your preferred length, taking into consideration the proportions of your Zen garden – a balanced visual aspect is important.
Next, you’ll need a simple water pump available at any hardware store. The pump will project water through the bamboo shoot, simulating a waterfall or brook-like sound. A waterproof container or basin serves as a storage for the pump and collecting reservoir for water.
Remember to position the pump properly to ensure the water flows at a pleasing, consistent rhythm. Camouflage your setup using the river rocks or gravel from your Zen garden. Fill the container with water and voila! You have a customized, cost-effective bamboo water feature that not only adds an aesthetic wow-factor but brings calming, therapeutic vibes to your garden.
As a bonus, consider adjusting the water flow for a range of tranquil sounds. From a serene trickle to a babbling brook, your water feature can be tailored to suit your desired ambiance. Should you wish to go an extra mile, adding LED lights can enhance the feature’s visual appeal, especially during twilight hours. Enjoy your tranquil new addition!
Pea Gravel for a Low-cost Walking Path
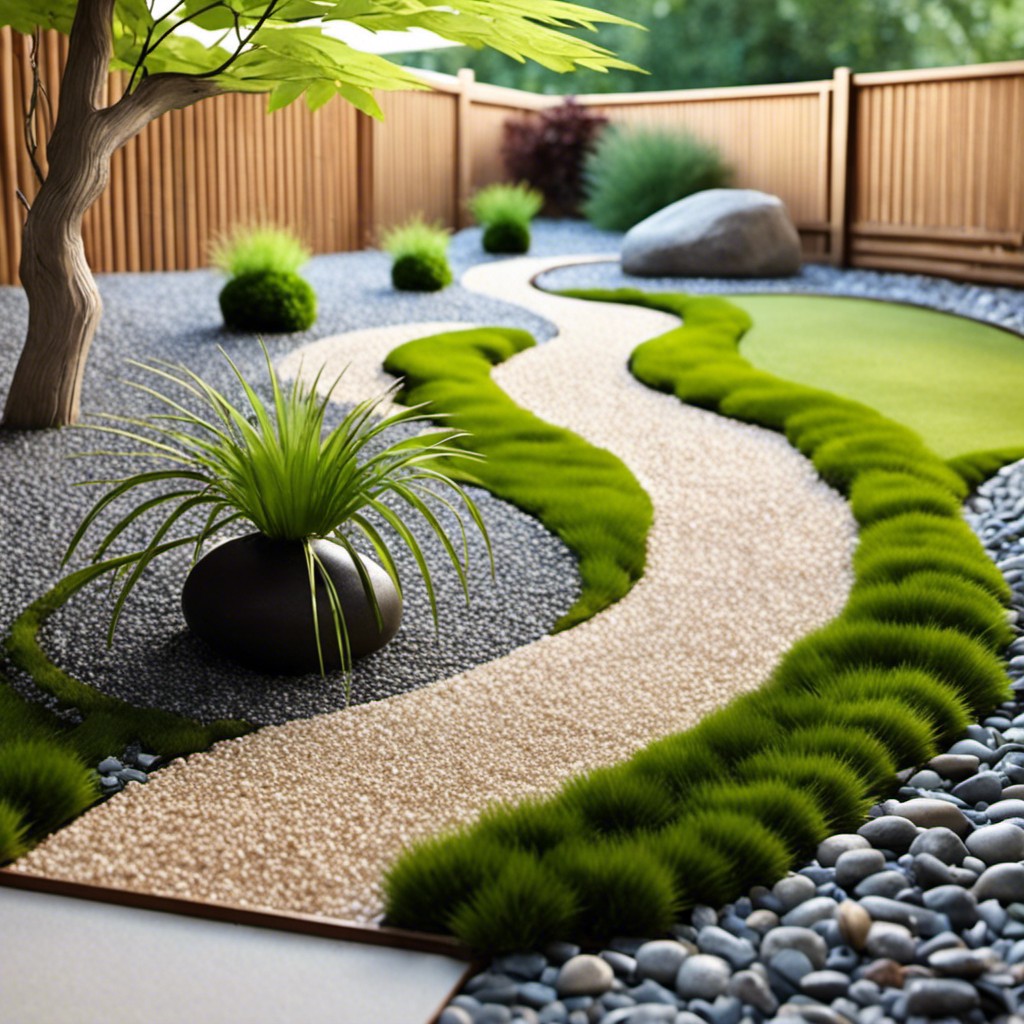
Incorporating an inexpensive pathway in your zen garden aids in navigating the space while promoting the essence of mindful walks. Pea gravel is a practical option for this. It provides a satisfying crunch underfoot and its rounded texture and neutral colors blend well with the natural surroundings. Easy to spread and maintain, it’s a win-win for budgets and aesthetics alike.
Here’s how to establish a pea gravel path:
- Begin by mapping out your path. Curved lines deliver a more natural, relaxed look.
- Next, dig out the rough shape to a few inches depth, evening out any undulations to ensure stability.
- Layer the bottom with a landscaping fabric. This prevents weed growth and enhances longevity.
- Fill the dug path with your pea gravel, maintaining a thickness of around 1-2 inches. This depth upholds comfort and stability when walked upon.
- For a crisp edge, consider bordering the path with brick, larger rocks, or timber.
Remember, maintaining a zen garden is an exercise in mindfulness itself. Enjoy constructing your new pathway!
Recycled Wood for Benches
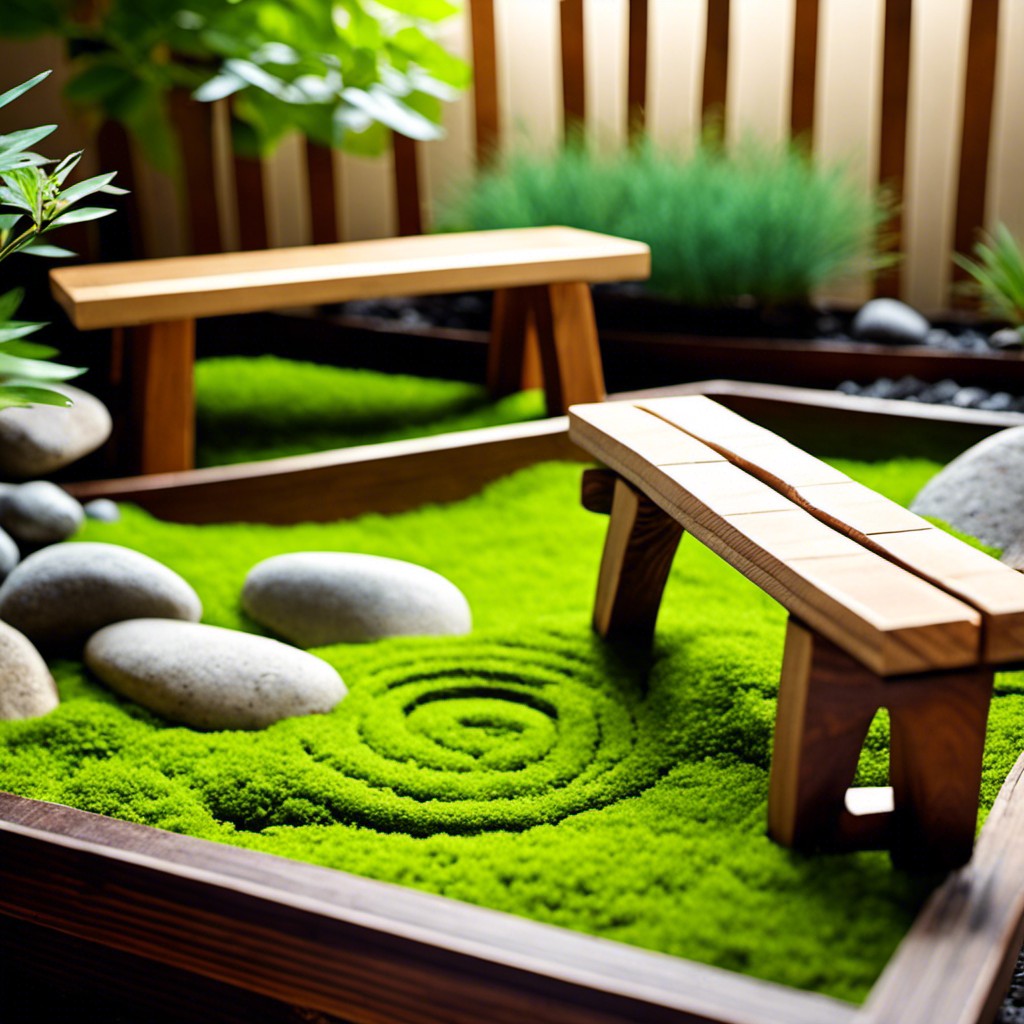
Finding the perfect spot in your zen garden is essential – a place where you can enjoy the peaceful surroundings, perhaps near your DIY bamboo water feature or within sight of your painted stones. Scouting local thrift stores, garage sales, or even your garage can often yield hidden gems. Dismantled pallets or aged barn wood are perfect materials to upcycle into your new bench.
Building your own bench not only saves costs but also adds a personal and unique touch to your garden. It doesn’t need to be perfect; even a couple of wooden planks supported by sturdy logs can make an appealing rustic seat. Remember to treat the wood with an affordable, eco-friendly preservative to increase its durability against weather elements.
You could even consider carving a little design or a quote on the bench. This makes it unique to your garden and a place of personal serenity. This bench becomes more than just a seat, but a place of reflection and calm in your own backyard oasis.
Painted Stones for a Pop of Color
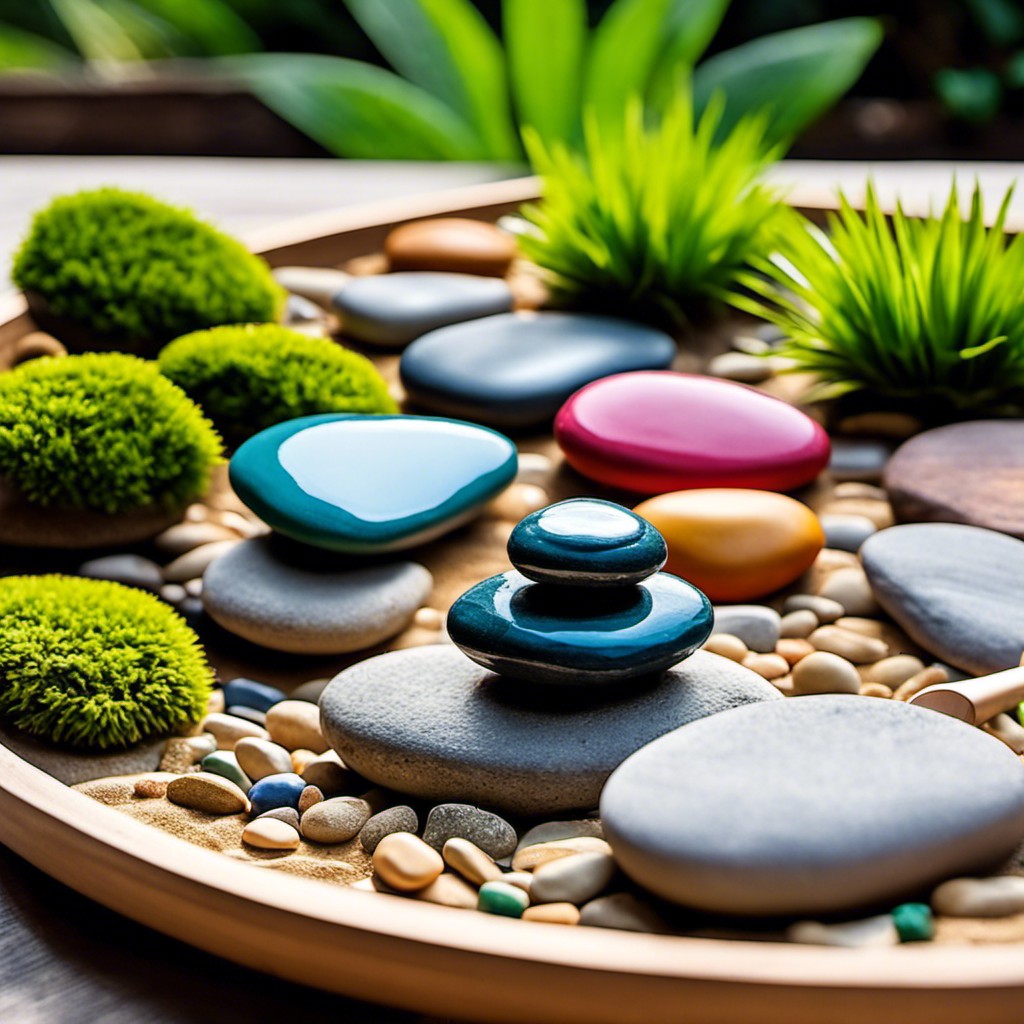
Dabbling into your creativity, consider breathing vibrant life into your collected stones. You need nothing more than a set of weather-resistant acrylic paints and brushes. These are easily available and often inexpensive, the perfect affair for keeping costs down.
Blossom your zen garden with hues from fiery reds to soothing blues; every color adds a different layer of tranquility. Floral motifs, abstract patterns, or even a simple monochrome palette not only enhances the aesthetic appeal, but also adds depth and interest.
Don’t be daunted if you’re not an artist; each irregular line or shape crafted by you brings personality into your garden. The painted stones serve not just as focal points but also as conversation starters. A simple act of painting stones ends up enriching your zen garden with a vibrant riot of colors, making it uniquely yours. This is the beauty of DIY initiatives – they personalise landscapes inexpensively.
However, diligently ensure to use non-toxic paints for nature’s well-being. Happy painting!
Old Ceramic Pots As Garden Decorations
Old ceramics can provide an unexpected and charming aspect to your zen garden. There’s no need to toss them out when they’ve outlived their initial purpose. A bit scarred and worn, they attractively embody the Japanese philosophy of wabi-sabi–the beauty of imperfection.
Cluster together for an intriguing focal point, or scatter individually for surprise elements amongst foliage. Don’t shy away from playing with colors and patterns; a bit of whimsy can be a delightful contrast against the serene greens and neutrals of the garden.
Ceramic pots can also play a functional role. Small ones can become quirky planters for succulents or bonsai trees, and larger ones can even serve as mini ponds if you’re keen to introduce some water elements into your space.
If you have bigger pots, you can use them as bases for stone lanterns or light features. It’s cost-effective, attractive, and a wonderful example of recycling and repurposing. Your garden will have more character, and you’ll have less clutter in your home, a true win-win situation.
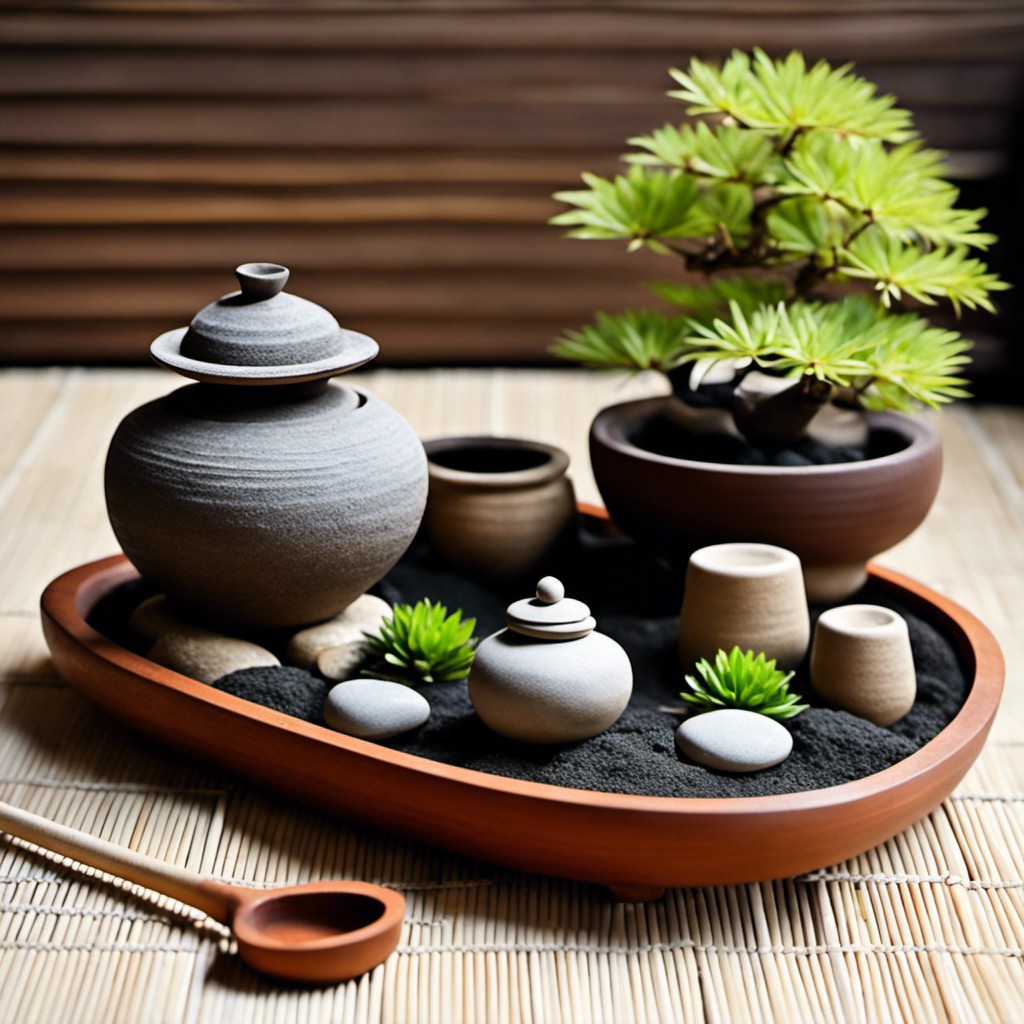
DIY Zen Sand Garden Section
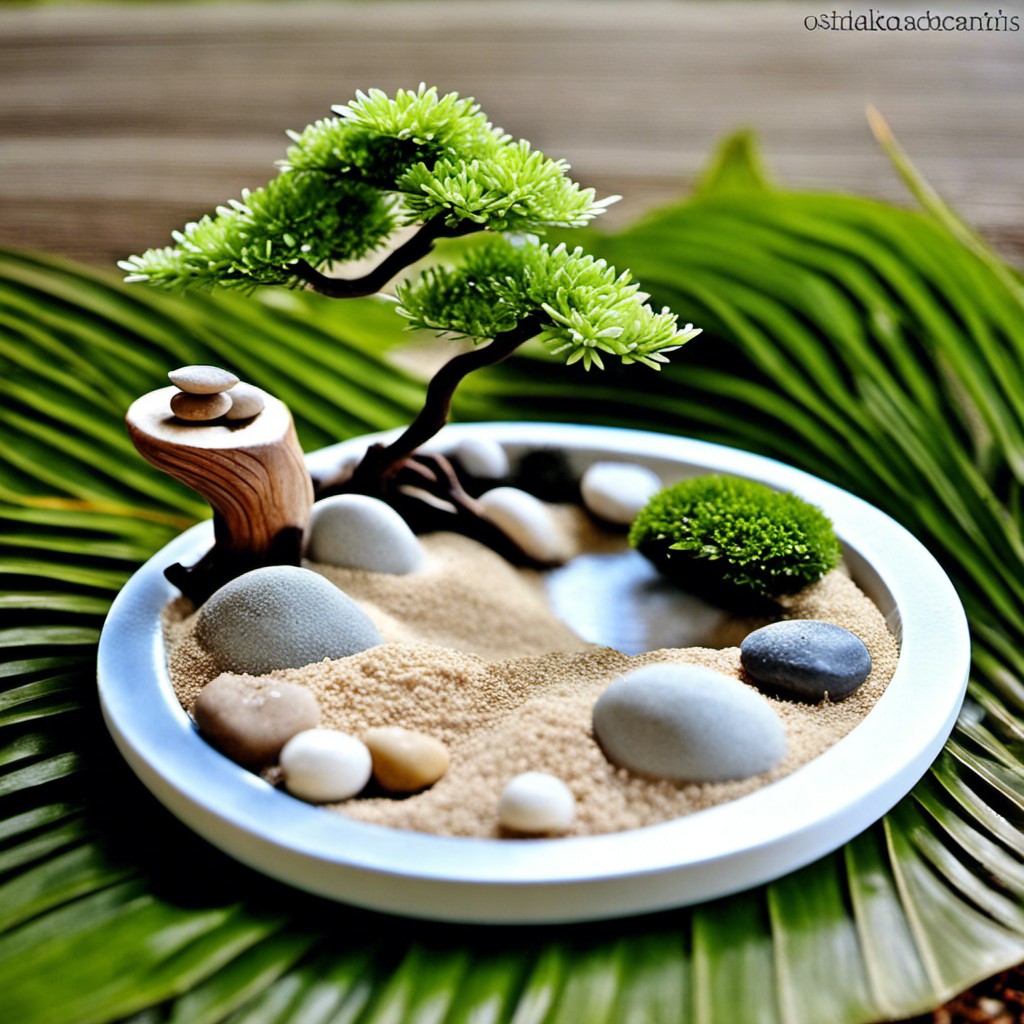
Crafting your own sand garden section, often referred to as a “dry landscape,” can transform your outdoor space into a tranquil, soothing haven. Follow these easy steps to achieve the desired Zen ambiance:
1. Choose a spot: Select an area that grants a sense of peace and tranquility. If space is a constraint, even a corner of your garden or a tabletop on your patio will suffice.
2. Shape the layout: Using timber or rocks, delineate the scope of your sand garden. Creativity is encouraged – it does not need to be a standard square or rectangle.
3. Fill with sand: Fill your designated area with fine white sand or gravel. Both of these are affordable and widely available, making the project budget-friendly.
4. Rake patterns: Create patterns in the sand to symbolize water ripples. This can be a calming, meditative practice, rejuvenating minds while instilling a Zen atmosphere.
5. Incorporate elements: To add visual interest, include a few rocks – but don’t go overboard. Rocks or stones represent mountains or islands in traditional Zen sand gardens.
Remember, Zen gardens are a means of reflection. Enjoy the process and feel the tranquility wash over you as you create your own miniature oasis.
Plant Moss Instead of Grass
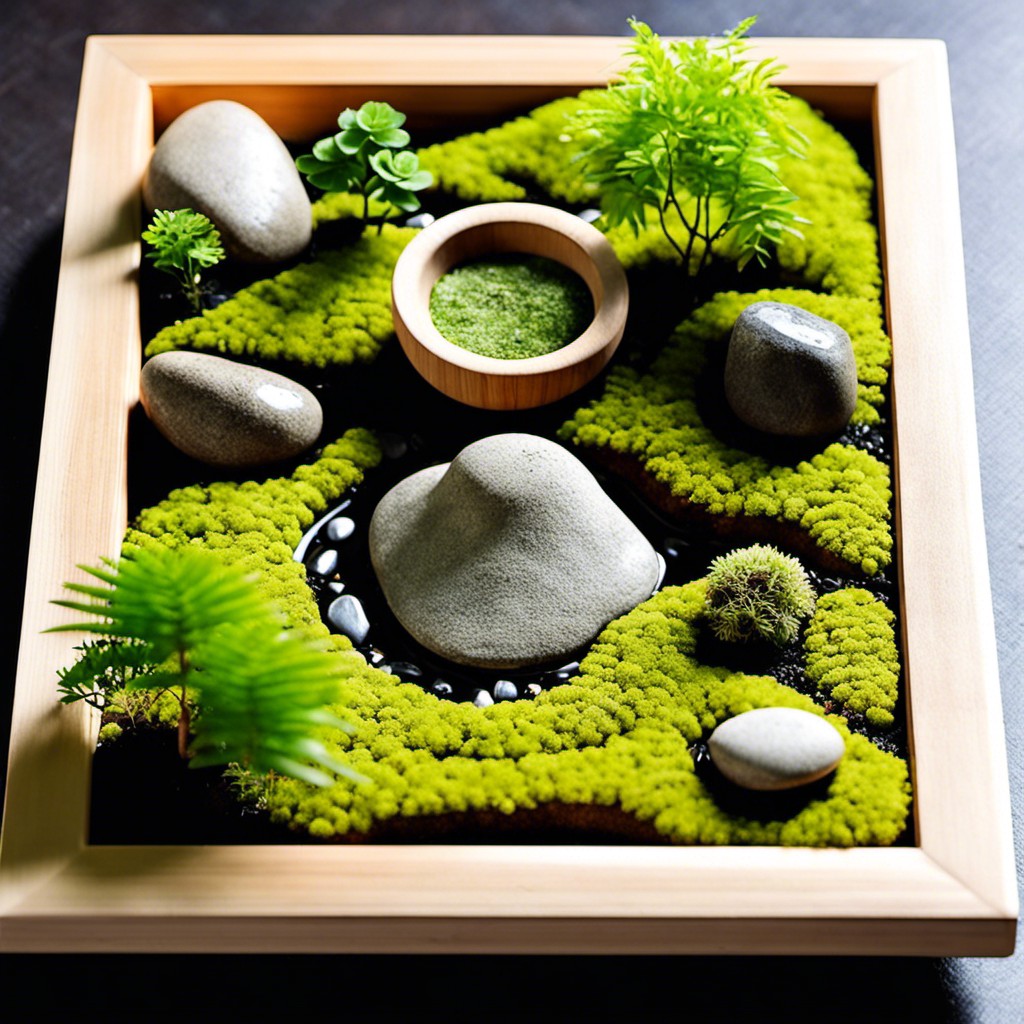
Choosing moss as a lawn substitute benefits both your wallet and the environment. Moss thrives in shaded, humid areas, requiring minimal maintenance and no mowing. Moss entry-level care costs far less than maintaining a traditional grass lawn.
Here are some key points to bear in mind:
- Preparation is simple; you need to clear the area from leaves and other debris; moss prefers a clean canvas to grow on.
- Moss can be propagated by division; from a single patch, you can cover a larger area.
- Keep the newly planted moss area moist for the first few weeks until it’s well established.
- Moss fills in the spaces between stepping stones and other hard features beautifully.
- Using a moss lawn for your zen garden not only saves water but helps in cooling the surrounding air.
Remember, patience is essential. Moss is a slow grower, but once established, it creates a magical effect in any Zen garden.
Utilize Fallen Leaves As Mulch
Collecting fallen leaves is an excellent way to reduce waste and enrich your garden’s soil. These leaves will decompose over time, providing necessary nutrients and improving the texture of the earth. It’s an eco-friendly approach that saves you on mulch cost.
Here’s how you go about it:
1. Rake the leaves into a pile: This can be a fun family activity during fall when leaves are plentiful. Remember, the more, the better!
2. Shred the leaves: Run your lawn mower over the pile a few times to quicken the decomposition process by increasing the surface area of the leaves.
3. Apply to your garden: Spread a 2-3 inch layer of shredded leaves around your plants and on any bare soil.
Remember: Don’t pile too much around the plant stems to prevent rot and pest infestation. Also, leaves can be a bit acidic, so it’s good to balance out with a bit of wood ash if available.
By following these simple steps, you’ll have a zero-cost, eco-friendly mulch for your zen garden. It not only keeps your ground moist but provides a natural backdrop that adds to the serenity of the garden.
Collect Rainwater for Plant Hydration
Maximizing nature’s bounty can truly help stretch your gardening budget. Harvesting rainwater is a method that not only benefits your wallet but also the environment. It’s a remarkably easy task!
To collect and store rainwater:
- Use simple barrels or trash cans: Place them under your gutter’s downspout to capture the flow.
- To avoid contamination from roof debris, consider adding a filter over the collection area.
- A spigot can be installed near the bottom to ease access to the collected water.
- Use a lid to prevent breeding of mosquitoes and other insects.
Residual minerals in rainwater can be significantly beneficial for your plants. Plus, it’s a softer water that’s free from harsh chemicals found in your household gathering. Feel the thrill of repurposing what nature provides, and watch your zen garden thrive.
Use Leftover Stones to Create a Rock Garden
Capitalizing on remnants from past projects presents an excellent opportunity. Leftover stones, whether from a landscaping project or a home renovation, can be beautifully repurposed into a stunning rock garden. Irregularly shaped stones add to the charm.
Here’s how to go about it:
1. Sort Your Stones: Begin by sorting your leftover stones by size, shape, and color. This way, it’s easier to determine the most aesthetically pleasing arrangement.
2. Pick a Spot: Find a suitable area in your garden – a spot that perhaps needs a bit of character. The edge of a path or the foot of a large tree can be a great choice.
3. Create Height: Use the larger stones to create some height. This not only adds depth to your garden, but it also makes it appear more dynamic.
4. Smaller Stones Add Texture: Fill in the spaces with your smaller stones. These act as the texture in your garden, much like how a painter uses smaller brush strokes between larger ones.
5. Consider Plants: For additional charm and a fusion of color, consider planting some rock-loving plants. Succulents and mosses often flourish in these environments.
Remember this is your creation! Experiment with placement until you achieve a balance that soothes your soul. With a little patience, you’ll have constructed a remarkable garden centerpiece from previously disregarded leftovers. Isn’t that a thrilling aspect of DIY projects? Repurposing with purpose!
In the next section, we’ll delve into another striking project: the DIY zen sand garden. Get ready to unroll those sleeves!
Create a Meditation Corner With Thrifted Items
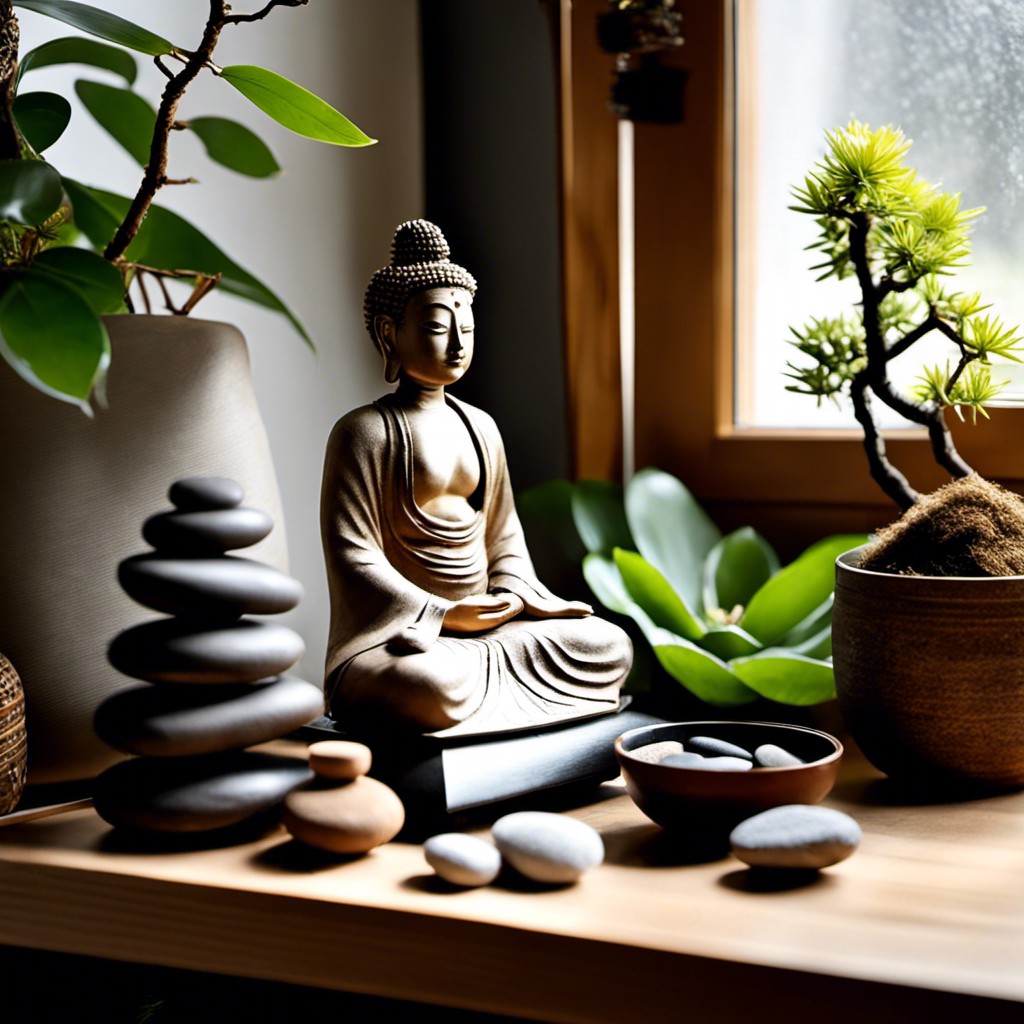
Creating your very own corner of tranquility doesn’t need to break the bank. Begin with a comfortable seating arrangement – a second-hand wicker chair or recycled textile pouf serves this purpose well. Add a side table from an old wooden crate for candles, a cup of tea, or crystal elements. Layer in some thrifted cushions and blankets, ensuring comfort during your meditation sessions.
Adding some soft lighting is crucial, consider inviting warmth by stringing up some budget-friendly LED fairy lights. Seek out discarded window frames or mirrors, which you can repurpose to reflect the light and amplify the serene mood.
Don’t forget the walls surround your corner. Hang up a fabric wall tapestry or some low-cost bamboo blinds to build a cozy, enclosed space. A reused canvas can be transformed into an inspiring art piece with some affordable acrylic paints.
The plants you’ve incorporated can help shape your area while purifying the air. Lastly, always on the lookout for sound elements, tuning bells from your local flea market or a DIY wind chime will help set the ambiance.
Remember, the idea is to construct a calm and personal space harmoniously composed of reused thoughtful elements. And the thrift store is a treasure trove of possibilities.
Make Your Own Japanese Stone Lanterns
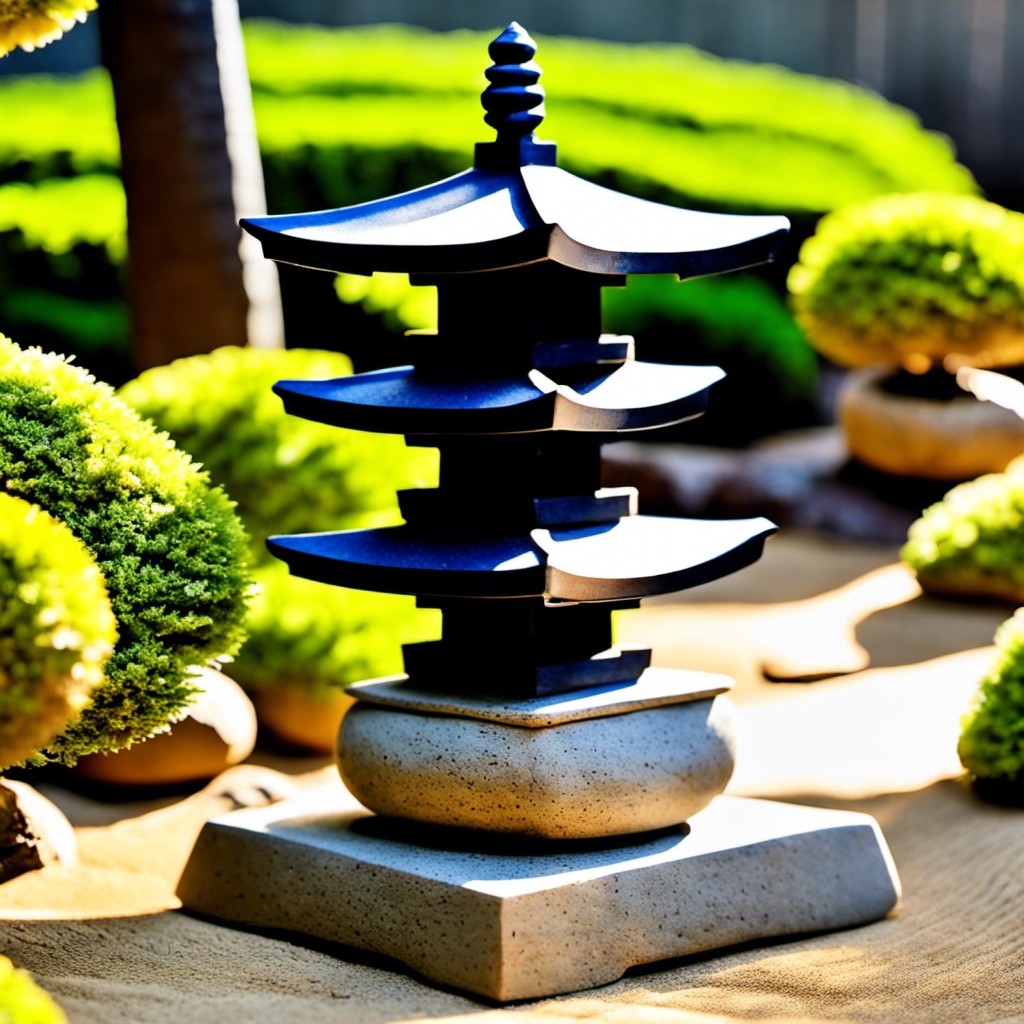
Forging your own Japanese stone lantern carries not only a sense of cultural history but it also brings an enticing ambiance to your zen garden. Here’s how to get started.
1. Choose an Appropriate Stone: Granite is the most traditional and sturdy, but any large, flat stone will do. Just ensure it has a smooth surface that you can safely carve.
2. Design before Carving: With a piece of chalk, sketch out the facade of a lantern. Include an area for the light bulb as well.
3. Chisel with Care: Start carving the stone following your design. Be gentle not to chip away too much in one go.
4. Hollow out a Space: Chisel out a space for light. Sand down inside to smooth out the surface.
5. Provide Light: Insert a solar-powered light or a weather-safe bulb. Always be sure to consider safety with electrical lights near potentially wet areas.
6. Weathering: Allow some seasons to pass for the lantern to gain a natural weathered look adding authenticity to your zen garden.
A homemade Japanese stone lantern becomes more than just a decoration, it’s a testament to your handiwork and dedication to your zen oasis. Plus, you’ll save more as compared to buying a traditionally made one!
Upcycle Wine Bottles Into Garden Borders
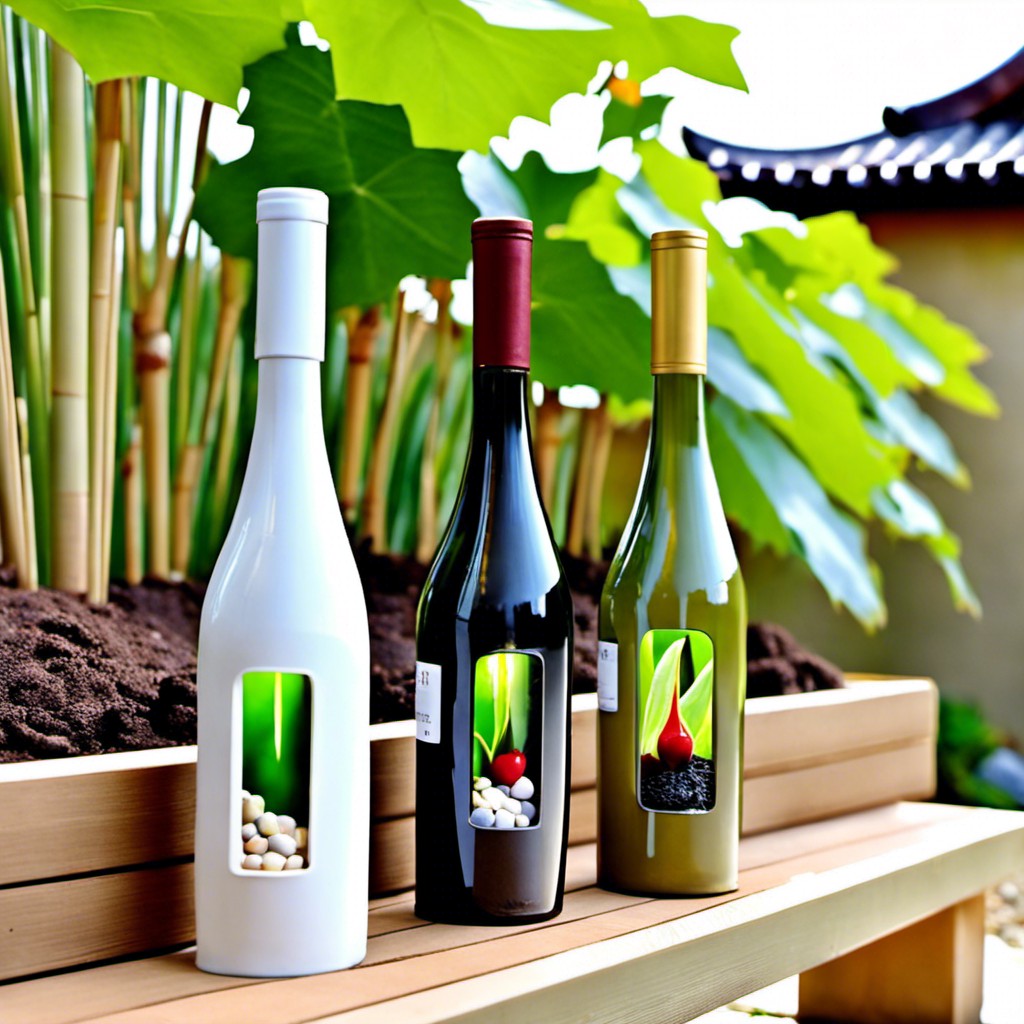
Transforming wine bottles into garden borders not only gives your zen garden a unique edge, but it also helps reduce waste.
Here’s how:
- Choose bottles with varied colors and shapes for a more appealing look.
- Remove labels and rinse bottles thoroughly.
- Dig a trench around your garden edges.
- Lower the wine bottles upside down into the trench, making sure they’re tightly packed against each other.
- Fill in the gaps with soil, securing the bottles.
This practice is an ode to the zen principle of impermanence, repurposing something fleeting – an empty wine bottle – into a permanent feature of calming beauty.
It’s also a celebration of resourcefulness, embodying the very soul of budget-friendly décor.
DIY Concrete Stepping Stones
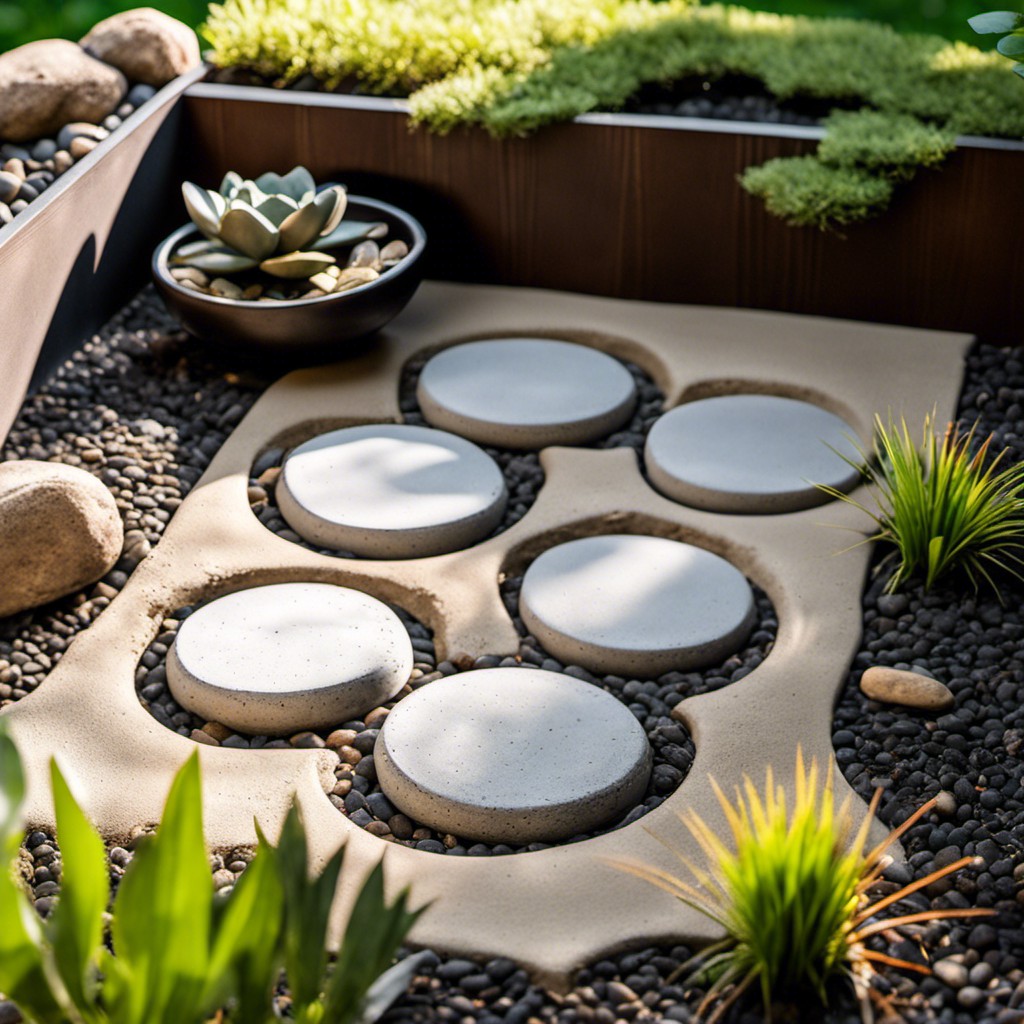
Crafting your own stepping stones isn’t just an economical approach, it’s also an opportunity to add personal touches to your Zen garden.
Start with a bag of ready-mix concrete, some water, and a mold. Anything can act as a mold – from leftover aluminum roasting pans to plastic plant pot trays.
To make the stones, mix the concrete according to the bag’s instructions, then pour it into the mold. For a smooth finish, manually tap the sides of the mold to eliminate air bubbles.
While the concrete is still wet, consider pressing objects into the surface to create patterns or designs. This could be leaves, pebbles, or even old keys or coins for an unexpected and personalized touch. Allow the concrete to cure – this usually takes about 24 hours. Once fully dry, your unique stepping stones are ready to be positioned in your Zen garden path.
Remember to be mindful of where the stones are placed. Their purpose is to guide both the eye and the feet to areas of interest, subtly encouraging exploration and discovery within your serene space. By crafting these stepping stones yourself, you’re not only saving money but also infusing your garden with your unique charm and personality.
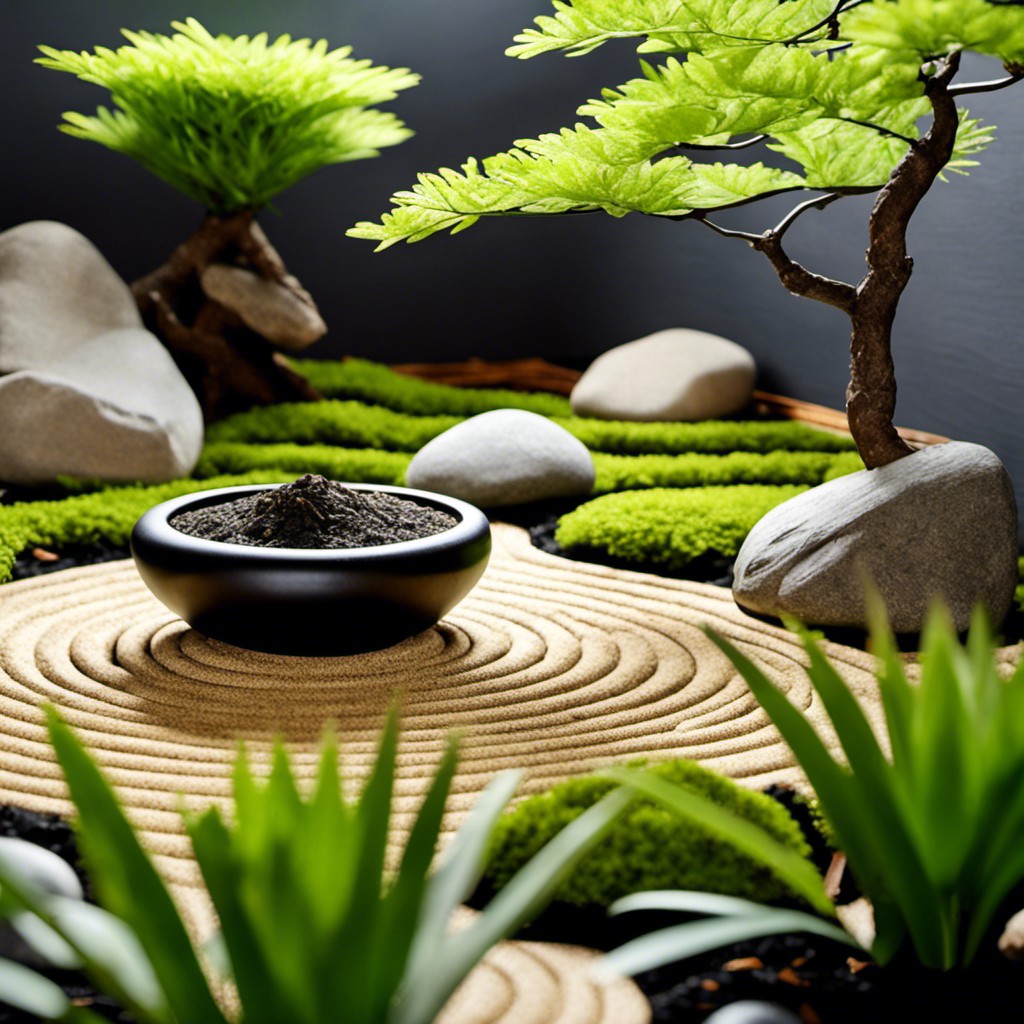
Grow Your Own Bonsai Trees
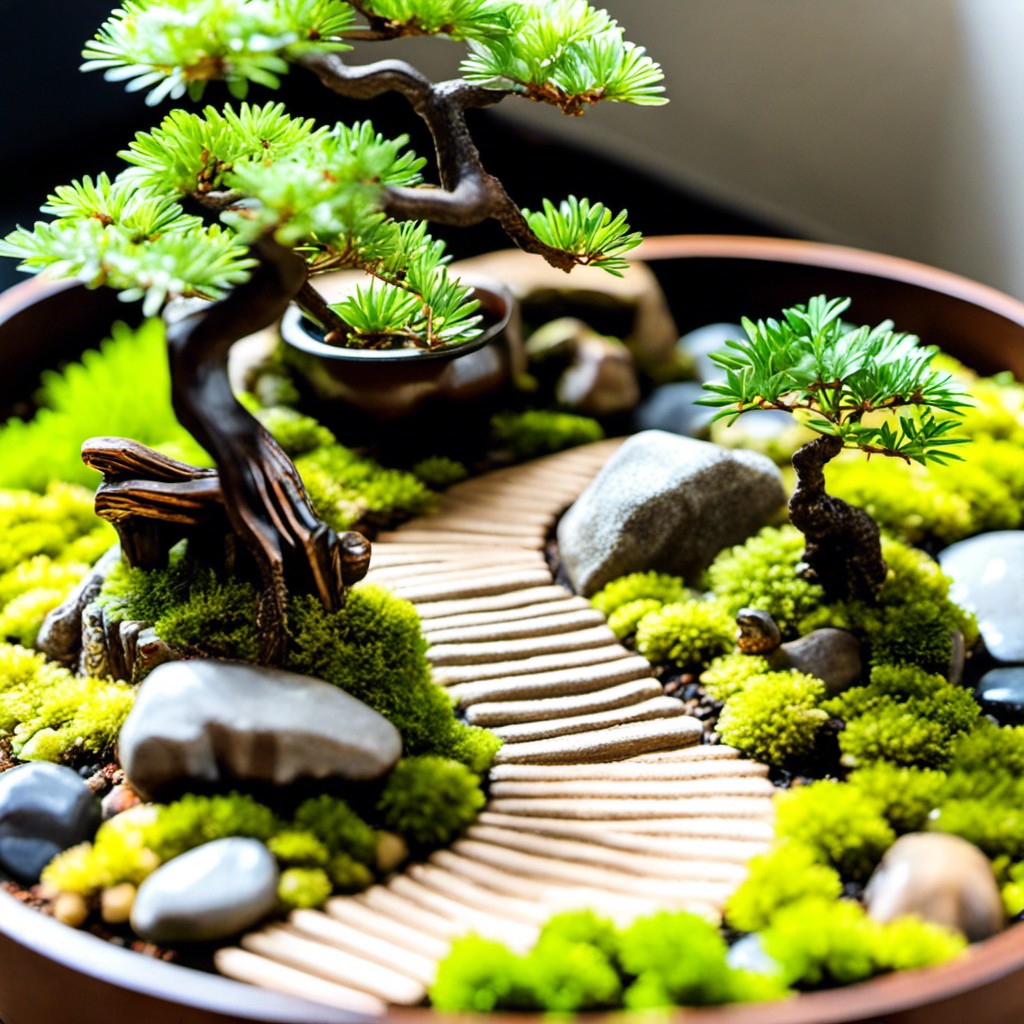
Starting at home may sound daunting, but when done right, can serve as a fulfilling means to not just save money, but also add a personal touch to your garden. Bonsai trees, despite their miniature stature, are no less of a statement-making piece!
1. Selection: Opt for species that have small leaves naturally.
2. Starter kits: A great place to begin, usually includes the seeds, soil, and container.
3. Pruning: A key practice that helps maintain their small size.
4. Watering: Bonsai trees require daily care but avoid overwatering.
5. Light: Providing plenty of indirect light is ideal.
6. Temperature: They typically prefer cooler conditions.
7. Re-potting: Every two to three years can be ideal to promote growth.
Remember, patience is of the essence here – from the initial germination to final pruning, the process requires diligence and time, but the end result is well worth it, creating a beautiful, tranquil addition to any Zen garden.
Use Secondhand Slate for a Path
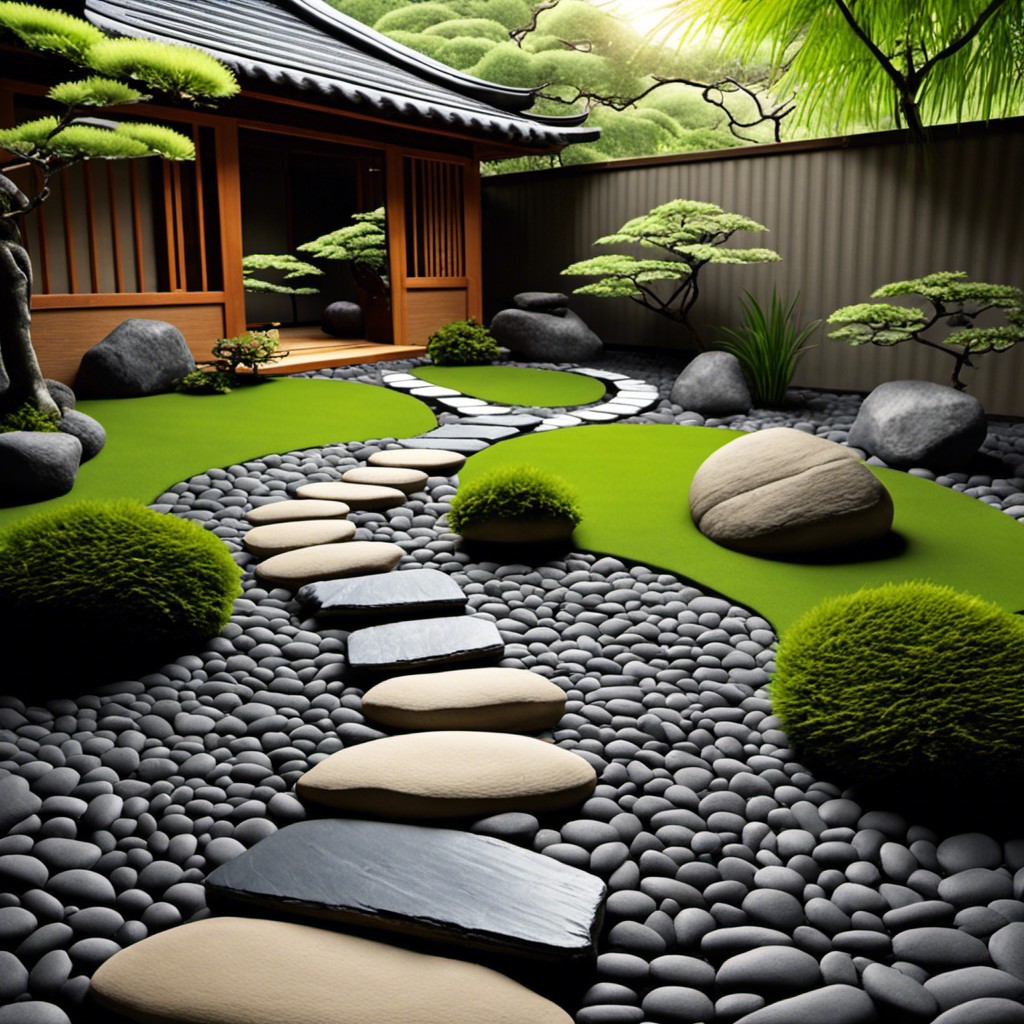
Finding the perfect material for your Zen garden path doesn’t need to be a costly endeavor. Secondhand slate, often available at a fraction of the cost, presents an impeccable choice, seamlessly blending into the serene surroundings while offering robust functionality.
Slate tiles – they are weather-resistant, a key attribute for outdoor applications. Furthermore, their natural flatness provides easy installation and a sleek walking surface.
Sources – home improvement stores, online platforms like Craigslist or Freecycle, or even local yard sales prove fertile grounds for sourcing secondhand slate.
Doing the job yourself – With a little creativity and some basic tools, you can lay down the slate path yourself, saving additional expenses.
Remember, it is not about creating a perfect geometrical design, the charm of Zen lies in harmony and balance. Arrange the slate pieces in a way that reflects the natural chaos of nature, and you’ll have a beautiful, inexpensive path that invigorates your Zen garden.
Upcycled Pallet Planters
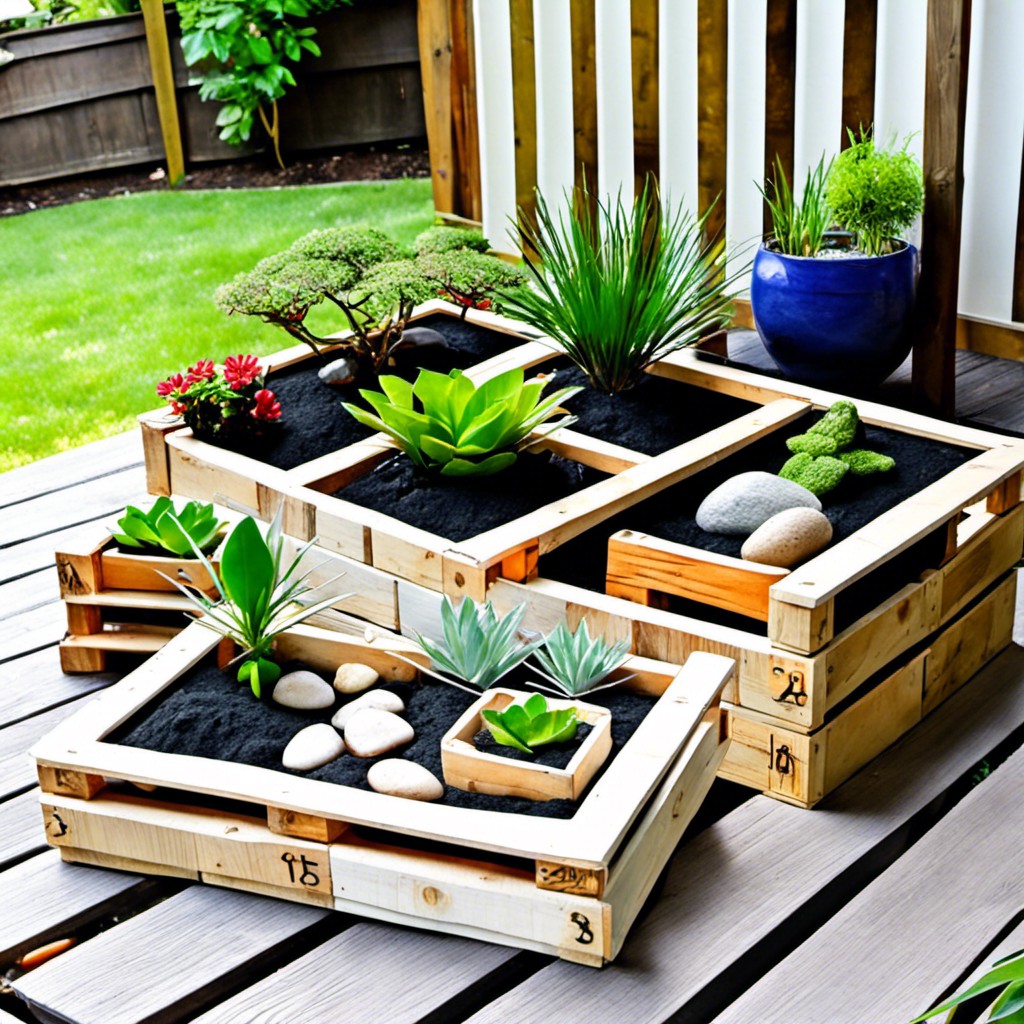
Securing some pallets might be easier than you think, especially if you live nearby any warehouses or stores. Break the pallets apart carefully to avoid any unwanted splinters. Select the best pieces and clean them thoroughly using soapy water before allowing them time to dry.
Next, arrange your cleaned wood into a box shape, affixing the corners with nails or screws. Depending on the chosen size and amount of soil, consider reinforcing with added wooden struts for stability.
Remember to drill some holes at the bottom for drainage to ensure plants won’t sit in a pool of water — this is crucial for their health. Once structured, line the pallet planter with landscaping fabric. This prevents soil runoff and provides an added layer of protection for the wood, enhancing durability.
Finally, fill the planter with soil and pick your favorite plants. Whether it’s succulents, herbs or flowers, your upcycled pallet planter is an innovative, sustainable, and cost-effective addition to your zen garden, serving both a practical and decorative purpose.
More Like This
 23 Splashy Small Pool Design Ideas
 22 Natural Swimming Pool Ideas to Dip Into
 21 Mini Vegetable Gardens for Any Space
 21 Mini Japanese Gardens That Will Make You Feel Zen-tastic
 24 Unique Garden Art Ideas That Will Make Your Neighbors Jealous
Recap