Last updated on
Professionals typically use a combination of sanding, priming, and applying a new finish or paint to refinish kitchen cabinets.
Key takeaways:
- Professionals use a combination of sanding, priming, and applying a new finish or paint to refinish kitchen cabinets.
- Disassemble the kitchen and label each piece for easy reassembly.
- Mask off the kitchen to protect countertops, appliances, and floors.
- Prep cabinet surfaces by cleaning, sanding, and addressing imperfections.
- Use wood filler for damage repair and sand cabinets to achieve a smooth surface.
Disassemble the Kitchen

Before diving into the refinishing process, careful removal of cabinet doors, drawers, and hardware is essential. This facilitates access to all surfaces that will be treated. Label each piece and store the corresponding hardware in bags to ensure a smooth reassembly process after the refinishing is complete.
Keep in mind that working on flat, horizontal surfaces minimizes the risk of drips and allows for a more controlled application of primers and paints. It’s also advisable to protect countertops, appliances, and flooring with drop cloths or plastic sheeting to guard against accidental spills or splatters during the refinishing steps that follow.
Mask Off the Kitchen
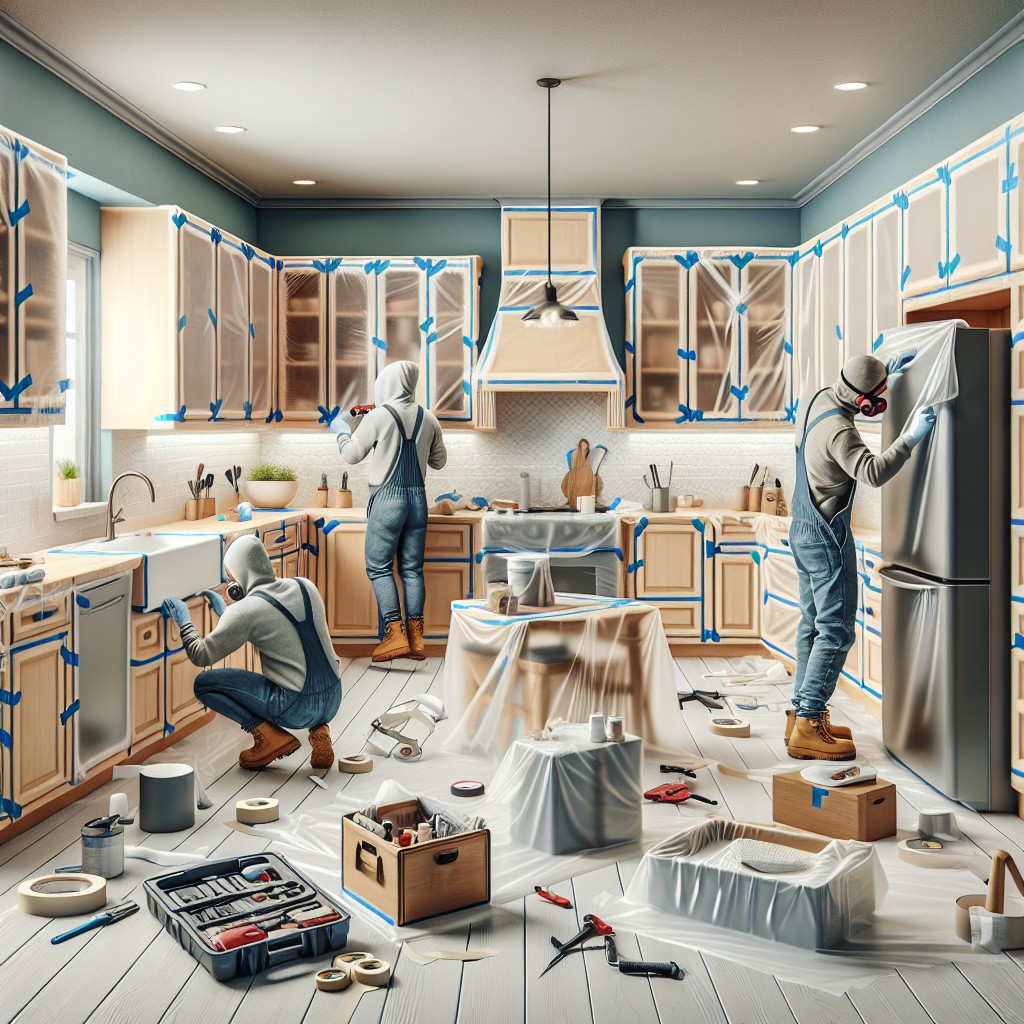
Ensuring your kitchen stays clean and free from paint drips or sawdust is paramount when refinishing cabinets. Use heavy-duty plastic sheeting to cover countertops, appliances, and floors. Secure it with painter’s tape, which leaves no residue and peels off easily. For openings, doorways, and windows, apply masking film or more plastic sheeting to create a barrier that keeps out dust and fumes. Remember to seal all edges tightly. This containment strategy not only protects your kitchen but also helps to maintain a healthier work environment by limiting the spread of particulates.
Prep Cabinet Surfaces
Before professionals dive into the transformative process of refinishing, the cabinets undergo thorough preparation to ensure a lasting finish. To start, each surface is meticulously cleaned, removing grease, dust, and grime using a degreaser or a trisodium phosphate (TSP) solution. This step is crucial for the primer and paint to adhere correctly.
Once clean, any loose or peeling finishes are scraped away. This can involve using a putty knife or a paint scraper. The next step is a comprehensive sanding which evens out the surface, scuffs up the old finish, and ensures the new paint will stick securely. Depending on the existing surface and the type of paint to be applied, the grit of the sandpaper used can vary.
Professionals then address any imperfections such as dings, dents, or cracks. A wood filler or putty is applied to these areas to create a smooth, flawless surface. Once the filler dries, another round of sanding is performed to integrate the repair seamlessly with the rest of the cabinetry surfaces.
Finally, every speck of dust from sanding and repairs is eliminated with a tack cloth or a damp rag. This meticulous preparation is vital, as even a minute amount of residue can prevent the primer and paint from bonding properly, leading to a subpar finish. With the cabinets now primed for refinishing, they are one step closer to revealing their refreshed, new look.
Wood Filler for Damage Repair
Before a fresh coat of paint or stain graces your cabinets, ensuring a smooth, blemish-free surface is crucial. Wood filler plays a pivotal role in this preparation step.
1. Identifying imperfections: Professionals meticulously inspect for nicks, gouges, and cracks, marking each spot that requires attention.
2. Choosing appropriate filler: Depending on the damage’s size and the cabinet’s material, a suitable wood filler is selected to create an even, repairable surface.
3. Application precision: With deft hands, specialists apply the filler, pressing it firmly into imperfections, then smoothing it out to align seamlessly with the surrounding wood.
4. Timing for drying: Each filler has its own set time. Experts know the exact window to allow for proper drying without rushing the process.
5. Sanding to perfection: Once dry, a fine-grit sandpaper is used to sand the filler down flush with the cabinet’s surface, ensuring there are no remaining elevated spots or dips.
This meticulous preparation ensures the final finish is flawless, laying the groundwork for a professional, durable, and aesthetically pleasing result.
Sand the Cabinets
Achieving a smooth surface is crucial for the finish to adhere properly, and sanding cabinets is an integral step in the refinishing process. It removes the old finish and creates a keyed surface for primer and paint to stick to.
Here are some focused points to understand why and how sanding is done:
- Begin with a medium grit sandpaper to strip away old paint or varnish without damaging the wood.
- Progress to a finer grit sandpaper to smooth out the surface, ironing out any imperfections that may affect the final look.
- For hard-to-reach areas or intricate designs, professionals often use a sanding sponge or a contoured sander that conforms to different shapes.
- It’s essential to wipe down the surfaces afterward with a tack cloth or damp rag to remove all dust particles, ensuring a clean canvas for the primer.
- A thorough sanding is followed by vacuuming the space to keep the work environment dust-free and to prevent dust from settling on wet surfaces.
Incorporating these steps guarantees a polished base, setting the stage for a professional-quality finish once painted.
Prime Cabinets
Once the cabinets are sanded and free of dust, applying a primer is the next crucial step. Priming ensures better adhesion of paint to the surface, increases paint durability, and provides additional protection for the cabinet material. It also helps to block potential stains from seeping through the paint and can minimize the number of topcoats required for complete coverage.
Professionals tend to use high-quality, stain-blocking primers, specifically designed for cabinetry. They opt for oil-based or shellac-based primers for their superior stain-blocking properties, although water-based options can be appropriate for less demanding jobs. It’s crucial to allow adequate drying time for the primer as per the manufacturer’s recommendations before moving on to sanding. This stage helps to achieve a perfectly smooth foundation for the final paint application, eliminating brush strokes or roller marks and ensuring a flawless finish.
Sand After Priming
Following the application of primer, a light sanding is essential to create a smooth base for the final paint coat. This step removes any primer bumps or brush strokes, ensuring a flawless finish. Professionals generally opt for fine-grit sandpaper, such as 220-grit, to delicately abrade the surface without causing damage.
- Sand with gentle, even pressure to avoid gouging the surface.
- Move in the direction of the grain when working with wood cabinets to maintain consistency.
- Remove all dust with a tack cloth or compressed air for a clean starting point for painting.
- The goal is not to remove the primer but to refine the surface for better paint adhesion.
This careful attention to detail makes a significant difference in the professional quality of the finished cabinets.
Apply Finish Coat
To achieve a factory-like finish, professionals often use a high-volume, low-pressure (HVLP) sprayer, dispensing fine layers of paint evenly across the cabinet surfaces. This method reduces the possibility of drips and brush marks, leaving a smooth and durable finish.
When space or equipment limitations arise, a high-quality foam roller and brush can be employed for a near-spray-quality application.
Professionals typically apply multiple thin coats, sanding lightly between each, to build a tough surface that resists wear and tear. They also remain vigilant about maintaining a dust-free environment during application to ensure the final coat is as flawless as possible.
Tinted lacquers or polyurethane may be used as topcoats when a transparent finish is desired over natural wood grain, enhancing durability and aesthetic appeal.
Reassemble and Install Cabinets
Once the finish coat has cured, the meticulous process of reassembling begins. This stage is critical for ensuring the refined appearance of your cabinets. Start by confirming that all hardware and doors are matched with their original locations for a seamless fit.
Use new felt bumpers on cabinet doors to soften closing and protect the fresh finish. When reinstalling hardware, consider using a template for uniform placement. If new hardware is part of your update, drill pilot holes to avoid splitting the wood.
Align doors and drawers properly, making minor adjustments to hinges for a perfect alignment. Keep the screwdriver torque low to prevent damage to the new surfaces. Reattaching in the correct sequence preserves the integrity of your redesign and leads to professional-level results.
Selecting Quality Paint and Finishes
When it comes to breathing new life into your kitchen cabinets, the type of paint and finish you select can make all the difference in durability and aesthetic appeal. High-quality acrylic latex paint offers a hard, durable finish and is less likely to yellow over time compared to oil-based paints. It’s also more environmentally friendly.
For a luxurious look, professionals often recommend an alkyd paint, which is known for its smooth application and resistance to the daily wear and tear of kitchen life. A satin finish is typically favored for its easy-to-clean surface and ability to hide imperfections, while a semi-gloss or gloss finish can provide a more modern and reflective sheen.
Keep in mind that the final finish is not just about the paint but also the top-coat. A clear polyurethane top-coat can add an extra layer of protection against scratches, stains, and water damage. Water-based polyurethanes are low-odor and less toxic, while oil-based varieties offer a more durable protective layer.
Ultimately, selecting the right paint and finish for your cabinets involves balancing aesthetics with functionality to ensure a result that looks great and stands up to the rigors of kitchen use.
Differences Between DIY and Professional Finishes
The primary distinction hinges on the level of expertise and the quality of the tools and materials utilized. Professionals often have access to high-grade, durable paint and finishes that are not readily available at retail stores. Additionally, they possess specialized equipment like HVLP (High Volume Low Pressure) sprayers, granting them the capability to achieve a more uniform and flawless coating compared to the average brush or roller options typically used in DIY projects.
With years of experience under their belts, professionals have honed their techniques, ensuring efficient and even application without drips or streaks. Their expertise also allows them to make swift and exact repairs to imperfections that might otherwise compromise the end result.
Moreover, pros understand the importance of thorough surface preparation, a step that can be underestimated in DIY attempts. By meticulously cleaning, sanding, and priming, professionals lay the groundwork for a finish that adheres better and lasts longer, reducing the likelihood of chipping or peeling over time.
Lastly, unlike the DIY approach, where trial and error can lead to material waste and additional costs, professionals calculate exactly how much of each product is needed, optimizing resources and ensuring cost-efficiency for the project.
Professional Techniques for a Smooth Finish
To achieve a velvety-smooth finish on refinished cabinets, professionals employ a combination of skill, the right tools, and meticulous preparation.
High-quality brushes and rollers are key to avoiding brush marks and achieving an even coat. For an ultra-fine finish, professionals often use a paint sprayer, which applies paint in a fine mist, creating a uniform surface.
Before applying any paint or finish, experts ensure the surface is impeccably clean. They use tack cloths to remove even the smallest dust particles that could mar the final appearance.
Professionals know that the key to a smooth final coat is layering. They apply multiple thin coats of paint or finish, sanding lightly between each layer. This technique builds a strong, smooth base and prevents drips or texture from developing.
Temperature and humidity are also monitored since extreme conditions can negatively affect drying time and paint consistency.
Throughout the process, consistency in application is essential. Maintaining the same direction for brush strokes and using a steady hand with the sprayer prevents uneven texture.
Lastly, they use high-grade, durable paint or finish formulated specifically for cabinetry to ensure long-lasting results and resistance to wear and tear.
Safety Measures and Best Practices
Before diving into the nitty-gritty of refinishing cabinets, ensure the room is well-ventilated; chemicals in paints and primers can be hazardous. It’s wise to work with windows open and fans running. Donning safety glasses, gloves, and a respirator mask goes a long way in protecting against dust and fumes.
Remember to take frequent breaks, particularly during tasks requiring precision and focus. Pacing yourself minimizes fatigue-related mistakes. Cover all surfaces not being refinished with drop cloths or plastic sheeting to shield against accidental drips or splatters.
Lastly, store paint and solvents securely, away from heat sources and out of reach of children and pets, to prevent accidental ingestion or fire hazards. Follow these safety protocols to create a secure and efficient working environment.
Tools and Materials Used By Professionals
Crafting an impeccable finish on kitchen cabinets hinges on the caliber of tools and materials in a professional’s arsenal. High-grade sandpaper or a sanding machine ensures a thorough and even surface preparation. Tack cloths and a vacuum with a dust extractor attachment are essentials in eradicating sawdust and debris.
When it comes to primers and paints, professionals tend to opt for high-quality, durable options specifically designed for cabinetry. A fine-bristle brush, a microfiber roller, or a professional-grade sprayer is critical for achieving that flawless, streak-free finish. Moreover, the utilization of painter’s tape and durable drop cloths helps in protecting countertops and appliances.
Each material serves a pivotal role, collectively contributing to the superior durability and aesthetic sought in professional cabinet refinishing.
Post-painting Care and Maintenance
Once your cabinets are freshly refinished, proper care ensures enduring beauty and functionality:
1. Regular Cleaning: Gentle cleaning with soap and water keeps surfaces free of grime and maintains finish integrity. Avoid abrasive materials that could scratch the paint.
2. Immediate Spill Clean-Up: Attend to spills promptly to prevent staining and damage to the finish.
3. Avoid Excessive Moisture: Humidity can weaken paint adhesion. Use exhaust fans or dehumidifiers to manage kitchen moisture.
4. Touch-Ups: Small chips or wear over time are normal. Have a small amount of your cabinet paint on hand for quick touch-ups.
5. Hardware Protection: When cleaning, avoid harsh chemicals on handles and knobs. These can tarnish finishes if not specifically designed for such use.
6. Limit Direct Sunlight: Prolonged exposure can fade paint colors. Consider window treatments to mitigate sun damage.
Following these points will help preserve the pristine condition of your cabinets, making the most of the professional refinishing job.
More Like This
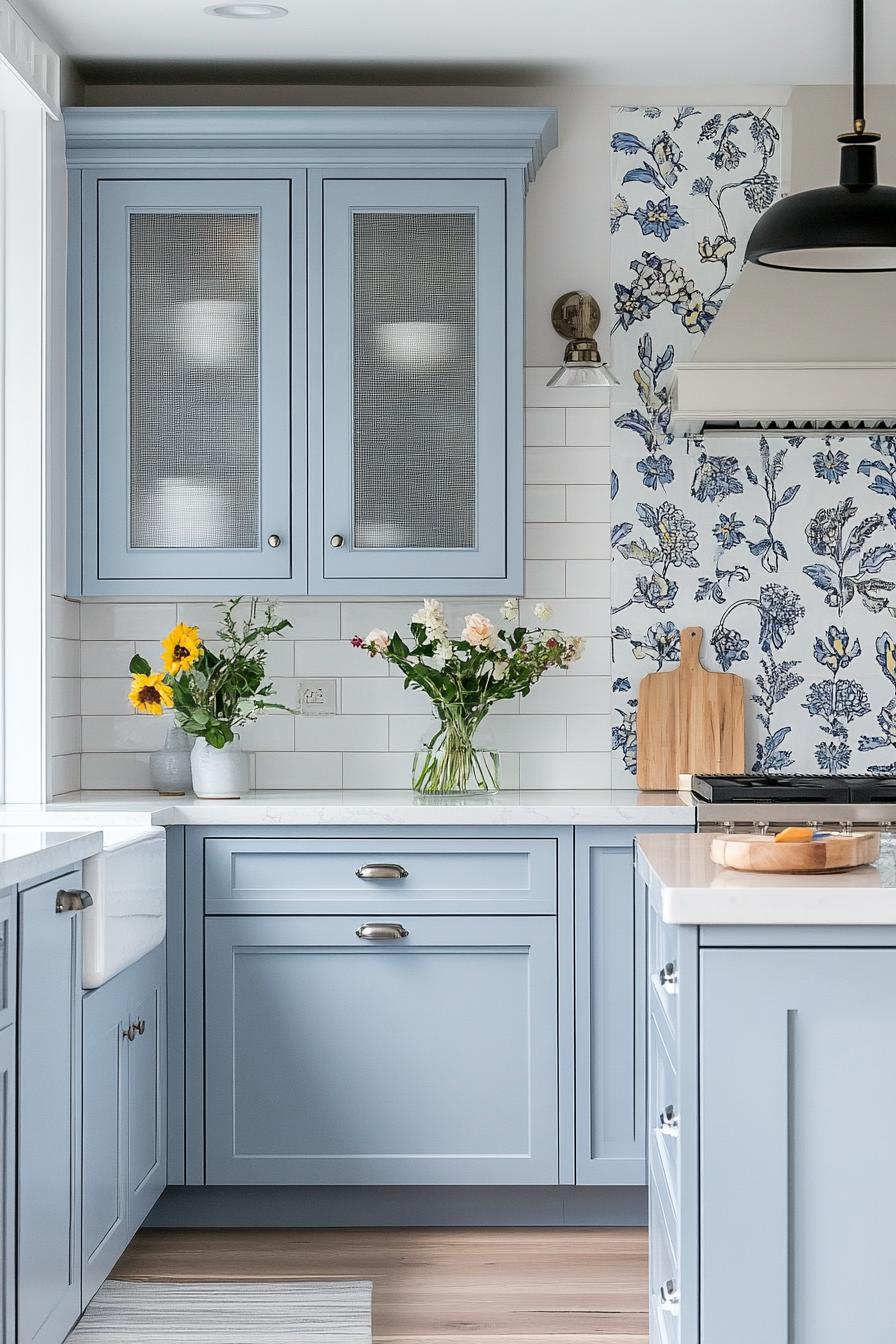 20 Chic Blue Kitchen Cabinets Ideas to Transform Your Space
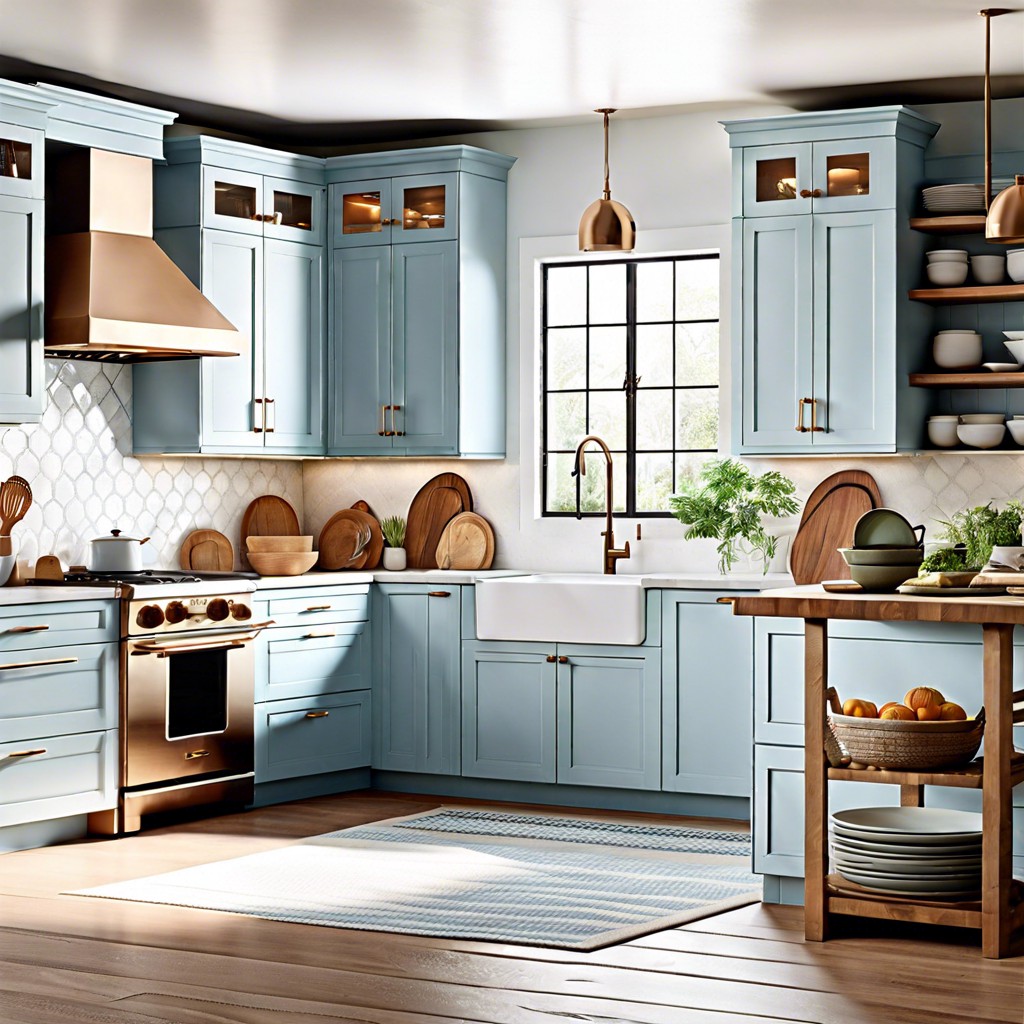 20 Fun Ideas for Light Blue Kitchens
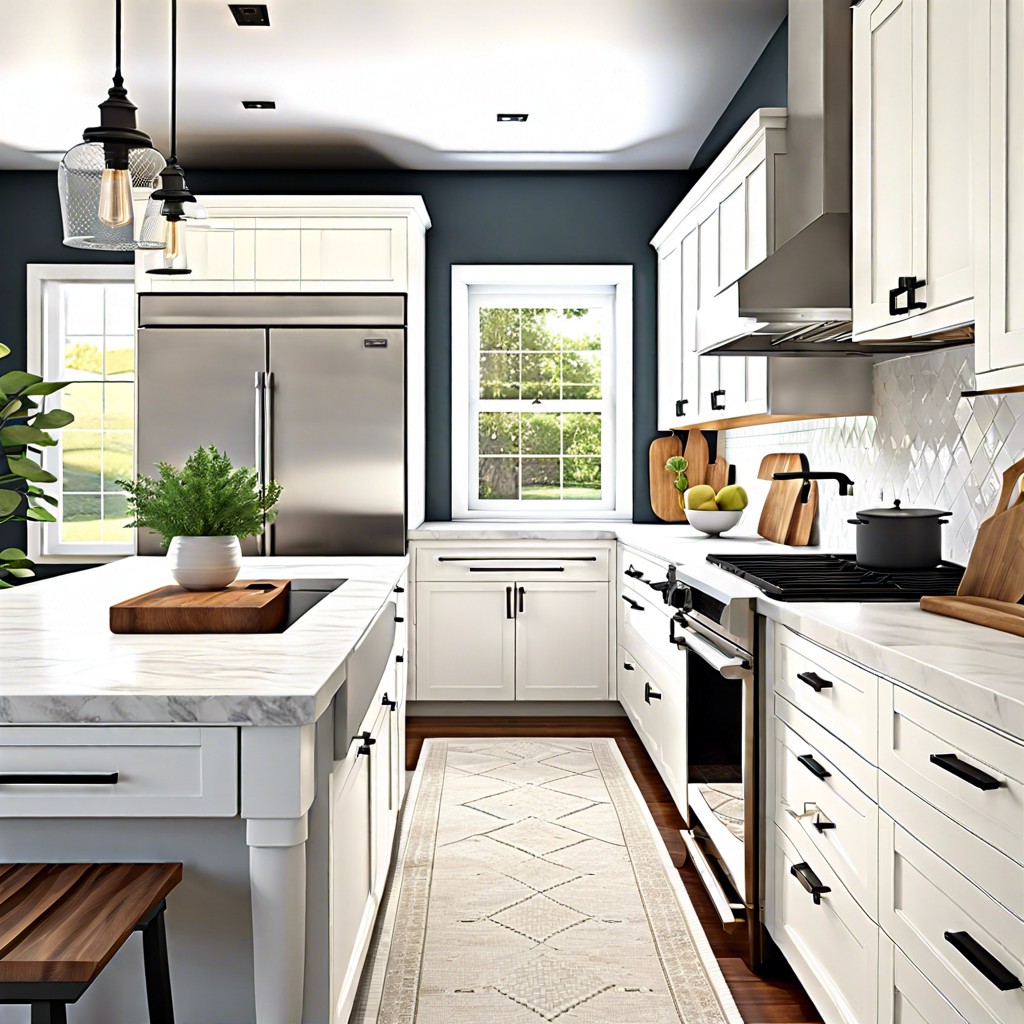 15 Ideas for Modern White Shaker Kitchen Cabinets
 15 Fresh Kitchen Colors for 2024 Ideas
 15 Kitchen Cabinet Stencil Ideas to Spice Up Your Space
Recap