Last updated on
Dive right into DIY cork board projects because their versatility and affordability transform mundane items into statement pieces.

Diving headlong into DIY cork board projects is a terrific way to repurpose everyday objects while stylishly de-cluttering your space. Whether you’re decorating a home office or sprucing up your kitchen, a cork board offers a versatile and cost-effective solution for organizing while adding flair to your décor.
Step-by-step, this piece will guide you through a variety of innovative cork board projects requiring minimal tools, time, and most importantly, money. Not just a simple pinning board, we’ll explore options that range from jewelry organizers to custom memo boards, ensuring that by the end, you’ll be brimming with creative ideas to transmute a humble cork board into something uniquely yours.
Key takeaways:
- Cork board project supplies: cork sheets, adhesive, cutting tool, ruler or measuring tape, frame, paint or stain, push pins or thumbtacks.
- DIY cork board ideas: jewelry organizer, key holder, inspiration board, recipe holder, coaster set.
- Transform wine corks into a cork board for a personalized touch.
- Add pockets to your cork board for extra storage.
- Paint white geometric patterns on your cork board for a chic look.
Supplies For A DIY Cork Board
Before starting your DIY cork board project, gather the necessary supplies to ensure a smooth crafting experience.
1. Cork Sheets or Tiles: Depending on your project size, choose from a variety of cork dimensions.
2. Adhesive: Select a strong glue appropriate for cork, or consider double-sided mounting tape for lightweight applications.
3. Cutting Tool: A utility knife or sharp scissors will be essential for customizing cork shapes and sizes.
4. Ruler or Measuring Tape: These tools help achieve straight lines and accurate dimensions.
5. Frame: If creating a cork board with a border, an old picture frame or a purchased blank frame works well.
6. Paint or Stain: These are optional for adding color or finishing your frame.
7. Push Pins or Thumbtacks: Have these on hand for immediate use of the cork board.
Having these items ready will help you effortlessly bring your cork board vision to life.
Easy DIY Cork Board Ideas

Transform your workspace or home with these simple yet effective cork board projects:
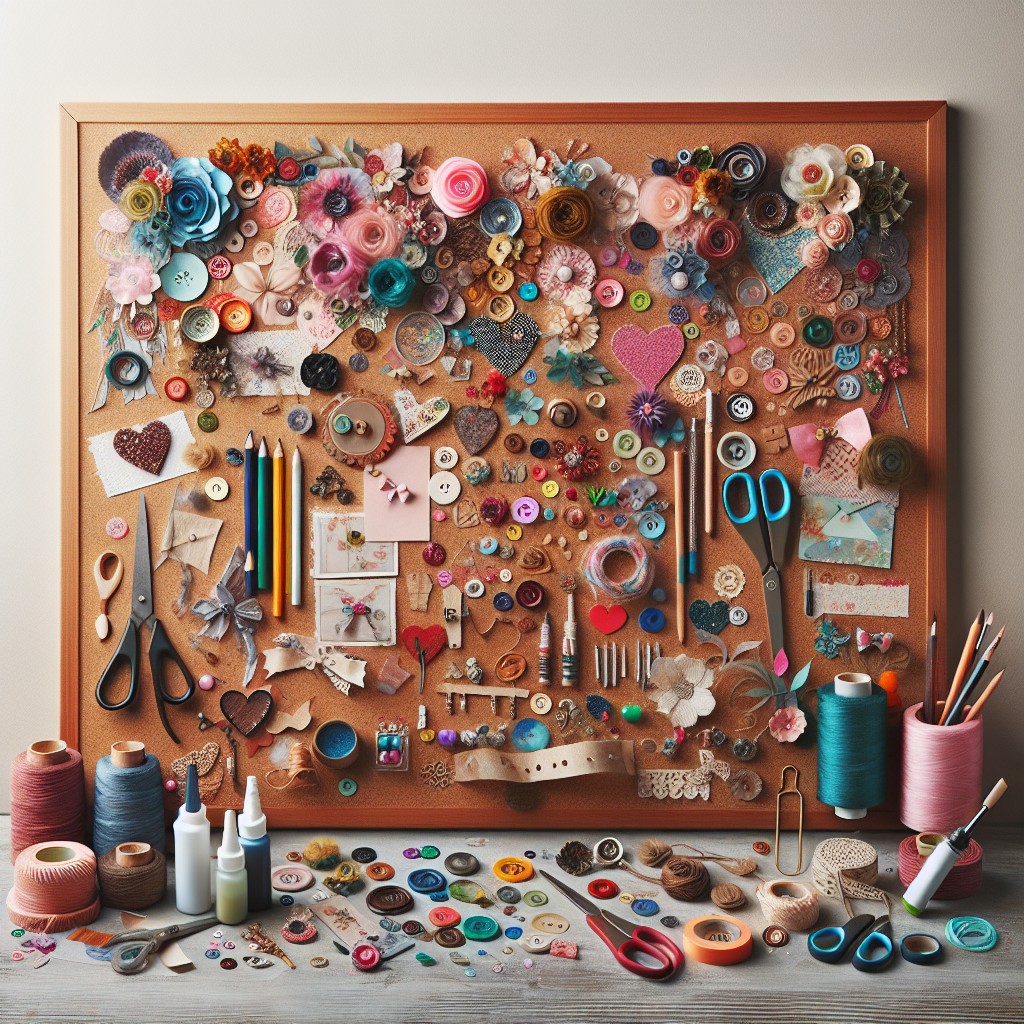
1. Jewelry Organizer: Pin your necklaces and bracelets to a framed cork board for a chic and tangle-free display.
2. Key Holder: Attach hooks to a small cork board by your entryway to keep keys organized and easy to find.
3. Inspiration Board: Create a visual collage of your goals, favorite images, and quotations for daily motivation.
4. Recipe Holder: Keep your favorite recipes within sight and out of the mess by pinning them onto a kitchen cork board.
5. Coaster Set: Cut cork into shapes for personalized drink coasters – functional and aesthetic.
6. Desk Tidy: Stick mini cork boards to the inside of a cupboard door to pin important notes and clear desk clutter.
7. Plant Pots: Wrap cork sheets around plant containers for an earthy touch to your decor.
These affordable cork board ideas can elevate your space, keep you organized, and allow you to express your creativity without spending a lot.
Collect Wine Corks to Make This DIY Cork Board
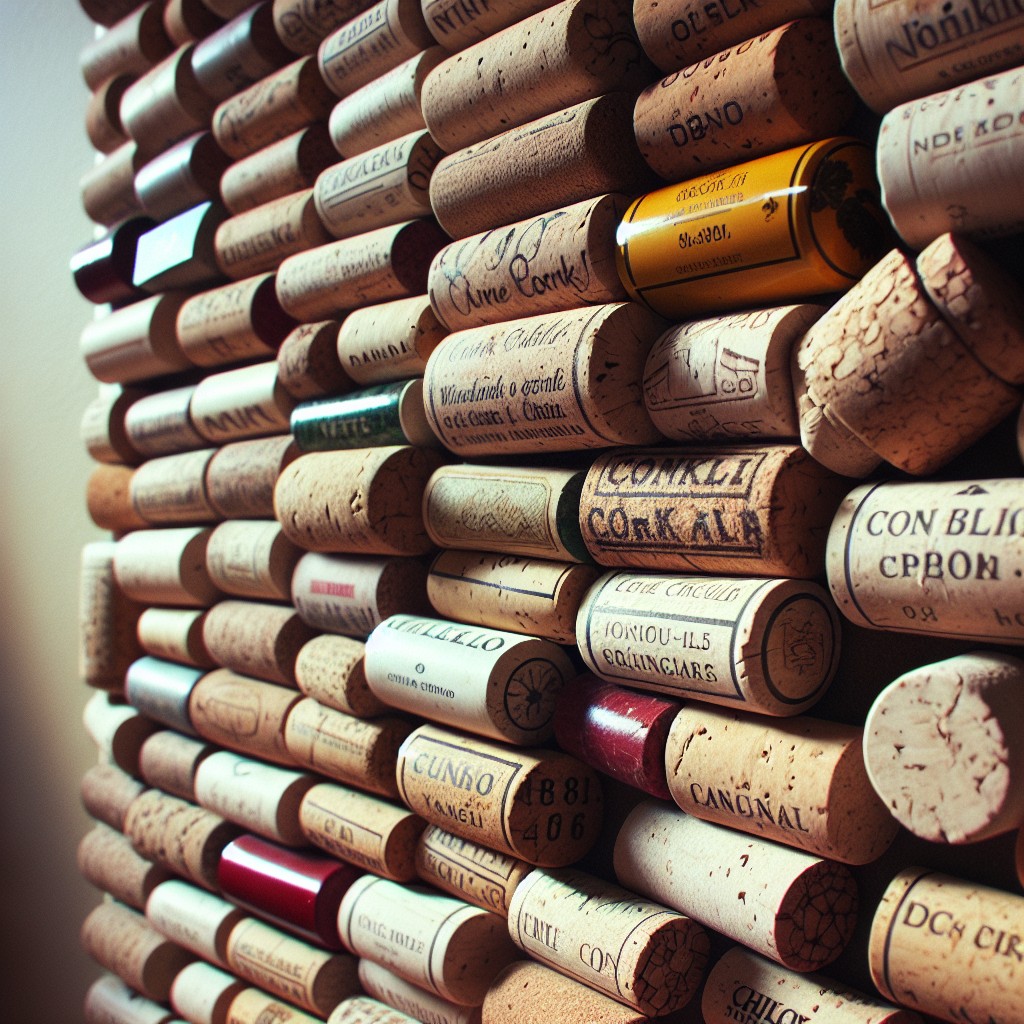
Transforming wine corks into a cork board infuses a piece of your festive memories into a functional item for daily use. Assemble a sizeable collection through celebrations, or source corks from local restaurants, wineries, or craft stores. Opt for a variety of shades and lengths for visual interest.
To create, choose a frame or backing that suits your desired dimensions. It’s often best to arrange corks loosely before adhering to spot any patterning opportunities or adjustments needed for a snug fit. Say, for instance, you incorporate a chevron pattern or stagger the corks for a brick-like effect.
When attaching corks, hot glue proves efficient and durable. Place corks on their sides for a textured, 3D look, or slice them in halves to lie flat and cover more space. Remember to press firmly as you glue to ensure strong adhesion and reduced gaps. Whether it hangs in a home office, kitchen, or hallway, this eco-friendly project weds sustainability to style.
Add Pockets for Extra Storage
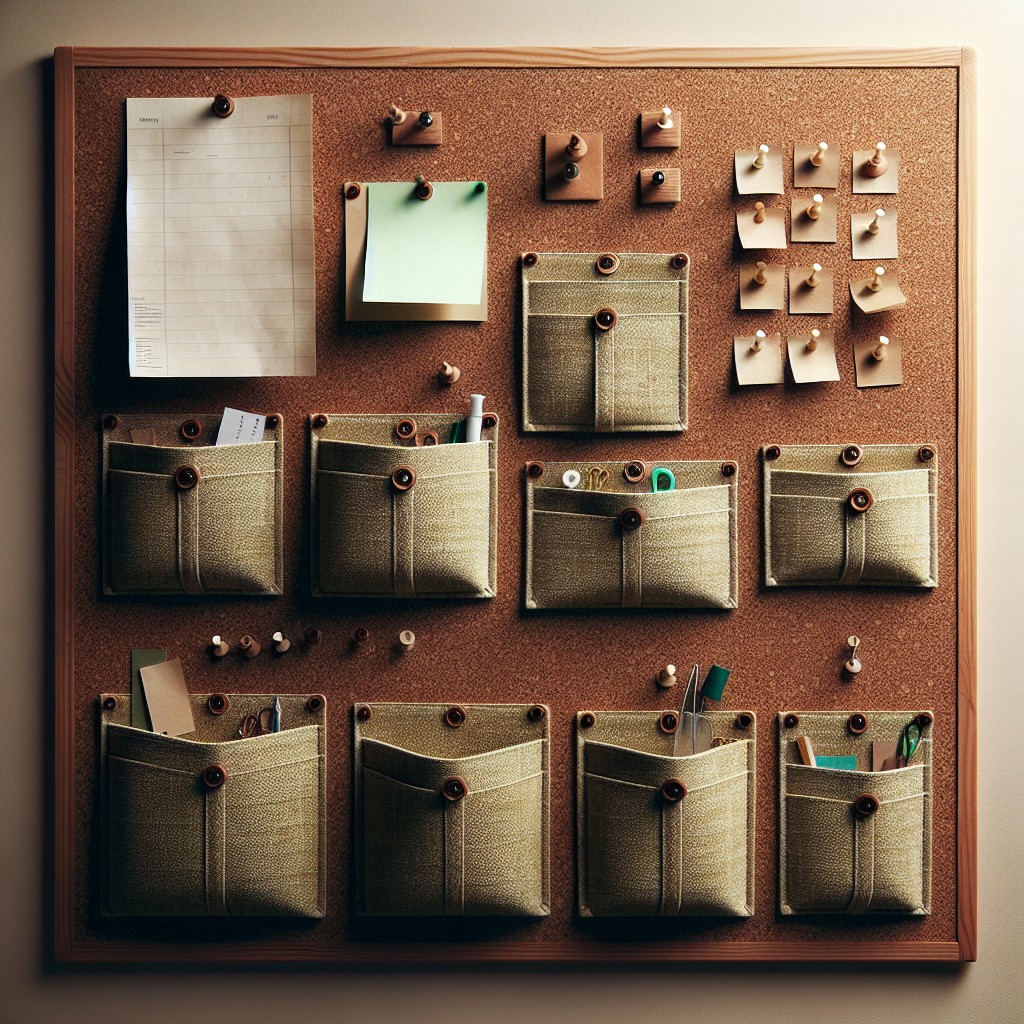
Elevate the functionality of your cork board by incorporating pockets that double as storage. Use fabric or repurposed denim to create pouches, securing them to the board with push pins or strong glue. This idea is especially handy for organizing mail, office supplies, or even crafting materials.
Select pockets in various sizes to accommodate different items, ensuring everything has its place. The addition of pockets will help keep your workspace clutter-free and stylishly organized.
Paint On White Geometric Patterns
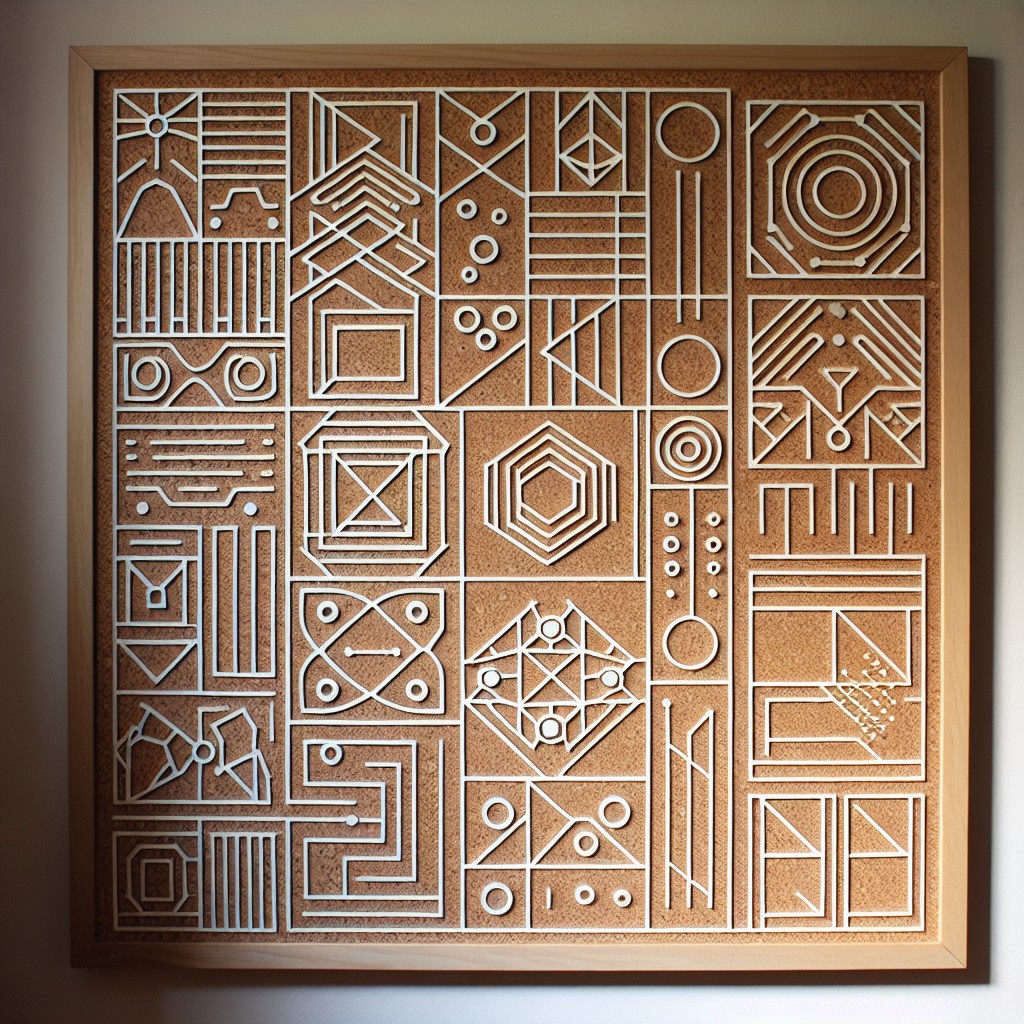
Transform your basic cork board into a chic art piece with white geometric patterns. Here’s how:
1. Select a pattern: Chevron, stripes, or diamond shapes are visually appealing and straightforward to create.
2. Tape design: Use painter’s tape to mark out your chosen pattern on the cork surface. Ensure tape edges are firmly pressed down to prevent paint bleed.
3. Paint application: Opt for white acrylic or spray paint for a clean, crisp look. Apply a thin coat to avoid seeping beneath the tape.
4. Peel and reveal: Allow the paint to dry completely before gently removing the tape, unveiling a sharp, geometric design.
5. Optional sealant: Apply a clear sealant spray if the board will be handled frequently, protecting your work.
This method not only saves money but also results in a custom decor piece that doubles as a functional organization tool.
Install Cork Board Inside a Kitchen Cabinet
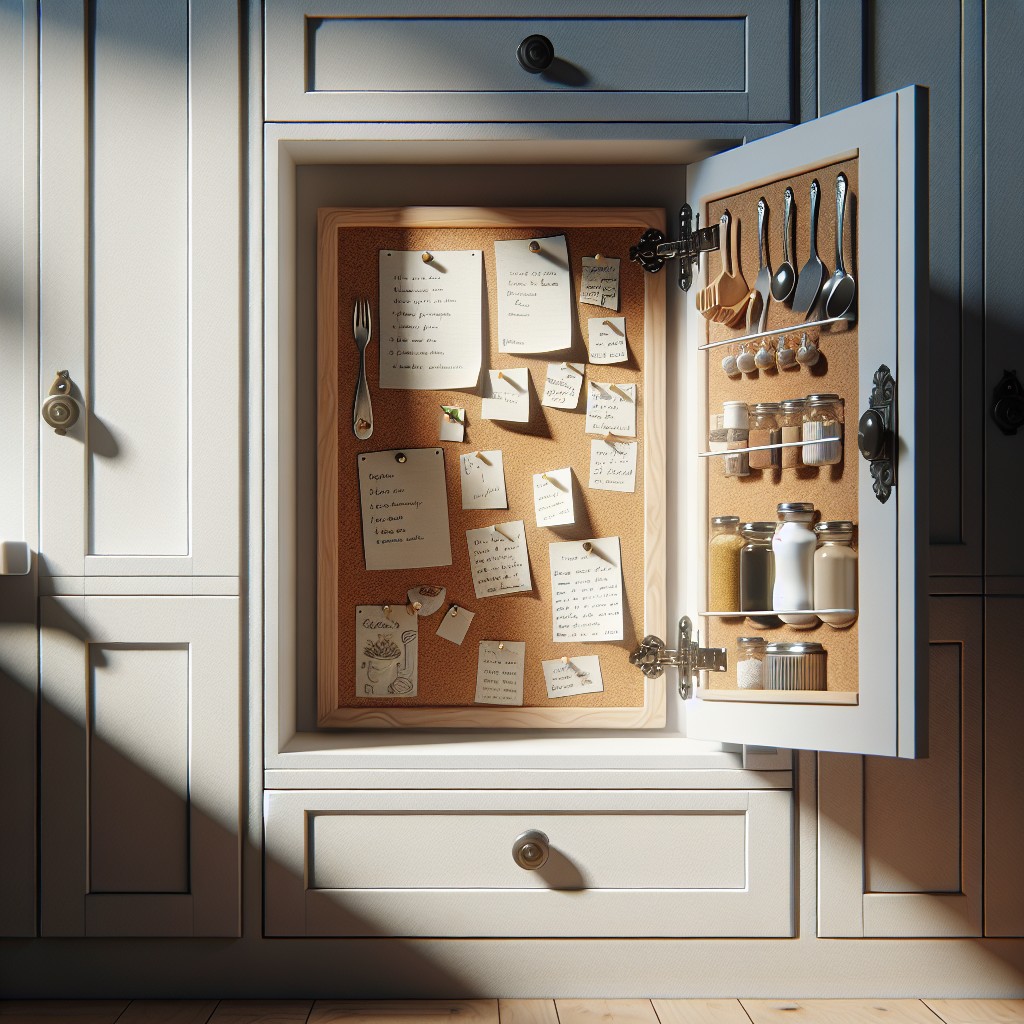
Transforming the inside of a kitchen cabinet door with cork allows for a hidden yet functional space to pin recipes, shopping lists, or even daily reminders.
To ensure a smooth installation, measure your cabinet door carefully and cut the cork to fit snugly.
Adhesive-backed cork sheets are convenient as they can be pressed directly onto the surface.
If using regular cork tiles, a strong glue or double-sided tape will suffice.
Keep pins and notes organized in this discreet location to maintain a clutter-free counter and have important information easily accessible while cooking.
Remember to close the cabinet gently to avoid dislodging any pinned items.
Place Cork Board Pieces in a Herringbone Pattern

Add visual interest to your space by arranging cork sheets in an eye-catching herringbone pattern. To achieve this, you’ll need:
- Rectangular cork board pieces
- A ruler or measuring tape for even spacing
- A pencil to mark placement
- Strong adhesive or double-sided mounting tape
Begin by deciding on the direction and size of your herringbone pattern. For a symmetrical look, cut your cork board pieces into equal-size rectangles. Lay out the pattern on the floor to tweak the design before mounting it on the wall. Mark light guidelines on the wall to keep your lines straight and evenly spaced. Attach each piece starting from one corner and working diagonally, ensuring the pattern remains consistent. This dynamic layout brings motion and texture to the room while keeping the organizational functionality of a traditional cork board.
Document Your Travels On a DIY Cork Board Map
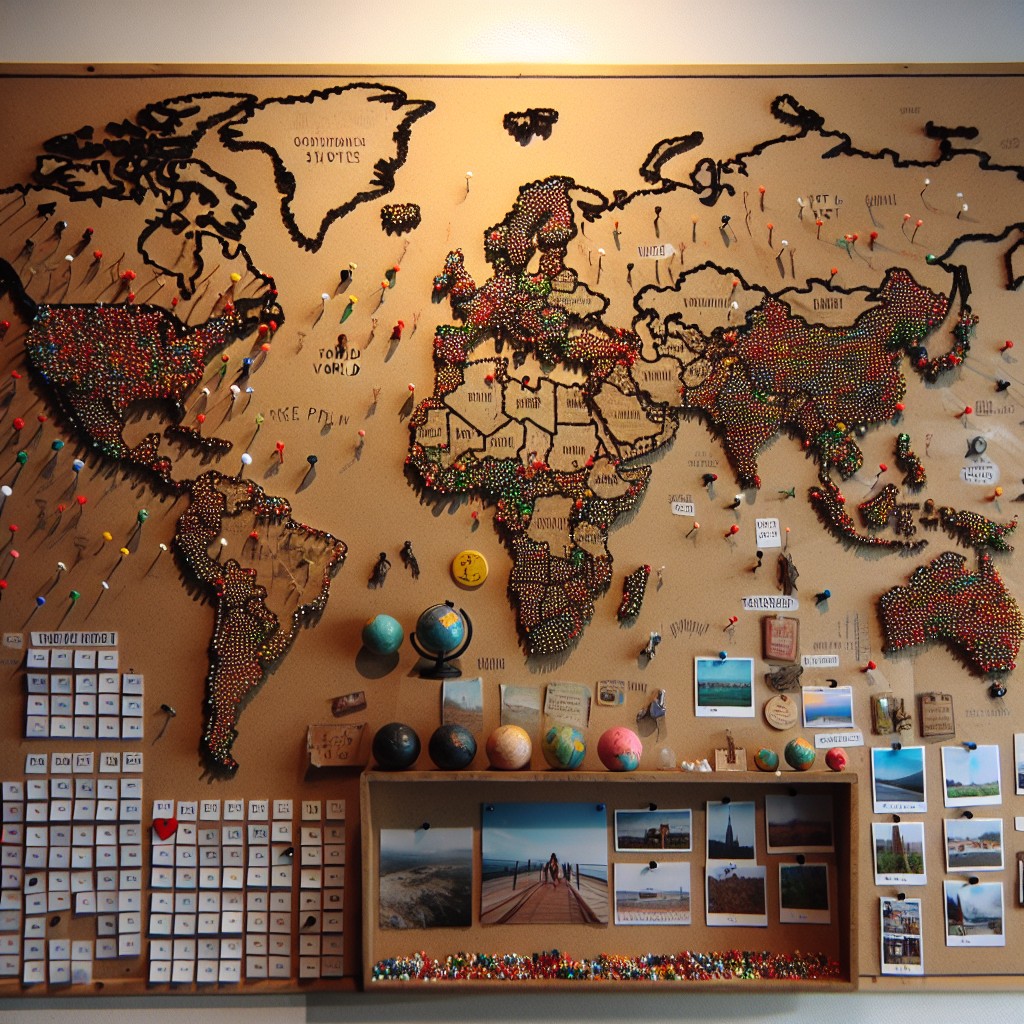
Transform a plain cork board into a personalized world map to track past adventures or plan future ones. Start by obtaining a map outline; options include stenciling, free-hand drawing, or using a pre-printed map. Trace the map onto the cork, and carefully cut out the continents using a sharp craft knife. Secure the map pieces onto a larger cork board or directly to the wall using adhesive.
Pin photos, tickets, and mementos from various travels onto the corresponding locations. This visual representation not only serves as a unique piece of art but also as an interactive way to reminisce or share stories with guests.
For a layered effect, add push pins or flags to mark specific cities or landmarks you’ve visited. Color-code pins by trip or year for additional organization and flair. This evolving project encourages you to explore new destinations and add to your travel display.
Organize Jewelry Using Four Square Cork Boards
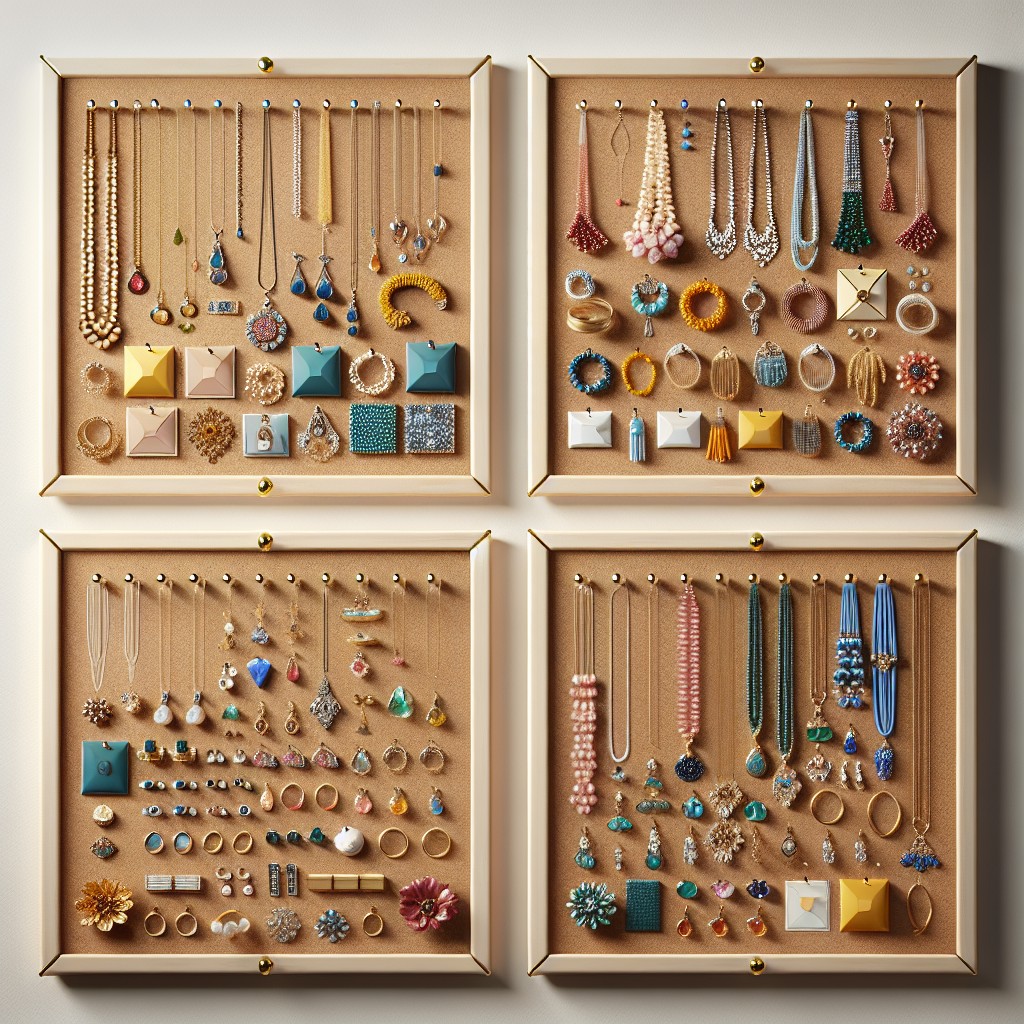
Maximize your accessory storage with a quartet of square cork boards. Here’s how you can transform them into a beautiful and practical jewelry organizer:
1. Choose Your Boards: Opt for four cork squares of equal size to create symmetry in your display.
2. Mount Securely: Use adhesive strips or small nails to hang your cork boards in a larger square formation on your bedroom or closet wall, leaving a bit of space between each for visual appeal.
3. Customize with Paint: For a pop of color, consider painting the edges or a pattern onto your boards. Let them dry completely before proceeding.
4. Add Hooks and Pins: Insert pushpins, decorative thumbtacks, or small hooks into the cork to hang necklaces, bracelets, or earrings. This helps prevent tangling and makes it easy to find what you’re looking for.
5. Arrange by Type: Organize your jewelry by type or frequency of use across the four boards. You might designate one board for necklaces, another for earrings, and so on.
6. Mix Function and Form: Intersperse your jewelry with favorite photos or small art prints pinned among your accessories for an even more personalized touch.
By following these points, your jewelry will be neatly displayed, doubling as both handy storage and a statement wall piece.
Hang a Giant Cork Board for Kids’ Art
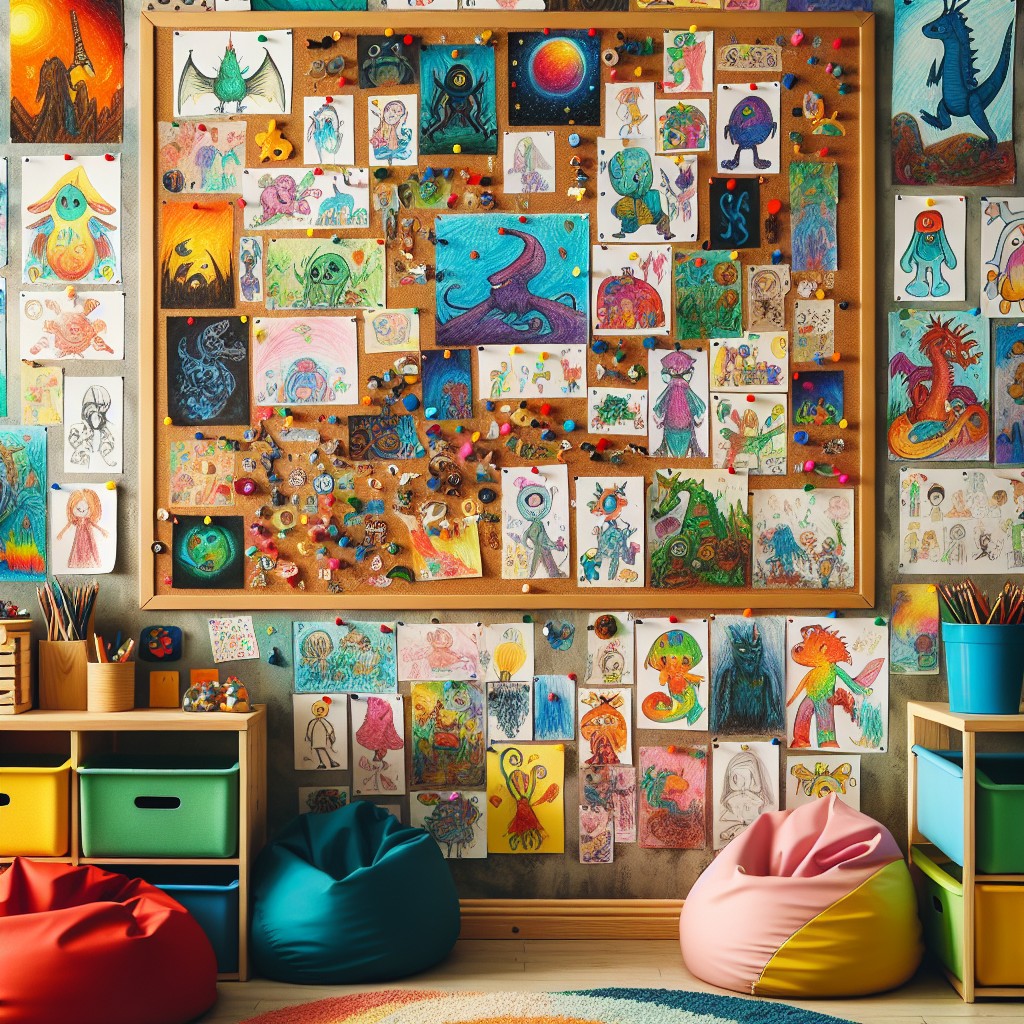
Transform an entire wall into a dynamic display for your child’s creativity by hanging a large cork board. Not only does this provide a dedicated space for showcasing their latest masterpieces, but it also protects your walls from damage caused by tape or tacks.
Use simple frame molding around the edges to give it a polished look, harmonizing with your room’s decor. For an interactive twist, paint sections with chalkboard paint, combining the texture of cork with the fun of chalk art. This setup encourages kids to share their work and helps to nurture their artistic development.
Periodically rotating the displayed pieces keeps the board fresh and engaging.
Repurpose Round Cork Plant Coasters to Make a Wall Organizer
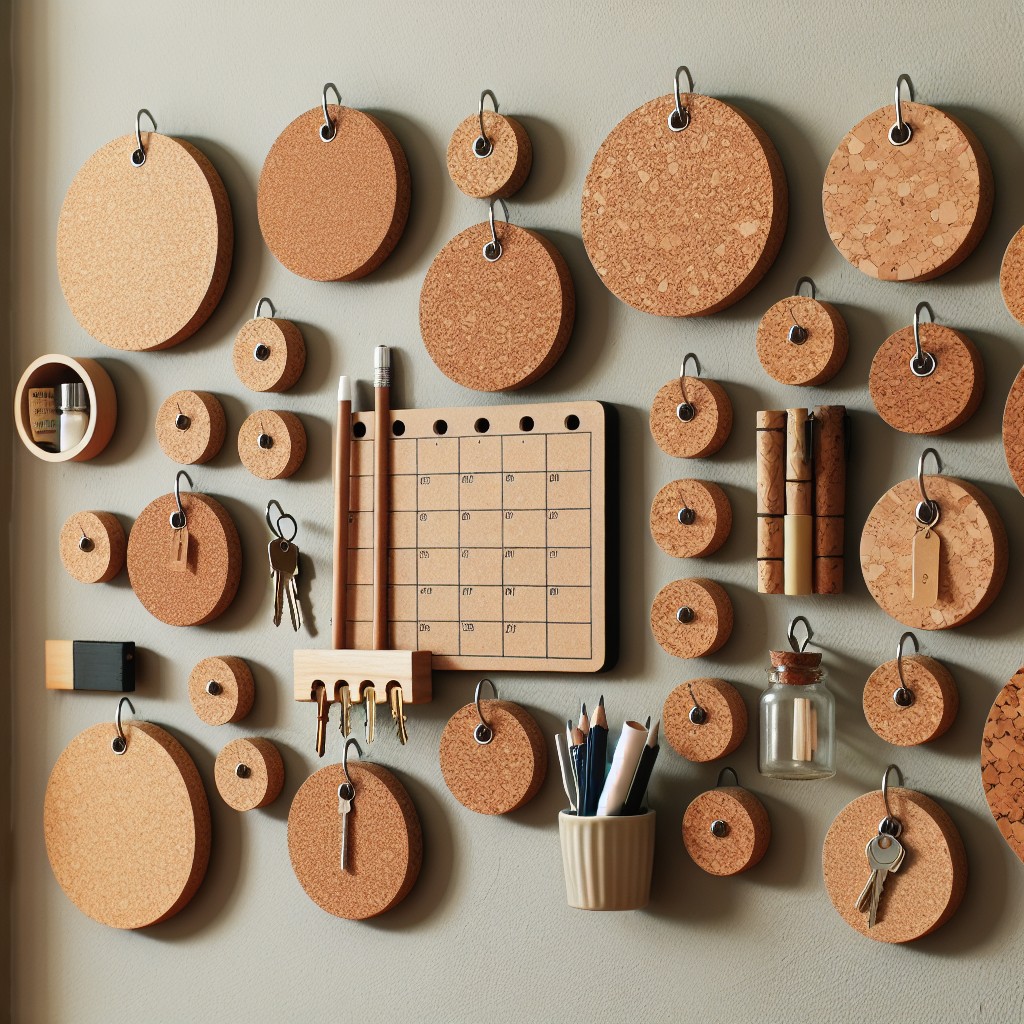
Transform unused round cork plant coasters into a chic and functional wall organizer with these simple steps:
1. Gather multiple cork coasters.
2. Arrange the coasters on the wall to form your desired pattern.
3. Use strong adhesive strips to mount each coaster securely.
4. Add push pins or thumbtacks to hang lightweight items like keys, jewelry, or notes.
5. Consider painting or staining the coasters for a custom color scheme.
This project creates a unique space to display important reminders, inspirational quotes, or personal mementos, maximizing vertical storage while adding an artistic touch to your home.
Cut a Monogram Out of a Sheet of Cork Board
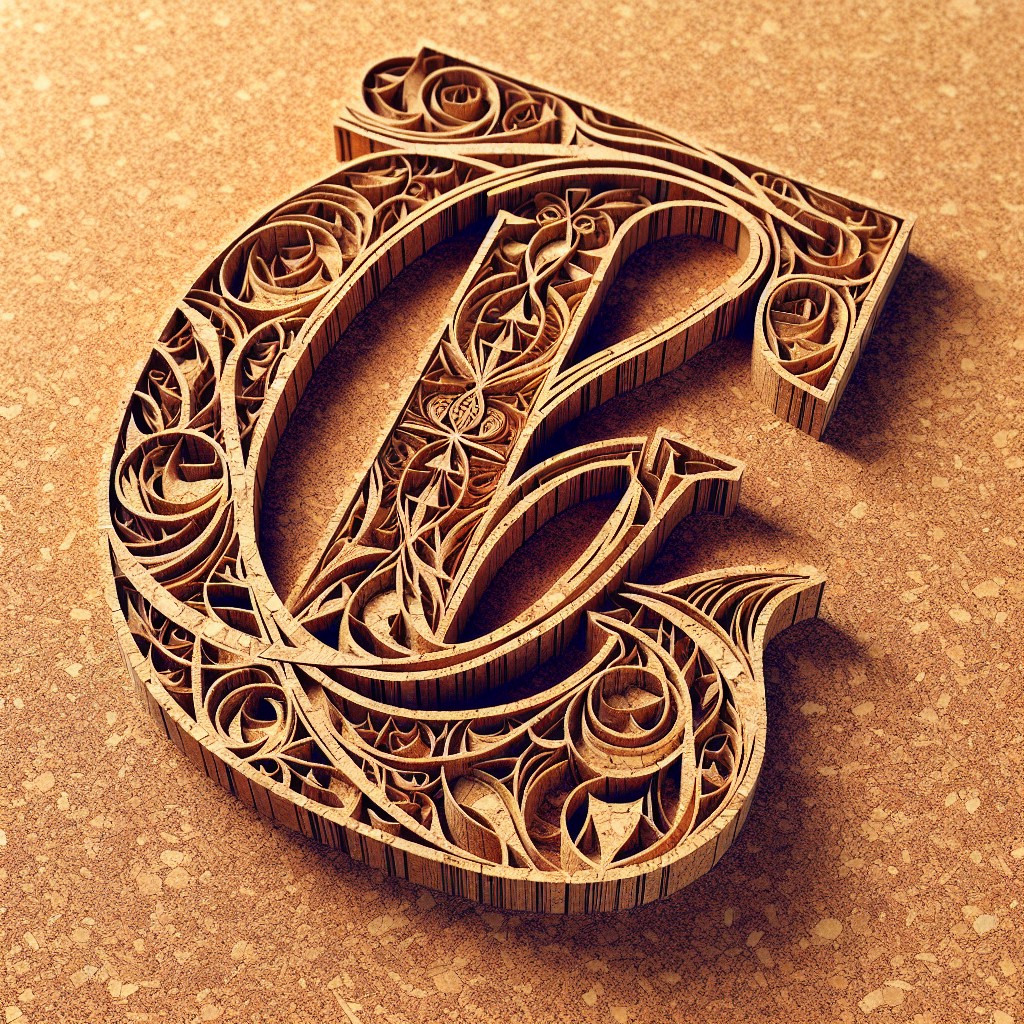
Transform a plain sheet of cork board into a personalized piece of art by cutting out a monogram. This custom addition to your home decor provides a practical pinning surface with a unique flair.
Begin by sketching or printing out your desired letter on a piece of paper, choosing a font and size that fits your style and the size of your cork sheet.
Trace the outline of the letter onto the cork with a pencil, ensuring clarity and precision. For intricate fonts or curves, use a craft knife for better control and accuracy.
If your monogram is large or complex, consider segmenting it into manageable pieces that can be cut and then reassembled.
After cutting, smooth out any rough edges with sandpaper for a clean look. You can leave the cork its natural shade for a rustic vibe or paint it for a pop of color.
To install, adhesive strips or mounting tape can safely secure your monogram to the wall without causing damage. Use your new creation to pin photos, notes, or even jewelry, adding functional style to any room.
Wrap a Glass Planter in Cork
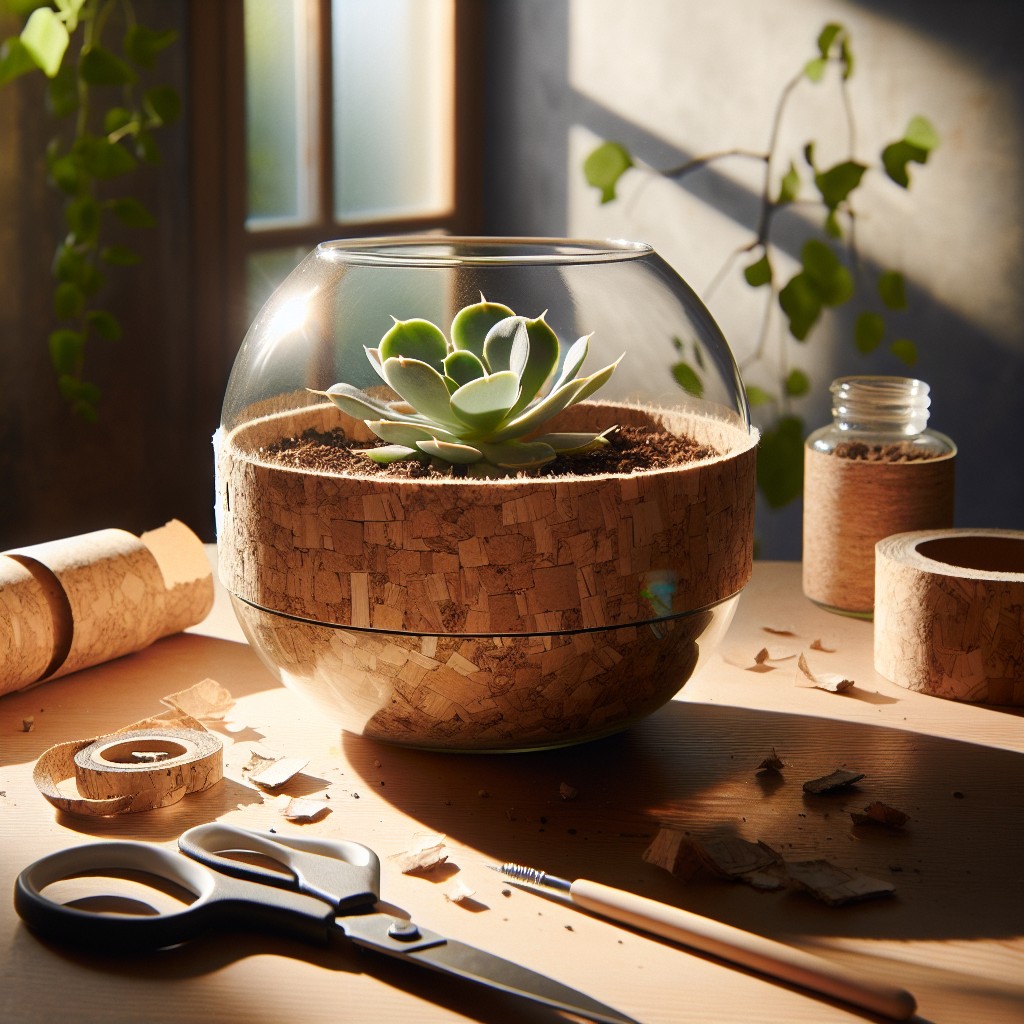
Transform a simple glass planter into a statement piece with a cork wrap that adds a touch of natural texture.
Measure the circumference and height of the planter to determine the amount of cork required.
Use a roll of thin cork or repurpose a cork yoga mat for this project.
Cut the cork to size with a sharp utility knife, ensuring straight edges for a clean finish.
Apply a layer of strong adhesive to the back of the cork or directly onto the glass.
Carefully align the cork with the planter’s edges and press firmly to secure.
The cozy wrap is not only stylish but also provides additional insulation for plant roots against temperature fluctuations.
Enjoy the blend of greenery and rustic charm this decor brings to any space.
Glue Circular Cork Boards Together to Make a Pencil Holder

Transform your desk space and ensure your writing tools are always within reach by crafting a unique pencil holder using circular cork boards. Follow these simple steps:
1. Select several circular cork coasters – they come in various sizes, so choose one to accommodate your pencil collection.
2. Use a strong adhesive to bond the coasters on their edges. Epoxy glue or a hot glue gun will provide a durable hold.
3. Stack the glued coasters to your desired height, allowing them to dry thoroughly between layers.
4. Once the structure is solid, you can customize it. Consider wrapping with twine for an added rustic touch or painting portions for a pop of color.
5. Optional: Seal the holder with a clear acrylic spray to protect against wear and stains.
This eco-friendly project repurposes simple materials into a functional office accessory. The cork’s natural grip keeps pencils in place and adds an earthy element to your work area.
Fit Together a Bunch of Hexagon Cork Boards
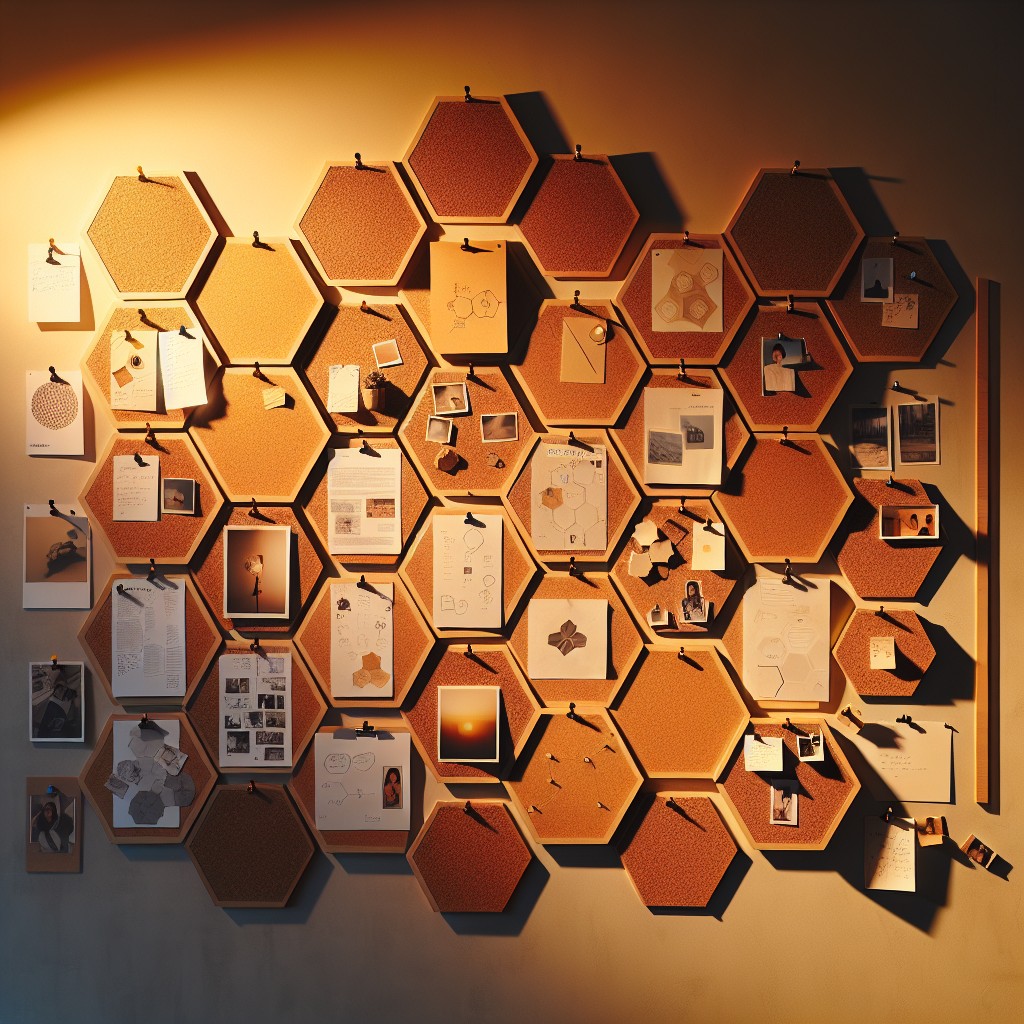
Transform your wall into a honeycomb-inspired masterpiece with hexagon cork boards. This geometric display not only adds visual interest but also offers ample space for pinning notes and photos.
1. Start by arranging your hexagon cork boards on the floor to finalize the pattern you’d like on your wall.
2. Ensure even spacing between each cork board for a clean, uniform look.
3. Use removable adhesive strips to affix the cork boards to the wall; this allows for easy adjustment and prevents wall damage.
4. Mix and match different cork board colors for a vibrant mosaic, or stick to a monochromatic scheme for a minimalist aesthetic.
5. Consider the functionality – place it in a home office or above a work desk for easy access to pinned reminders and documents.
This approach to cork board design is perfect for creating an organized yet stylish feature wall that blends seamlessly with the room’s decor.
Spell Out an Inspirational Word Using Cork Boards
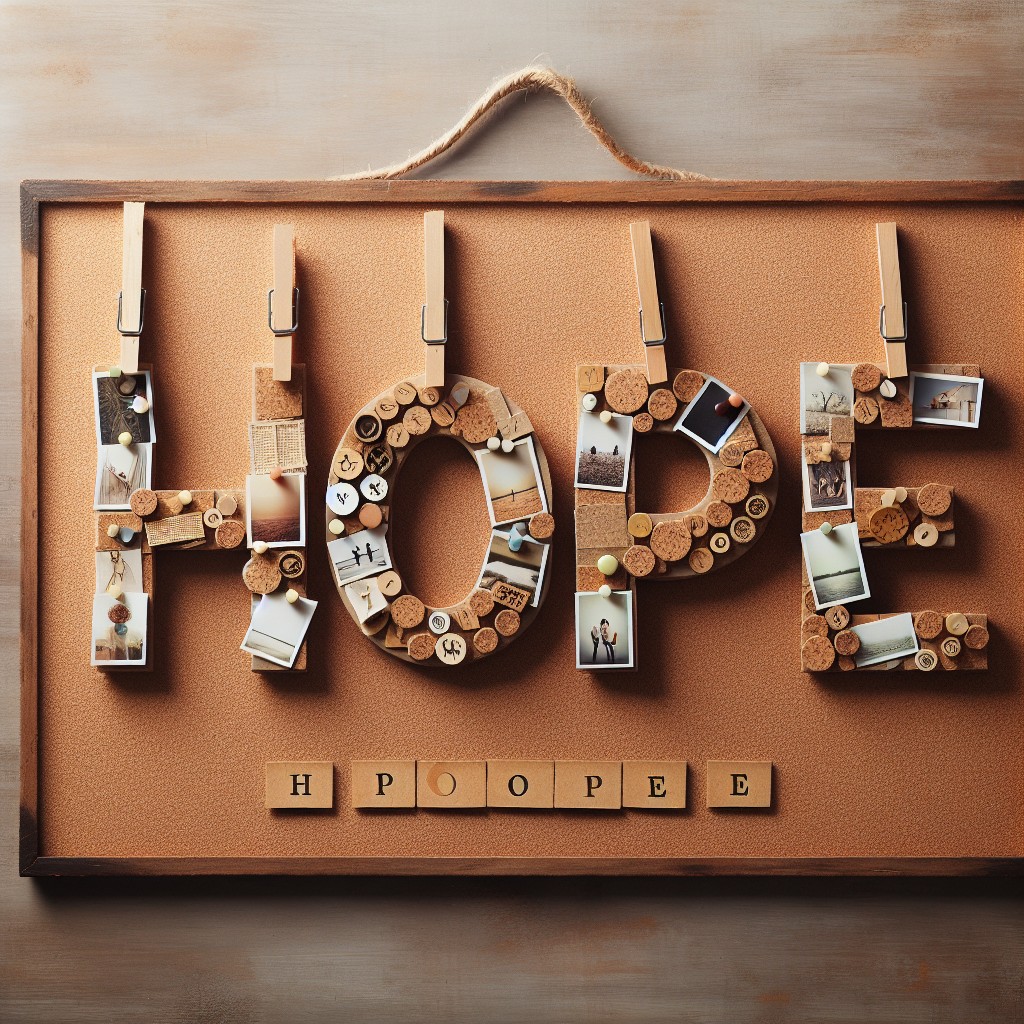
Create a daily dose of inspiration with a functional wall display. Choose a word that resonates with you – think “create,” “dream,” or “focus.”
Purchase or repurpose small cork board tiles, one for each letter of your chosen word. Next, trace each letter onto the corresponding tile and carefully cut out the shapes with a sharp craft knife.
Arrange the letters on your wall in a layout that pleases your eye, ensuring each piece is evenly spaced. Use removable adhesive strips to secure the letters to the wall, perfect for renters or those who like to frequently change decor.
As a bonus, pin important notes or motivational quotes onto your letter-shaped cork boards to blend practicality with personalization.
FAQ
What can I make with cork board?
Cork boards can be used to create personalized notice boards for keeping track of calendars, to-do lists, reminders, displaying photos, artwork, and can serve as an organizational tool for papers and documents in a home office, and also for posting announcements and schedules in a classroom or office.
What can I use instead of a corkboard?
You can use customizable felt wall tiles as a versatile and space-efficient alternative to corkboards.
What material sticks to cork board?
Materials like most glues, adhesives, stickers, two-way tape, craft or wood glue are suitable for sticking to a cork board.
How can I personalize a cork board with everyday household items?
Personalize a cork board by lining it with decorative washi tape, attaching photos and keepsakes using colorful paperclips, or painting it with leftover wall paint for a coordinated home office look.
What are the different design styles I can apply to a DIY cork board project?
Design styles for a DIY cork board project can vary greatly, including modern minimalism, rustic farmhouse, boho chic, vibrant eclectic, industrial, nautical, and classic elegance.
Can cork board be painted for an added aesthetic appeal?
Yes, corkboard can be painted to enhance its aesthetic appeal.
More Like This
 20 Fairy Houses With Natural Materials That Will Make You Believe In Magic
 20 Cheap Walkway Ideas DIY Benefits
 15 Ingenious DIY Pantry Cabinet Ideas
 15 Creative DIY Buffet Table Ideas for Your Next Gathering
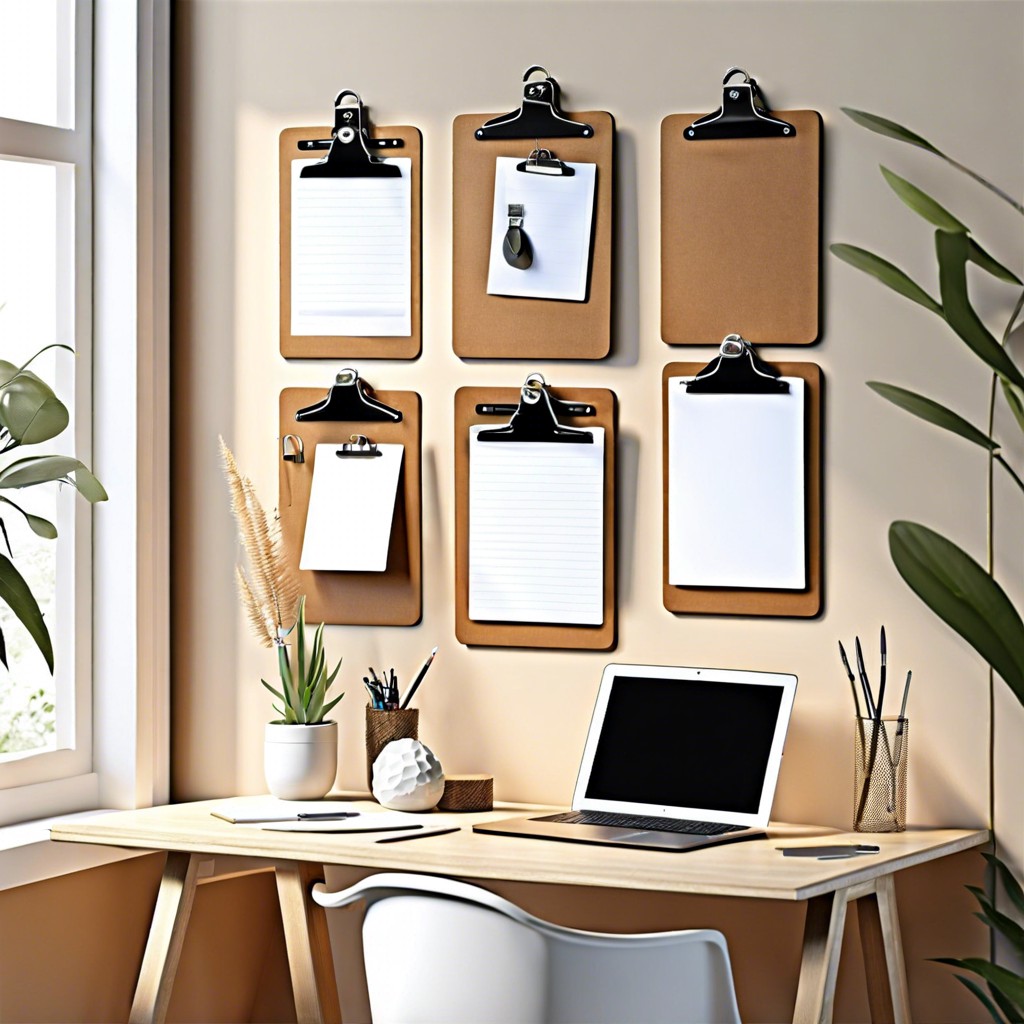 15 Genius Office Supply Storage Ideas to Boost Your Productivity
Recap