Last updated on
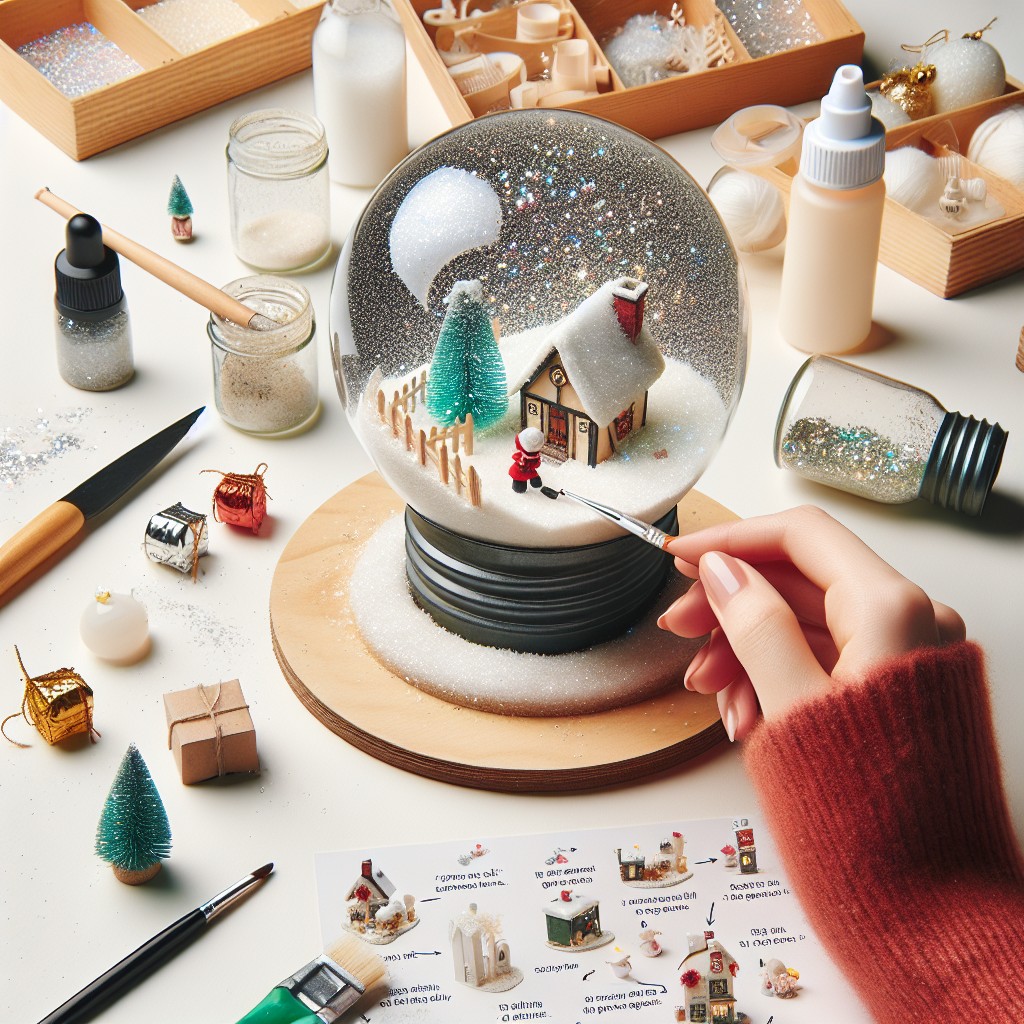
Discover unique DIY snow globe ideas to add a touch of winter magic to your home decor, because festive charm isn’t exclusive to expensive store-bought items.
This article includes my original designs. Some of them may be exaggerated to make a point — that’s my style. Enjoy them for your inspiration!
Snow globes, those mesmerizing mini wonderlands, have always had a way of capturing our hearts. While there’s no dearth of common DIY snow globe ideas on the internet, this piece aims to take a detour from the usual. By injecting a dose of fresh breath into the realm of snow globes, we will explore ideas that walk the less-trodden path—all under a budget.
We will offer resources to the best of existing ideas as a value add-on. But the spotlight here? Those unique, yet-to-be-explored snow globe designs to fuel your creative spirit. So, let’s shake things up a bit and delve right in!
DIY Snow Globe With Musical Elements
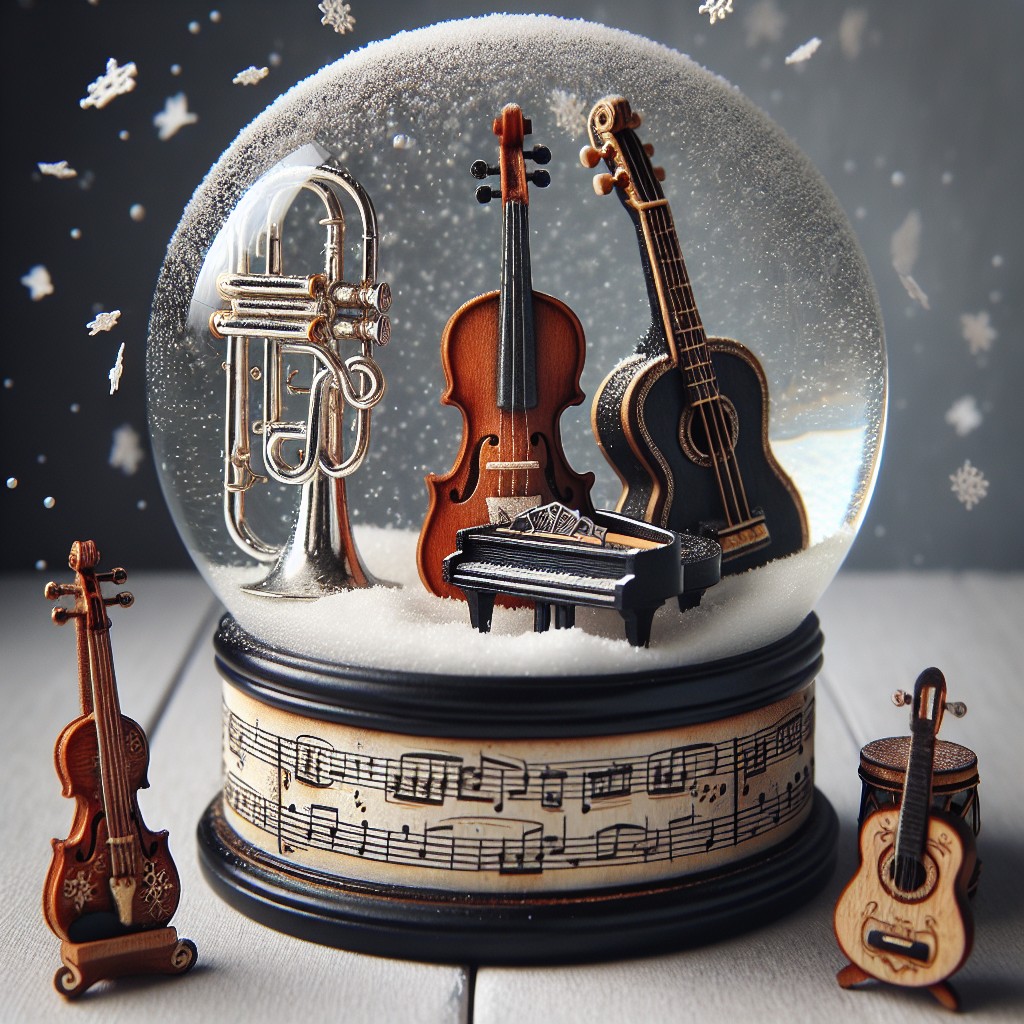
Elevate your snow globe by incorporating a musical element for an enchanting auditory experience. Select a small, waterproof music box that plays your favorite tune and fits within your chosen container. Attach the music box to the lid so it remains accessible for winding and ensure its sound resonates clearly through the jar.
For a cohesive theme, choose figurines or decorations that harmonize with the melody, like a delicate ballerina for a classic tune or a festive reindeer for a holiday jingle. Secure these elements to the base, add glitter or faux snow, and fill with water, leaving a small gap to accommodate the music box. Seal tightly, and your melodic snow globe will not only captivate the eyes but also the ears with every shake.
Nautical Themed DIY Snow Globe
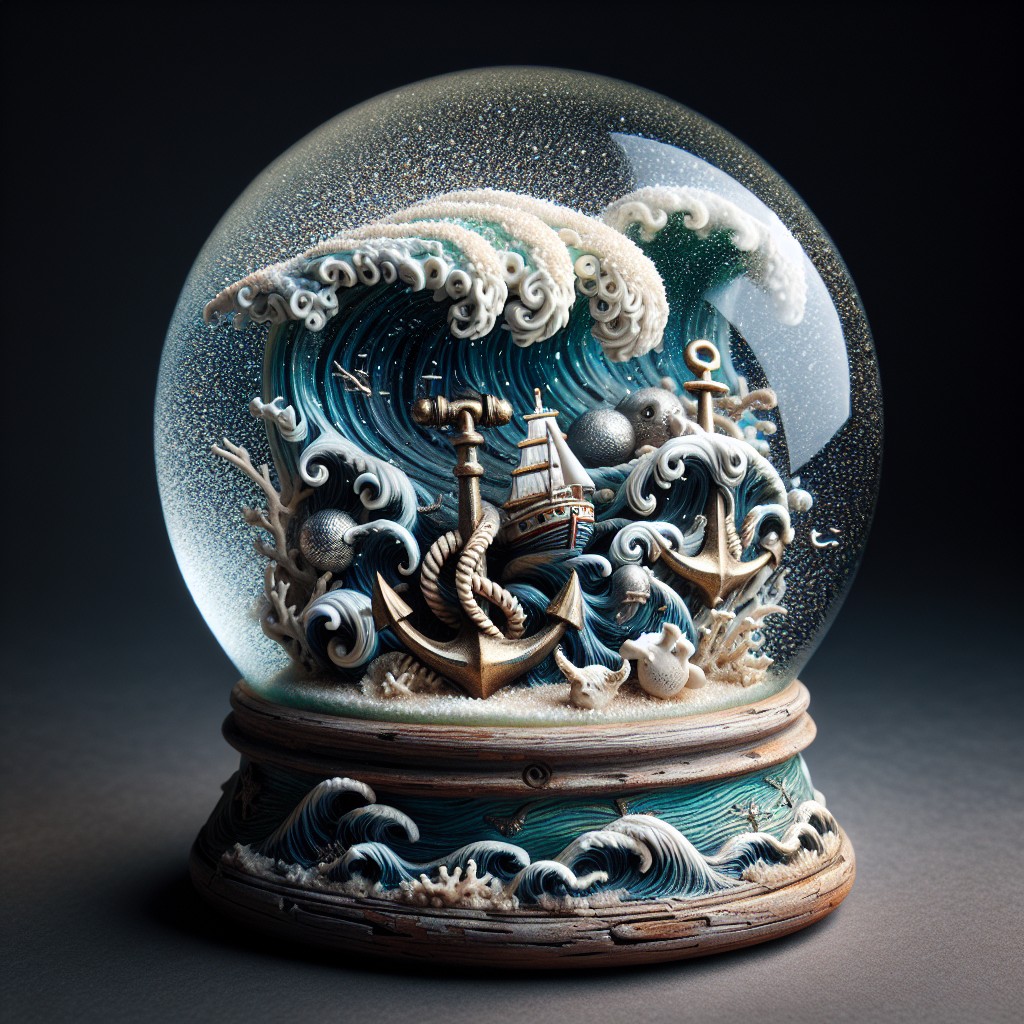
Capture the essence of the sea by choosing elements that evoke maritime charm, such as miniature sailboats, lighthouses, or sea creatures. When selecting figurines, ensure they are waterproof and will fit comfortably inside your chosen jar or container.
Opt for sand or small shells as the base to reinforce the beachy vibe. Instead of traditional snow, use a fine glitter or small white beads to mimic ocean froth or the glint of sunlight on the water’s surface.
Blue food coloring can add a tinge of the ocean to your liquid, just a drop or two will suffice to create a serene blue hue. Consider using glycerin mixed with distilled water to slow the glitter’s descent, mimicking the unhurried underwater world.
For an authentic maritime touch, incorporate a piece of rope or twine around the base or lid of the container, securing it with a dab of hot glue for a rustic, anchored look.
Keep the scene simple to avoid clutter; a singular focus with small accents often creates the most visually appealing display. Remember, less is sometimes more when crafting a serene, nautical vignette.
DIY Picture Frame Snow Globe
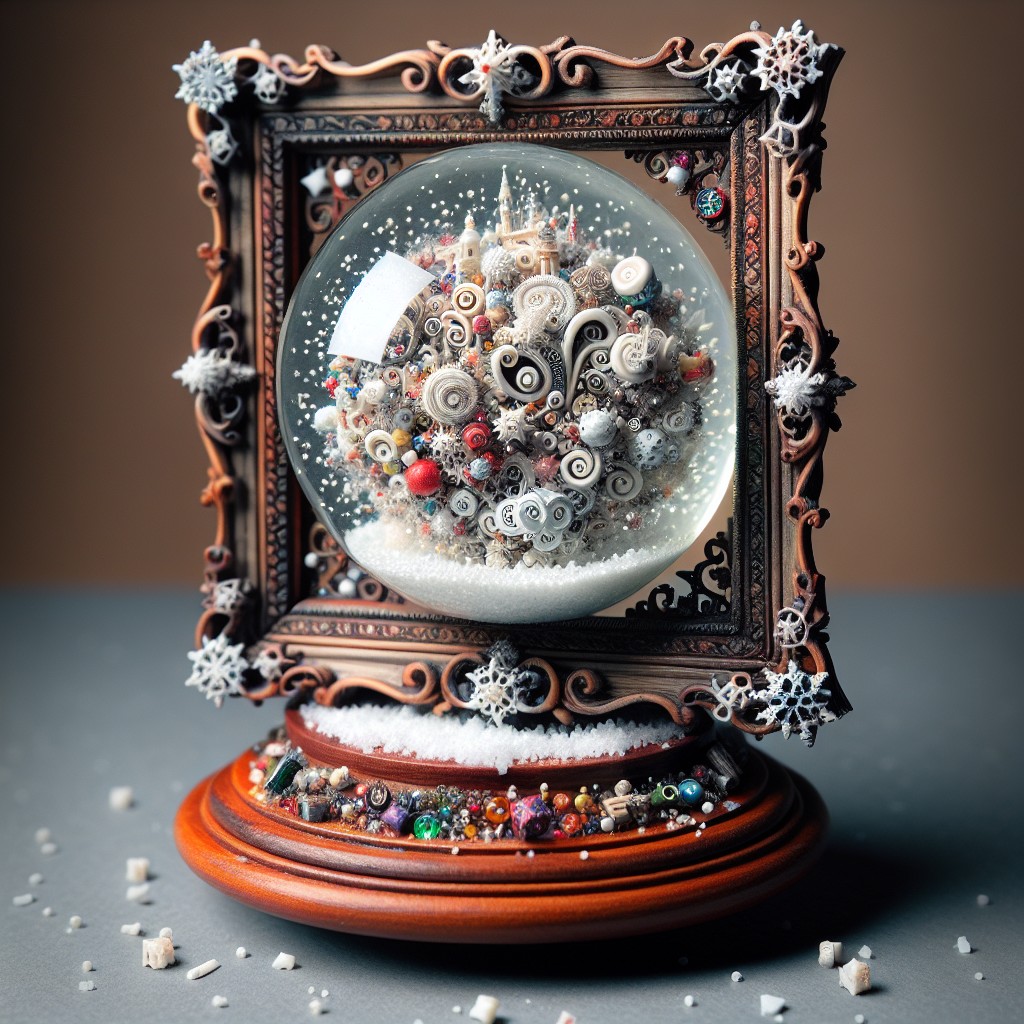
Transform a picture frame into a mesmerizing, personalized snow globe by using a clear, plastic photo frame as your canvas.
- Select a frame that can be sealed tightly to prevent water from entering.
- Choose a photo or a printed image that invokes a fond memory or desired theme.
- To create the snow, opt for waterproof materials like laminated glitter, plastic snowflakes, or even faux snow from a craft store.
- Assemble your globe by arranging the photo inside the frame, adding your snow material, and filling it with distilled water mixed with a dash of glycerin to slow down the snowfall effect.
- Seal the frame edges with waterproof silicone sealant, wiping away excess to maintain a clean look.
- Allow the sealant to cure before shaking your new creation to life.
This project not only repurposes common household items but also offers an opportunity to craft a unique, heartfelt display piece.
DIY Solar Light Snow Globe
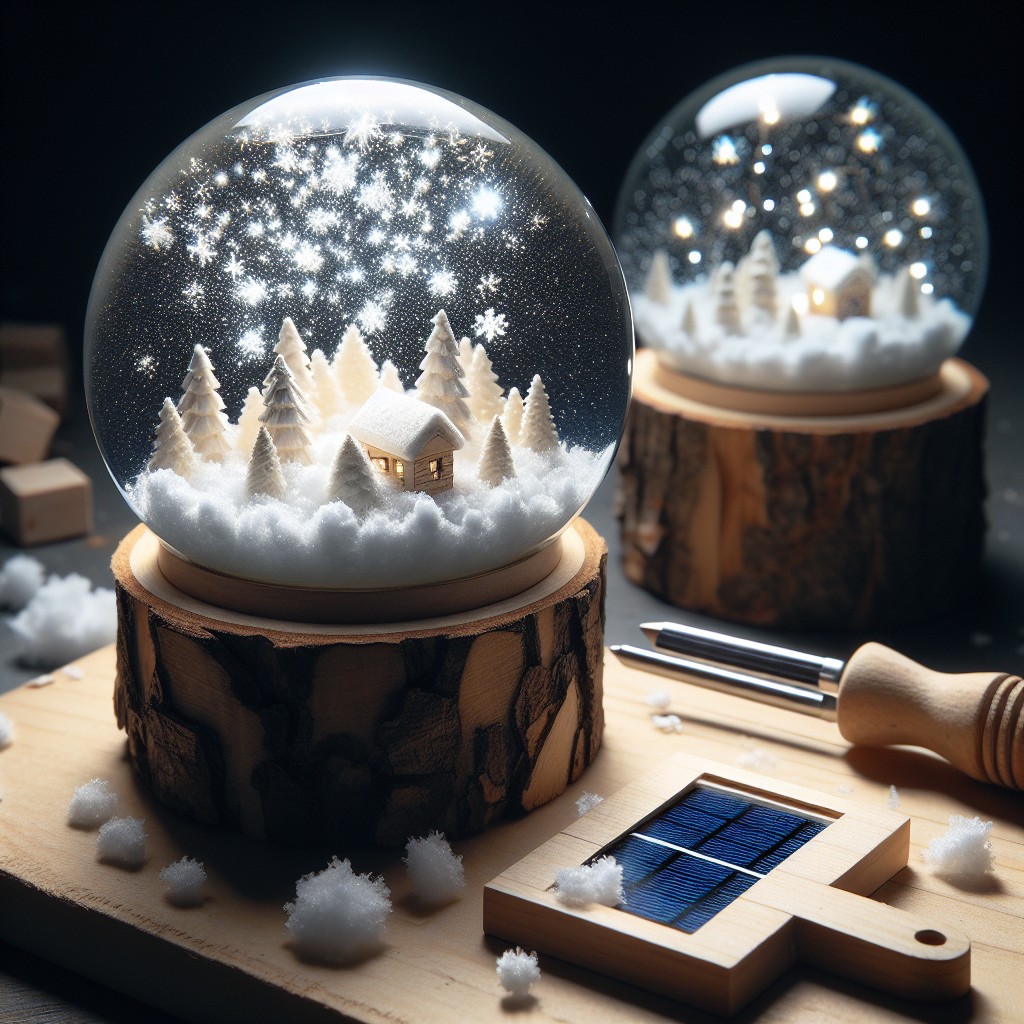
Transforming a traditional snow globe into a luminous nighttime spectacle can be achieved with a few simple materials. Start with a clear, sealable plastic or glass container, a small solar-powered garden light, and your choice of waterproof miniature figurines or scenery.
Remove the solar light’s stake, ensuring that the solar panel and LED are intact. Position the light inside the lid or the base of the container, depending on design preference, so the light faces inward. Secure it with waterproof adhesive.
Next, arrange your miniature scene on the opposite side to the light within the container. When gluing the pieces down, use a strong waterproof adhesive to ensure they remain in place once water is added. Avoid overcrowding, keeping the focus on one or two central elements that will be illuminated.
Fill the container with distilled water, leaving a little room at the top. Add a dash of glycerin, which thickens the water, allowing the glitter or faux snow to fall slowly, creating a mesmerizing effect when the globe is shaken.
Seal the container with its lid firmly, applying silicone sealant around the edges to prevent leaks. Allow the seal to dry before testing the globe.
Finally, place the snow globe in a sunny spot during the day to charge the solar light. As darkness falls, the globe will come to life, casting a soft, enchanting glow upon your chosen scene, perfect for outdoor tables or as a whimsical night light.
DIY Magical Fairy Snow Globe
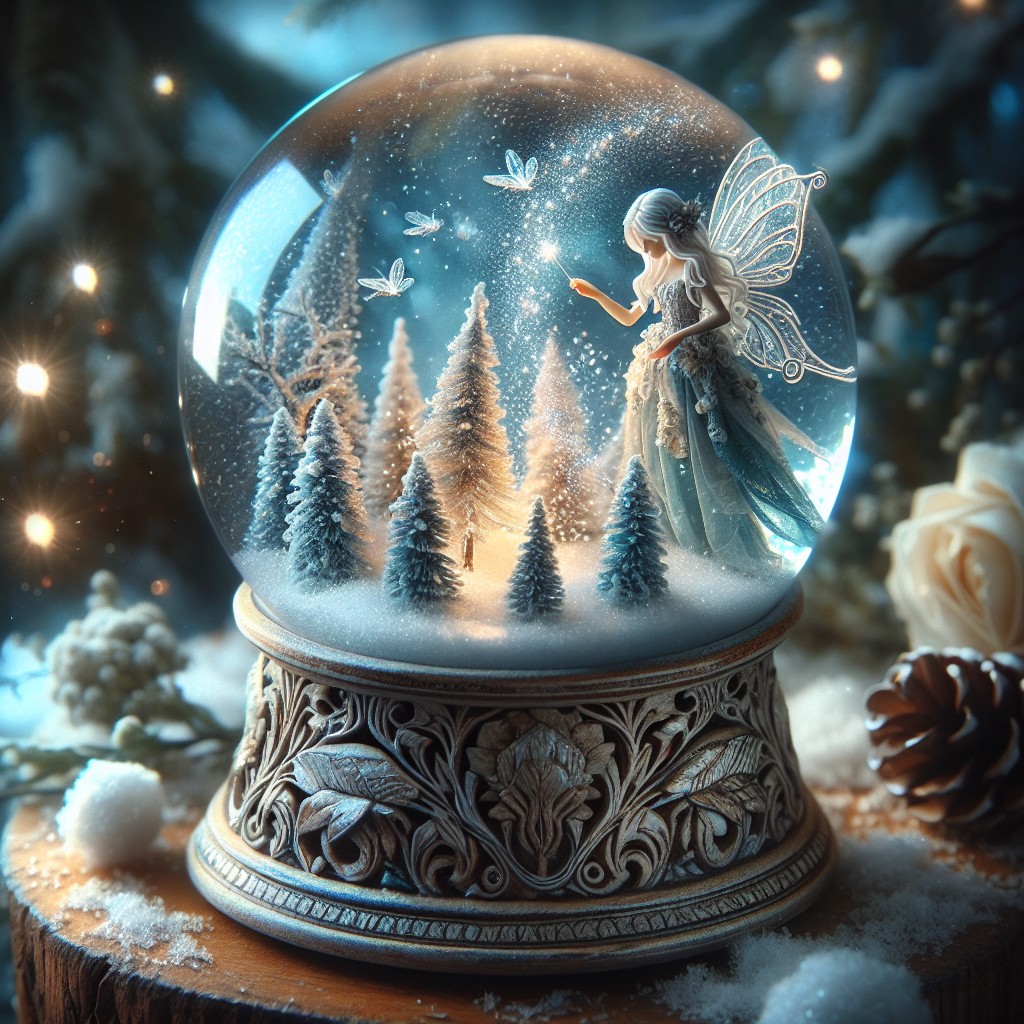
Crafting a fairy-themed snow globe is like capturing a sliver of an enchanted forest to display in your home. Begin with a clear glass jar or any transparent, sealable container that fits your aesthetic. Fill the base with artificial moss or green felt to represent grass.
Choose miniature fairy figurines from craft stores or repurpose old trinkets and jewelry to serve as the inhabitants of your whimsical world.
Accentuate the scene with tiny toadstools made from polymer clay or sourced from dollhouse accessories, and add a sprinkle of fine glitter for a touch of fairy dust. Insert a small, sturdy branch to mimic an aged tree — a perfect perch for your fairies. Consider using water-resistant LED lights to create an ethereal glow within the globe.
When assembling the globe, secure the elements with waterproof glue ensuring they withstand agitation when the globe is shaken. For the liquid, a mixture of distilled water and glycerin creates a viscous environment for the glitter to float enchantingly. Seal the lid tightly with silicone sealant to prevent leaks.
Your magical fairy snow globe now brings a bit of fantasy and serenity to any space it occupies.
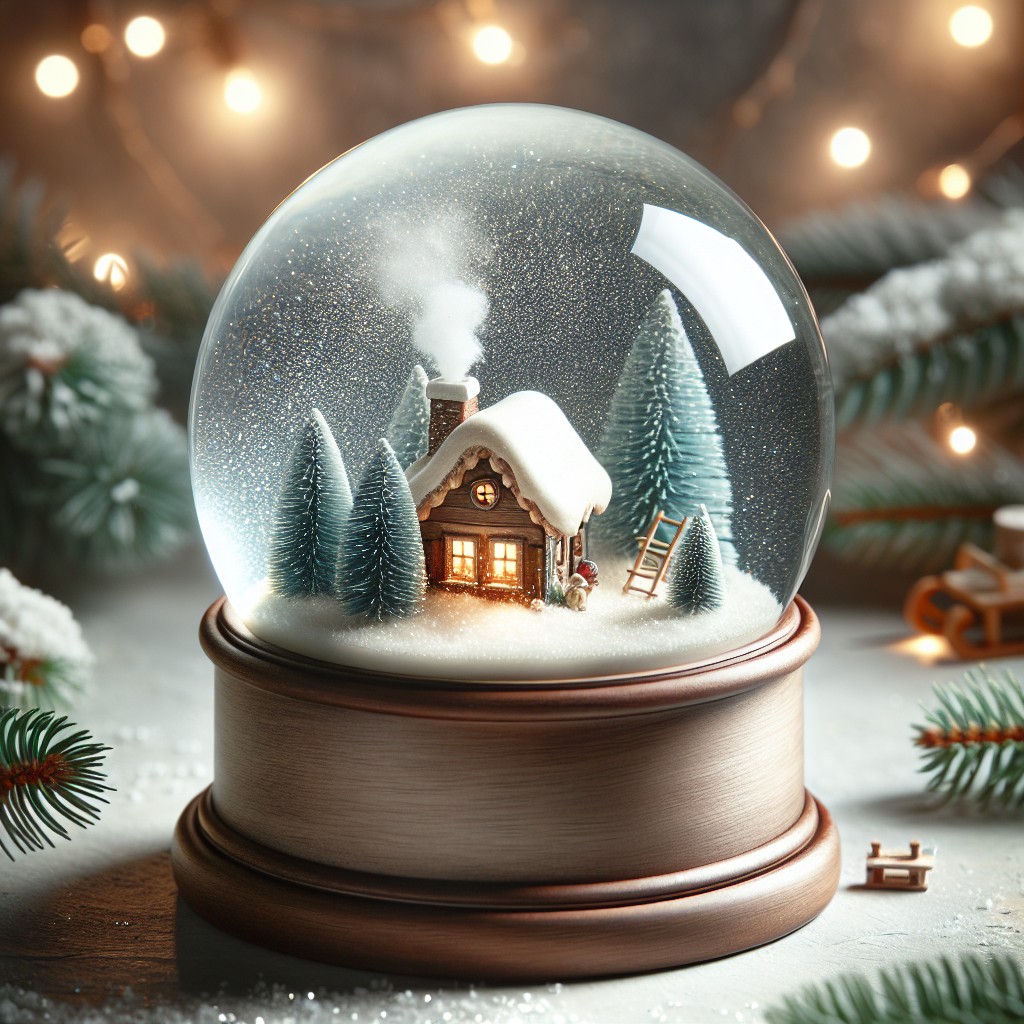
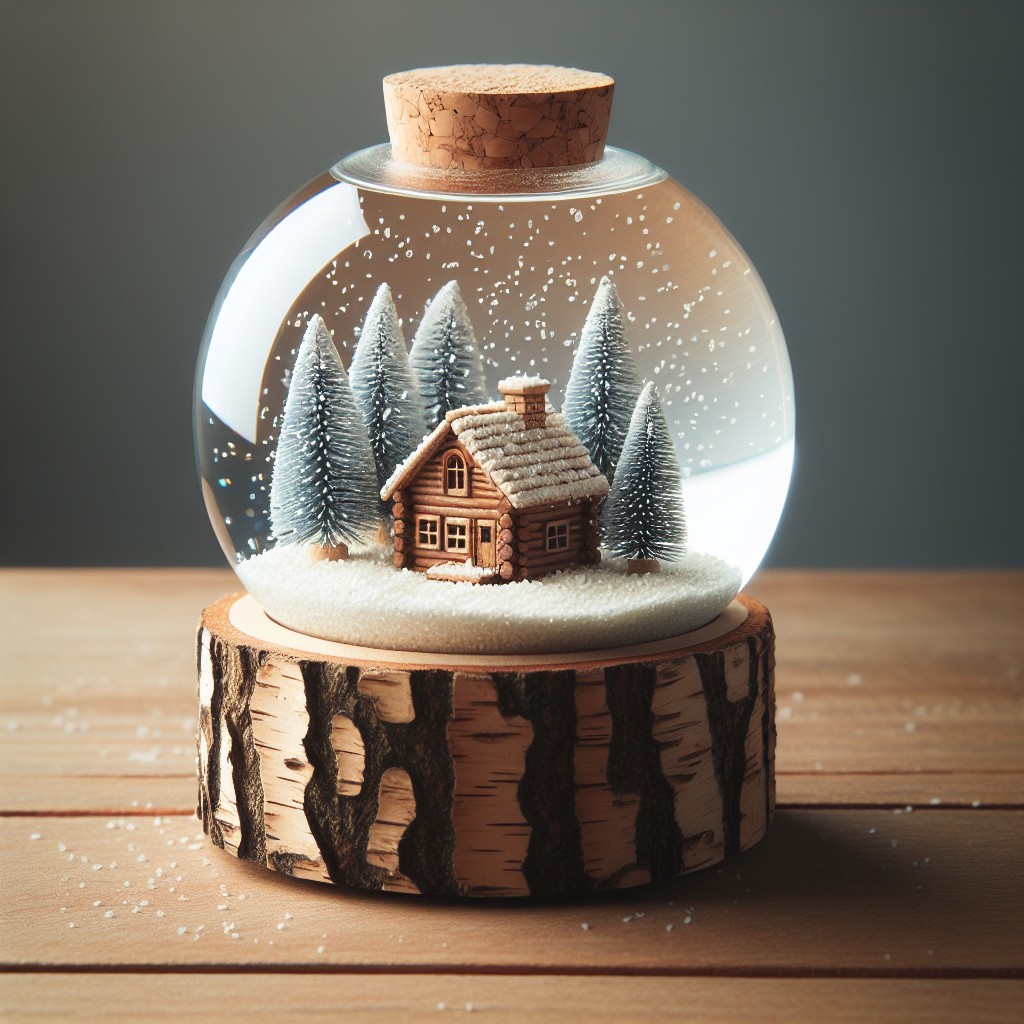
DIY Winterland Snow Globe With Miniature Trees
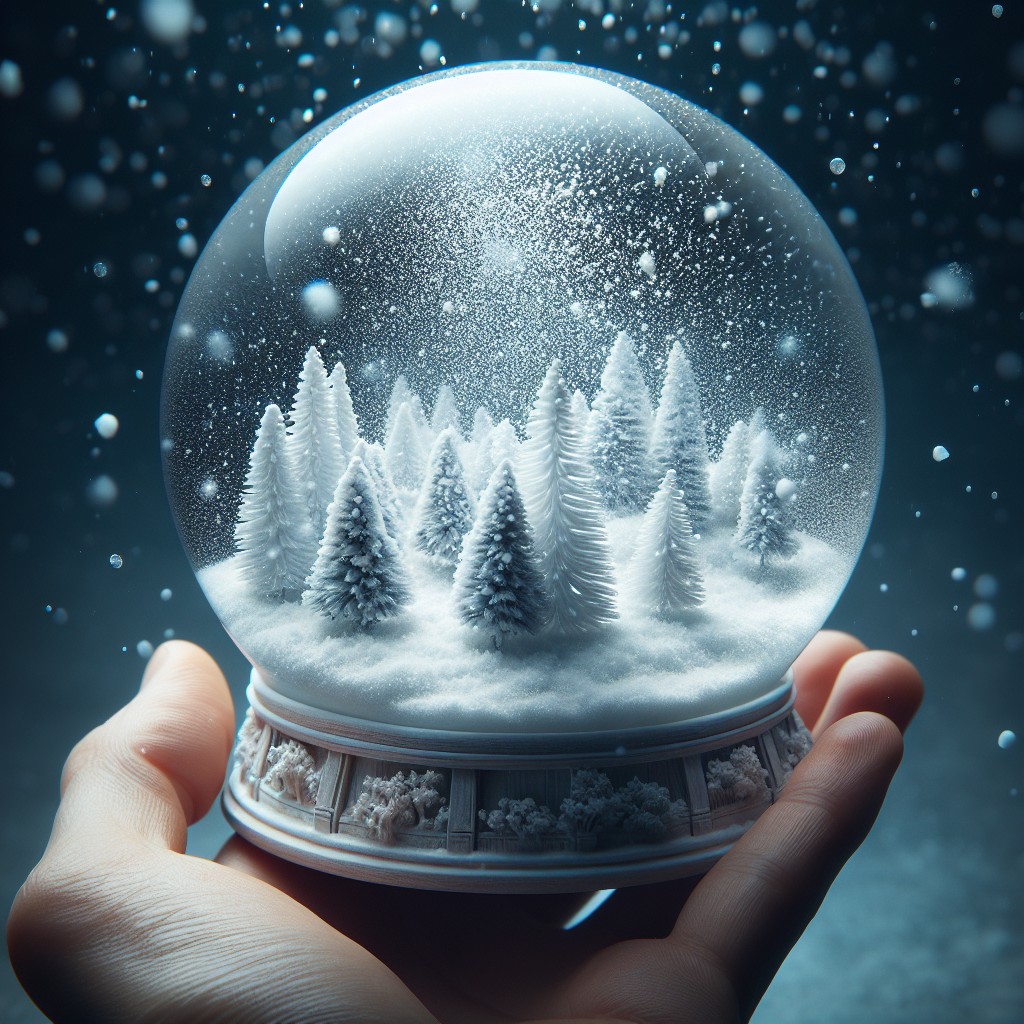
Capture the serene essence of a winter wonderland in your very own handcrafted snow globe. Begin by selecting a clear, sealable jar—anything from a mason jar to an old pickle jar will work. Ensure it’s clean and dry before starting your project.
For the wintry landscape, gather miniature trees, which can typically be found at craft stores or online. Look for varieties that come in different sizes to create a sense of depth.
To secure the trees, use waterproof glue to attach them to the jar’s lid. Allow it to dry thoroughly, ensuring a watertight seal, as water seepage can ruin the aesthetic.
Fill the jar with distilled water to limit any potential bacterial growth. Add a dash of glycerin to slow down the falling of your ‘snow,’ which can be crafted from glitter or even crushed eggshells for an eco-friendly alternative.
Once filled and sealed, invert the jar to witness a charming, snowy scene. Place your new decoration in a spot that catches the light, as this will enhance its shimmering, snowy effect.
Not only is this project simple and inexpensive, but it also serves as a wonderful, personalized gift or mantel-piece for the holiday season.
DIY Glittery Snow Globe Filled With Floating Hearts
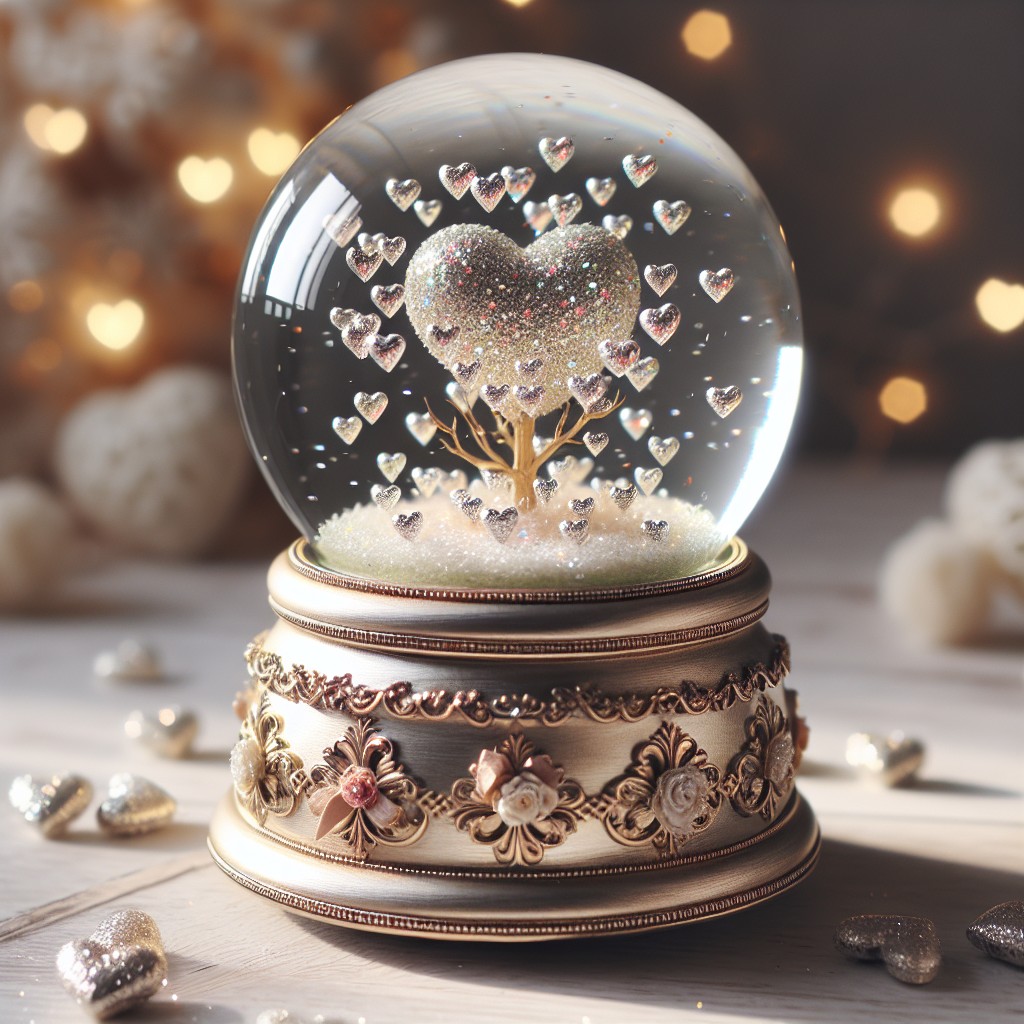
Capture the magic of love with a touch of sparkle in your own glittery heart snow globe. For this enchanting project, you’ll need a few simple materials:
- Clear glass jar with tight-fitting lid
- Distilled water
- Glycerin or light corn syrup (slow down glitter fall)
- White or iridescent glitter
- Polymer clay or waterproof craft hearts
- Waterproof glue or epoxy
- Ribbon or decorative elements for the jar exterior
First, form your hearts using polymer clay, bake them according to package instructions if needed, and let cool. Alternatively, select pre-made craft hearts. Either way, ensure they are waterproof. Attach your hearts to the inside of the jar lid using waterproof glue, creating a floating effect. Let them dry completely.
Mix distilled water with a dash of glycerin or corn syrup in the jar. This mixture ensures the glitter falls slowly, enhancing the snow globe effect. Sprinkle in the glitter, adjusting the amount to achieve your desired sparkle. Screw on the heart-adorned lid tightly, seal it with waterproof glue to prevent leaks, and flip the jar.
Add a decorative touch by tying a ribbon around the lid or painting the exterior with thematic designs, giving your globe a finished look. Shake gently and let the shimmering hearts twirl, creating a mesmerizing, budget-friendly display of affection.
DIY Halloween Themed Snow Globe
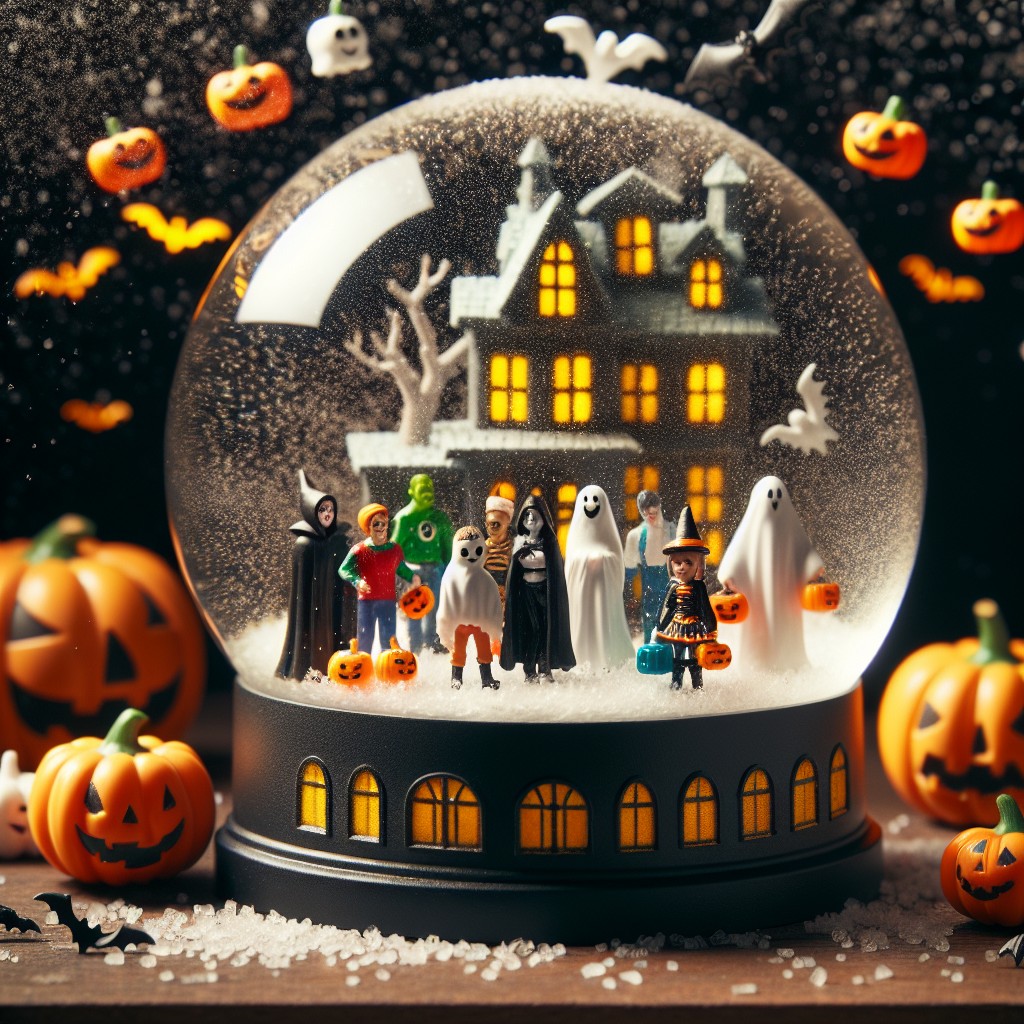
Create a bewitching display with miniature pumpkins, spooky trees, and tiny tombstones secured to the base with strong glue.
Opt for a glycerin-water mix to slow down the fall of the ‘snow,’ which can be black glitter or orange confetti to fit the theme.
Illuminate the scene using small, battery-operated LED lights concealed within, casting an eerie glow.
Showcase ghoulish characters by painting or choosing ready-made figurines of witches, ghosts, and other classic Halloween figures.
Seal your globe tightly to prevent leaks, and experiment with different jar sizes to tailor the globe to various spaces in your home, adding a touch of Halloween whimsy wherever desired.
DIY Easter Bunny Snow Globe
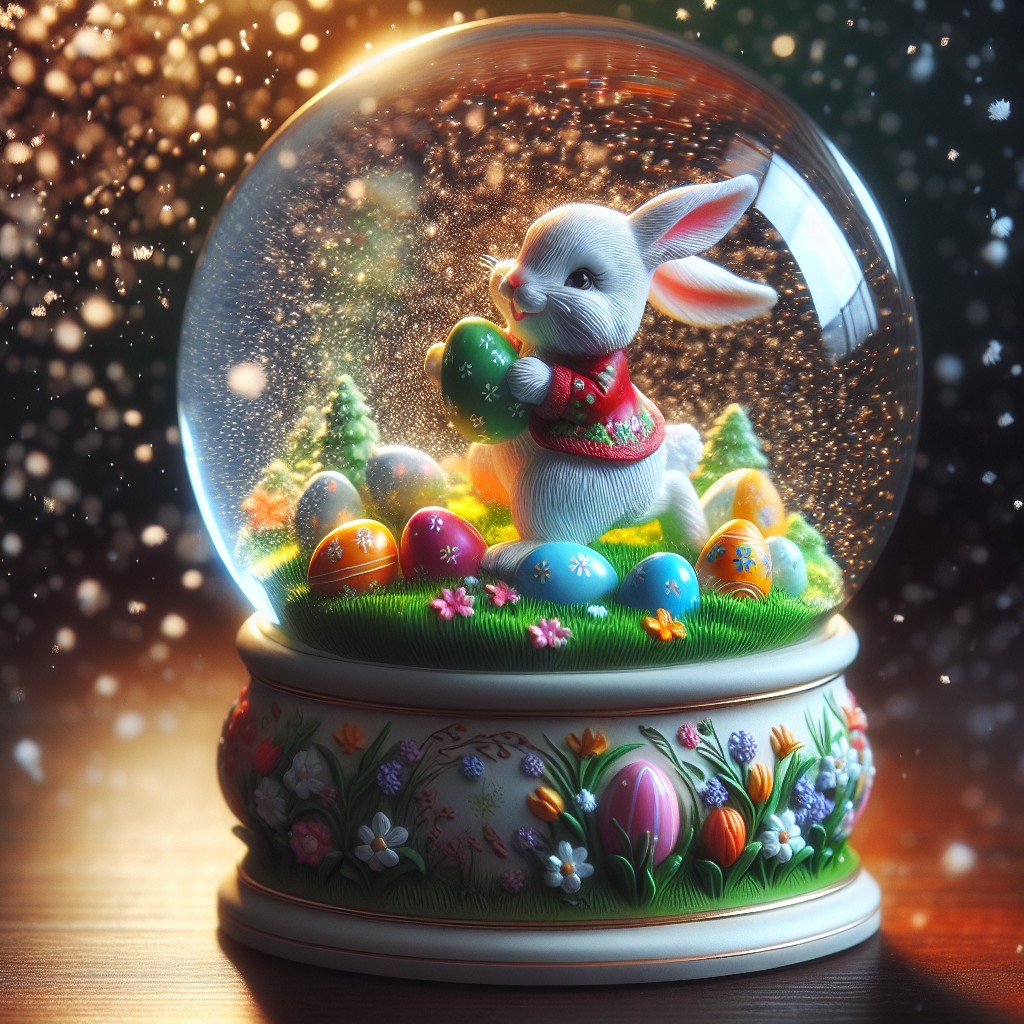
Celebrate spring with a charming craft that captures the essence of Easter. Begin by choosing a clear jar or a plastic snow globe kit as the base. Inside, nestle a small, adorable Easter bunny figurine, ensuring it’s waterproof and fits comfortably. Surround your bunny with faux grass or green shredded paper to mimic a vibrant spring meadow.
Add a personal touch by including miniature eggs, crafted from clay or purchased from a craft store. You can even paint these tiny eggs in pastel colors for an added pop of Easter festivity. Instead of the traditional snow effect, use fine glitter or confetti that complements the color scheme of your scene.
For a dynamic element, attach the Easter bunny to the lid or the base so it remains stationary. Seal the globe with water, ensuring to leave some space at the top to allow for shaking. Add a few drops of glycerin or baby oil to the water to slow down the glitter’s descent, creating that whimsical, fluttering effect when shaken.
To finish, secure the lid tightly with waterproof glue to prevent leaks. For a festive touch, tie a colorful ribbon around the neck of the jar or adorn the base with thematic decorations. This delightful DIY project not only serves as a festive centerpiece but can also be a heartfelt gift to share the joy of Easter.
DIY National Park Snow Globe

Capture the essence of America’s natural treasures with a DIY project that pays homage to the National Parks. Select miniatures that represent iconic wildlife, like bears or deer, or famous landmarks found within your chosen park, such as Old Faithful or Half Dome.
Use clear glue or glycerin to thicken the water, ensuring a leisurely fall of glitter that mimics serene snowflakes. Add a green touch at the base with faux moss or tiny trees to ground your scene in nature.
This craft not only celebrates the beauty of these protected areas but also serves as a charming reminder of past adventures or future trips.
DIY Dinosaur Themed Snow Globe for Kids
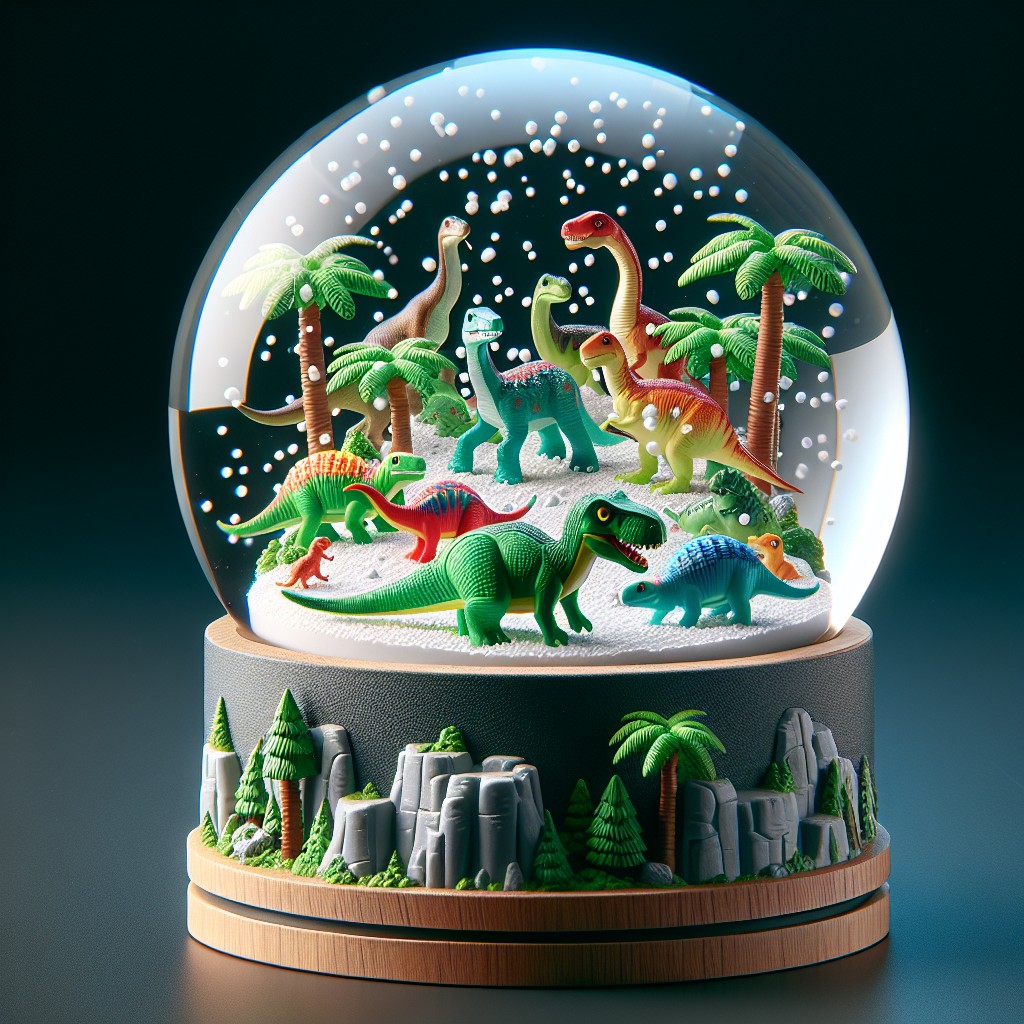
Transform a classic globe into a prehistoric playland by embedding miniature dinosaurs amidst a Jurassic environment.
Begin with a sturdy, sealable jar and add a drop of glycerin to distilled water to achieve slow-floating snow.
Glue the dinosaurs to the jar’s lid using strong waterproof adhesive.
To conjure up an ancient terrain, mix in small rocks, faux plants, and a pinch of glitter to represent dust from eons past.
For the snow, opt for a combination of fine glitter and larger, iridescent flakes to give a mixed texture when shaken.
Ensure your dinosaurs range in size for a sense of depth, and choose vibrant colors to catch a child’s eye.
Once sealed, this mini Jurassic world invites young explorers to shake and watch the prehistoric “snowstorm” they’ve created.
DIY Snow Globe With Monogrammed Initiation
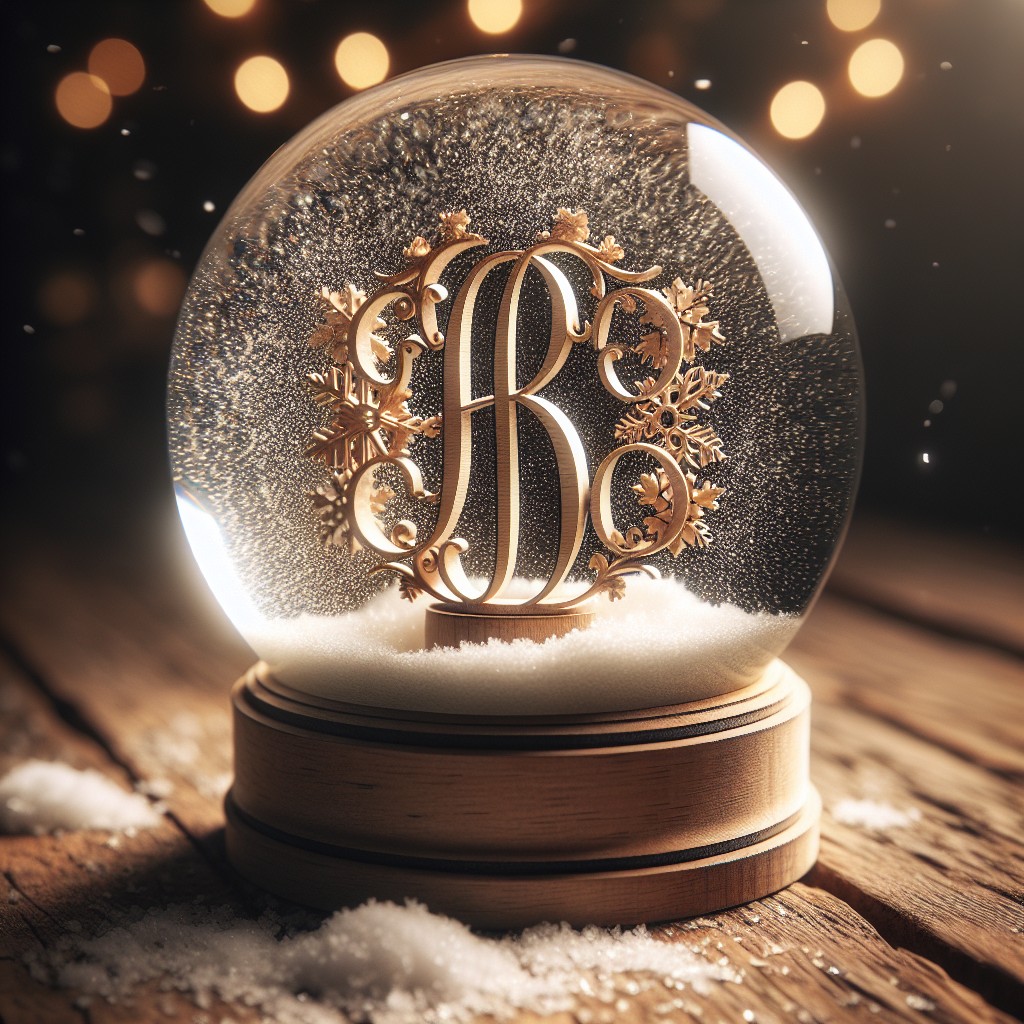
Personalize your snow globe by embossing it with a monogrammed initiation, making it the perfect bespoke gift or elegant home accessory.
Begin with selecting waterproof letters – these can be found at craft stores or made from polymer clay.
For a seamless floating effect, attach the monogram to the inside of the globe’s lid using strong waterproof glue.
Consider the backdrop for your letters; a serene winter scene or a colorful floral arrangement can add a touch of personality.
Use distilled water, a dash of glycerin (to slow down the glitter), and the glitter of your choice to create the snowfall effect.
Secure the lid tightly, ensuring no water leaks, and behold the elegance of a floating monogram in your own personalized snow globe.
DIY Pokemon Snow Globe
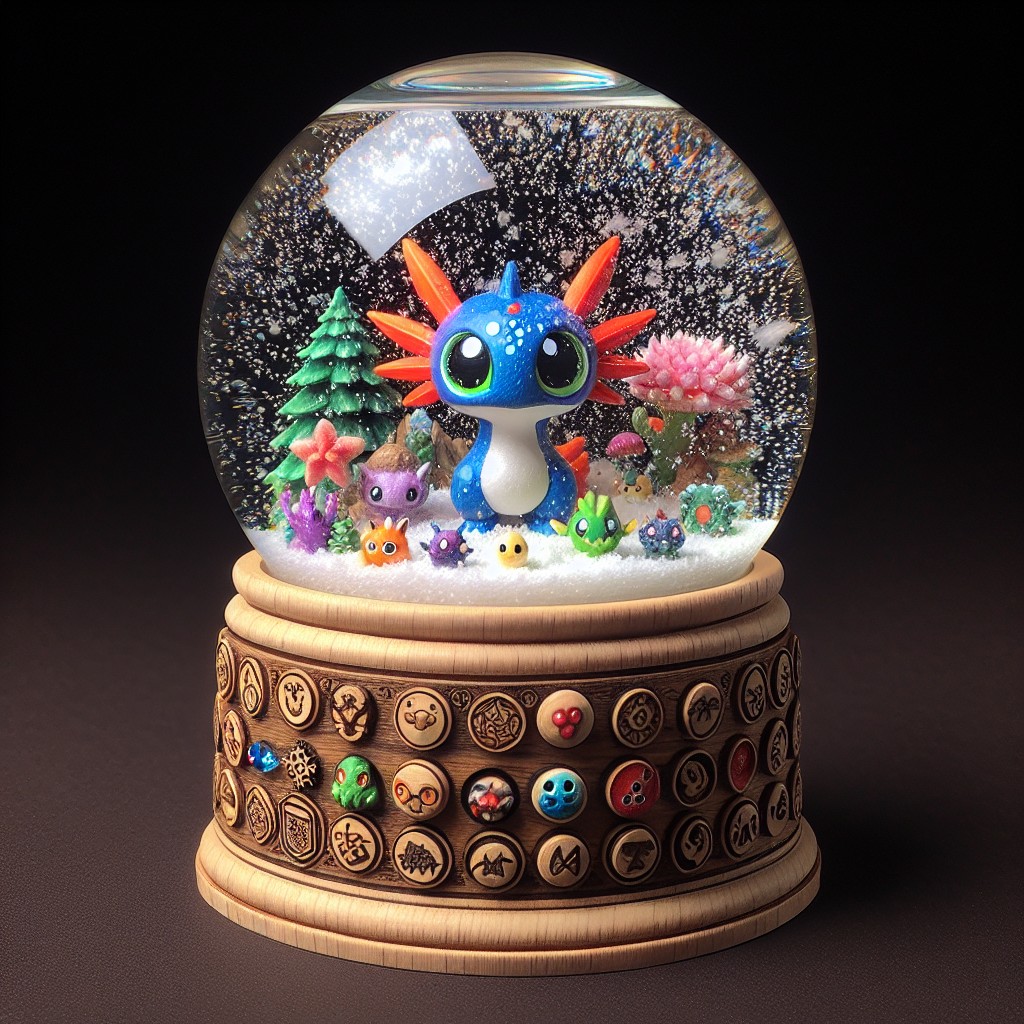
Transform your favorite Pokémon characters into a magical, miniature winter wonderland with this simple craft.
Here’s what you’ll need:
- Clear plastic or glass jar with a tight-fitting lid
- Small Pokémon figurines
- White or iridescent glitter for snow
- Glycerin or clear liquid glue
- Distilled water
- Epoxy or waterproof glue
- Optional: Small bottle brush trees or decorative rocks
Begin by sealing your Pokémon figurine to the inside of the jar lid with waterproof glue or epoxy; this ensures it stays submerged.
Allow adequate drying time to create a watertight bond.
Once secured, sprinkle a pinch of glitter into your clean jar—this is your snow.
Mix distilled water with a few drops of glycerin or clear glue to achieve a slower, snowfall-like drift when shaken.
Pour this mixture into the jar, screw the lid on tightly, and watch as your beloved pocket monsters become encapsulated in a snowy, mesmerizing scene.
Consider adding miniature trees or rocks to create a more dynamic setting.
With this playful snow globe, the world of Pokémon is literally in your hands.
DIY Beach Themed Snow Globe

Capture the essence of summer with a unique coastal-inspired creation. To craft this beachy scene, fill a clear glass jar with fine white sand, which will mimic the look of a sun-kissed shore. Scatter an assortment of small shells and bits of sea glass to add texture and color, reminiscent of a leisurely stroll along the beach.
For a touch of whimsy, nestle a miniature beach chair or a tiny umbrella within the sandy landscape.
Instead of traditional glitter, consider using blue or turquoise sequins that will swirl around like water when shaken. To seal your seaside spectacle, use waterproof glue to secure the lid. This way, you ensure your oceanic tableau remains undisrupted, preserving the calm of a beach getaway.
DIY Snow Globe Using Old Perfume Bottles
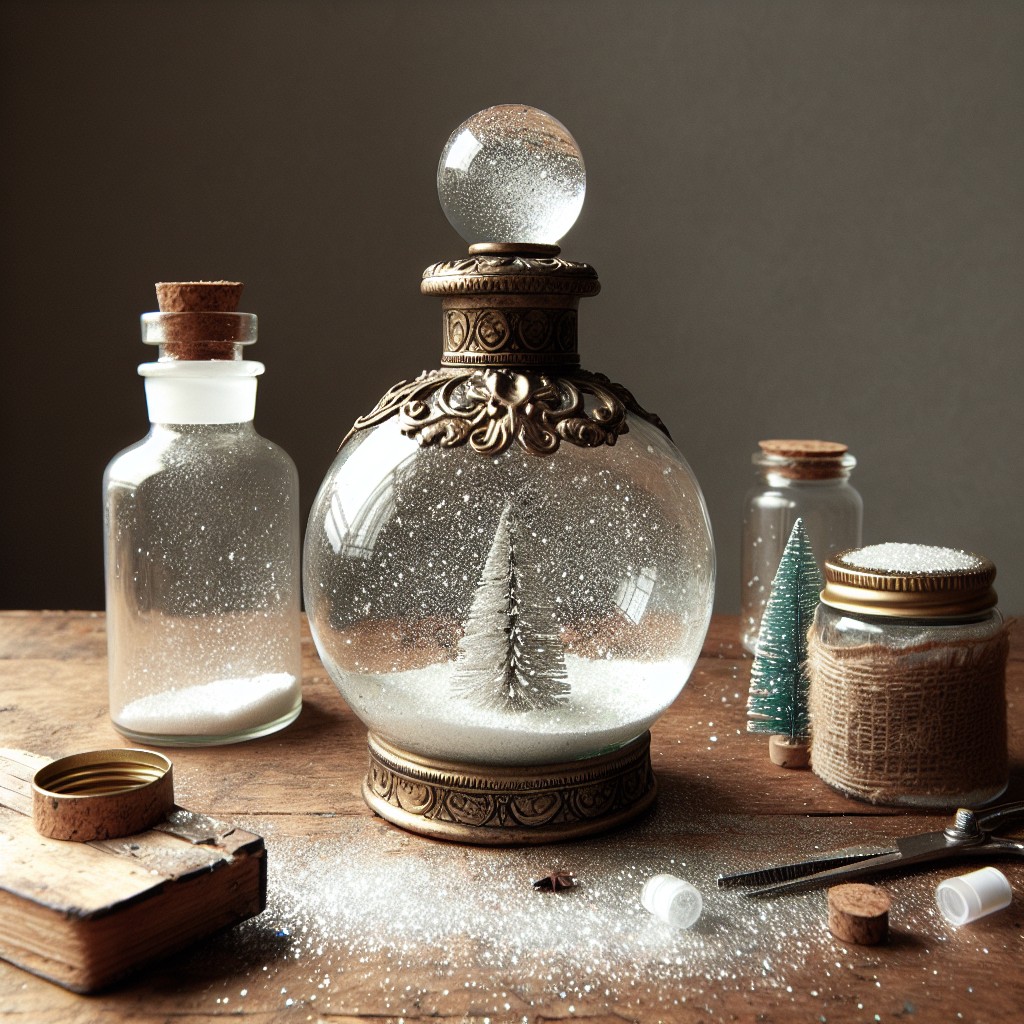
Transform a treasured, yet empty, perfume bottle into a whimsical snow globe with these simple steps:
- Begin by thoroughly cleaning the bottle, ensuring all residue is removed for a clear view.
- Select a figurine that fits the theme and scale of the bottle; adhere it to the inside of the lid with waterproof glue.
- Fill the bottle with distilled water, adding glycerin to create a slow-falling snow effect.
- Sprinkle in white or iridescent glitter as your ‘snow.’
- Seal the lid tightly with waterproof silicone to prevent leaks.
- Once dry, invert the bottle and watch the magic unfold as your new snow globe comes to life.
Upcycling perfume bottles not only saves them from the landfill but also gives you a unique piece of decor that holds a personal memory.
DIY Harry Potter Themed Snow Globe
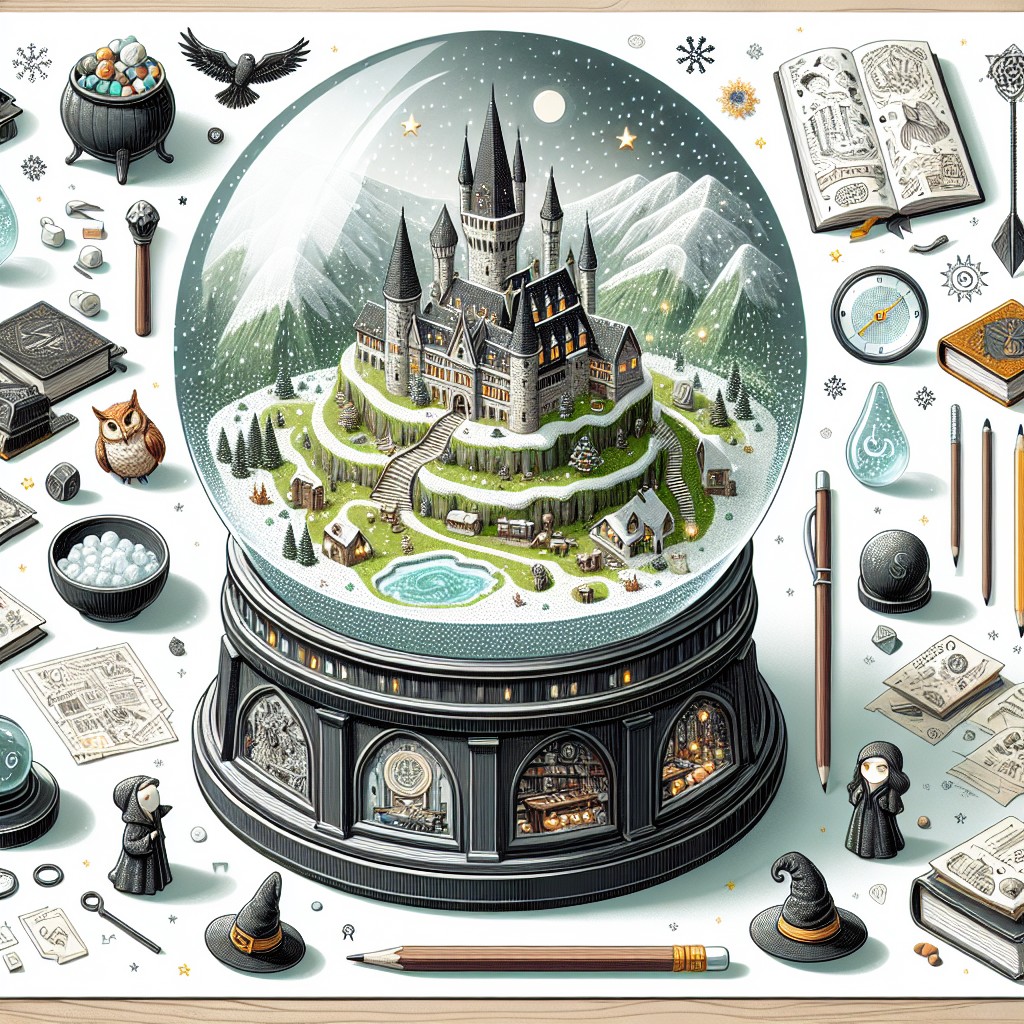
Creating a magical world within a globe, this craft pays homage to the enchanting Harry Potter series. To begin, select your favorite scene or element from the books – perhaps the iconic Hogwarts Castle, a quidditch broom, or the Sorting Hat – as the centerpiece of your creation.
Start by securing a clean, empty jar, which will act as the base of your globe. Inside it, you’ll anchor your chosen figurines or handcrafted pieces using strong waterproof glue. Add a touch of sparkle with fine, iridescent glitter to mimic the mystical allure of wizardry.
Fill the jar with distilled water, leaving room for glycerin – this helps to suspend the glitter longer when you shake the globe. Proceed to affix the lid with strong glue, ensuring it’s tightly sealed to prevent any leaks.
Customize your snow globe further by painting the lid with colors representing your favorite Hogwarts house or adorning it with tiny charms that hold significance within the Potter universe. With each shake, watch the magic come to life as the glitter swirls around your chosen scene, creating an entrancing, otherworldly effect.
Mini Glass Dome Snow Globe DIY
Crafting a mini glass dome snow globe is a charming and delicate way to add a touch of whimsy to any space. To begin, select a small glass dome with a base — these are often available at craft stores or can be repurposed from old clocks or jewelry displays.
Within this confined glass universe, the main focus is on simplicity and detail. Choose miniature figurines or elements that represent a scene or theme you’re passionate about. A dab of strong adhesive ensures your tiny treasures stay anchored to the base.
Next, sprinkle a pinch of fine, white glitter or artificial snow into the dome to emulate a serene, wintry scene. Pay attention to the size of the particles; too large may impede the falling snow effect.
To assemble, apply a sealant around the edge of the glass dome’s base to prevent water from entering. Carefully invert the dome onto the base, and secure it. Then, gently shake to bring your miniature winter wonderland to life.
Choose decorations that scale well with the dome, keeping in mind the adage that less is more. Subtlety is the key to a tastefully done mini glass dome snow globe — a single, well-placed element can make a more significant impact than several crowded together.
DIY Wedding Souvenir Snow Globe
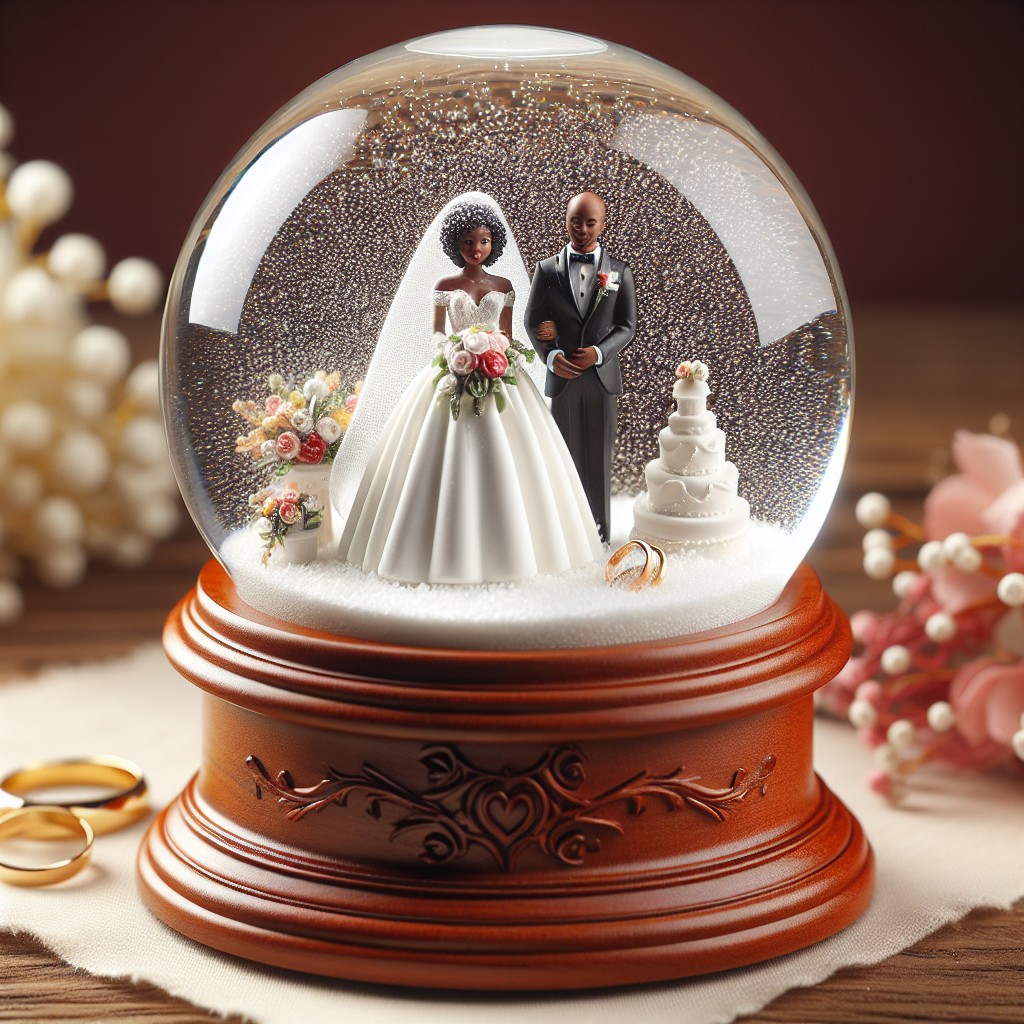
Capture the romance of your special day with a personalized keepsake that guests can treasure. Start by selecting small jars or bottles that embody the essence of elegance – think miniature glass canisters with secure lids.
Inside, anchor a figurine that represents the couple; options range from classic bride and groom figures to something that reflects shared interests or the wedding theme.
For the snowy touch, use synthetic snow or biodegradable glitter, which, when swirled with distilled water and glycerin, creates that enchanting snowfall effect.
If desired, add a backdrop inside the jar such as a printed photo or a mini scene that tells a story about the couple.
When assembled, these snow globes double as touching mementos for your guests and festive decorations for their homes.
With a glue gun, seal everything in place to ensure the contents stay secure, and finish by tying a ribbon around the jar’s neck or adding a customized tag with the wedding date.
Not only do these snow globes capture the magical atmosphere of the wedding, but they also serve as a heartfelt thank you to those who shared in your joy.
DIY Snow Globe With Cork Stoppers
Transform unused glass jars into enchanting, eco-friendly decor with cork stoppers. This sustainable approach repurposes materials you likely already have at home.
Materials:
- Clear glass jars (any size)
- Cork stoppers (fit jars appropriately)
- Figurines or decorations for inside the snow globe
- Glycerin or clear glue (to thicken the water)
- Glitter or faux snow
- Waterproof sealant (e.g., silicone or epoxy)
- Distilled water
Steps:
1. Select jars and ensure they’re clean and dry.
2. Affix your chosen figurines to the inside of the cork stopper—this will act as the base of your display.
3. Fill your jar with distilled water, leaving a small gap at the top to accommodate the cork stopper.
4. Add a few drops of glycerin or clear glue, then sprinkle in glitter or faux snow.
5. Apply waterproof sealant around the cork stopper’s edge.
6. Carefully insert the decorated cork into the jar, ensuring a tight seal.
7. Give the globe a gentle shake to validate the seal and watch your wintry scene come to life.
Tips:
- Customize your design with paint or ribbon around the jar.
- For a festive touch, use themed decorations, such as tiny pumpkins or hearts.
- Always test the waterproofness of the cork before adding decorations.
By harnessing the simplicity of cork stoppers, you give new life to ordinary jars, crafting a personalized, budget-friendly snow globe that captures the imagination.
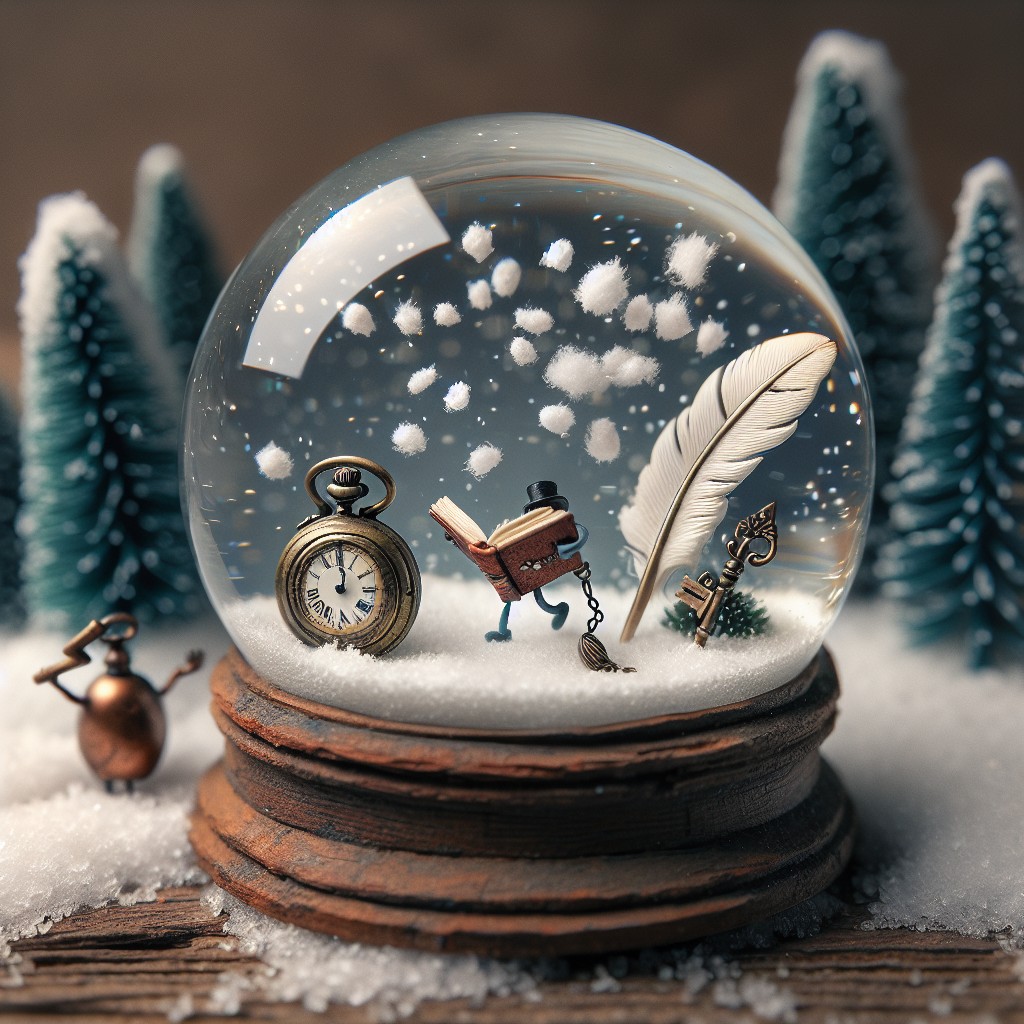
DIY Snow Globe With Floating Words or Quotes
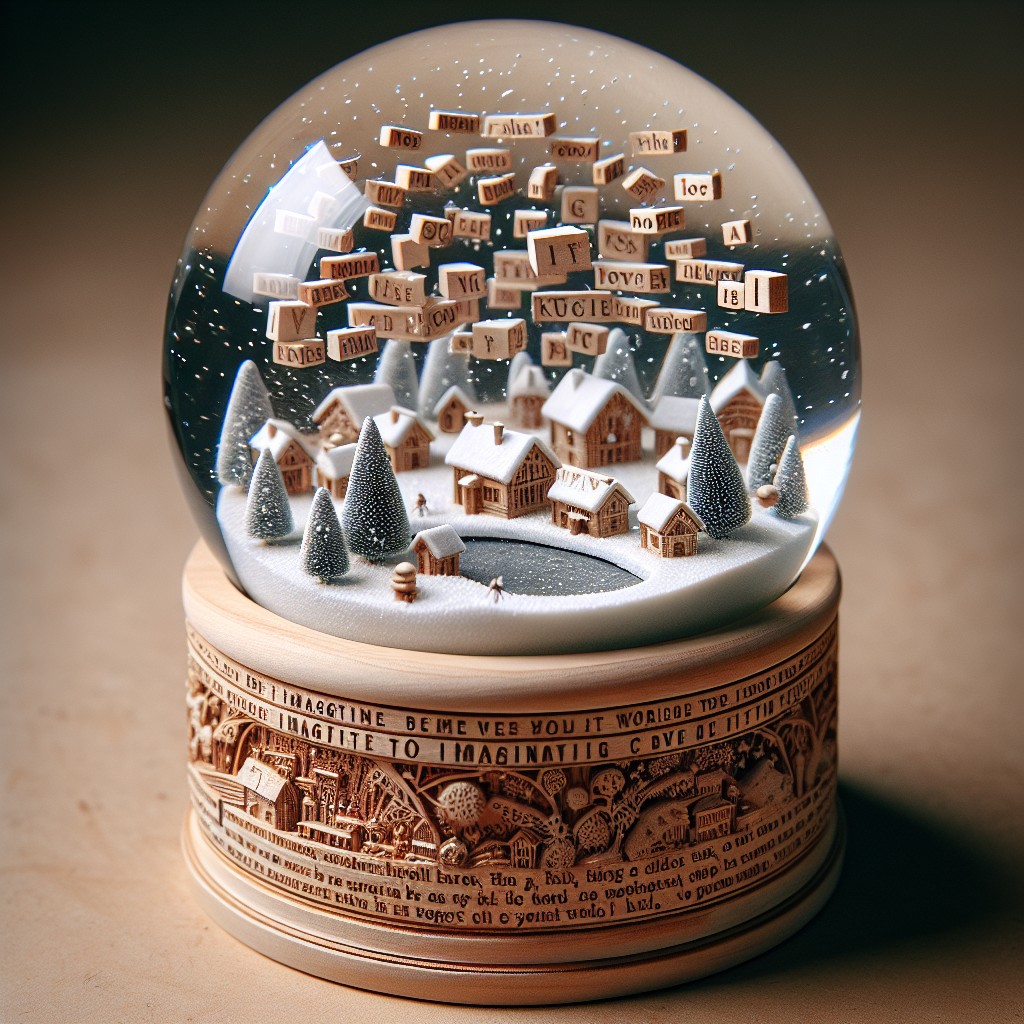
Capture inspiration in a globe by embedding your favorite sayings or quotes. First, select waterproof paper or use a laminating machine to seal your words.
Cut out the quote in an appealing shape—consider a banner, cloud, or scroll design. To secure the floating effect, attach your quote to a clear plastic stick, which can easily be camouflaged by the surrounding glitter or faux snow.
When assembling, pay special attention to the weight and balance to ensure your message hovers perfectly amidst a tranquil snow flurry. This personal touch transforms a simple snow globe into a thoughtful gift or an inspiring decorative piece.
DIY Zodiac Signs Snow Globe
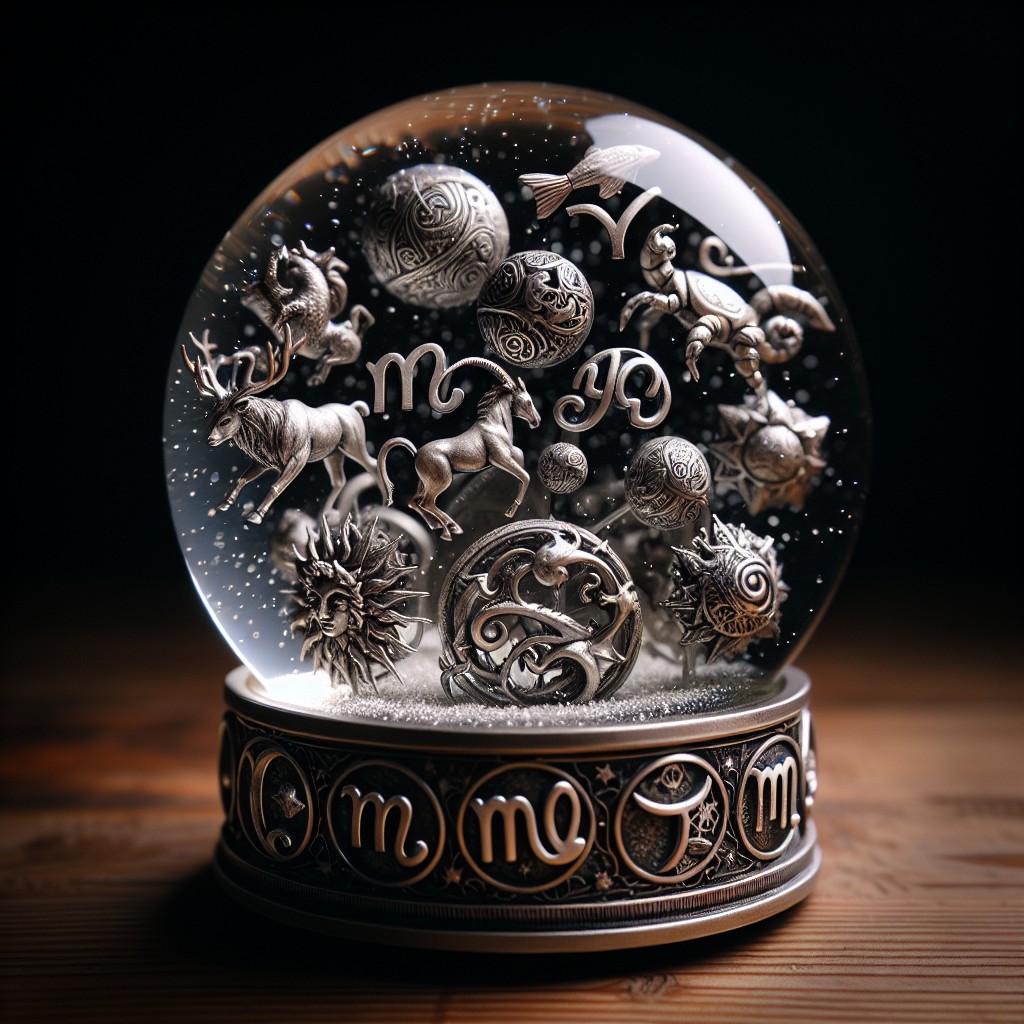
Create a celestial showcase by incorporating your astrological sign into a snow globe. Begin with a clear jar or a pre-made globe base. Select a figurine or printable that represents your zodiac sign, such as a lion for Leo or scales for Libra. Secure it to the base using strong adhesive.
To enhance the astrological theme, consider adding small stars or glitter representing the constellation associated with your sign. Choose a waterproof glue to stick these tiny stars onto the interior of the jar or globe. Distilled water mixed with glycerin or clear liquid soap creates the snowstorm effect, slowing down the glitter’s descent when the globe is shaken.
Personalize your globe with colors that resonate with your zodiac sign – cool blues for water signs, fiery reds for fire signs, earth tones for earth signs, and pastel shades for air signs. Finally, assemble your snow globe, ensuring a tight seal to prevent leaks. This personalized decoration brings the cosmic charm of the zodiac into your home decor.
DIY Snow Globe With Upcycled Light Bulbs
Embrace sustainability and creativity by transforming old light bulbs into enchanting snow globes. Begin by carefully removing the electrical components from the bulb to hollow it out.
Use fine sandpaper to smooth any sharp edges. Next, select miniature figurines that can fit through the bulb’s opening. Attach your chosen scene to the bulb’s metal screw base, which serves as the stand.
Fill the bulb with distilled water, a dash of glycerin to slow the glitter’s fall, and the glitter itself. Seal the bulb tightly with strong adhesive to prevent leaks. Finally, decorate the base to add a personal touch and hide any imperfections.
Upcycled light bulbs not only give a magical twist to traditional snow globes but also promote an environmentally friendly approach to holiday decor.
DIY Snow Globe With Quilled Paper Designs
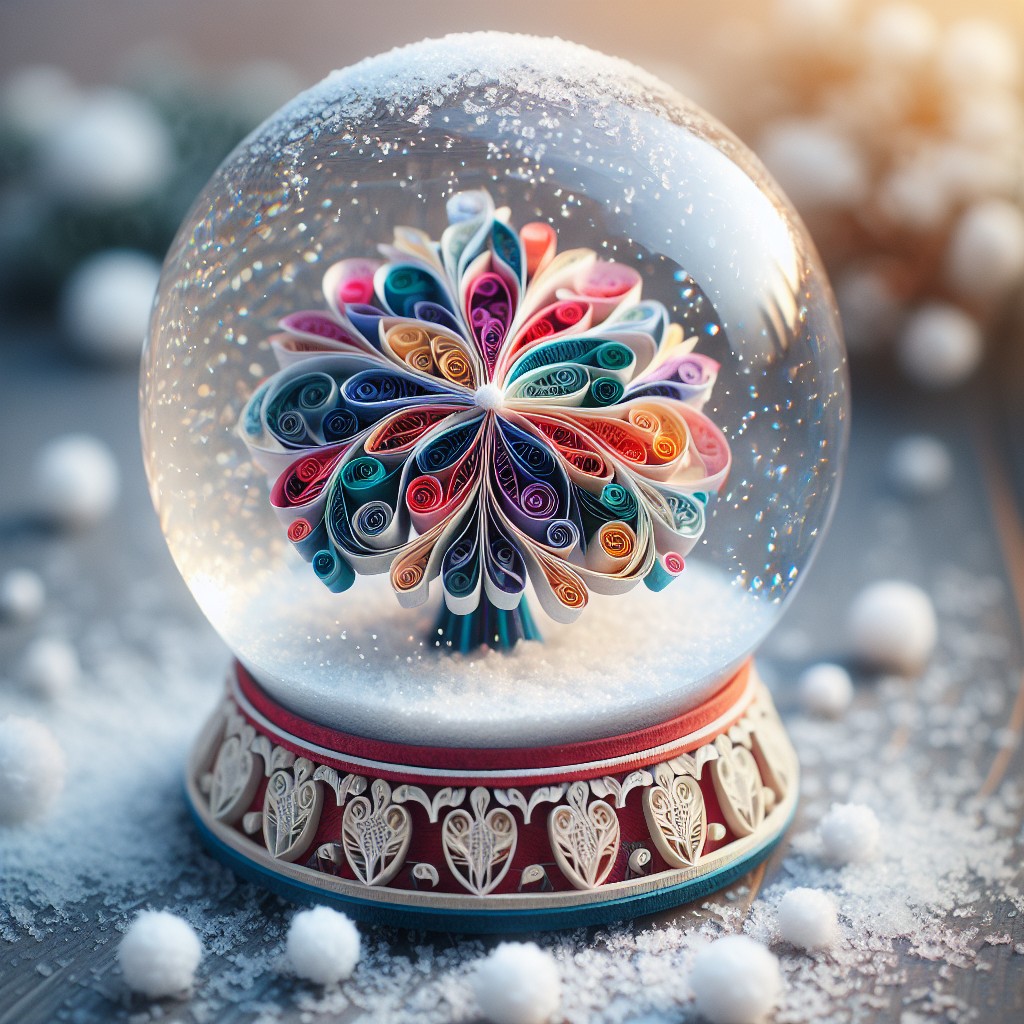
Quilling paper offers a unique texture and dimension to your snow globe, transforming it into a whimsical, artistic display. Begin by twisting narrow strips of colorful paper into coils, shapes, and patterns. Floral designs, abstract shapes, and seasonal motifs work well for this project.
Secure your quilled creations onto the base of your snow globe using clear-drying adhesive, ensuring they are flat enough not to interfere with the seal. Choose a glycerin-water mixture for the liquid to allow the paper designs to maintain their shape and float gracefully. To avoid any water damage, thoroughly coat your quilled art with a clear sealant before assembling the globe.
Remember, the charm of quilled paper designs lies in their intricate details, so opt for a clear jar or globe that showcases your handiwork from all angles. Use minimal glitter or faux snow to ensure your quilled paper designs remain the focal point of your DIY snow globe.
DIY Snow Globe With Vintage Keys
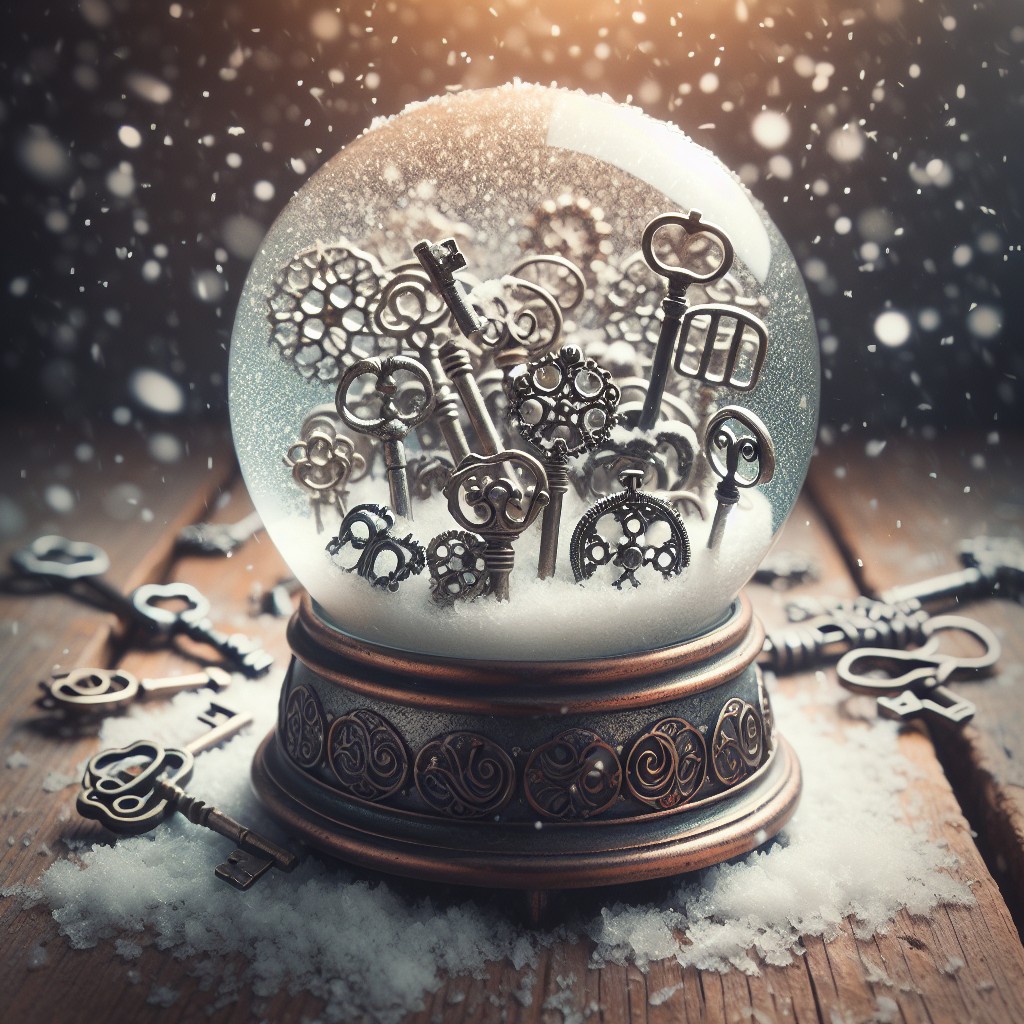
Begin by selecting a key with character – perhaps one with intricate designs or a unique shape. The appeal of this project lies in transforming these old-fashioned items into enchanting pieces of art.
Gently clean the key to remove any rust or dirt.
Choose a jar with a lid that complements the size of your key. A mason jar works well, but any clear, sealable container will do the trick. To secure the vintage key, use waterproof glue or epoxy to attach it to the inside of the lid. Position it to look as though it’s floating in your wintery scene.
Fill your jar with distilled water for clarity, adding glycerin or baby oil to thicken the water slightly, which allows the glitter to fall more slowly, like snow. Utilize superfine glitter or fake snow, swirling it in to replicate a gentle snowfall.
For adding a backdrop, consider placing a small piece of antique lace or velvet at the bottom of the jar, beneath the key. This fabric layer can add a touch of sophistication and a pop of color that makes the key stand out.
Seal the jar tightly. If necessary, apply clear silicone or strong glue to the rim to prevent leaks. Once assembled and sealed, flip the jar over, give it a gentle shake, and watch as your vintage key snow globe brings a touch of old-world charm to your decor.
DIY Game of Thrones Inspired Snow Globe
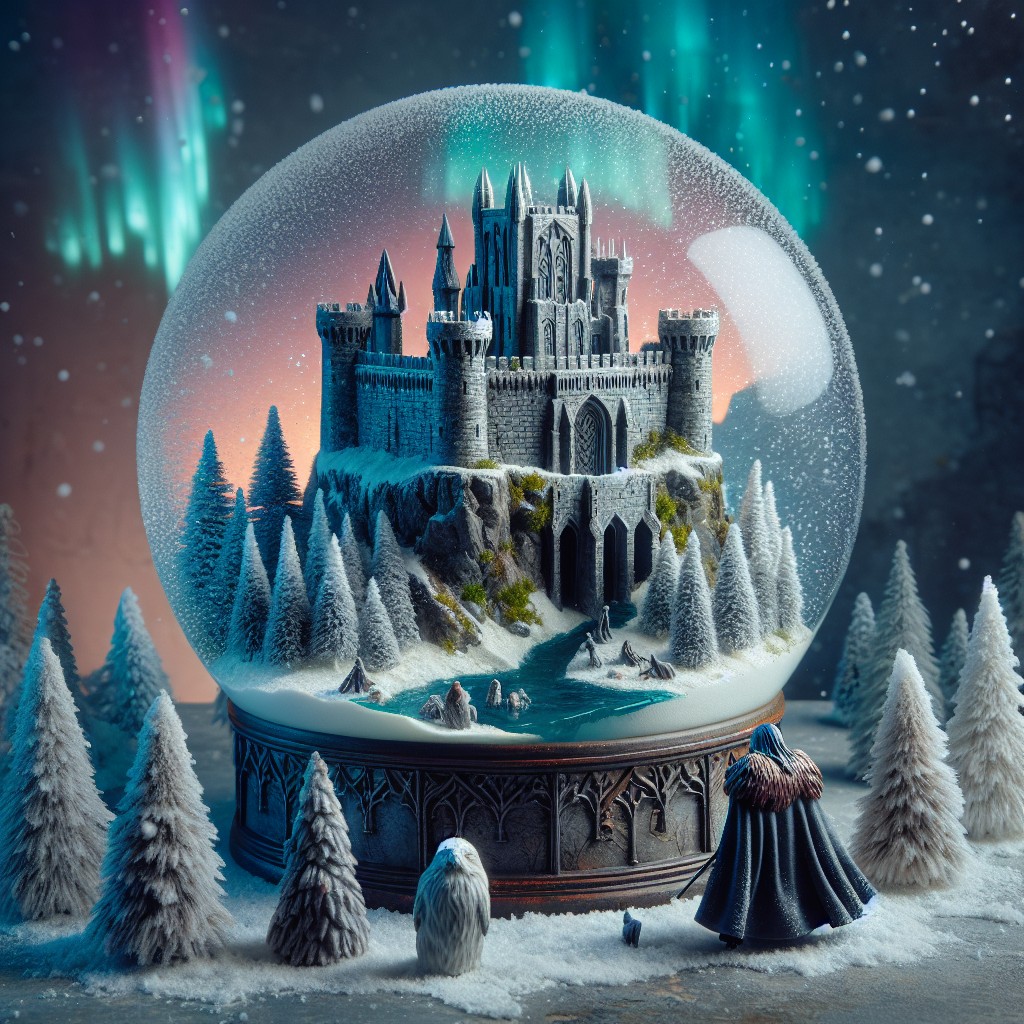
Immerse yourself in the fantastical realm of Westeros by crafting a snow globe that pays homage to the iconic television series. Select a miniature Iron Throne, a direwolf, or a dragon to play the central role in your snowy scene.
A few drops of black and red glitter in the water can represent the complex struggle for power, reminiscent of Targaryen and Lannister hues.
For the liquid, mix distilled water with glycerin or baby oil to ensure the ‘snow’ falls slowly, capturing the wintry atmosphere of the North. The base of the globe can be painted with sigils of the various houses or wrapped in a map of the Seven Kingdoms for an immersive effect.
Remember to seal the jar tightly to prevent leaks—the goal is to contain the long winter, not welcome it onto your shelves! With patience and creativity, you’ll have a piece of the epic saga to display proudly in your home.
DIY Snow Globe With Tiny Book Charms
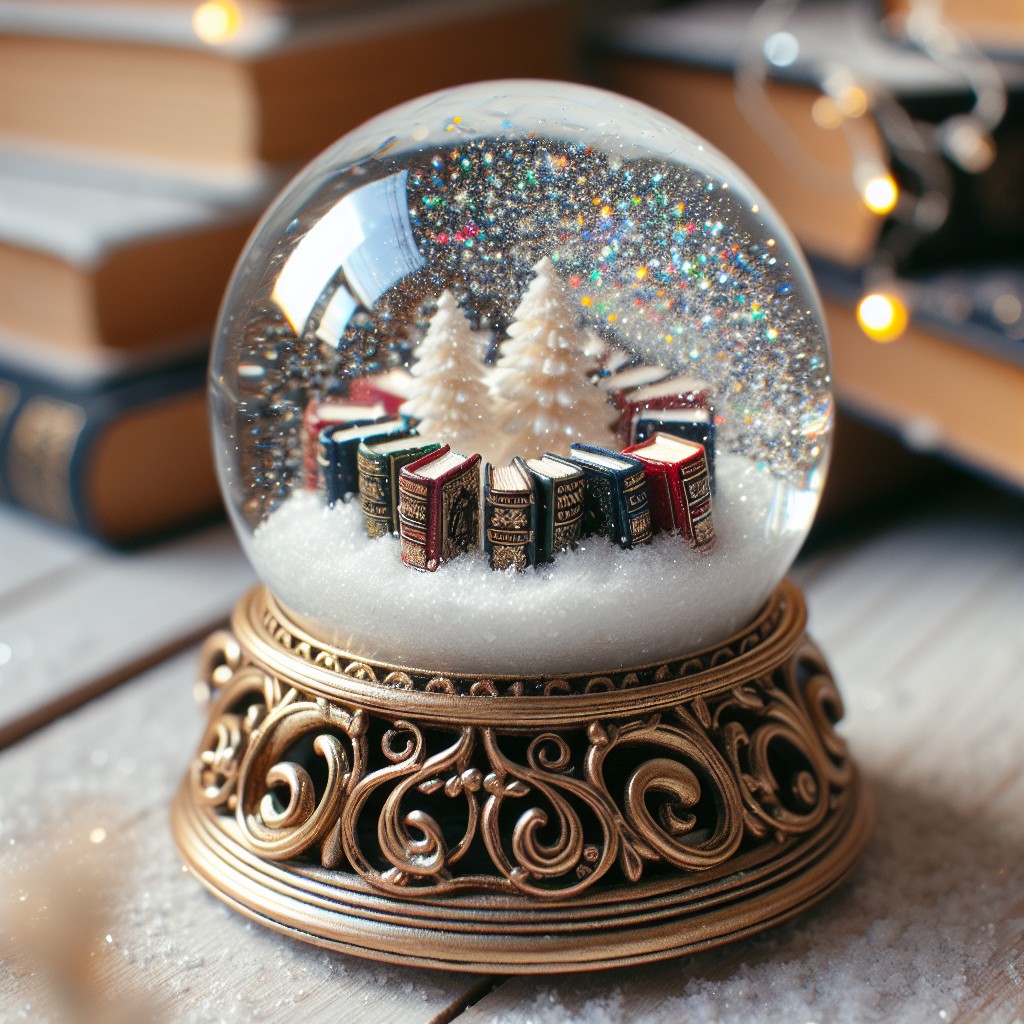
Dive into a whimsical bibliophile’s dream with a snow globe that features tiny book charms. Perfect for literary enthusiasts, this unique globe epitomizes the magic of reading.
Preparation
- Choose a clear jar with a tight-sealing lid, such as a mason jar or old jam jar, ensuring a leak-proof display.
- Collect or purchase mini book charms, often found at craft stores or online; make sure these are waterproof.
- Select a strong waterproof glue – epoxy or silicone sealant works well – to secure the charms to the jar lid.
Creation
- Arrange the book charms on the inside of the jar lid, positioning them to create a miniature library scene; once pleased with the layout, glue them in place and allow to dry thoroughly.
- Fill the jar almost to the top with distilled water to keep it clear over time.
- For the “snow,” add a pinch of glitter or faux snow; choose a color that complements the book charms.
- Glycerin or baby oil can be added to the water to slow down the fall of the “snow.”
Assembly
- After the lid is dry and the inside of the jar is ready, carefully screw the lid back onto the jar.
- Seal the lid with waterproof silicone to prevent leaks.
Display and Enjoyment
- Gently shake your new literary snow globe to swirl the snowy scene around your charming little books.
- Place in an area where it can be admired, such as a bookshelf or reading nook, matching your love for literature with your decor.
DIY Snow Globe With Mini Hot Air Balloon
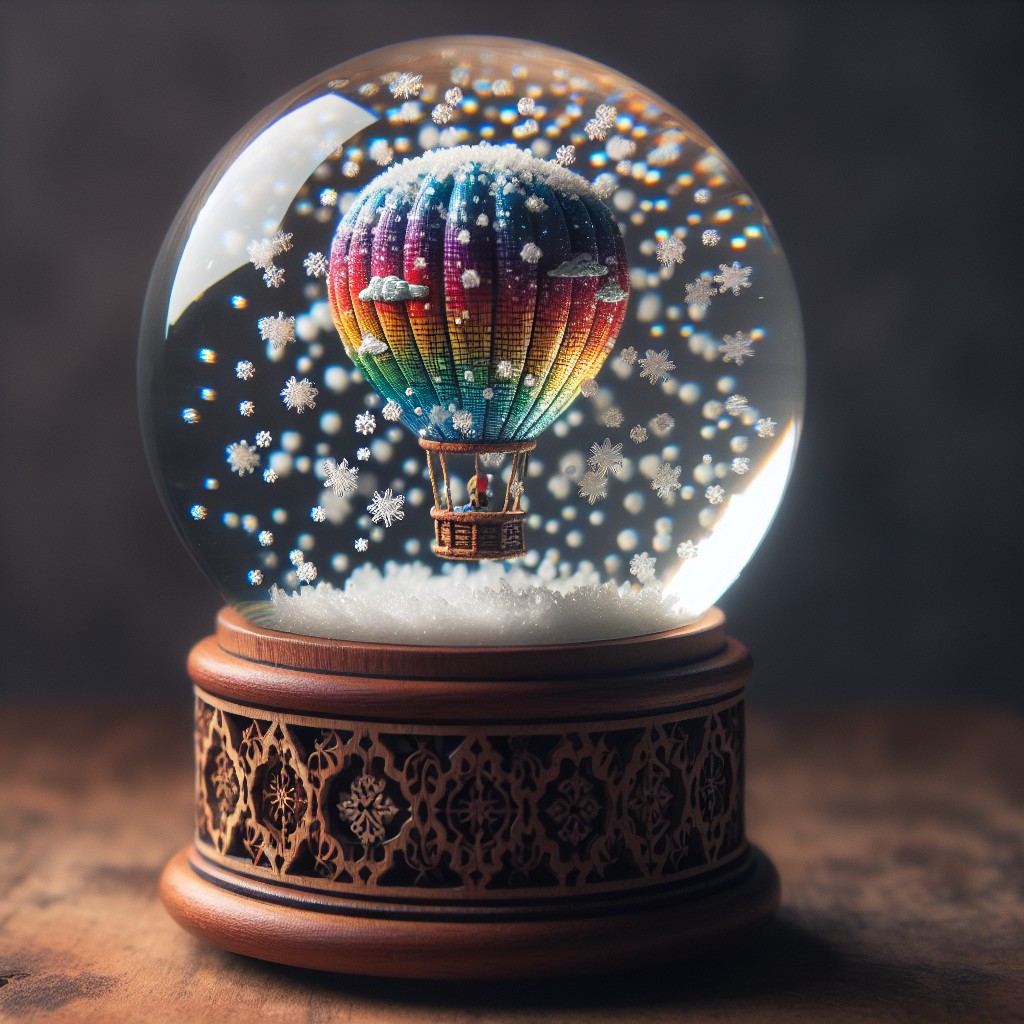
Embark on a whimsical craft by creating a scene of aerial adventure within your very own snow globe. Begin with a small, lightweight hot air balloon figurine—choosing one that fits comfortably inside your chosen jar. Secure your balloon with strong adhesive to the inside of the jar’s lid, ensuring it has enough space to ‘float’ when the lid is screwed on.
Next, fill your jar almost to the brim with distilled water, adding a pinch of white glitter or faux snow for that magical, snowy sparkle. A dash of glycerin or light corn syrup will make your ‘snow’ fall more slowly, enhancing the dreamy effect.
Now, carefully invert the lid and lower the hot air balloon into the liquid, ensuring no air bubbles trap under the figurine. Screw the lid on tightly, sealing with waterproof silicone if desired for extra leakage protection. Once secure, flip the jar and watch the enchantment take flight as your mini hot air balloon gently drifts amidst a shimmering snowfall.
DIY Mason Jar Snow Globe With a Twist
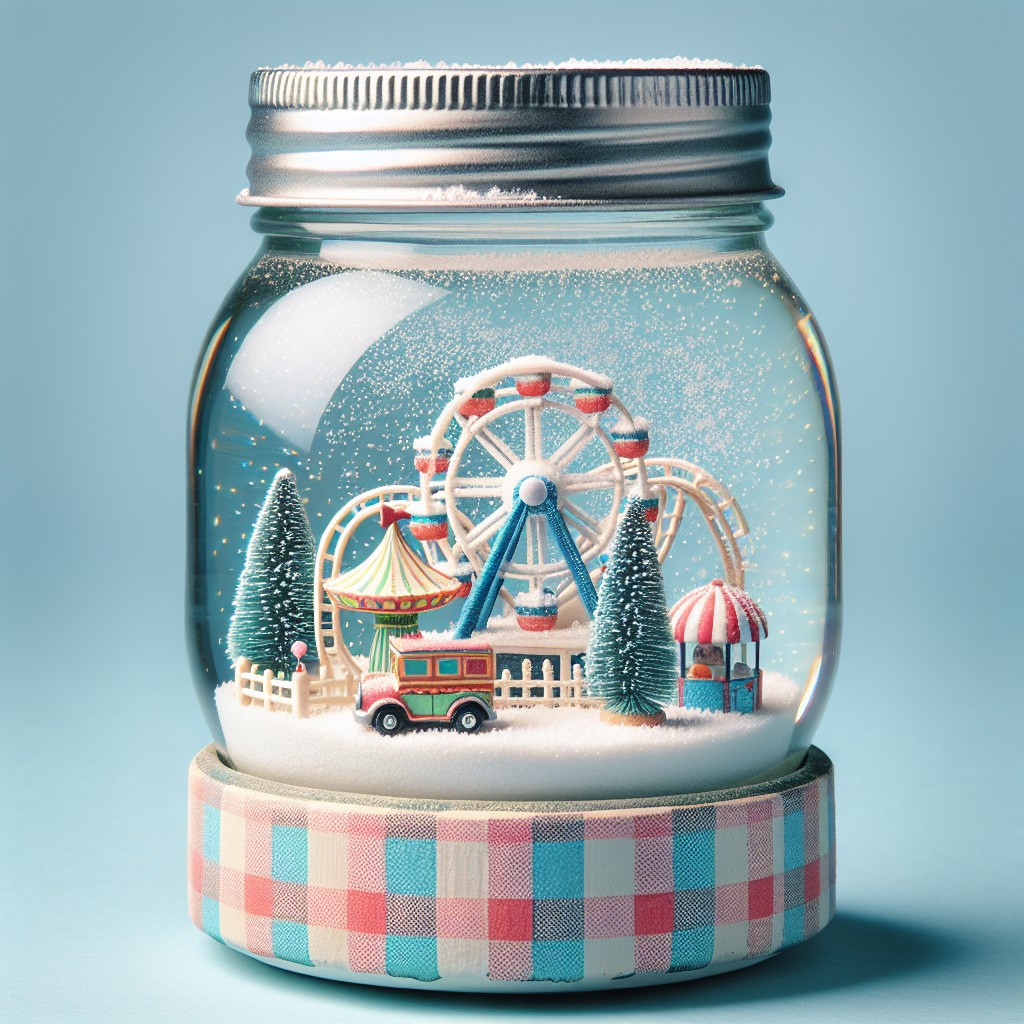
Transforming a mason jar into a personalized snow globe adds a charming twist to traditional holiday decorations. Here’s how to do it:
- Select a jar of any size, ensuring it has a tight-sealing lid.
- Choose a figurine or ornament that fits comfortably inside the lid’s interior, leaving room for snow effect.
- Attach your chosen object to the lid with strong waterproof glue; allow it to dry completely.
- Fill the jar with distilled water, leaving space to accommodate the displacement once the lid is screwed on.
- Add a dash of glycerin to ensure the “snow” falls slowly, delivering a mesmerizing display.
- Opt for biodegradable glitter or fake snow for an eco-friendly alternative; sprinkle it into the water.
- Screw the lid on tightly, securing your winter scene, and invert the jar to watch it come to life.
Get creative by adding small touches like mini trees, tiny car models, or painted backdrops to the scene within the jar. Bringing together these components results in a delightful mason jar snow globe with your unique spin.
DIY Snow Globe With Animated Objects
Bring your snow globe scene to life with a touch of motion by incorporating animated objects. To achieve this dynamic effect:
- Select light figurines or characters that can easily move, such as plastic miniatures from a toy set.
- Attach your chosen piece to a motorized base hidden within the snow globe’s base, ensuring the motor is waterproof or well-protected.
- Use clear silicone glue to adhere the figurine securely to your animated mechanism.
- Opt for slow-moving motors to keep the movement subtle, enhancing the magical atmosphere without overwhelming the scene.
- Carefully test the animation before sealing the globe to ensure the motion is smooth and the figurine doesn’t collide with the glass.
- Consider adding a switch on the base to control the animation, creating an interactive experience for viewers.
This animated twist draws the eye and adds a whimsical element to your snow globe, captivating onlookers with the gentle motion within your miniature world.
DIY Cherry Blossom Snow Globe
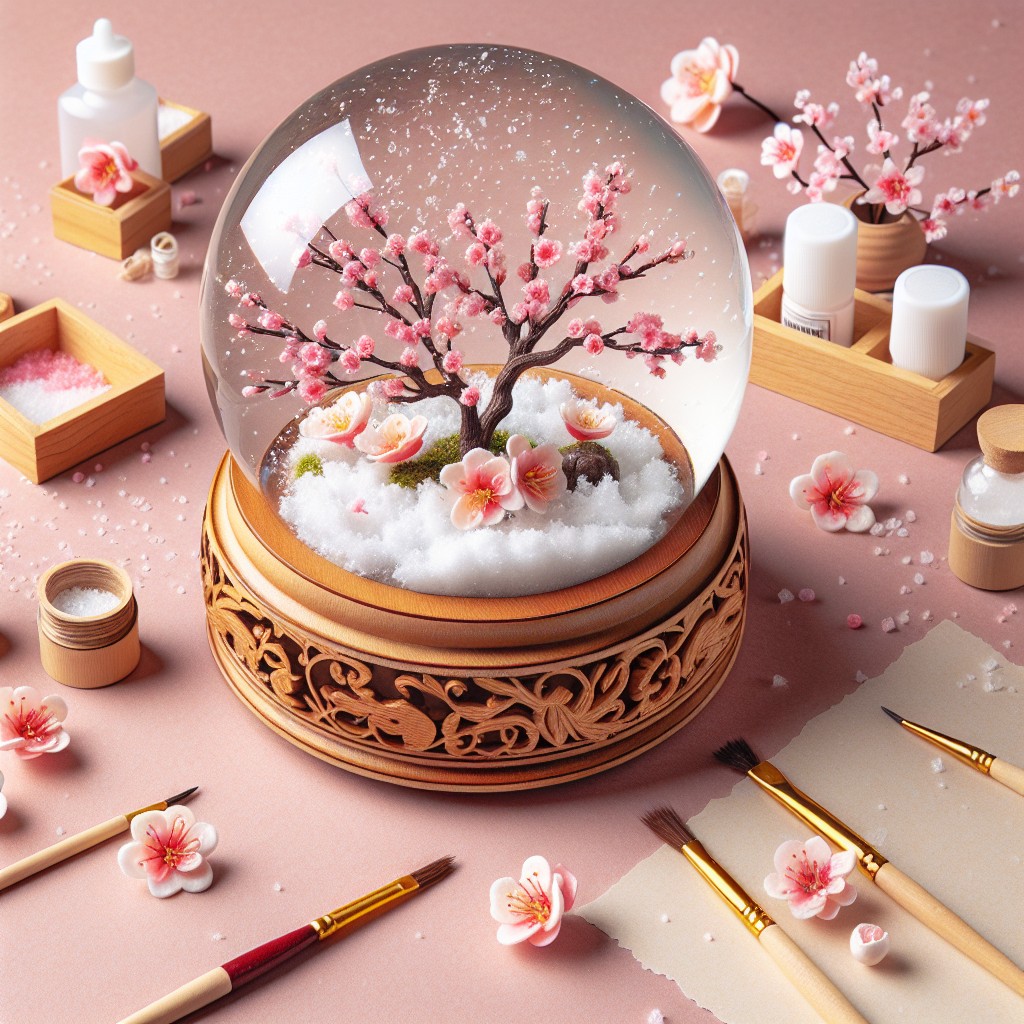
Capture the delicate beauty of spring with a cherry blossom snow globe that brings a touch of zen to your decor.
Use faux cherry blossom branches or pink paper cut to resemble the blossoms.
Secure your branches to the globe’s base, ensuring they’re proportionate to the size of your container.
For the liquid, distilled water mixed with glycerin creates a serene fall for the glitter, mimicking flower petals drifting in a gentle breeze.
A few drops of pink food coloring can add a subtle rosy tint, enhancing the floral theme.
Seal your globe carefully to avoid leaks and shake gently to create your own cherry blossom festival in a globe.
Ideas Elsewhere
- https://thesweetestoccasion.com/2012/12/diy-snow-globes/
- https://www.thepioneerwoman.com/home-lifestyle/crafts-diy/g41900770/diy-snow-globes/
- https://www.madetobeamomma.com/diy-snow-globe/
- https://ourbestbites.com/how-to-make-a-homemade-snow-globe/
- https://www.thesprucecrafts.com/diy-snow-globes-4213799
- https://www.countryliving.com/diy-crafts/g2832/how-to-make-snow-globes/
- https://littlebinsforlittlehands.com/diy-snow-globe/
- https://tidymom.net/waterless-snow-globes-tutorial/
More Like This
 22 Mini Zen Gardens to Conquer Your Inner Chaos
 22 Mini Cactus Garden Ideas That Prickle with Delight
 20 Fairy Houses With Natural Materials That Will Make You Believe In Magic
 20 Cheap Walkway Ideas DIY Benefits
 15 Ingenious DIY Pantry Cabinet Ideas
Recap