Last updated on
Revamping your kitchen space becomes delightfully budget-friendly because this feature is full of inspiring easy DIY projects to create unique produce storage bins and stands.
This article includes my original designs. Some of them may be exaggerated to make a point — that’s my style. Enjoy them for your inspiration!
Embarking on a fresh journey into the realm of do-it-yourself (DIY) produce storage bins and stands today! Here, you’ll be discovering an exciting amalgamation of notched-up traditional ways and new, edgy, and unique ideas crafted exclusively for you.
While plenty of known techniques abound online, this article aims to bring a unique twist that will take your DIY projects up a notch. For those who love the classics, don’t worry! At the end of this piece, you will find resources that pay homage to those tried and tested ideas.
Let’s dive into a world of fresh angles, unique approaches, and innovative solutions for DIY produce storage bins and stands, guaranteed to be an illuminating addition to your DIY toolkit!
Key takeaways:
- Create DIY wire and wood basket produce storage.
- Make stackable produce boxes with wheels.
- Transform a wooden pallet into a vegetable bin.
- Mount vintage baskets on a wooden frame for produce storage.
- Repurpose an old ladder into a produce stand.
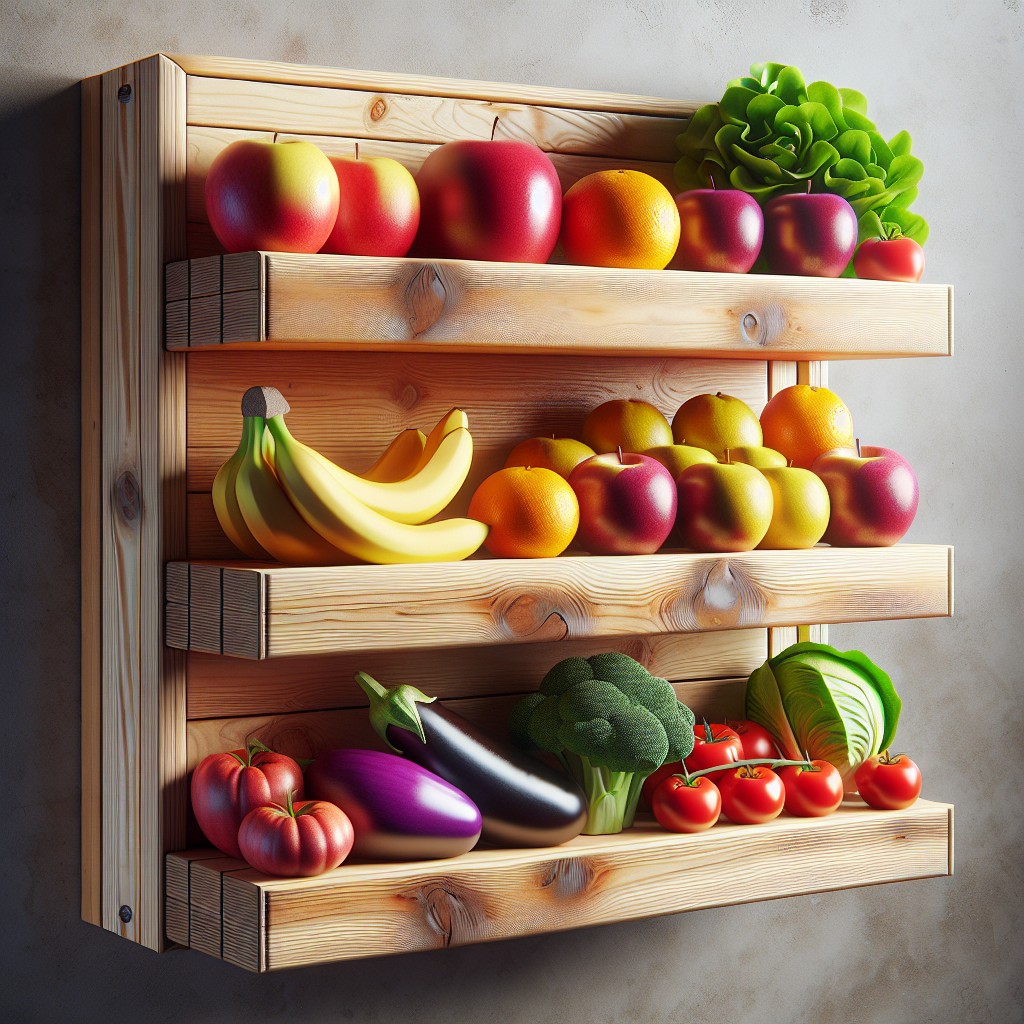
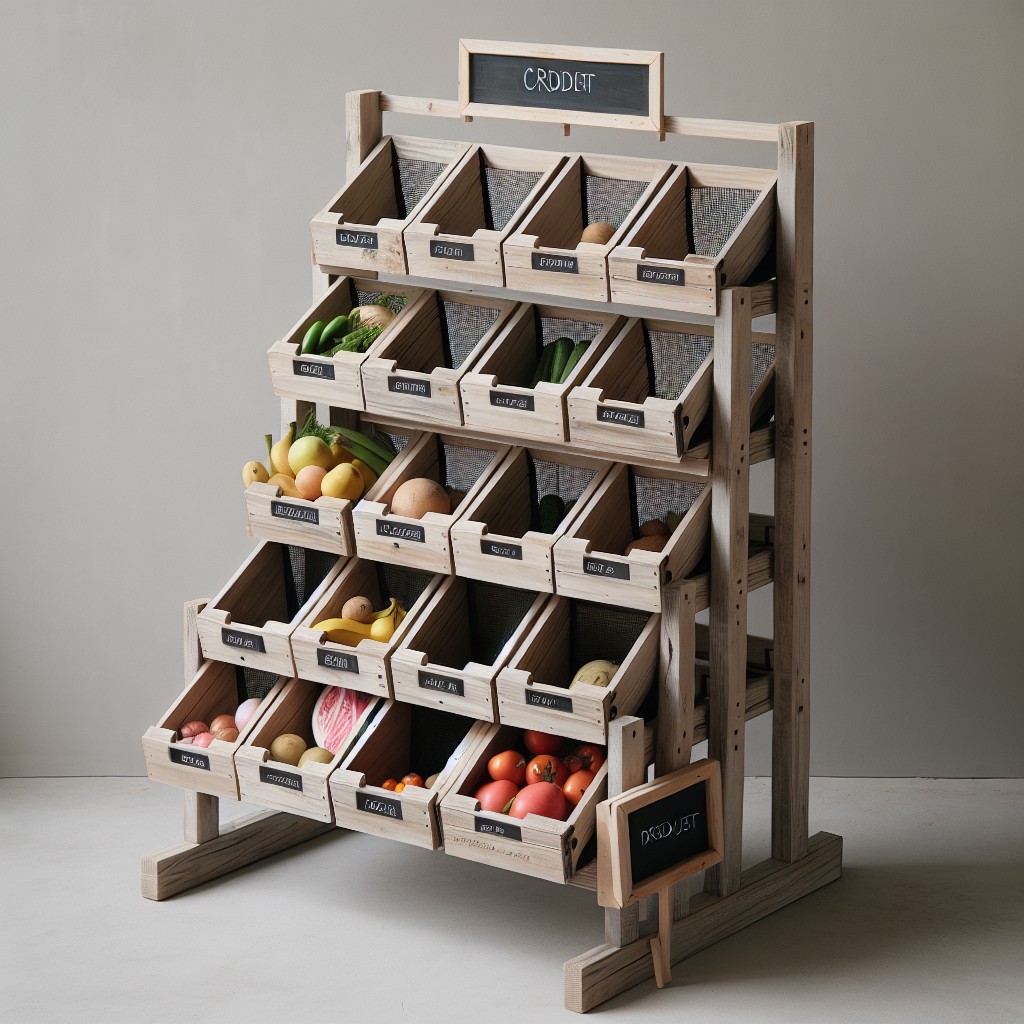
DIY Wire and Wood Basket Produce Storage
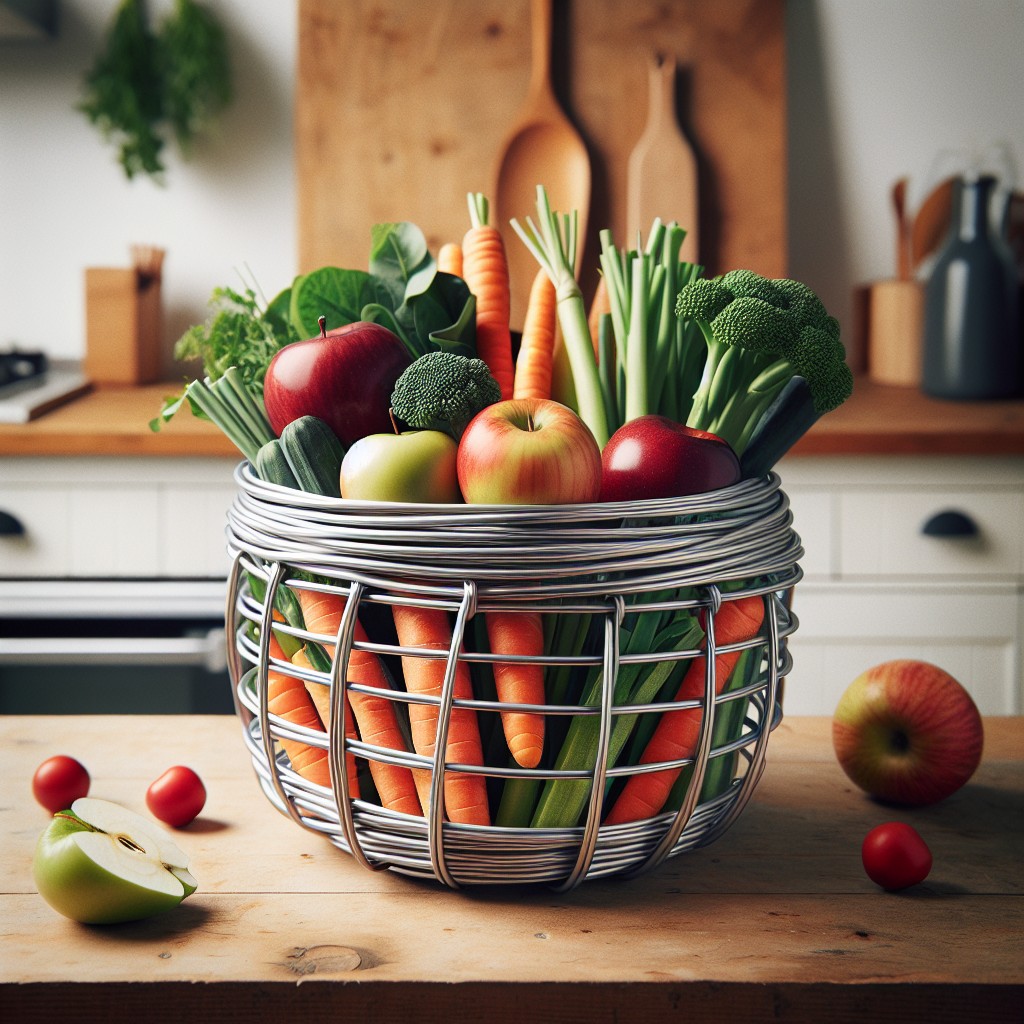
Harness the rustic charm of wire baskets and the strength of wood to fashion a produce storage solution perfect for your kitchen. The airy design of wire baskets ensures your fresh produce is well-ventilated, reducing the risk of spoiling. Paired with a sturdy wooden frame you can DIY, these baskets can be displayed on countertops or hung on walls to save space.
Here’s how to execute this simple yet effective storage idea:
Gather wire baskets of your chosen size, a wooden plank for the frame, screws, wall anchors (for wall mounting), paint or stain (optional for aesthetics), and basic tools like a screwdriver and drill.
Assemble the Frame
Cut the wooden plank to desired dimensions to create a frame that will hold the baskets. If you plan to wall-mount, ensure the frame includes a backing for support.
Customize
Paint or stain the wooden frame to match your kitchen decor. Allow it to dry thoroughly before proceeding with assembly.
Secure Baskets
Attach the wire baskets to the frame using screws, spacing them evenly. If the baskets will be carrying heavier loads, it’s vital to reinforce the attachment points.
Install
Choose whether you want a standing or wall-mounted unit; if wall-mounted, use wall anchors and screws to secure the frame to the wall, ensuring it is level and firmly in place.
This easy project not only functionally stores your produce but also adds an industrial-chic look to your kitchen. It’s a straightforward process that yields practical and aesthetically pleasing results.
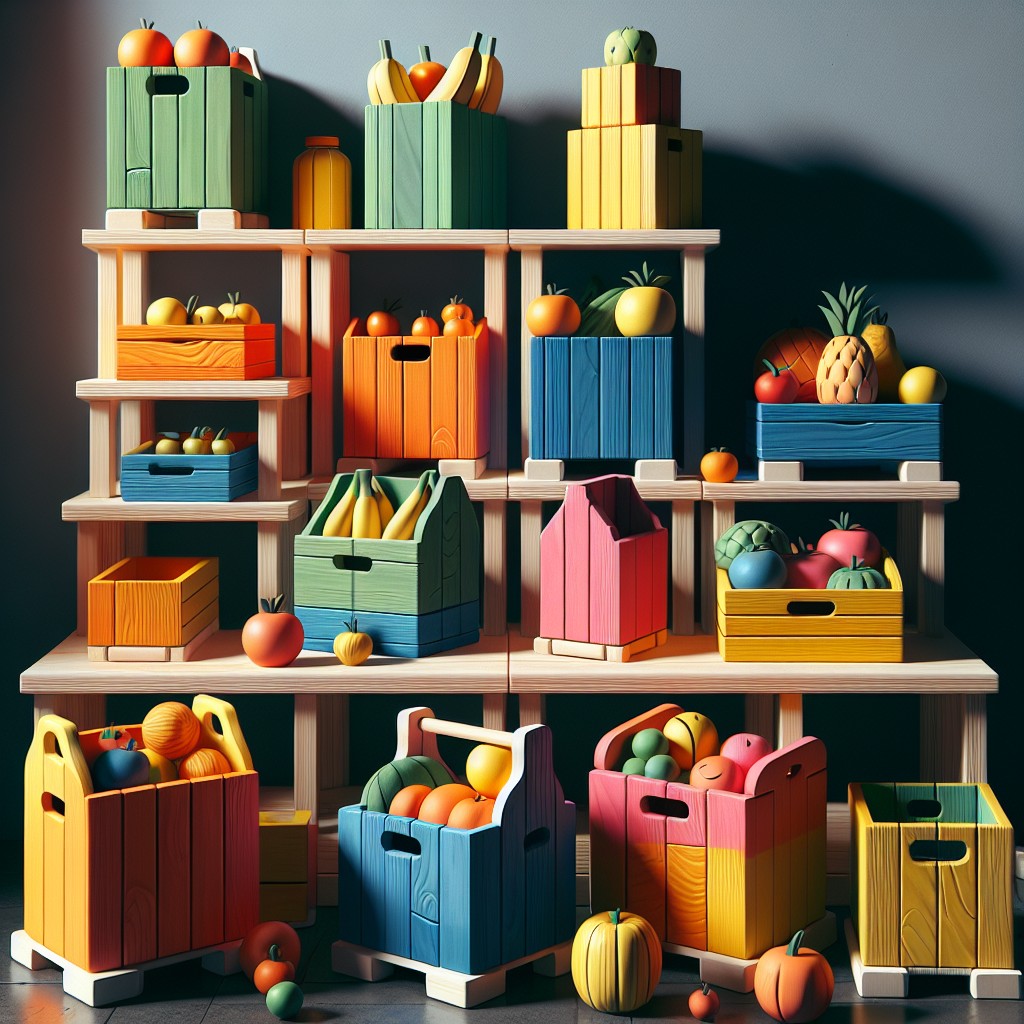
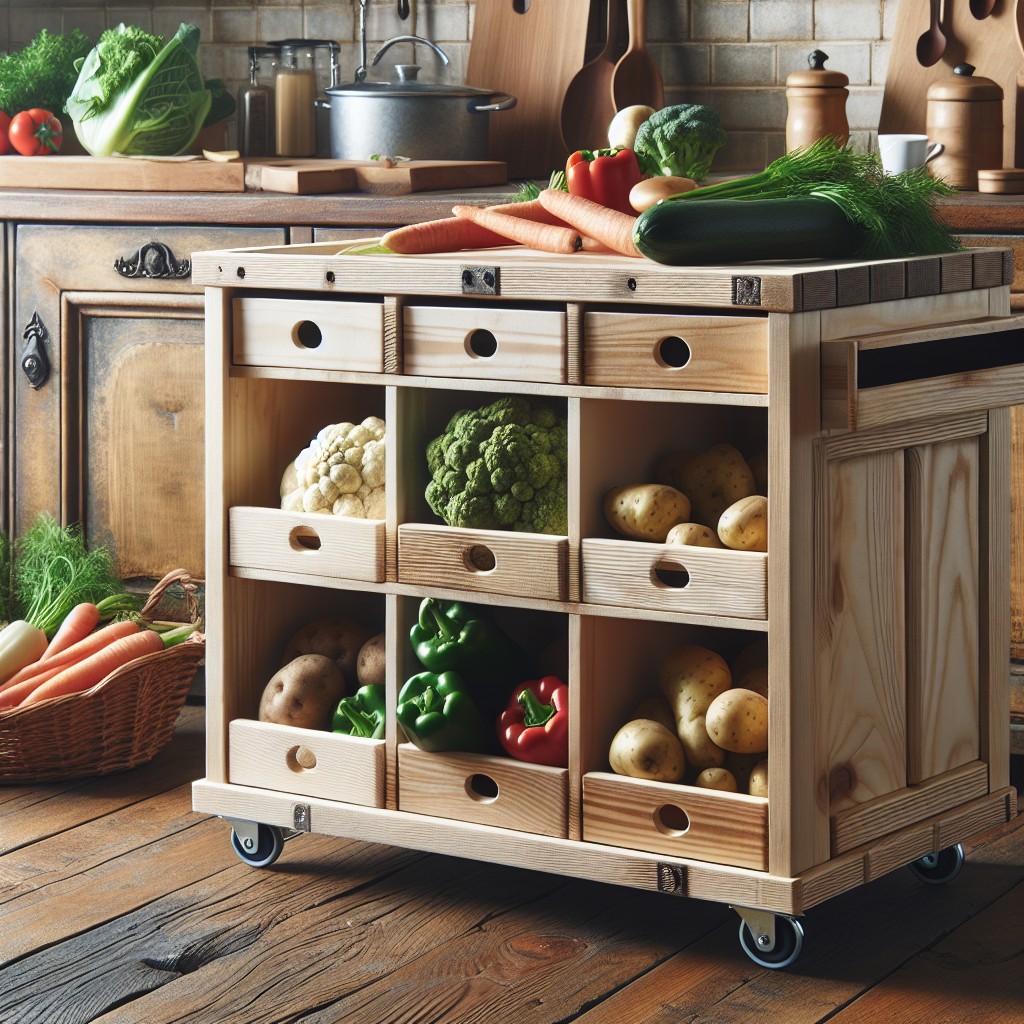
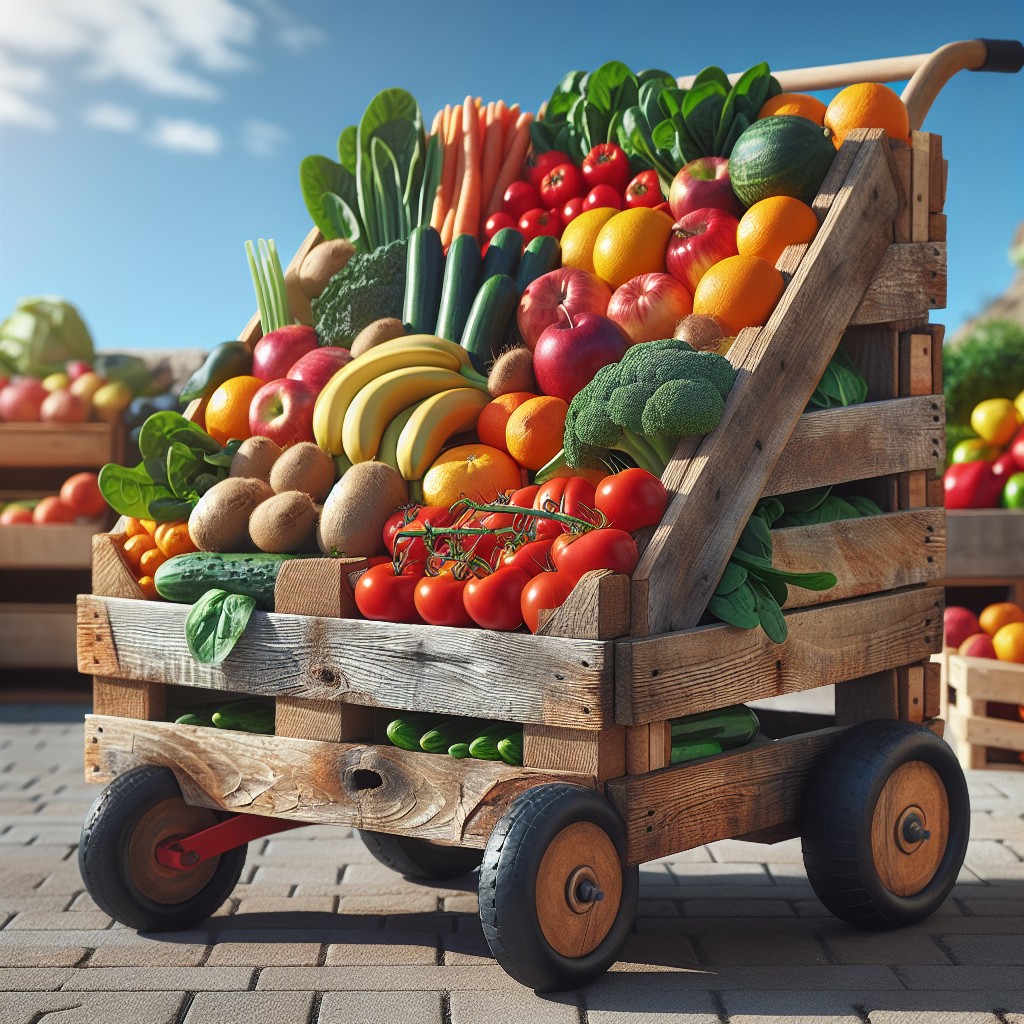
DIY Stackable Produce Boxes With Wheels
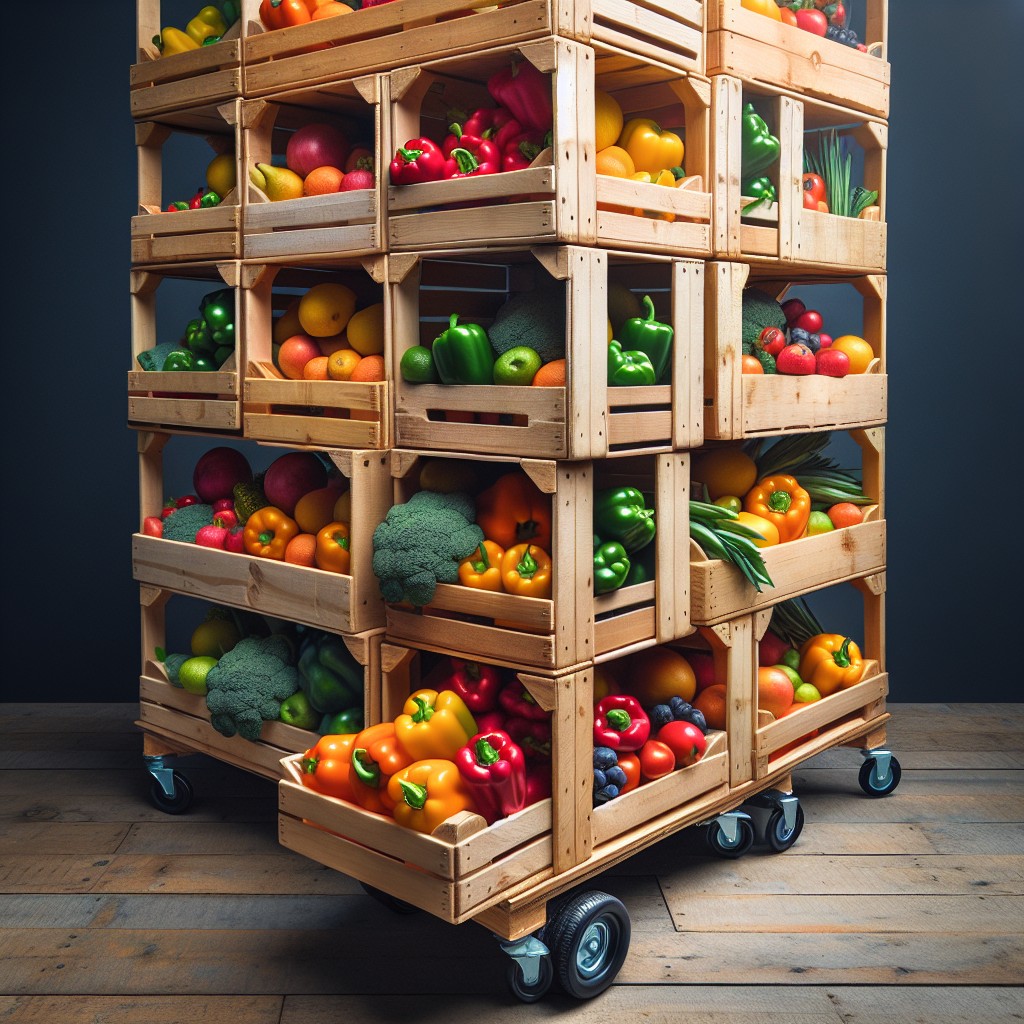
Maximize your kitchen space and mobility with a clever solution: stackable produce boxes equipped with wheels. These boxes not only provide organized storage but also allow for easy access and movement. Here’s how to create your own:
- Measure and Cut: Begin by measuring your available space. Design your boxes to fit, ensuring they stack securely. Use plywood or reclaimed wood for a budget-friendly option and cut according to your dimensions.
- Assemble the Boxes: Nail or screw the sides together to form a sturdy box. Reinforce corners with L-brackets for added stability.
- Sand and Finish: Smooth rough edges with sandpaper to prevent splinters. For a polished look, paint or stain your boxes; seal with a food-safe sealant to protect against moisture.
- Attach Wheels: Select heavy-duty casters and attach to the bottom corners of each box. Choose lockable wheels for stationary security.
- Stack and Store: Fill your boxes with fruits and vegetables, then stack them neatly. The wheels make it easy to roll the stack out for cleaning or to rearrange your kitchen setup as needed.
This mobile storage solution offers convenient access to produce while keeping your kitchen orderly and your fruits and vegetables in prime condition.
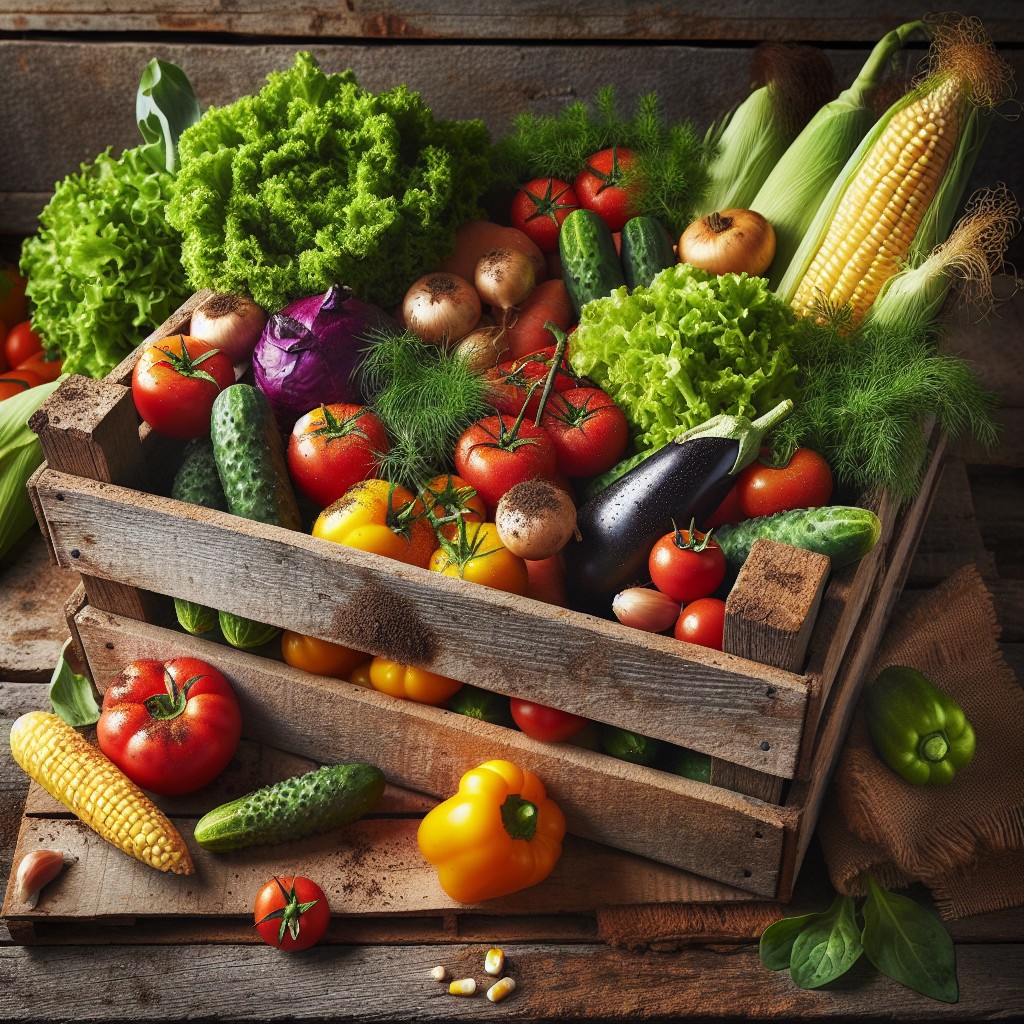
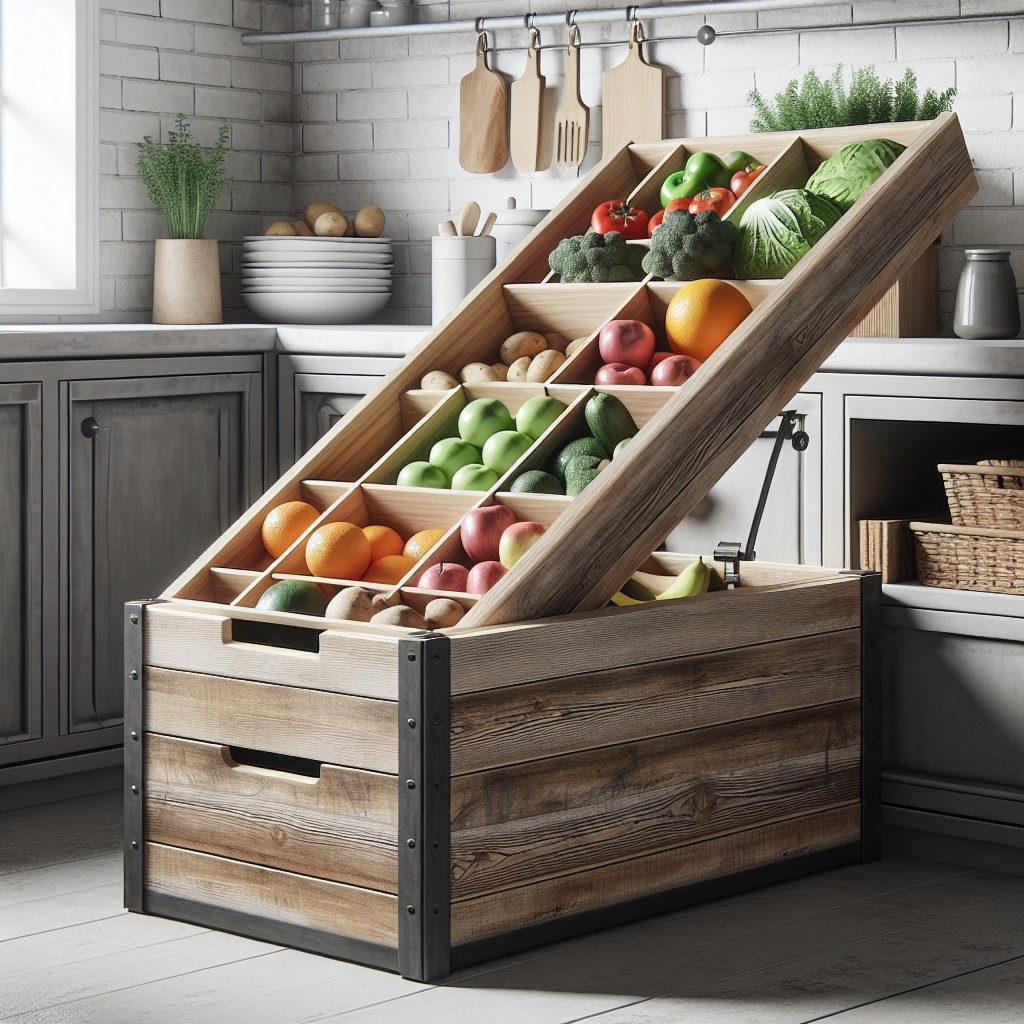
Wooden Pallet DIY Vegetable Bin
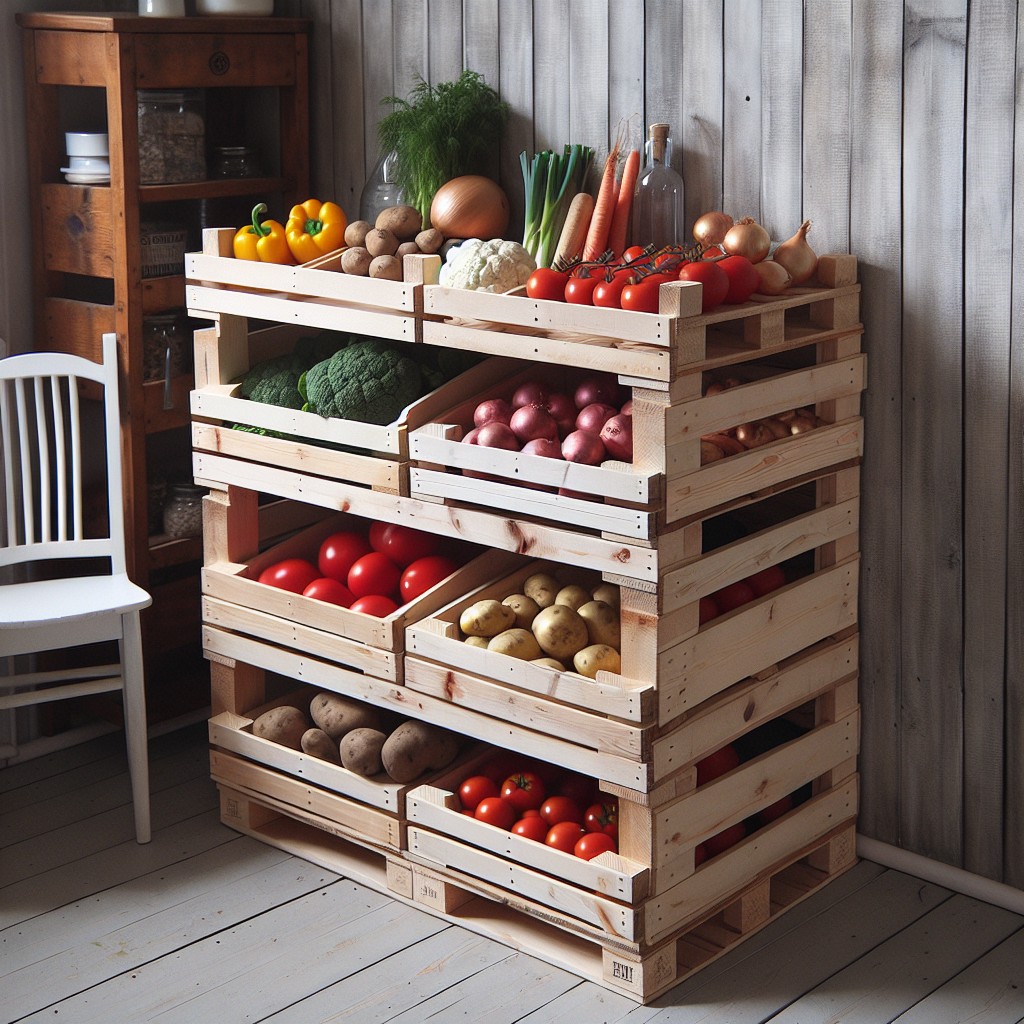
Transforming a wooden pallet into a useful vegetable bin is both eco-friendly and cost-effective. To start, thoroughly sand the pallet to prevent splinters and give it a smoother finish.
Cut the pallet according to the desired size of your bin, keeping one side intact with slats for the front of the bin.
Next, reinforce the structure using additional wood pieces from the pallet to create sides and a back for the bin, ensuring your vegetables are securely contained.
If you wish to add compartments within the bin, use extra slats as dividers.
For mobility and easy cleaning, consider attaching casters to the bottom of your bin, making it simple to move around as needed.
You can also personalize your vegetable bin with a coat of food-safe paint or stain, and add labels or stenciled designs for a customized look.
Lastly, line the bottom of the bin with landscape fabric to allow for ventilation while keeping dirt and small particles from falling through the slats.
This adaptable DIY project not only recycles old materials but also provides a practical solution for storing your produce in a cool, dry place.
DIY Produce Rack With Vintage Baskets
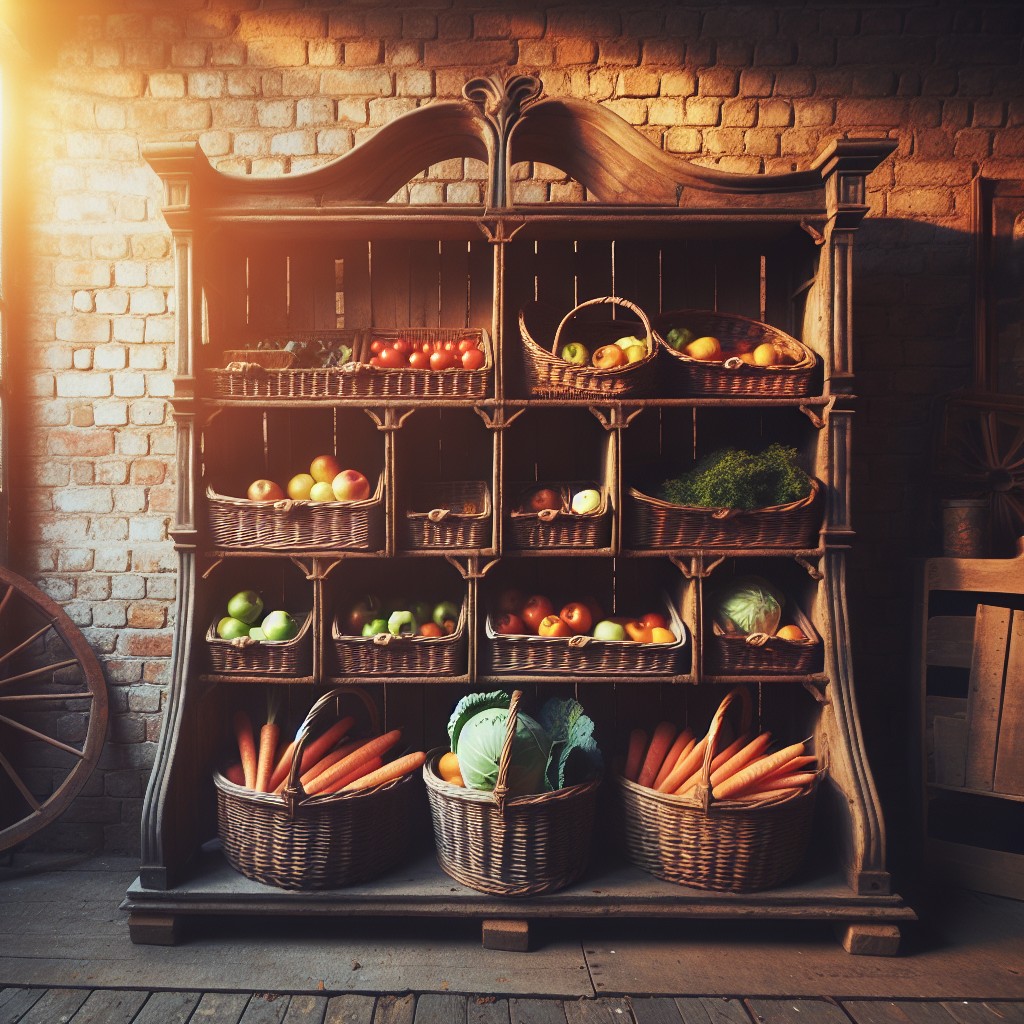
Embrace rustic charm and functionality with a vintage basket produce rack. This project involves mounting baskets on a wooden frame to create an eye-catching and practical storage area for your fruits and veggies.
- Choose baskets in varying sizes for visual interest and to cater to different types of produce.
- Ensure your vintage baskets are sturdy; if necessary, reinforce them with wire for added strength.
- Opt for a frame material that complements the baskets, like distressed wood for a farmhouse look or a metal frame for an industrial touch.
- Mount baskets with enough space in between to allow air circulation and easy access to the produce.
- Label each basket with tags or stencils to keep items organized.
- To prevent damage to your wall, secure the frame to studs or use appropriate anchors for the weight of the fully loaded rack.
This DIY project is not only a storage solution but also a statement piece that adds character to your kitchen or pantry.
Upcycle an Old Ladder Into Produce Stand
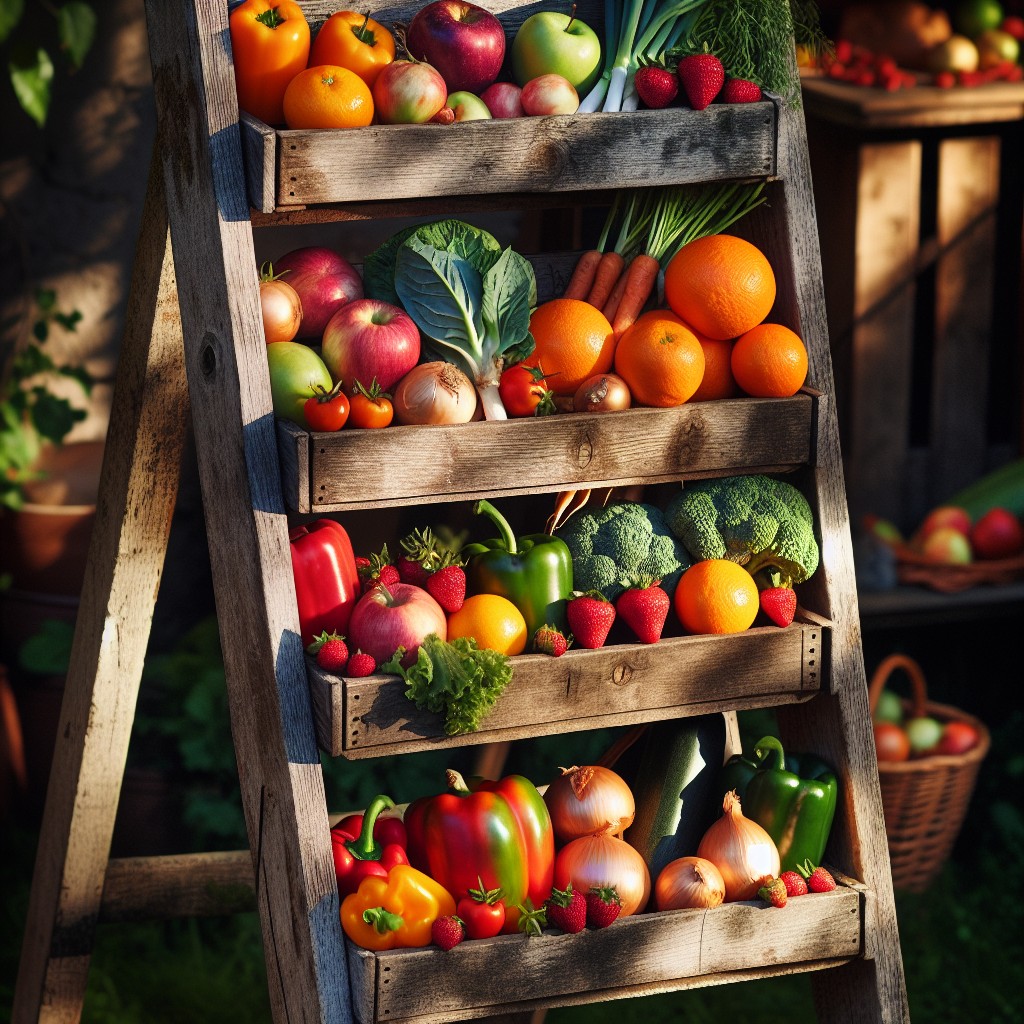
Transforming an old ladder into a chic and functional produce stand is both eco-friendly and space-saving. The rungs of the ladder serve as natural shelves for displaying fruits and vegetables, and its vertical design is perfect for those with limited countertop or floor space.
- Sand down the ladder to remove any rough spots or chipping paint, ensuring a smooth, clean surface.
- Apply a fresh coat of paint or stain to match your kitchen’s decor, opting for food-safe options if produce will be in direct contact.
- Secure wire baskets or wooden planks across the rungs to create shelving that’s perfect for holding produce.
- To enhance stability, anchor the ladder against a wall or add small feet at the bottom to prevent tipping.
- Personalize the stand with labels or signs to indicate different types of produce, lending a farmer’s market charm to your kitchen.
This project allows you to repurpose with purpose, adding a unique, rustic touch to your home while keeping fruits and veggies in prime condition.
DIY Under Bed Produce Storage
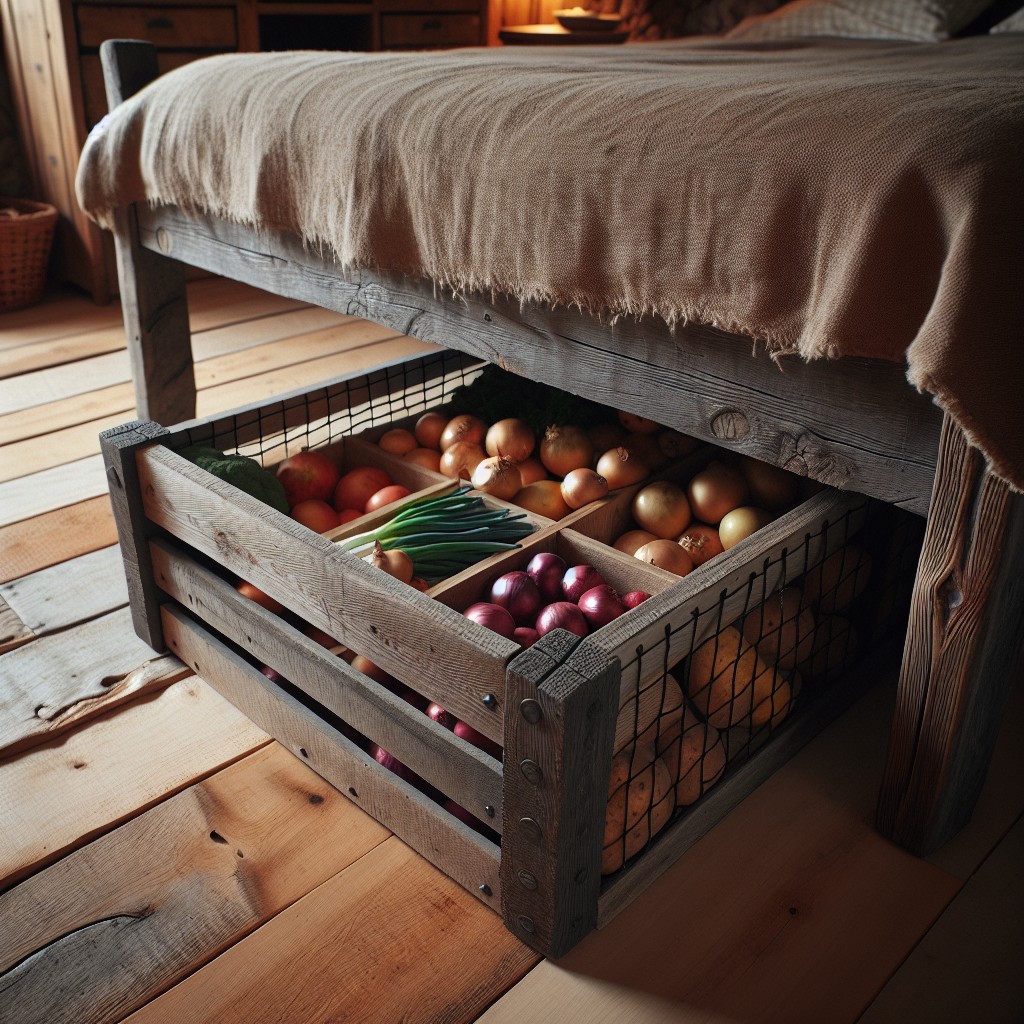
Maximizing unused space is key when dealing with small kitchens or limited pantry areas. Sliding bins or low-profile boxes can serve as excellent under-bed produce storage solutions, keeping your fruits and vegetables in cool, dark conditions, which is ideal for prolonging freshness.
To set up an under-bed storage system:
- Measure the available space beneath your bed to ensure a proper fit for your bins or boxes.
- Opt for baskets or boxes with wheels for easy access; consider DIY solutions like attaching casters to wooden crates.
- Choose breathable materials like wood or plastic with ventilation holes to enable air circulation, which helps to prevent spoilage.
- Line your chosen container with a clean tea towel or natural liner to absorb any moisture, which can deter mold and rot.
- Sort produce according to type and ripening stages, keeping ethylene-producing fruits separate from ethylene-sensitive vegetables to avoid premature ripening.
This method not only creates an organized way to keep extra produce but also taps into an often unused space, providing a clever and unobtrusive storage solution.
DIY Wall Mounted Mason Jar Herb Storage
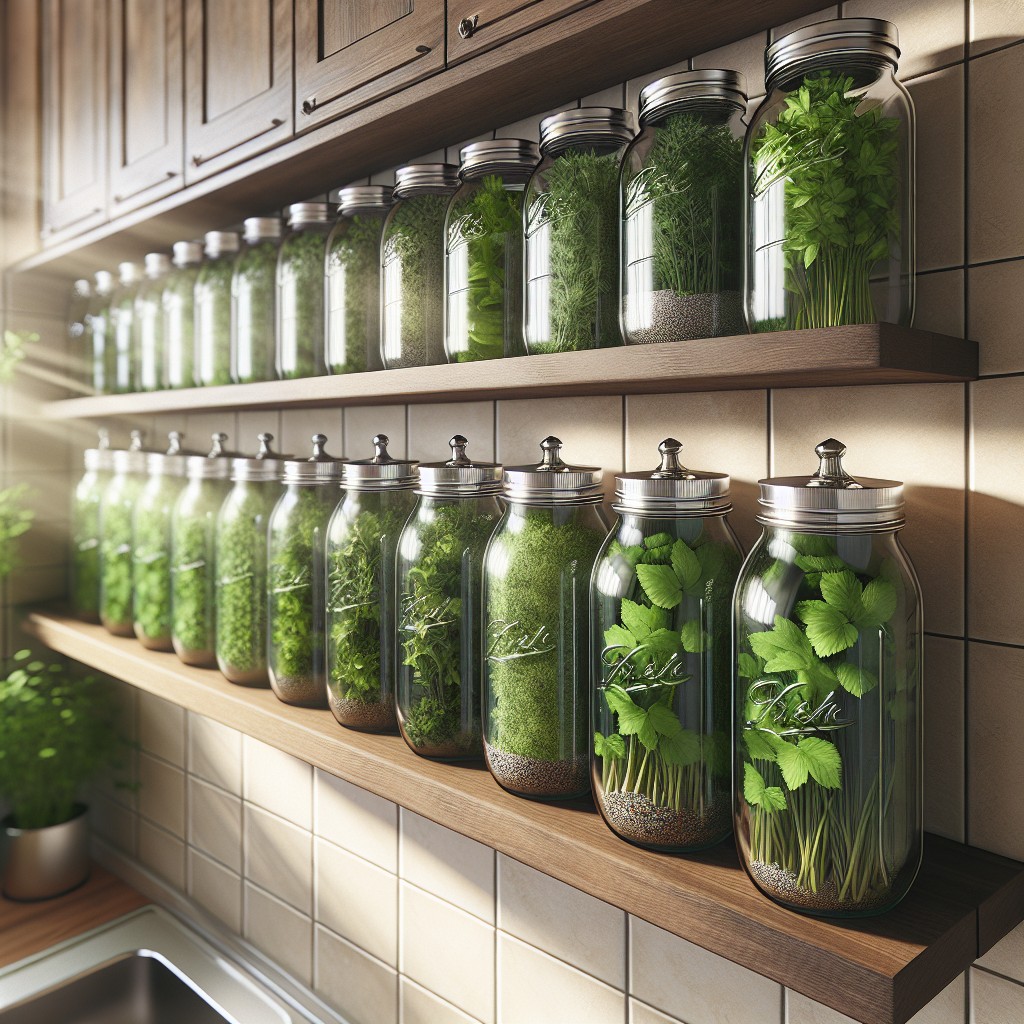
Elevate your kitchen’s form and function with a wall-mounted mason jar herb storage system. Here’s how to make the most of this practical decor:
- Reclaimed Wood Base: Using a piece of reclaimed wood as the mount adds rustic charm and sustainability. Ensure it’s sanded and sealed to withstand kitchen moisture.
- Secure Clamps: Attach hose clamps to the wood using screws. They should be evenly spaced to accommodate the number of jars and allow for easy jar removal.
- Quart-Sized Jars: Select mason jars large enough for growing herbs yet small enough to fit your space. Quart-sized jars are typically a good balance.
- Labeling: Opt for chalkboard paint or adhesive labels on the jars for easy herb identification. This is especially useful when harvesting your homegrown seasonings.
- Drainage: Consider adding pebbles at the bottom of each jar or drilling small holes for proper root aeration and drainage which are vital for healthy herbs.
- Mounting Safely: Secure the wood base to the wall at studs or use appropriate wall anchors to ensure the structure can support the weight of the jars and soil.
This setup not only keeps your herbs within arm’s reach but also creates an attractive and aromatic wall feature.
DIY Cascading Produce Stand With Chalk Labels
Maximize vertical space and keep your produce in sight with a cascading stand. Begin by sourcing graduated sizes of wooden crates — these will form the tiers of your stand. Stack them from largest to smallest, creating a pyramid shape that allows for easy access to your fruits and veggies.
To add mobility, attach casters to the bottom crate; this will let you move the stand for cleaning or rearrangement. For a personal touch and easy identification, paint each crate with chalkboard paint on one side. Once dry, use chalk or a chalk pen to label the crates according to the produce they’ll hold.
Ensure stability by securing the crates to one another with wood screws or brackets. This step is essential to keep the structure safe, especially if you have little ones or pets. Consider staining or sealing the wood for a polished look and added durability. With these simple steps, your custom cascading produce stand will not only provide practical storage but also contribute to a dynamic visual aesthetic in your kitchen.
Repurposed Old Cabinet Turned Produce Stand
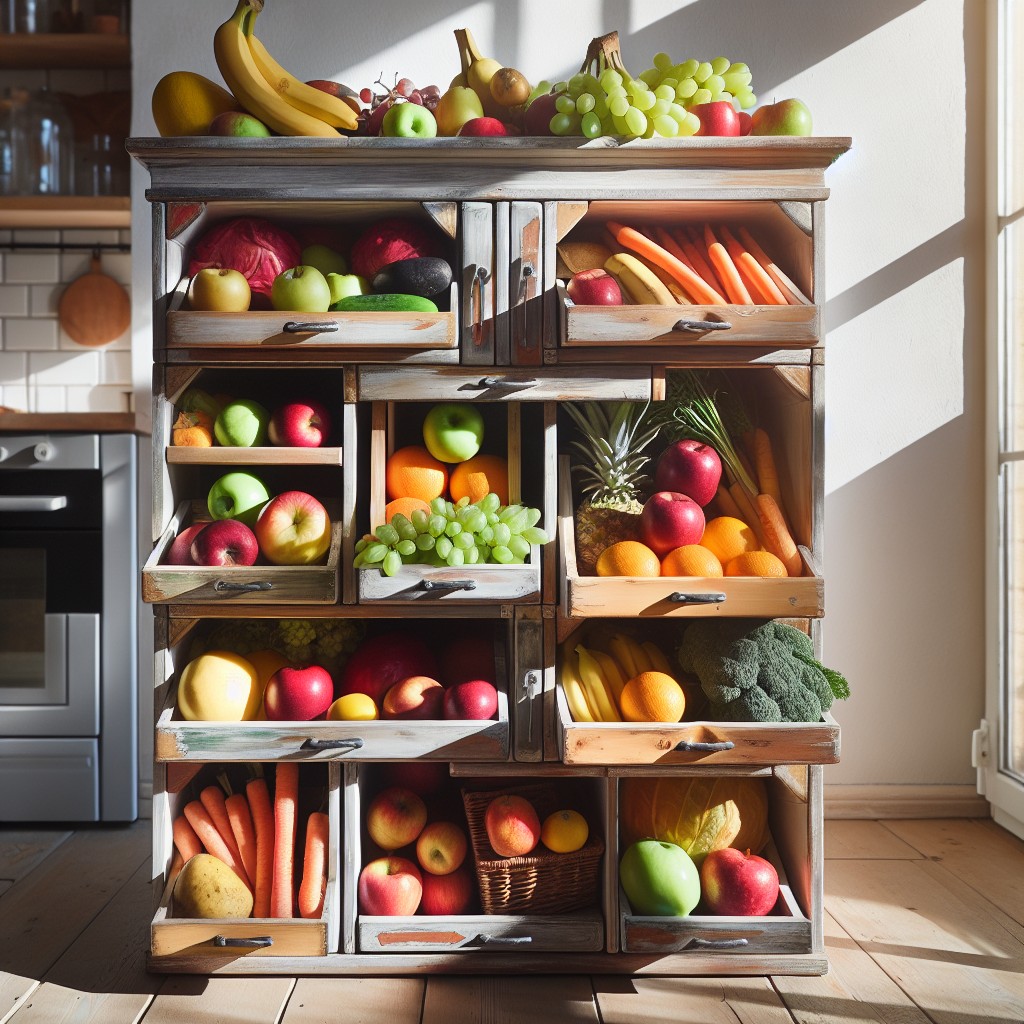
Transforming an old cabinet into a functional produce stand is a budget-friendly and eco-conscious choice. Here’s how to get started:
- Select a cabinet: Choose a sturdy, well-ventilated cabinet. If it’s a solid piece, consider removing panels and replacing them with wire mesh or chicken wire for better airflow.
- Sand and paint: Give the cabinet a fresh look by sanding down any rough areas and applying paint or a sealant, especially if you’ll place it in a moisture-prone area like a kitchen.
- Add levels: To maximize storage, install shelves or baskets at varying heights inside the cabinet to accommodate different types of produce.
- Ensure stability: Check that the cabinet is stable and reinforce any weak spots. If you want the cabinet to be mobile, attach casters to the base for easy movement.
- Accessorize: Consider hooks for hanging reusable produce bags or small tools, and label holders to sort and identify different fruits and vegetables quickly.
By following these points, an old cabinet can be both a charming and functional addition to your home, keeping produce organized and accessible.
DIY Sliding Door Produce Bins
Craft sliding door produce bins to maximize kitchen space and maintain aesthetic appeal. Utilize lightweight plywood or recycled wood to construct a simple box frame, taking care to ensure smooth edges for safety. Attach cabinet runners on each side of the bin’s interior to facilitate the sliding mechanism.
For doors, repurpose old cabinet doors or cut a wood piece to size, then sand and finish for a smooth texture. Fix door handles or knobs for easy access and add a coat of sealant to protect against moisture and stains.
Customize the size to fit under counters or as standalone pieces. Incorporate wire mesh or perforated panels for ventilation, essential for keeping produce fresh longer. Opt for caster wheels on the bottom for easy relocation when cleaning or rearranging your space.
Consider painting or staining the bins to match your kitchen décor, or add chalkboard paint on the sliding doors for labeling. The use of magnetic strips or Velcro can add versatility, allowing you to attach and detach labels as needed.
In the spirit of organization, separate fruits and vegetables into different bins to prevent ethylene-sensitive items from ripening too quickly. The sliding doors will not only conceal your produce neatly but also provide quick access and inventory checks.
DIY Canned Produce Storage
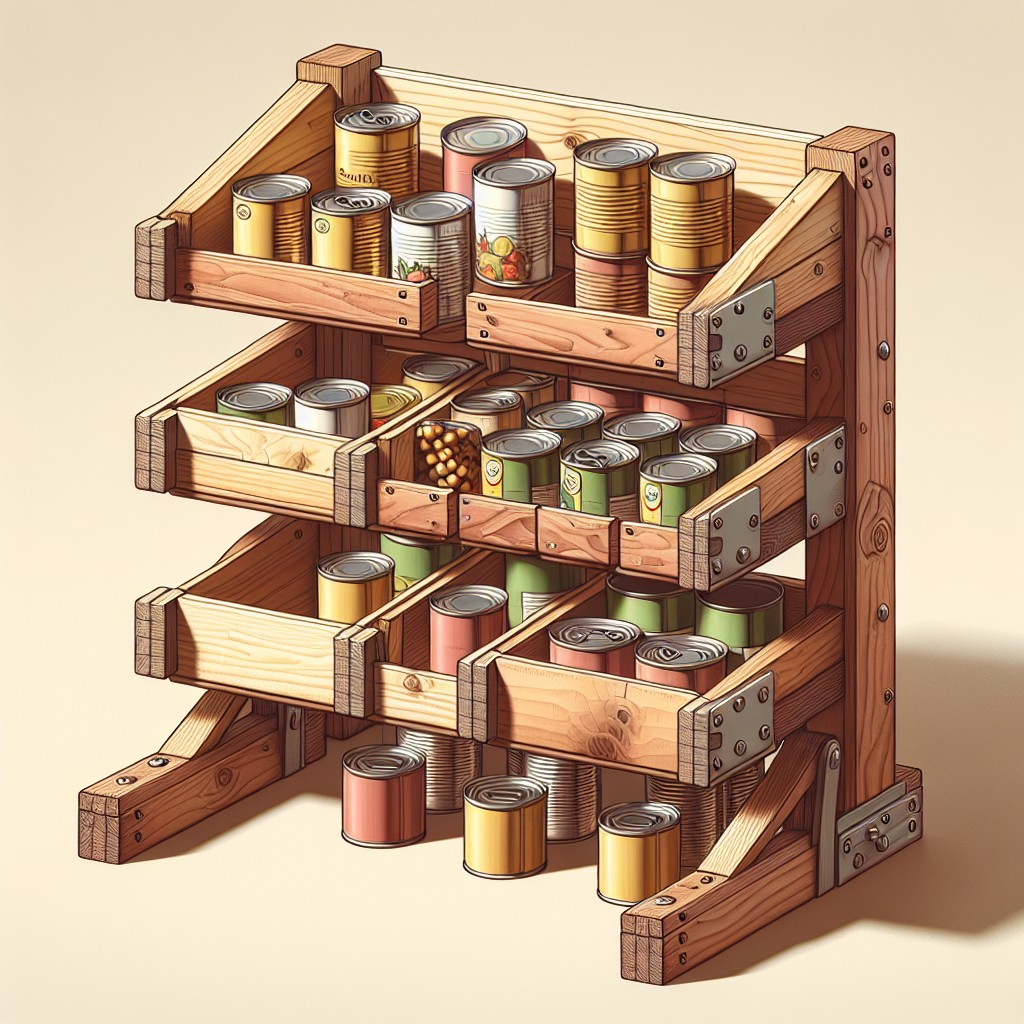
Transform your surplus of home-canned goods into a decorative feature with a crafted storage solution. Building a shelving unit specifically for your jars allows you to customize the dimensions to fit your space and the size of your jars. Use sturdy materials such as reclaimed wood for eco-friendly appeal and lasting durability.
Consider adjustable shelving to accommodate various jar sizes, ensuring each shelf has a lip or secure system to prevent jars from tipping over. Paint or stain the wood for a polished look or keep it rustic for a farmhouse vibe. Utilize labels for quick identification and to add a touch of vintage charm. Install your storage in a cool, dark location to preserve the quality of the canned produce, such as a pantry or cellar.
By displaying your canned goods, you not only create a conversation piece but also keep inventory at a glance, reducing waste and inspiring meal planning around your preserved bounty.
DIY Bucket and Rope Produce Storage
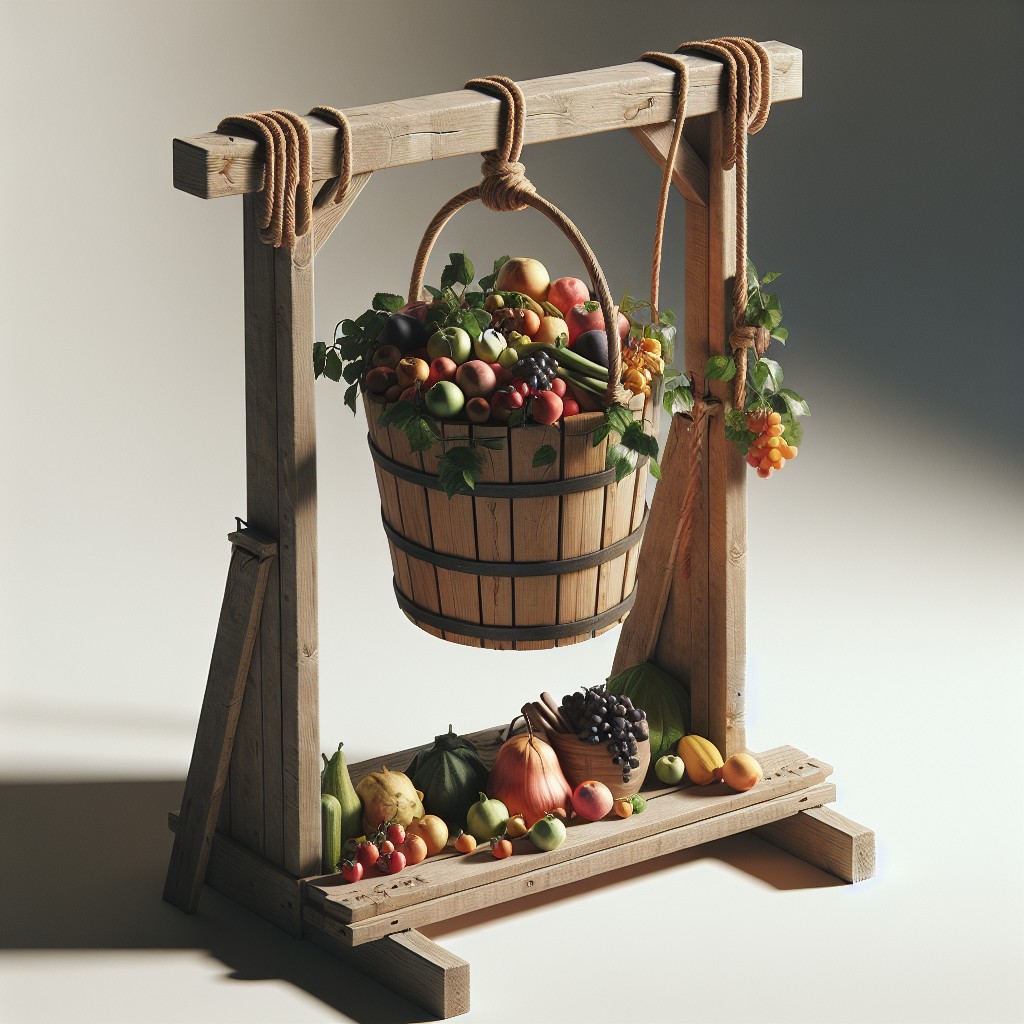
Transforming ordinary buckets and rope into a hanging produce storage solution is not only functional but also adds a touch of rustic charm to any kitchen or pantry. Here’s how to create your own:
1. Select food-safe buckets or baskets that match your decor and are appropriately sized for the types of produce you plan to store.
2. Drill three evenly spaced holes near the top edge of each bucket for secure rope attachment.
3. Cut a sturdy rope into lengths that allow your buckets to hang at accessible levels. Knot the rope ends through the drilled holes.
4. Install ceiling hooks or anchor a horizontal bar in a convenient location where the buckets can hang without obstructing pathways.
5. Knot the rope ends securely around the hooks or bar, adjusting the height for optimal reach and visual appeal.
6. Fill your buckets with fruits and vegetables, benefiting from the airflow and reduced countertop clutter.
This concept marries simplicity with utility, offering an easily accessible means of organizing your produce stylishly and affordably.
DIY Painted Wooden Fruit and Veggie Holders
Embrace the charm of rustic decor and functionality with this project. Select sturdy wooden boxes or crates as the base. Sand them down to smooth out rough edges, ensuring your fruit and veggies remain unscathed.
Customize the look with non-toxic paint; consider chalk paint for a shabby-chic finish, or go bold with a vibrant hue to add a pop of color to your kitchen. Once dry, apply a food-safe sealant to protect the paint from moisture and make the holders easy to wipe clean.
If space allows, add divan names or artistic designs to elevate their appeal. These holders are not only practical for storage but also double as attractive countertop decor.
Consider varying the sizes for different types of produce—larger boxes for root veggies, and smaller ones for fruits like apples or bananas.
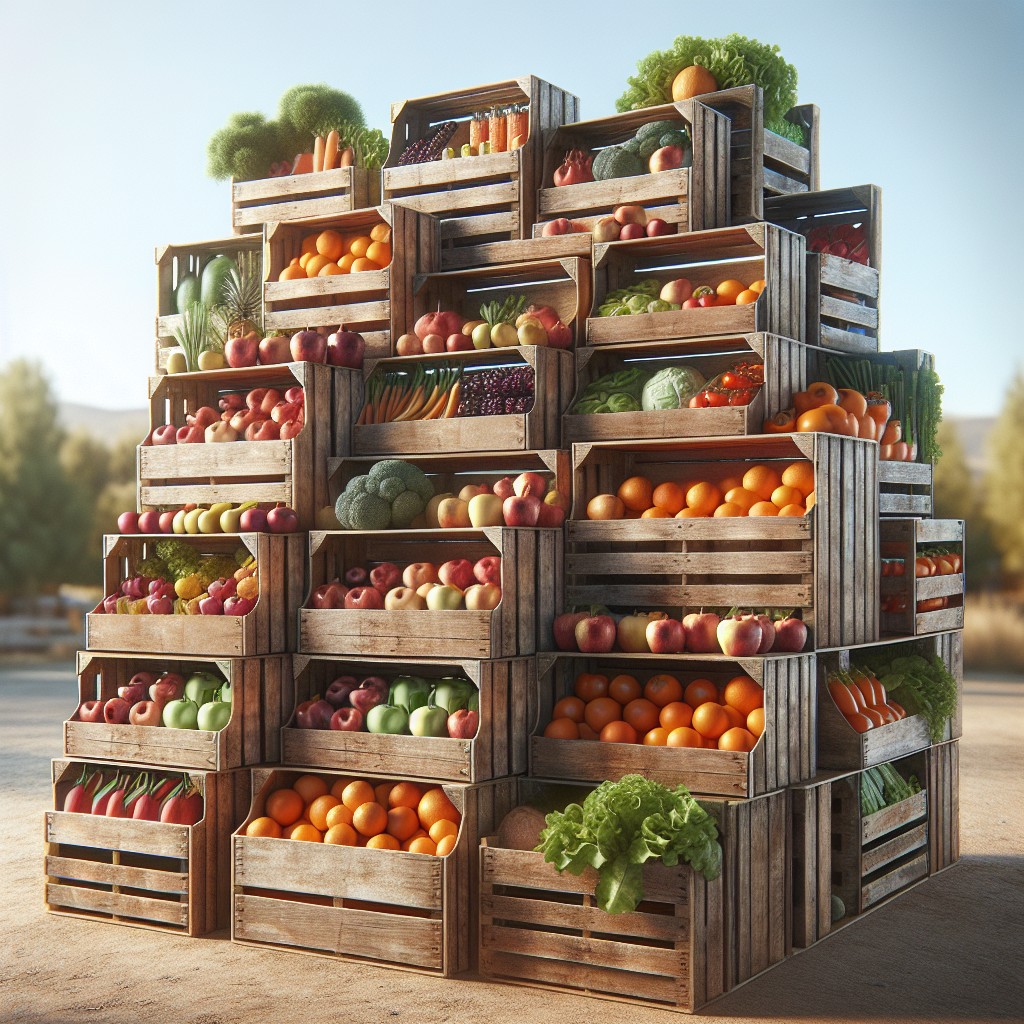
DIY Pallet Wood Produce Crate
Transforming pallet wood into produce crates is not only economical but also eco-friendly. Here’s how to craft your own sturdy storage solution:
- Source the Material: Locate pallets often given away by hardware stores or businesses. Ensure they are heat-treated (look for the “HT” stamp) for safety.
- Disassemble Pallets: Carefully pry apart the planks using a crowbar and hammer, removing nails and ensuring a smooth working surface.
- Plan Your Size: Decide on the dimensions, accounting for what you plan to store. A typical crate size is around 12″x18″, but tailor it to your space.
- Cut to Size: Using a saw, cut the planks to your predetermined dimensions.
- Assemble the Frame: Create a box frame by nailing or screwing the four sides together.
- Add the Bottom: Attach additional planks to the bottom, ensuring they are close enough to hold produce but have some gaps for airflow.
- Sand and Finish: Sand the crate to prevent splinters and apply a food-safe finish or leave raw for a rustic look.
- Additions: Consider attaching labels or handles for easy access and identification.
Creating these crates is a straightforward project that results in functional, personalized kitchen storage without breaking the bank.
DIY Ceiling Hanging Fruit and Veggie Baskets
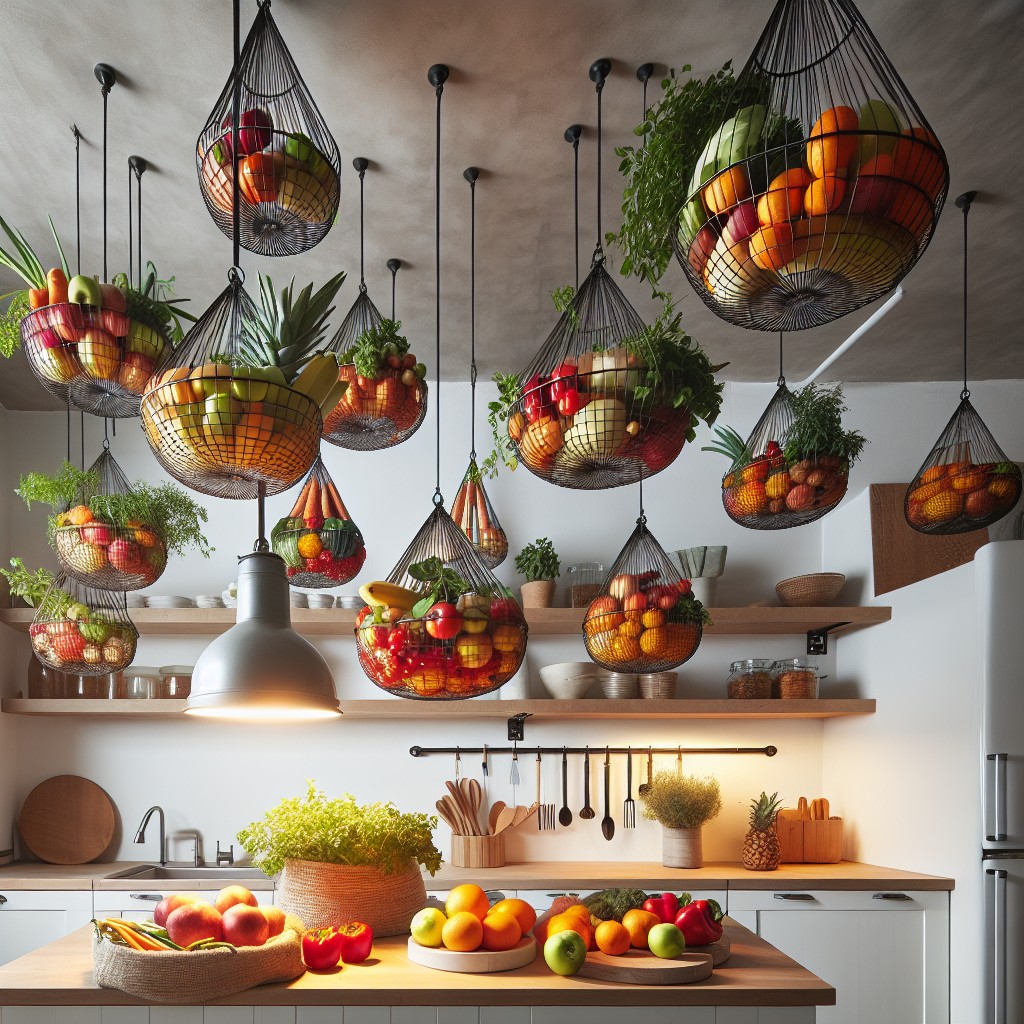
Transform unused overhead space into a functional storage area with a DIY ceiling-hanging basket project. Incorporating fruit and veggies into your decor can bring a natural and vibrant aesthetic to your kitchen.
- Select durable materials: Choose baskets made of wire or woven materials that allow air circulation to keep produce fresh longer. Ensure chains or ropes used for hanging are sturdy enough to support the weight of the baskets when filled.
- Ensure accessibility: Adjust the length of the chains or ropes to hang your baskets at a height that allows easy access while simultaneously making good use of vertical space.
- Opt for a tiered design: Hang baskets in a tiered fashion to maximize space and segregate fruits and veggies to prevent accelerated ripening caused by ethylene gas.
- Add a touch of style: Customize baskets with a splash of paint or by weaving fabric through the wires for a pop of color and personalized touch.
- Protect your ceiling: Use heavy-duty hooks anchored securely into ceiling beams to ensure the weight of the hanging baskets does not cause damage.
Implementing these considerations will create an attractive and space-saving solution for produce storage in your kitchen.
Old Wine Rack Turned Produce Stand
Transforming an old wine rack into a functional produce stand is a creative and chic storage solution. The inherent design of wine racks, which keeps bottles securely in place, is perfect for stowing vegetables and fruits that require ventilation.
Here are the steps to repurpose your wine rack:
- 1. Clean and Sand: Start by cleaning your wine rack thoroughly. If it’s a wooden wine rack, give it a light sanding to create a smooth surface and remove any old varnish or stains.
- 2. Paint or Stain: Apply a coat of food-safe paint or stain to renew the look of the wine rack and match your kitchen decor. Allow it to dry completely.
- 3. Fabric Liners: Cut breathable fabric to size and line each compartment, which helps keep smaller produce from falling out and adds a decorative touch.
- 4. Adjust Shelves: If your wine rack has adjustable shelves, position them based on the size of the items you plan on storing. This maximizes space and accessibility.
- 5. Add Labels: Use small tags or labels to categorize your produce, making it easy to locate what you need while adding a personalized element to your stand.
- 6. Placement: Decide the best spot in your kitchen or pantry for your new produce stand. It should be easily accessible, away from direct sunlight, and in a cool spot to keep your produce fresh longer.
This project not only upgrades your kitchen storage but also gives a second life to a piece of furniture that might otherwise go unused, aligning perfectly with sustainable decorating practices.
Multi-Tiered Produce Stand With Wooden Crates
Maximize vertical space and add rustic charm to your kitchen with a multi-tiered stand using wooden crates. Select crates of the same size for a uniform look or varying sizes for a more eclectic vibe.
Ensure they’re strong enough to hold the weight of your produce. Stack them securely, staggering if needed to allow easy access and visibility for all items. If desired, attach with small brackets or wood glue for added stability.
Consider adding wheels for portability or painting/staining for a personalized touch. Label each tier for efficient organization, perhaps dedicating areas for fruits, root vegetables, and herbs.
DIY Mesh Produce Bags for Storage
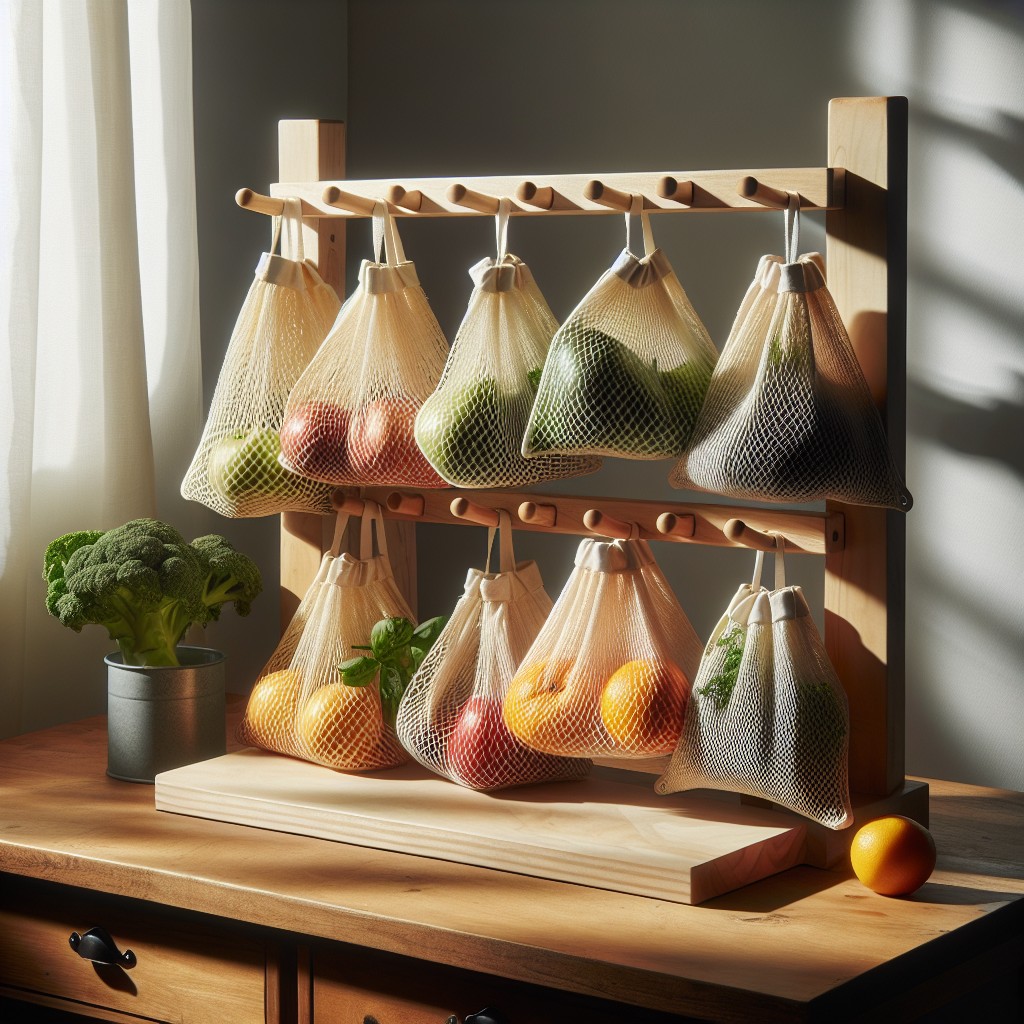
Harnessing lightweight and breathable materials, mesh produce bags provide an innovative solution to store your fruits and vegetables. They promote air circulation, preventing moisture buildup and extending the shelf life of your produce. Creating your own bags is a cost-effective process that can be tailored to suit your specific storage needs.
Materials Required:
- Mesh fabric, such as tulle or nylon laundry bag material
- Cord or ribbon for drawstring
- Sewing machine or needle and thread
- Scissors
Steps to Create:
- Cut the mesh fabric to the desired size, factoring in extra for seam allowance.
- Fold the top edge to create a casing for the drawstring and sew in place, leaving an opening to insert the cord or ribbon.
- Sew the sides of the bag together, leaving the top with the casing open.
- Thread the cord or ribbon through the casing, create a loop for easy hanging.
These bags not only serve as a practical solution for produce storage but can also be utilized for organizing other items around your home. Keep in mind, the transparency of the mesh allows for easy identification of the contents—no more guessing games with stored produce.
Vintage Giant Mason Jar Storage Idea
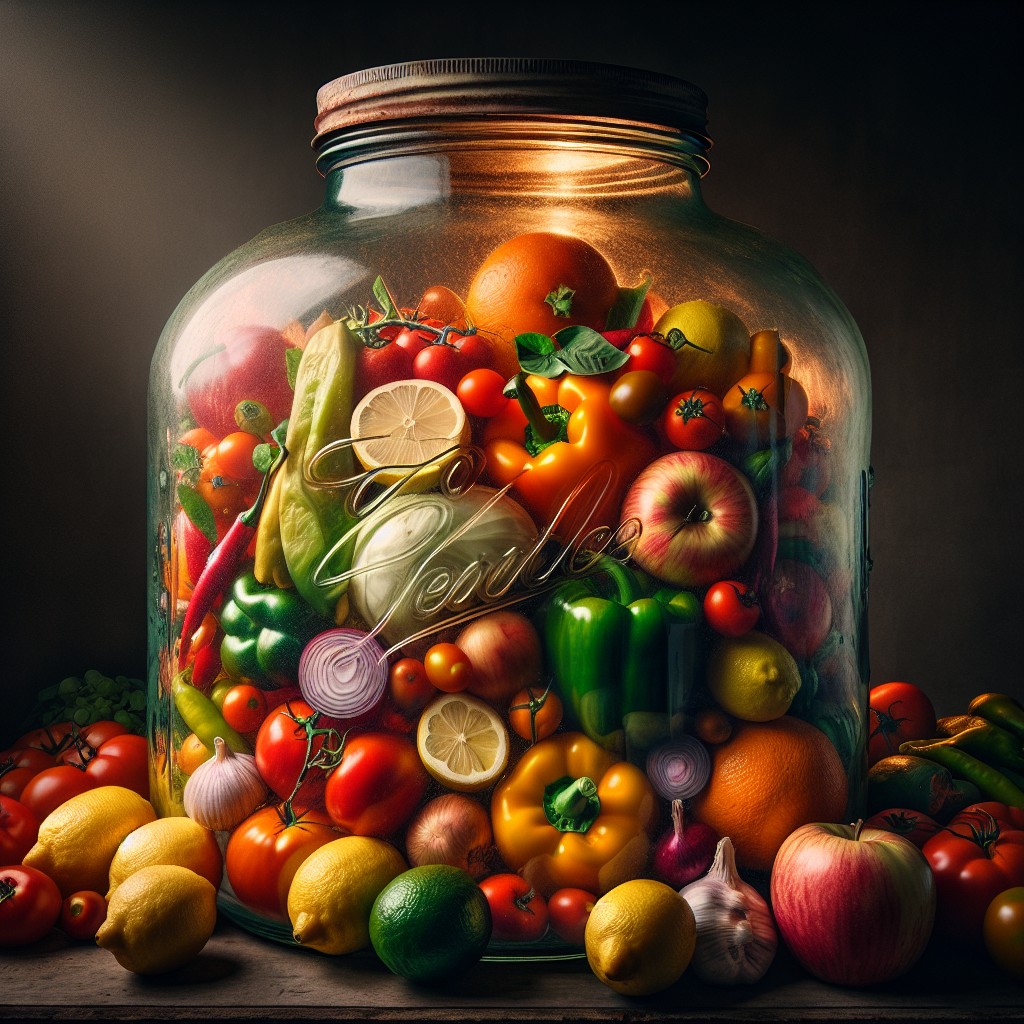
Transforming a vintage giant Mason jar into a stylish and functional storage solution for your produce is both economical and chic. Its translucent nature allows you to effortlessly monitor your supply and adds a touch of rustic charm to your kitchen.
Here’s how to repurpose these jars for your fruits and vegetables:
- Choose the Right Size: Large Mason jars are ideal for items like potatoes, onions, or apples. Ensure the mouth of the jar is wide enough for easy access.
- Maintain Ventilation: Drill small holes in the jar’s lid or replace it with a mesh fabric to allow for air circulation, preventing spoilage.
- Add Labels: Utilize chalkboard stickers or paint to label the jars. This helps in identifying the contents and adds a personalized touch.
- Protect from Sunlight: Place the jars away from direct sunlight to keep your produce fresh longer. A cool, dark corner of the countertop or pantry is ideal.
- Consider Accessibility: Arrange the jars in a manner that keeps frequently used items within easy reach.
By employing these tips, you can effectively use vintage Mason jars to store and display your produce, adding both functionality and a decorative element to your kitchen space.
DIY Produce Stand From Old Bookshelf
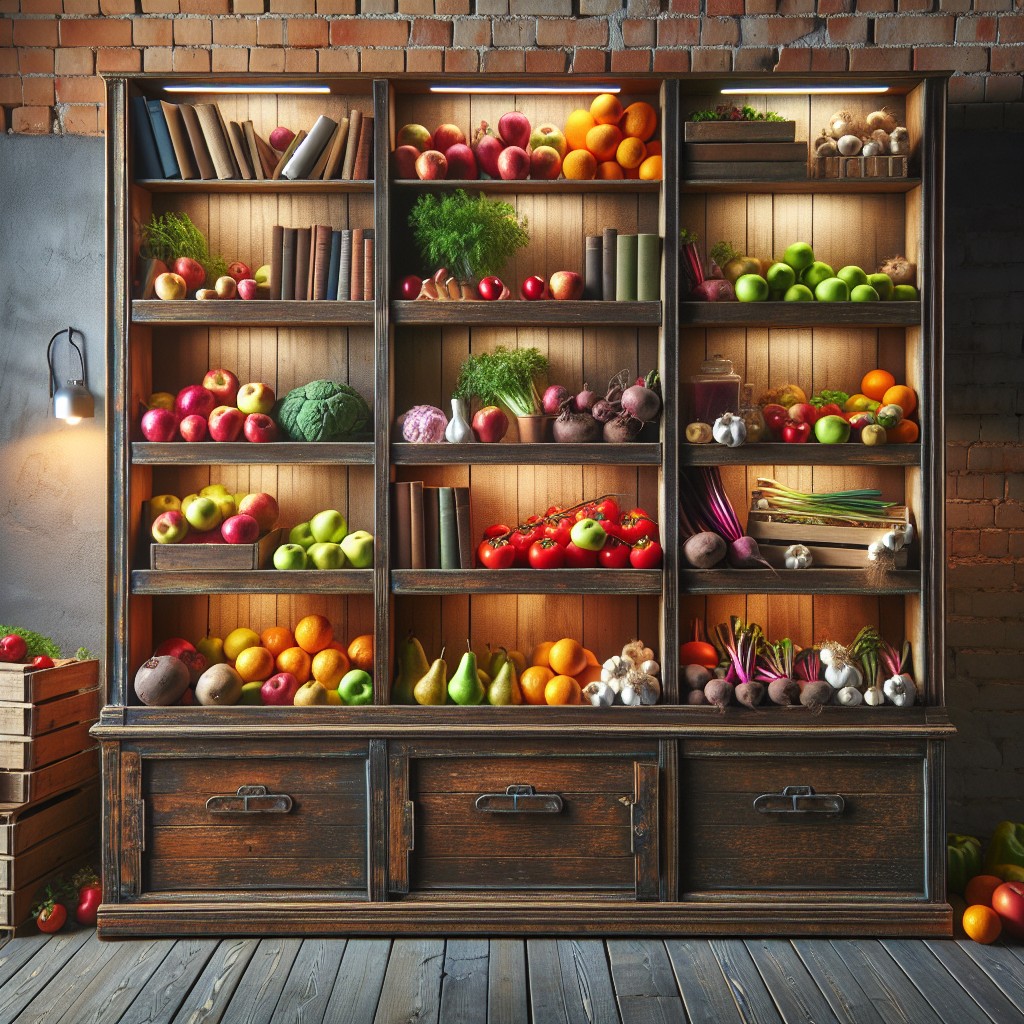
Transforming an old bookshelf into a produce stand adds both character and functionality to your kitchen. Here’s how to make it happen:
- Start by sanding the bookshelf to prepare for painting or staining. Choose a color or finish that complements your kitchen’s palette.
- If the shelves are adjustable, space them according to the height of your produce. Sturdier shelves are ideal for heavier items like melons, while lighter ones can hold herbs and greens.
- Adding wheels to the bottom turns your bookshelf into a rolling produce cart, convenient for moving to different areas during meal prep.
- Consider lining the shelves with wire mesh or clear acrylic for easy cleaning and to contain smaller items.
- Personalize your stand with labels or chalkboard paint to identify each type of produce.
Remember, this project recycles old furniture, reducing waste while making your kitchen more efficient.
Floating Shelf Produce Storage
Maximize vertical space in your kitchen by installing floating shelves at a reachable height for convenient access to fresh fruits and vegetables. Ensure the shelves are securely anchored to the wall to support the weight of your produce.
Select a breathable design, such as slatted wood or metal mesh, which promotes air circulation around the produce, thus elongating its freshness. Consider transparent containers or wire baskets on the shelves, effectively organizing and visibly displaying your items so you can quickly gauge what you have on hand.
For added functionality, incorporate hooks underneath to hang reusable mesh bags or banana bunches. Customize the look with non-toxic paint or stain to match your kitchen decor, creating both a practical and stylish solution for produce storage.
DIY Rolling Vegetable Storage Bin
Transform an old dresser drawer or build a custom wooden box to craft a rolling vegetable storage bin that easily glides out from its nook. Here’s how you can achieve this functional piece:
- Attach casters on the bottom corners for mobility, ensuring at least two are locking casters to keep the bin stationary when needed.
Treat the wood with a food-safe sealant to protect it from moisture and make it easy to clean.
Consider adding dividers to organize different types of vegetables. These can be made from thin plywood or even thick cardboard for a budget-friendly option.
If creating a custom bin, incorporate a handle or a cut-out at the top for convenient pulling, as well as ventilation holes to keep produce fresh.
Personalize the exterior with non-toxic paint or wood stains to seamlessly blend with your kitchen’s decor.
By keeping these points in mind, you’ll create a practical and stylish solution that simplifies kitchen organization and maintains the freshness of your vegetables.
Tilt-out Wooden Trash Bin Turned Produce Storage
Transforming a tilt-out wooden trash bin into a produce storage solution is a clever and space-efficient way to store fruits and vegetables. This repurposing project not only provides a ready-made compartment for your goods but also allows you to keep them out of sight, contributing to a clutter-free kitchen environment.
Here’s how to make the switch:
- Start by thoroughly cleaning the bin to eliminate any residues and odors that may have lingered from its previous use.
- Remove the existing hardware and give the bin a fresh coat of food-safe paint or sealant to prevent moisture damage and ensure hygiene.
- Line the tilt-out section with a breathable material such as burlap or mesh that allows air circulation and helps to prolong the freshness of produce.
- For better organization, add dividers or small crates within the bin, creating designated spaces for different types of produce.
- Label the compartments if necessary, using chalkboard paint or adhesive labels for easy identification.
- If the bin is deep, consider installing a sliding basket or shelf to improve accessibility and visibility of the items stored at the bottom.
- To help absorb excess moisture, place silica gel packs or a small container of baking soda within the storage space.
By keeping these points in mind, you’ll end up with a practical and aesthetically pleasing addition to your kitchen that makes produce storage both convenient and stylish.
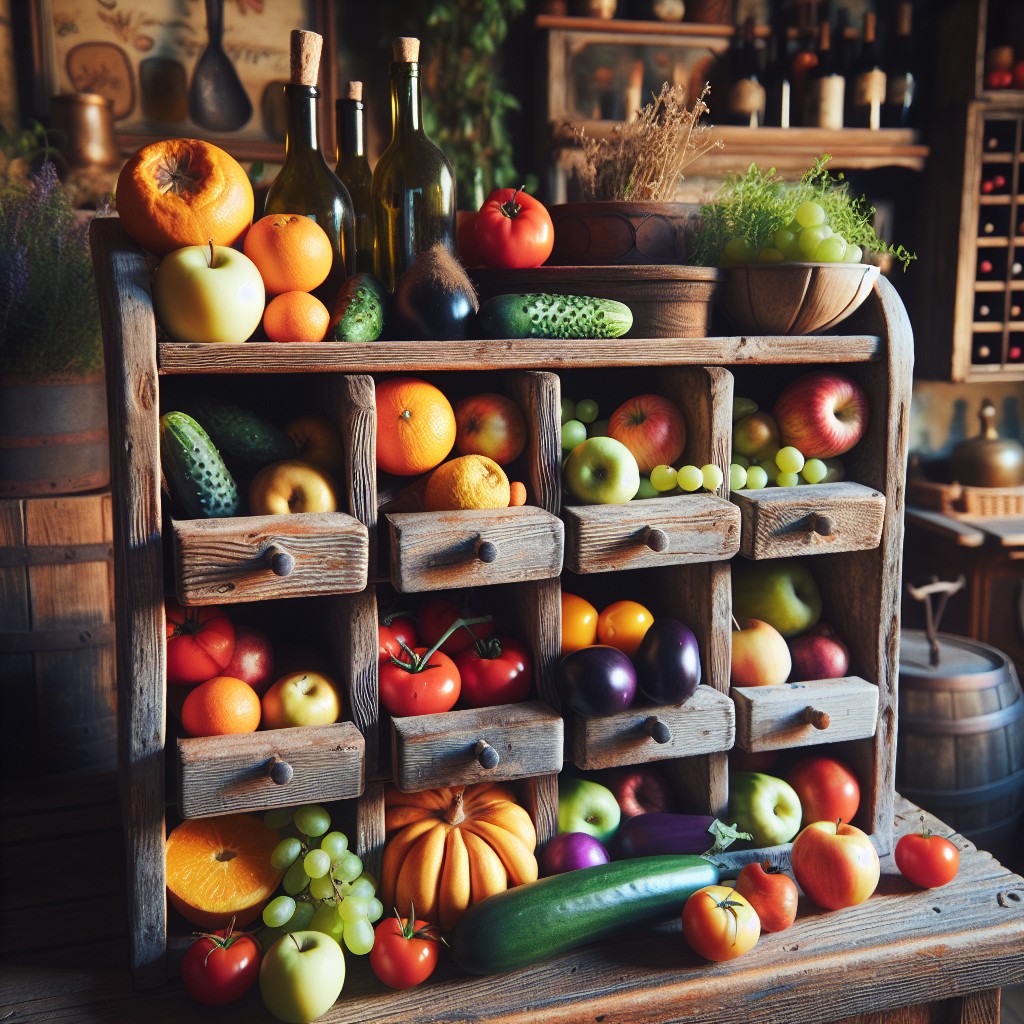
Recycled CD Rack for Vegetable Storage
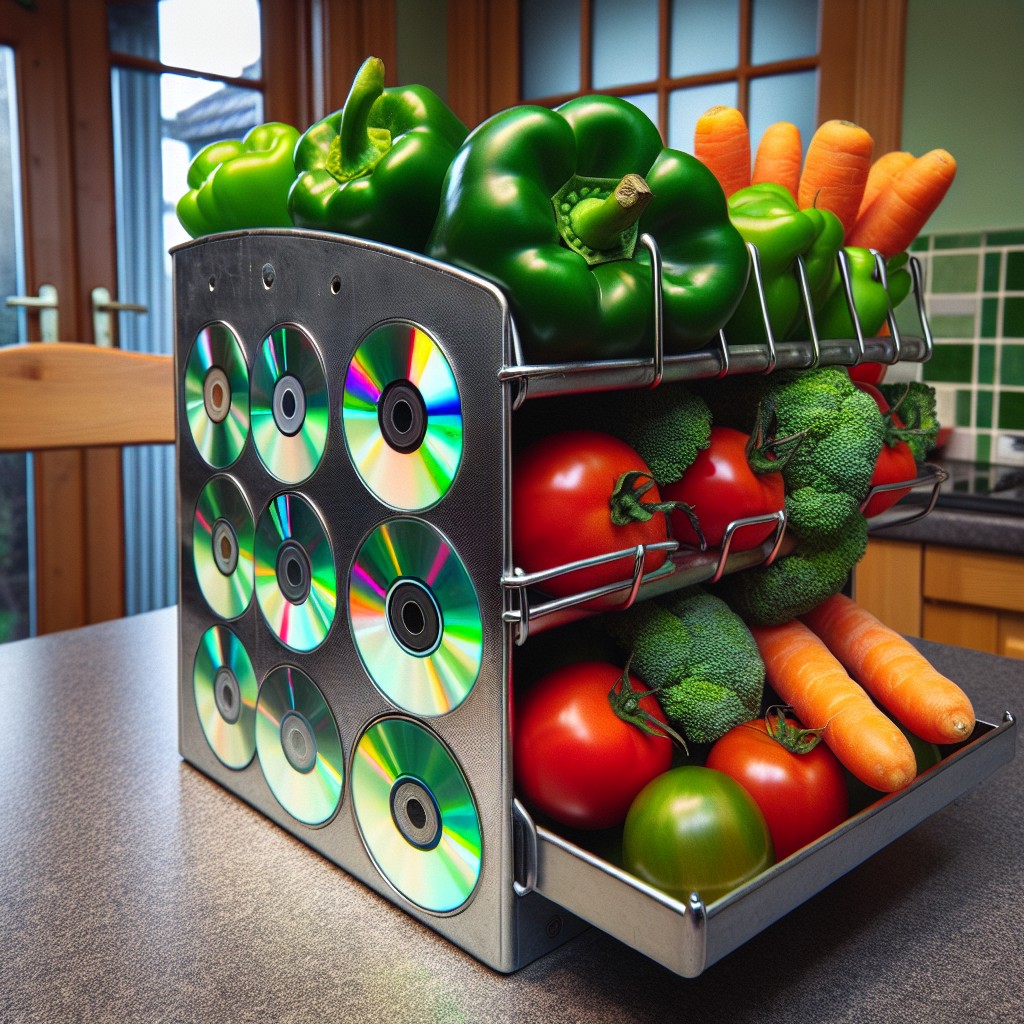
Transform an obsolete CD rack into a functional vegetable storage solution. Here’s how:
- Clean and sand the rack to prepare it for repurposing, ensuring it’s free from dust and grime.
- If desired, apply a fresh coat of paint or a wood stain to match your kitchen decor. Let it dry completely.
- Attach fine mesh or chicken wire to the open sides to prevent smaller items from falling out.
- Use the slots intended for CDs to organize vegetables that need ventilation, such as onions and potatoes.
- Consider adding wheels at the base for mobility, making it easy to move the rack to cooler areas of your home if necessary.
- For a personal touch, label each shelf using chalkboard paint or hanging tags to identify the stored produce.
Remember, creativity is key—each old CD rack has unique features that can add character to your kitchen while keeping your vegetables neat and orderly.
DIY Adjustable Produce Bin Stand
Transform an adjustable shelving unit into a versatile produce bin stand with ease. Select a sturdy unit with multiple shelves that can be repositioned according to the size of your produce containers.
For the bins, repurpose wooden crates or sturdy baskets for a rustic look, or choose clear plastic bins for a more modern aesthetic.
Ensure each shelf is set at an appropriate height to accommodate the bins while considering the produce that needs more air circulation at the top. To maintain freshness, drill a few holes for ventilation in your chosen containers if they’re not already aerated.
Feel free to personalize your stand with paint or stains that match your kitchen’s decor. Add labels to keep your produce organized by type or ripeness. For added convenience, attach casters to the bottom of the unit to make it mobile, enabling you to move your produce to a cooler area on hot days or to catch more sunlight on windowsill-friendly mornings.
DIY Utility Cart Produce Storage
Transform an unused utility cart into an efficient produce storage solution with these easy steps:
1. Prep the cart by cleaning it thoroughly and, if desired, apply a fresh coat of paint to fit your kitchen’s aesthetic.
2. Decide on the tiered arrangement based on the size and weight of the produce. Heavier items should go on the bottom shelf for stability.
3. Add wire baskets or plastic bins to the shelves to organize the produce and ensure proper airflow.
4. Consider adding labels or signs to categorize your fruits and veggies, making it simple to locate what you need.
5. If the cart doesn’t include them, install quality caster wheels to ensure the cart can be easily moved for cleaning or to catch the best light throughout the day.
6. Maximizing vertical space, use the sides of the cart to hang lightweight items such as herb bunches or garlic braids.
This rolling storage can be tucked into a pantry, positioned against an empty kitchen wall, or wheeled out to a deck or patio when entertaining.
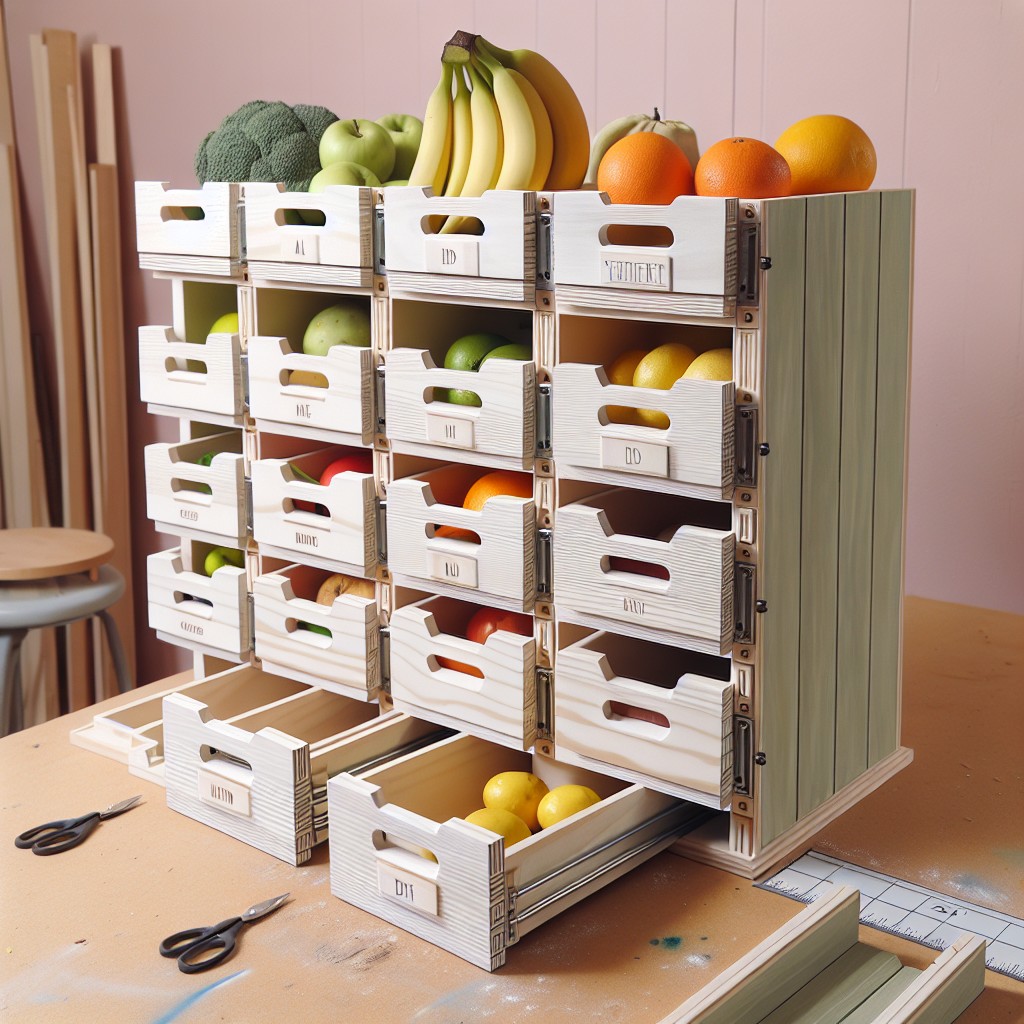
DIY Stenciled Produce Crates
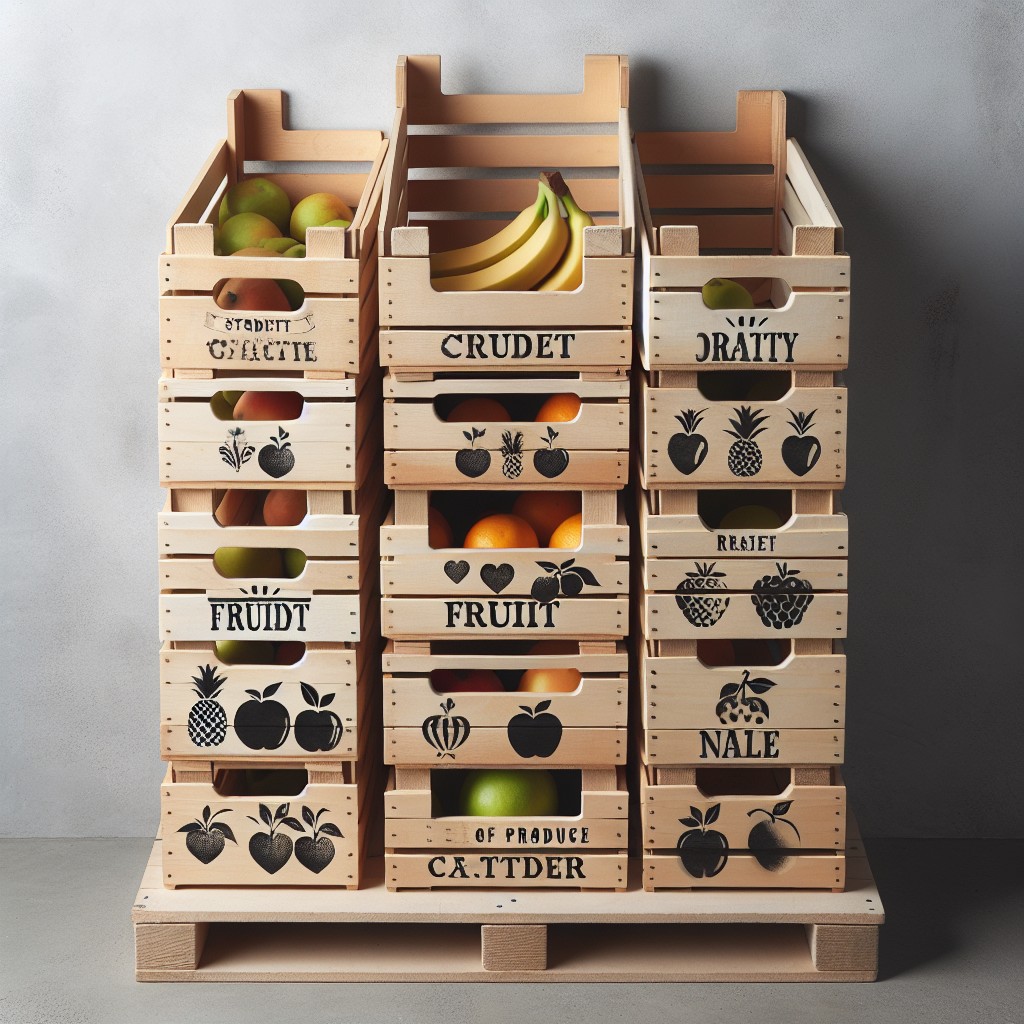
Transforming plain wooden crates into personalized produce storage is a simple project that adds a decorative touch to your kitchen or pantry. Here’s how to do it:
1. Choose Crates: Select wooden crates sturdy enough to hold produce. Consider size based on available space and the quantity of produce you typically store.
2. Sand and Paint: Lightly sand the crate to smooth out rough edges and apply a coat of paint if desired, opting for a food-safe variety.
3. Create Stencils: Use pre-made stencils or design your own on adhesive paper for custom labels like “Fruits” or “Veggies”.
4. Apply Stencils: Position stencils on the crate and secure them. Apply paint over the stencil with a sponge or brush for a crisp design.
5. Seal the Crate: Once the paint is dry, seal the crate with a clear, food-safe sealant to protect the design and make cleaning easier.
6. Organizing Produce: Line the bottom of the crate with a breathable material like burlap to keep produce fresh and arrange items for easy access.
This project not only aids in separating and organizing different types of produce but also adds a charming, rustic element to your home’s decor.
DIY Sandwich Bag Produce Storage
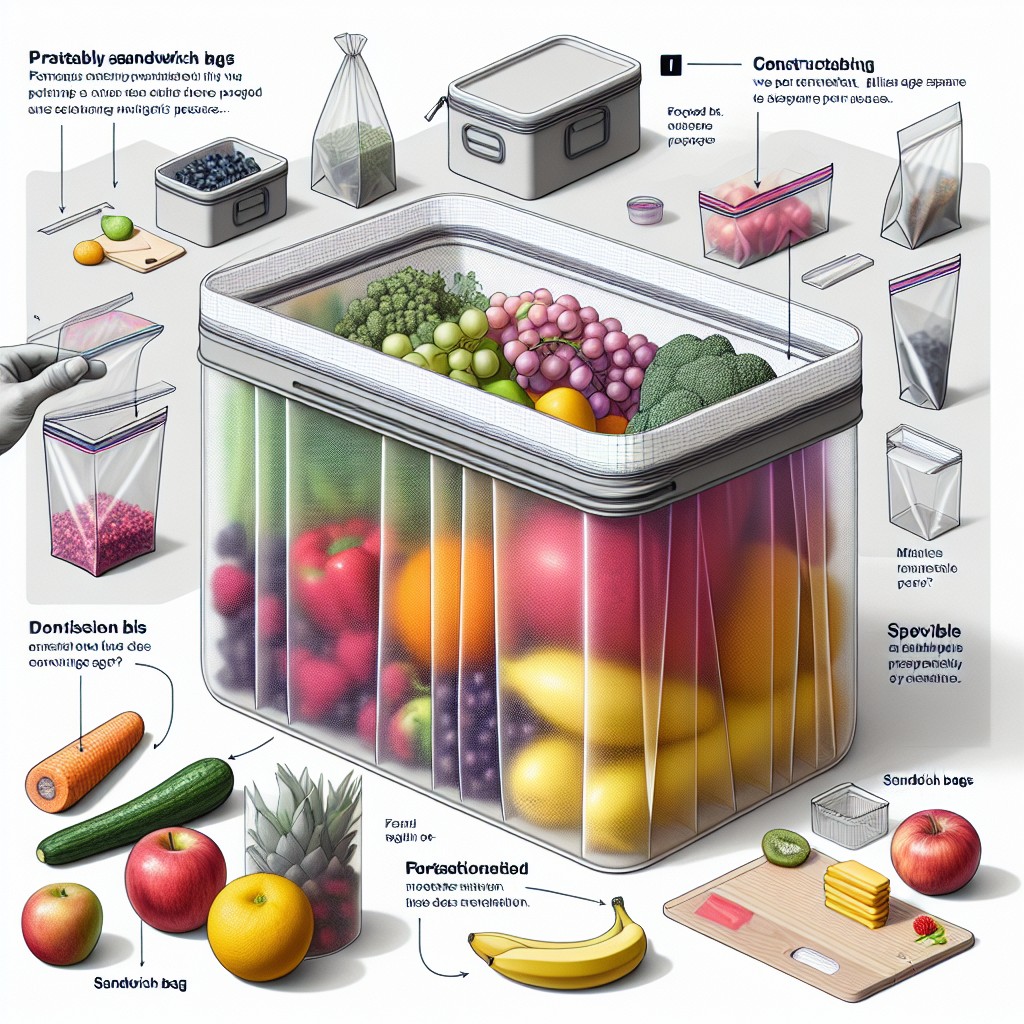
Maximize your refrigerator’s potential with the innovative sandwich bag produce storage solution. Here’s a creative way to organize your fruits and veggies using simple, clear sandwich bags:
- Label each bag with a permanent marker noting the contents and date of storage, ensuring you keep track of freshness and reduce waste.
- Punch a few holes in each bag for ventilation. This will help maintain the right humidity level and prevent the produce from spoiling too quickly.
- Implement a ‘first in, first out’ system by placing newer bags at the back, making sure older produce gets used up first.
- Use sturdy adhesive hooks on the inner walls of your refrigerator to hang bags and save shelf space.
- Consider grouping similar produce together to maintain optimal storage conditions for each type.
This approach not only utilizes unused vertical space but also makes it easy to see at a glance what you have on hand. It’s a great way to stay organized and reduce the chances of produce getting lost and forgotten in the back of the fridge.
DIY Leather and Wood Produce Bag
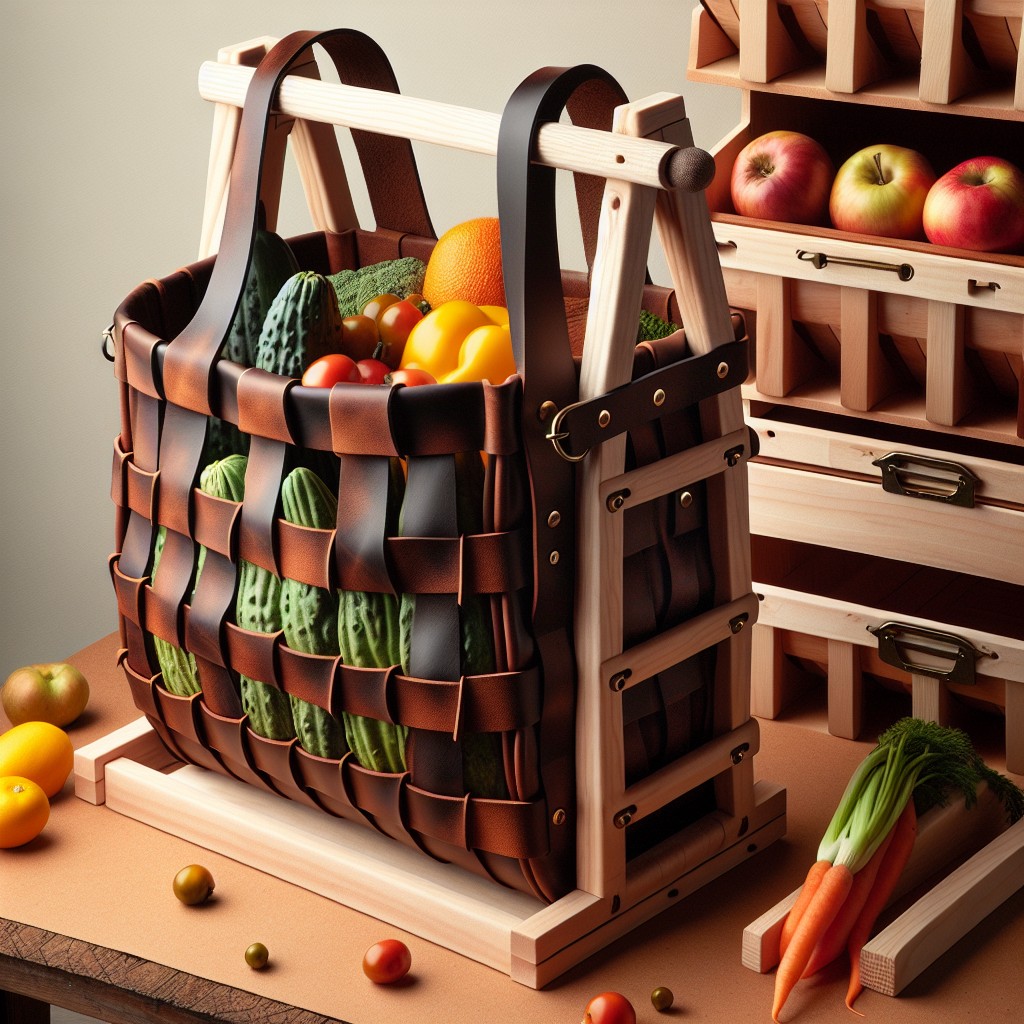
To craft a sturdy and stylish leather and wood produce bag, begin with selecting a piece of soft leather or faux leather that provides flexibility and durability. Cut the leather to the desired size, allowing extra inches for seams.
Next, choose a lightweight piece of wood, like balsa or thin plywood, for the base. Cut to match the dimensions of the leather base, sand the edges smooth to prevent snags, and possibly treat with a food-safe sealant to protect the wood from moisture.
Punch holes around the perimeter of the leather piece where it will attach to the wooden base. Use a durable thread or leather cord to stitch the leather to the wood, creating a secure and seamless join. The corners of the bag can be reinforced with additional stitching or small metal brackets.
For handles, cut longer strips of leather, ensuring they are comfortable to grip. Attach the handles securely to the sides of the bag with rivets or strong stitching. Consider adding a few holes or grommets along the top edge for a drawstring closure if desired.
This DIY project merges the warmth of wood with the chic appeal of leather, creating an eco-friendly bag perfect for trips to the farmer’s market or for stylish countertop storage.
Wine Barrel Convert Into Produce Storage Bin
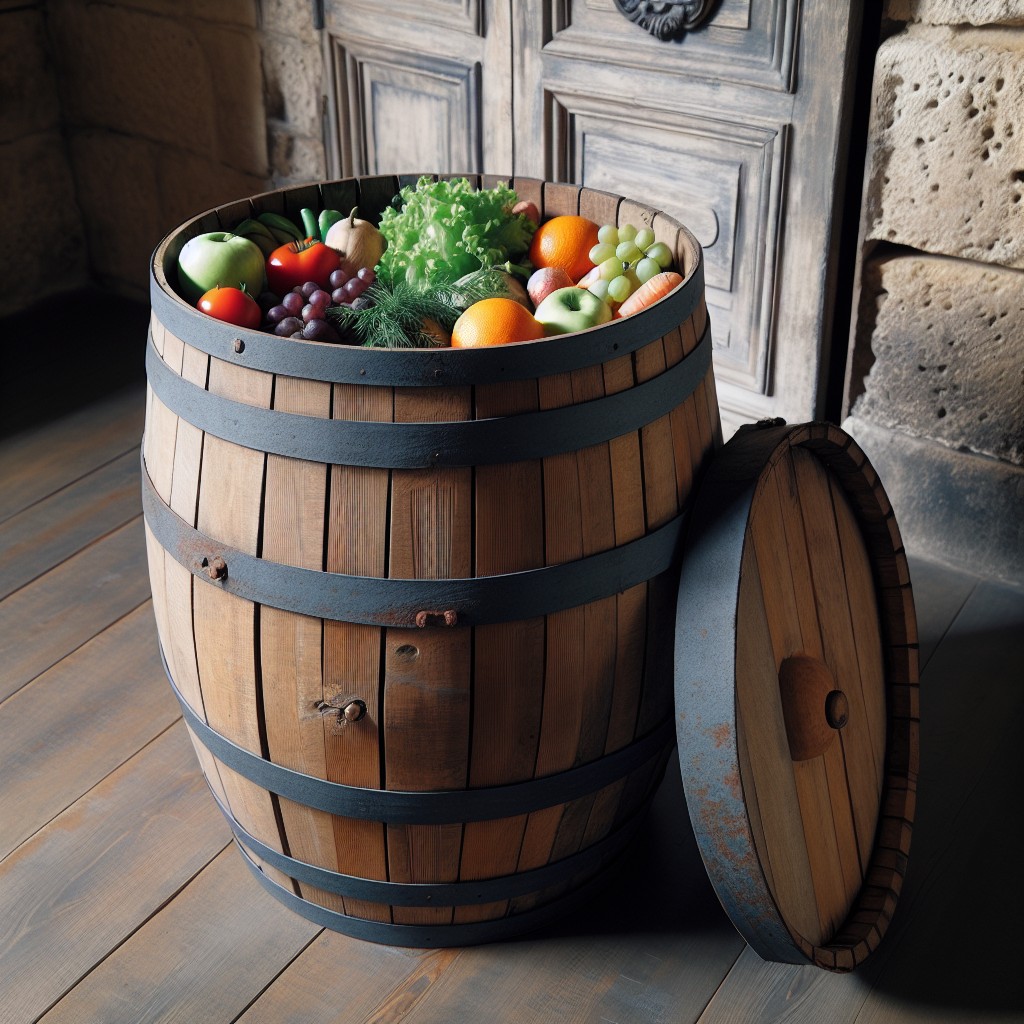
Transforming a wine barrel into a storage solution combines rustic charm with functionality. To start, cut the barrel in half horizontally, ensuring stability for each half to stand independently. Sand away rough edges to create a smooth finish, preventing snags or injuries. Next, apply a wood sealant to protect against moisture and extend the life of the bin.
If you desire shelves for additional organization, measure and cut planks of wood to fit snugly inside the barrel halves. Secure them with wood glue and reinforce with screws for sturdiness. For a decorative touch, you can stain the wood in a complementary shade or leave it natural for a more authentic look.
Adding casters to the bottom edge provides mobility, convenient for moving the storage around your space. Select heavy-duty, lockable wheels to ensure the structure’s safety and prevent it from rolling away. Finally, consider fitting a hinged lid or a fabric cover to shield your produce from dust and pets.
This upcycled storage solution gives a second life to an otherwise discarded object, seamlessly blending sustainability with home décor style.
Ideas Elsewhere
- https://www.diyncrafts.com/38573/organization/20-creative-diy-produce-storage-solutions-to-keep-fruits-and-veggies-fresh
- https://www.anikasdiylife.com/diy-divided-produce-storage-bin/
- https://www.ana-white.com/node/76161
- https://www.motherearthnews.com/diy/diy-produce-storage-bins-zm0z14aszmar/
- https://www.homedesigninspired.com/15-insanely-cool-ideas-for-storing-fresh-produce/
- http://fordiyers.com/produce-storage-ideas/
More Like This
 22 Mini Cactus Garden Ideas That Prickle with Delight
 20 Fairy Houses With Natural Materials That Will Make You Believe In Magic
 20 Cheap Walkway Ideas DIY Benefits
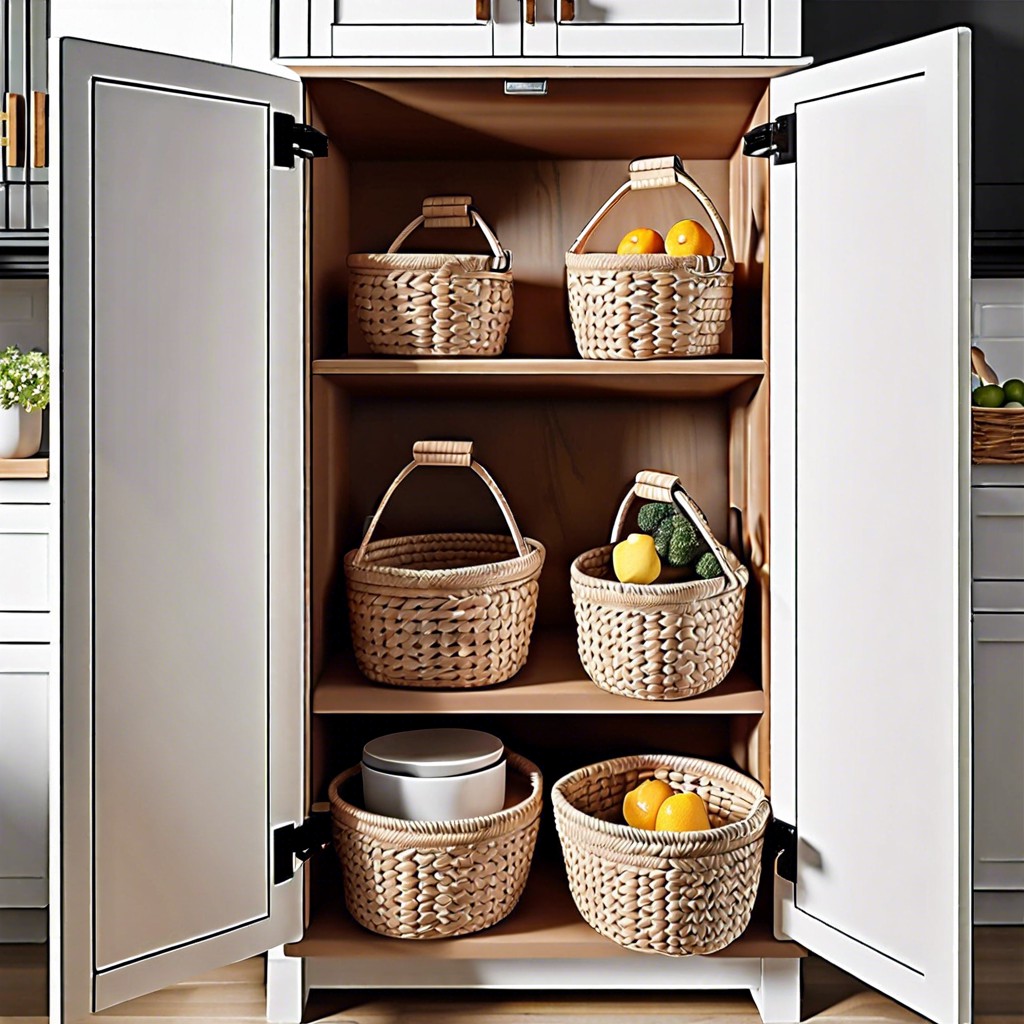 15 Ingenious DIY Pantry Cabinet Ideas
 15 Creative DIY Buffet Table Ideas for Your Next Gathering
Recap