Last updated on
Transform your outdoor space into a relaxing oasis with a DIY hammock stand because it’s neither as complicated nor as expensive as you might think.
This article includes my original designs. Some of them may be exaggerated to make a point — that’s my style. Enjoy them for your inspiration!
Dive into a world where relaxation meets innovation! Get set to explore a fresh list of unique, DIY hammock stand designs.
While there’s a plethora of ideas already on the web, this guide hopes to inspire you with a unique perspective.
Rest assured, References to the best of existing designs will be included towards the end.
However, prepare to witness some fresh, budget-friendly creations that promise not just a hammock stand, but a talking point in your backyard.
So, gear up to swing in style with these original designs, that blend easy of building with aesthetic appeal like never before!
Key takeaways:
- DIY Hammock Stand With Built-in Cooler
- Double-Decker Hammock Stand Design
- Tree-Inspired Wooden Hammock Stand
- DIY Hammock Stand With Attached Side Tables
- Hammock Stand Plan Incorporating a Canopy
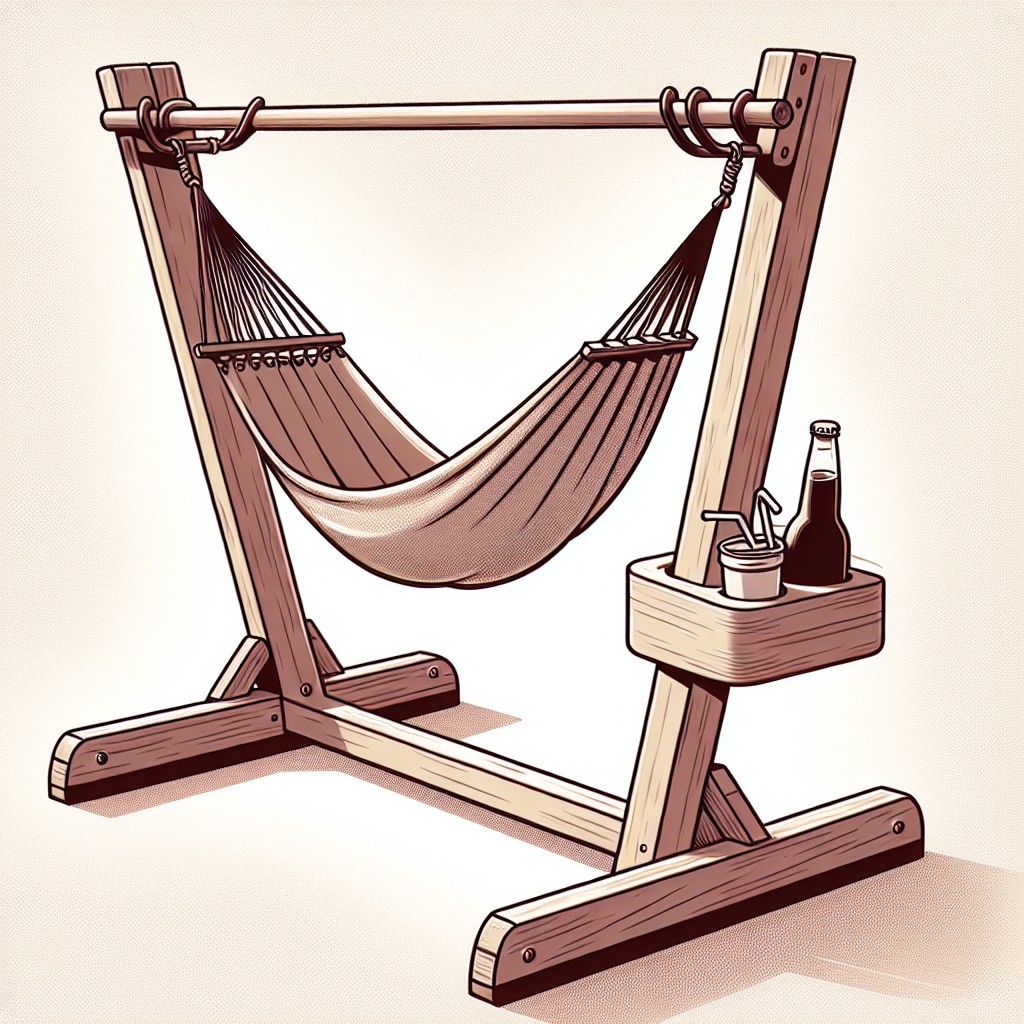
DIY Hammock Stand With Built-in Cooler
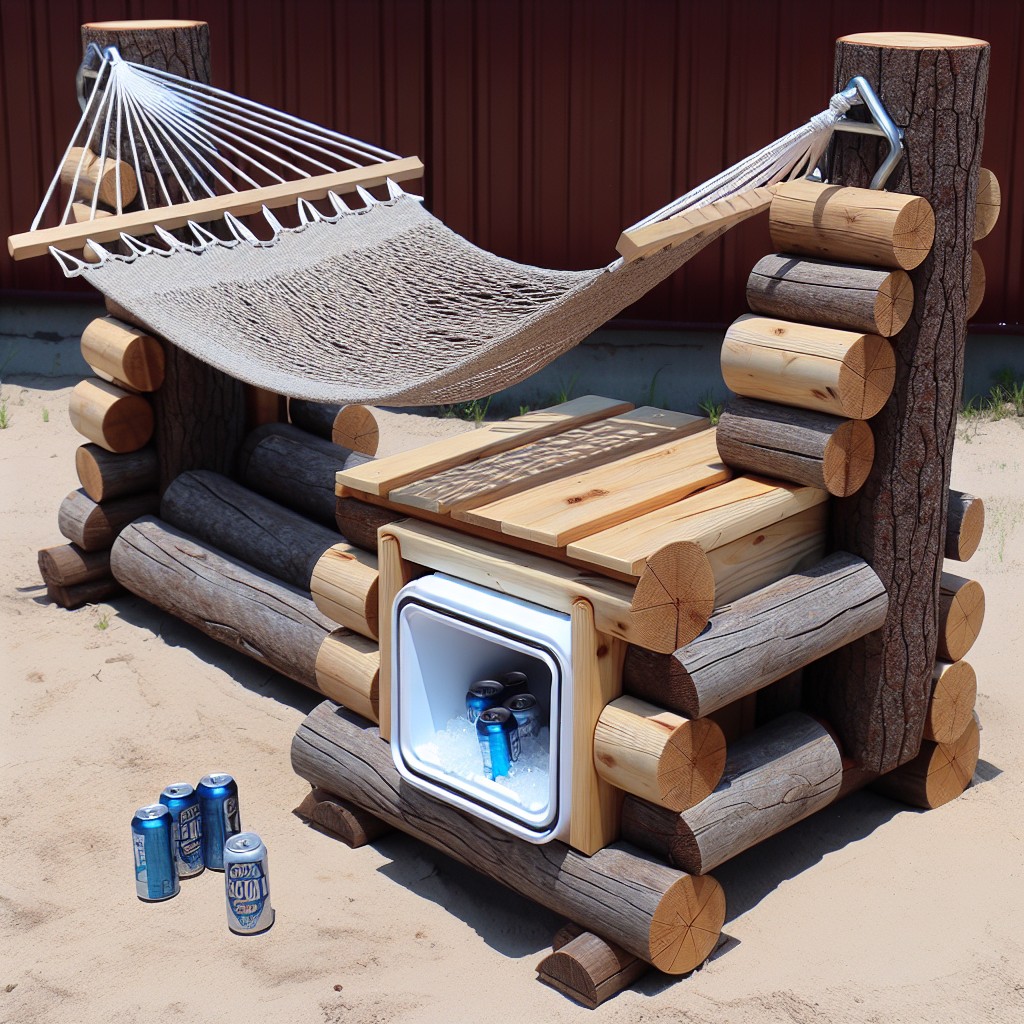
Enhancing your outdoor relaxation with a DIY hammock stand featuring a built-in cooler is both practical and clever. By integrating a space for refreshments, you can enjoy a cold drink without leaving the comfort of your hammock.
Here are some key concepts to consider when building this project:
- Stability: Ensure the cooler’s weight and placement do not compromise the stand’s balance.
- Insulation: Use materials like foam or insulated panels to keep your drinks cold for hours.
- Accessibility: Position the cooler within arm’s reach from the hammock for convenience.
- Drainage: Incorporate a drainage system to prevent water accumulation from melted ice.
- Materials: Opt for durable, weather-resistant materials such as treated wood or heavy-duty plastic.
Remember to measure your hammock and cooler beforehand to align the stand’s dimensions with your needs. This setup is ideal for those looking to create a mini oasis in their backyard.
Double-Decker Hammock Stand Design
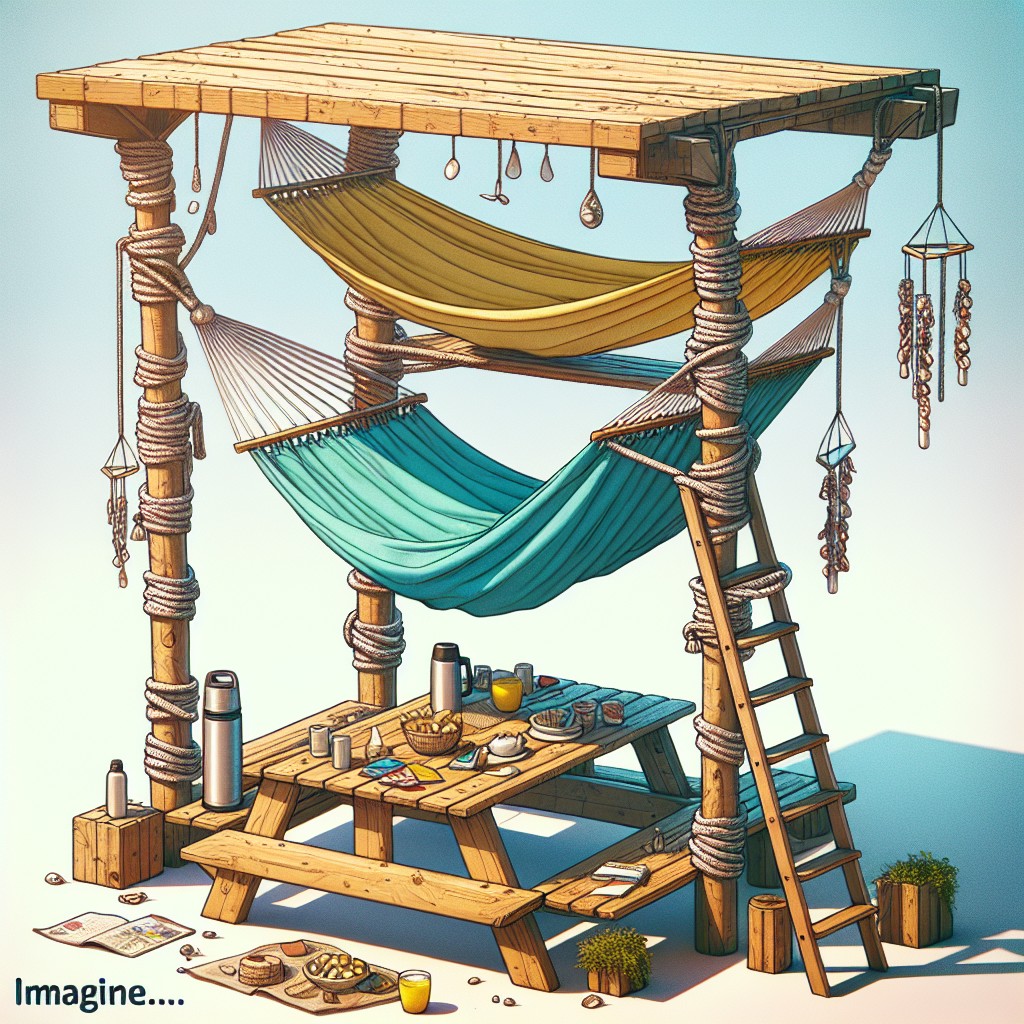
Maximizing vertical space while delivering twice the relaxation, the double-decker stand accommodates two hammocks, one above the other. This design is ideal for family gatherings or when backyard space is at a premium. Key components include a sturdy base with four solid points of contact with the ground to ensure stability for both levels.
When constructing, it’s important to use heavy-duty materials such as thick wooden beams or robust steel pipes that can handle the weight of multiple occupants. Consider the spacing between the two levels carefully; there should be enough room to avoid contact while swinging and to get in and out comfortably.
The attachment points need to be securely fastened and reinforced to avoid any structural compromise. Implementing a ladder or steps for access to the upper level enhances functionality. If you’re going for a wooden look, treat all materials with a weatherproof stain or sealer to extend the life of your stand against the elements.
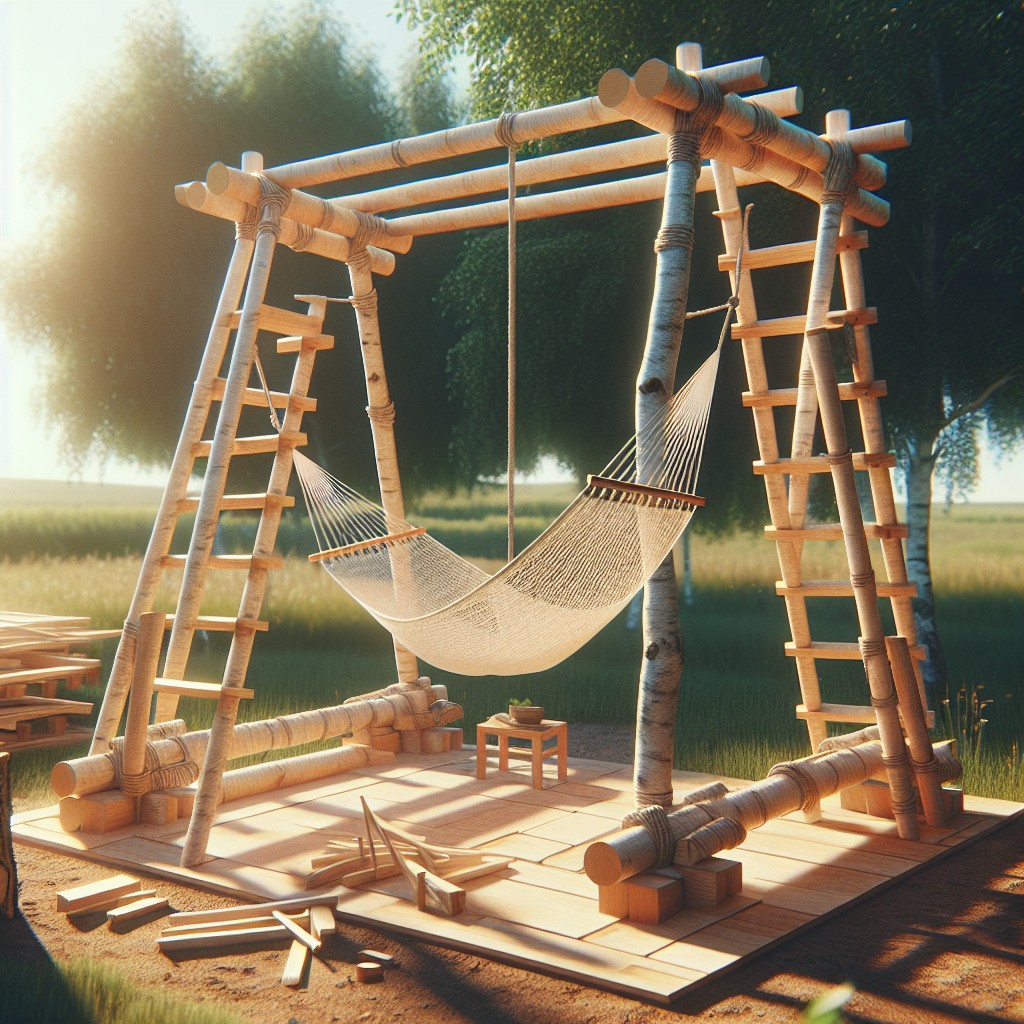
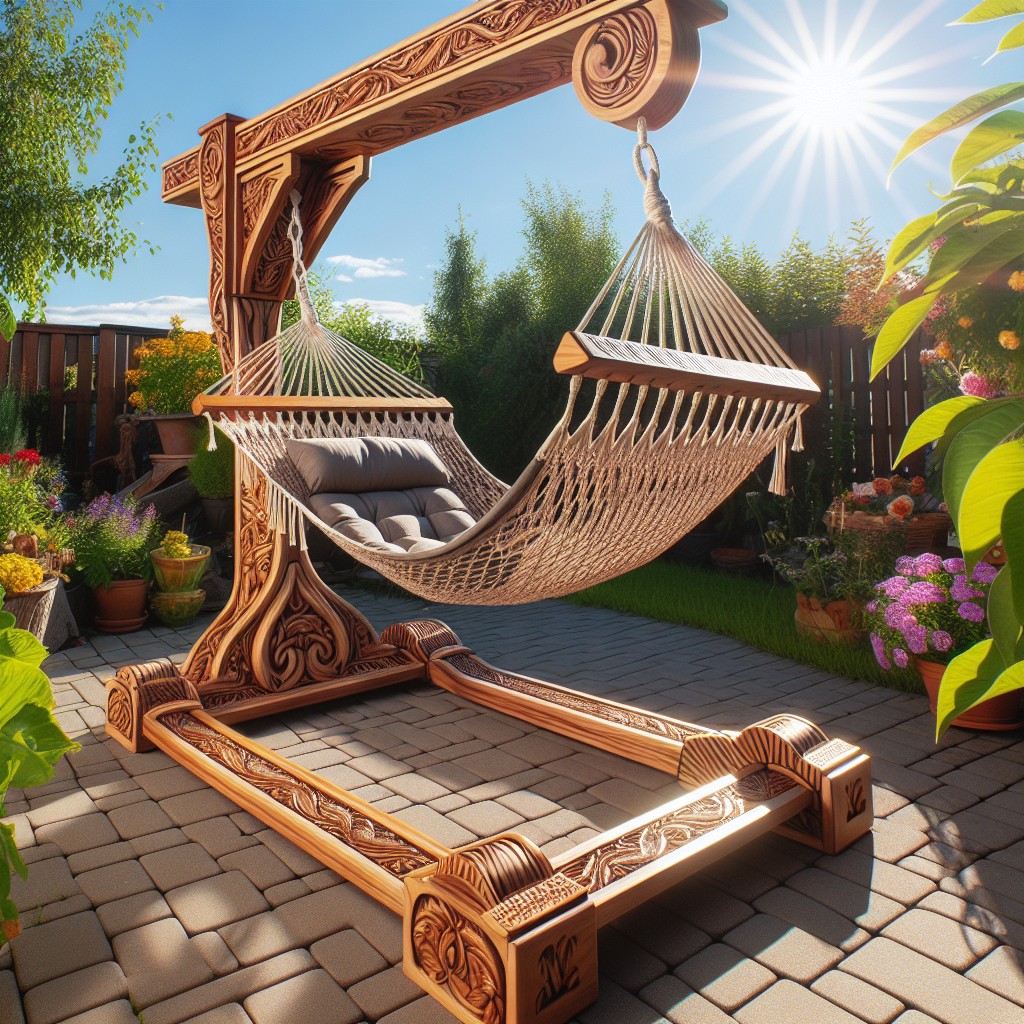
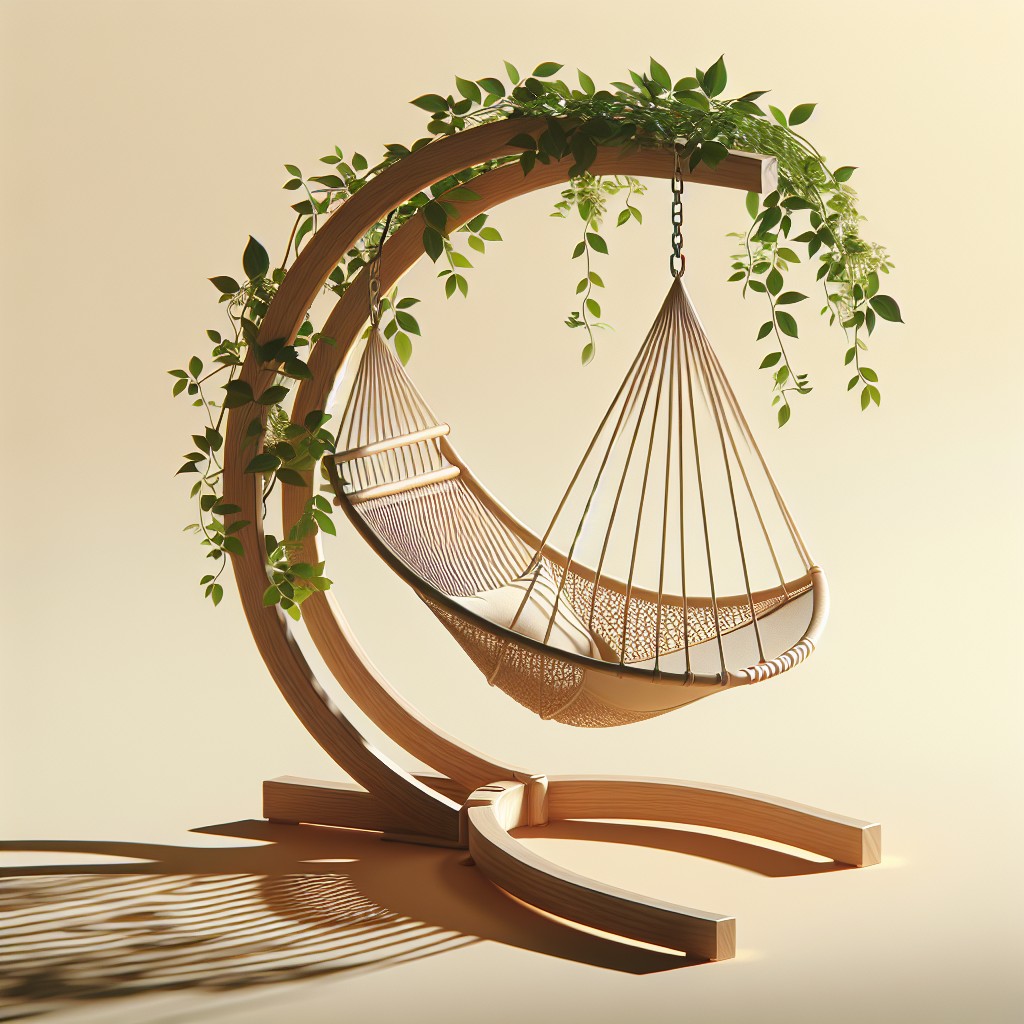
Tree-Inspired Wooden Hammock Stand
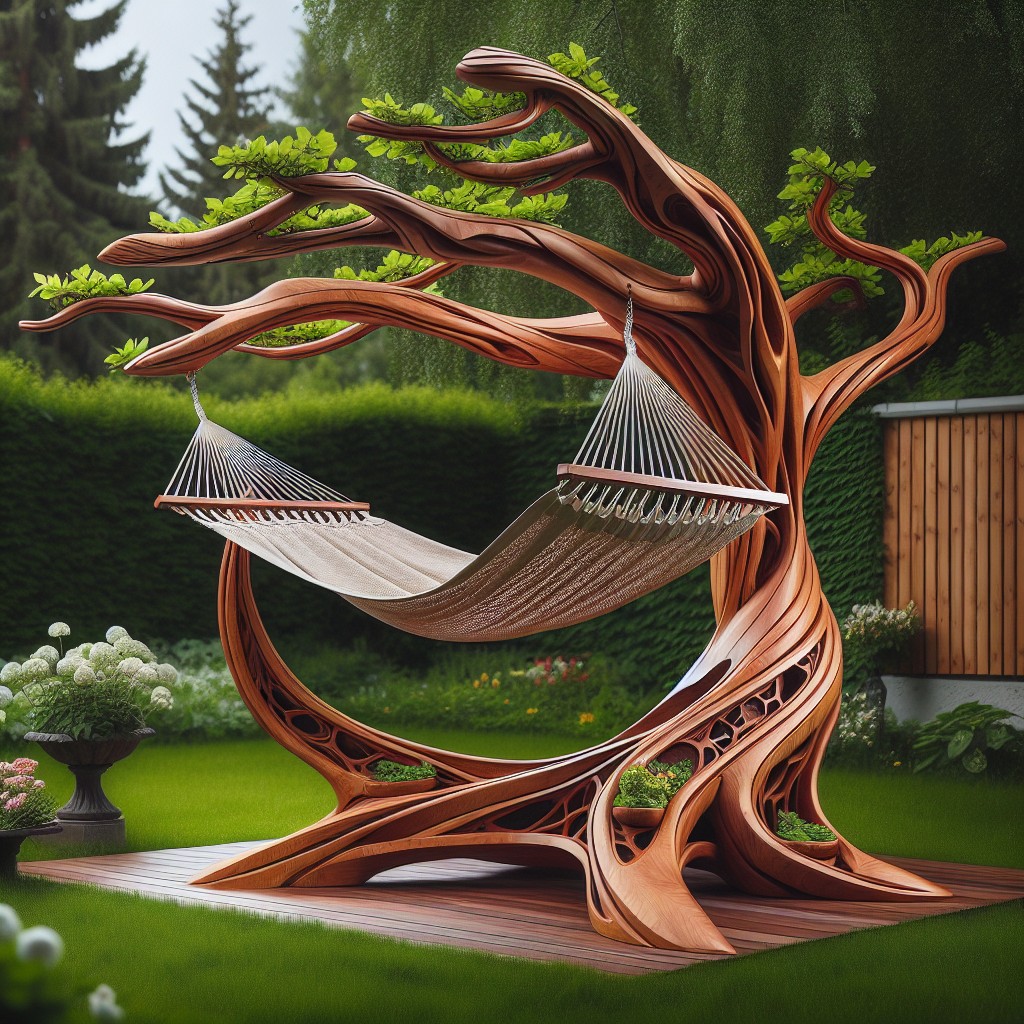
Embodying the essence of nature, this design marries aesthetics with functionality. Envision a stand that mimics the strong, branching structure of a tree. Using pressure-treated lumber for durability, cut pieces to represent the trunk and branches—these will support your hammock.
Ensure stability by angling the ‘branches’ and using a cross-brace construction. To maintain an organic look, stain the wood in deep, earthy tones. Consider incorporating wood joints that not only add to the tree-like appearance but also make for a sturdy and safe resting place.
Remember to measure the space for your hammock carefully and adjust the ‘branch’ lengths accordingly to create the perfect hang.
DIY Hammock Stand With Attached Side Tables

Elevate your relaxation space by incorporating side tables into your hammock stand. This feature offers a convenient surface for your books, drinks, and sunscreen, keeping them within arm’s reach as you sway in comfort.
Materials Needed:
- Wooden planks for the stand and tabletops
- Durable screws and brackets for assembly
- Waterproof sealant for outdoor protection
Construction Steps:
- Determine the size of your hammock to ensure the stand and tables fit proportionately.
- Cut wooden planks according to the desired dimensions of your stand and side tables.
- Assemble the main structure of the hammock stand, ensuring stability and balance.
- Attach the side tables at an optimal height for easy access without obstructing your hammock’s swing.
- Finish with a waterproof sealant to weatherproof your creation and prevent wood decay.
Design Tip:
Match the wood stain of the stand and tables for a cohesive look, and consider adding a thin edge around the table to prevent items from slipping off during use.
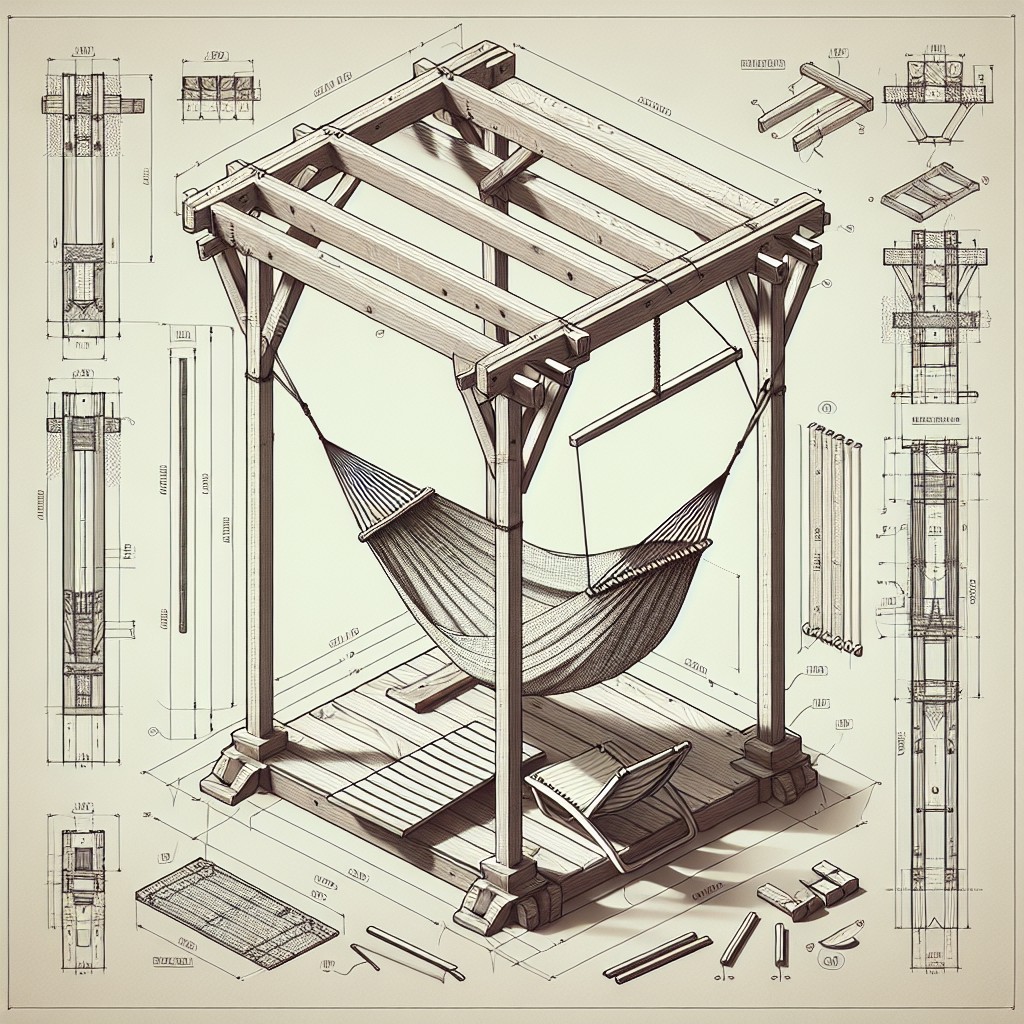
Hammock Stand Plan Incorporating a Canopy
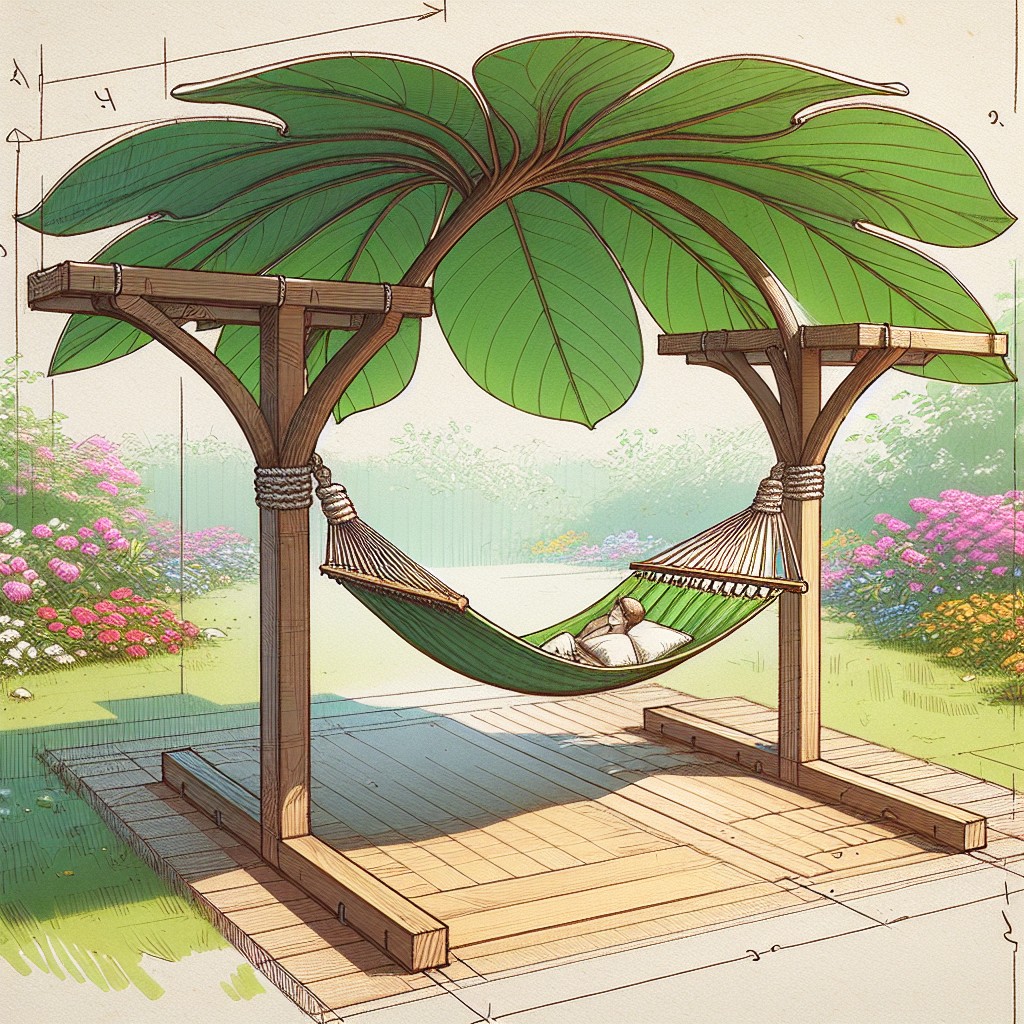
Maximize your outdoor relaxation with a hammock stand that comes with the added benefit of shade. By integrating a canopy into the structure, you not only enhance the aesthetic appeal but also provide a functional retreat from the sun’s intensity. This design allows for personalization with various fabric choices, from breathable mesh to waterproof materials, suitable for different weather conditions.
Key considerations for this plan include:
- Stability: Ensure the base is wide and sturdy to support both the hammock and canopy.
- Material Durability: Opt for weather-resistant wood like cedar or metal for the frame, and high-quality outdoor fabrics for the canopy.
- Adjustability: Incorporate a mechanism to adjust the canopy angle as the sun moves through the sky.
- Assembly: Design for simple setup and disassembly, ideal for seasonal storage or relocation.
- Maintenance: Select materials that are easy to clean and maintain.
This design cleverly marries form with function, creating a serene and shielded hammock haven in the comfort of your backyard.
Nomadic Hammock Stand Design for Campers

Campers require hammock stands that are lightweight, easily portable, and quick to assemble. The goal is to create a stand that won’t weigh down a backpack and can be set up or taken down in a matter of minutes.
- Build with aluminum or another light-but-sturdy metal to keep the overall weight down.
- Use a collapsible design that breaks down into a compact form, making it easy to transport.
- Introduce a simple, intuitive connection system that doesn’t require tools, such as snap buttons or interlocking joints.
- Ensure that the base is wide enough to provide stability on uneven ground, which is typical in camping situations.
- Include carrying straps or a bag to facilitate transportation when on the move.
- Consider a design that can double as a seat or table to maximize utility without adding extra items to pack.
Rustic Log Hammock Stand DIY
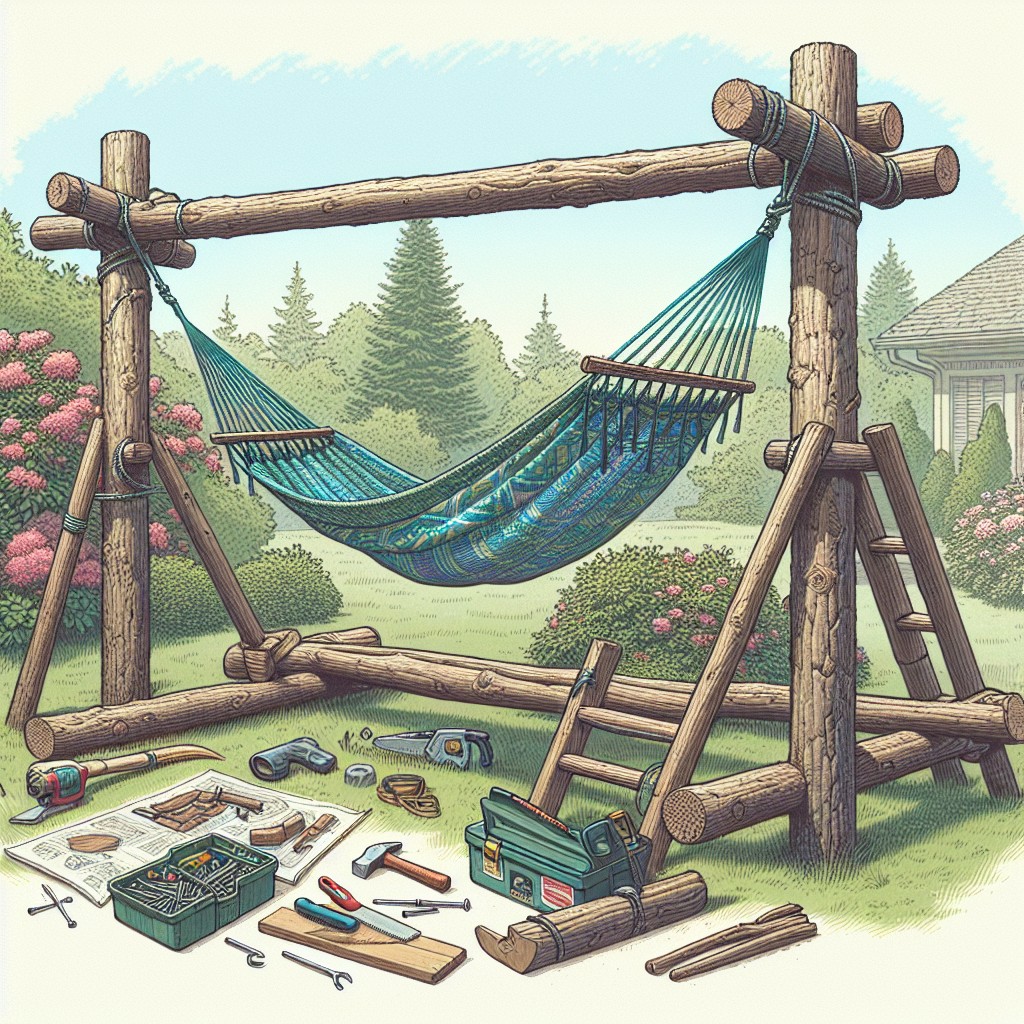
Creating a rustic log hammock stand adds an element of natural charm to any outdoor space. Here’s how to bring this DIY project to life:
- Select durable wood: Opt for logs like cedar or pine known for outdoor durability and resistance to decay.
- Measure for comfort: Ensure the distance between the support logs fits your hammock’s length plus some extra for the necessary sag.
- Cut notches for stability: Carve out notches where the cross beams will rest on the main support logs to secure the structure.
- Join with robust hardware: Use heavy-duty bolts and screws to assemble the stand, ensuring it can support the intended weight.
- Seal for protection: Apply a weather-resistant sealant to protect the wood from moisture and insects, preserving the stand’s rustic aesthetic.
Remember, the beauty of this design lies in its simplicity and rugged appearance, making it a functional yet attractive addition to your yard or garden.
Hammock Stand Design Made From Ladders
Utilizing a pair of wooden or aluminum ladders, you can craft a stable, elevated space for your hammock, perfect for any backyard or patio. Here are the steps to turn ordinary ladders into a unique hammock stand:
- Ensure ladders are of equal height and have a solid, locking mechanism for safety.
- Measure the hammock length to position the ladders properly, allowing for slight sag.
- Join the ladders at the top with a sturdy crossbar that surpasses the width of the hammock.
- Secure the crossbar with bolts or heavy-duty rope to maintain rigidity.
- Hook the hammock loops onto the steps of the ladder that align with each end, adjusting as necessary for tension.
- For additional stability, connect the ladders at the base with a spreader bar or heavy-duty straps.
- Optional: Sand and paint the ladders to match outdoor decor and add protective caps on feet to prevent slipping and lawn damage.
The end result is a functional and conversation-provoking hammock stand that can be dismantled and stored as needed.
DIY Minimalist Hammock Stand
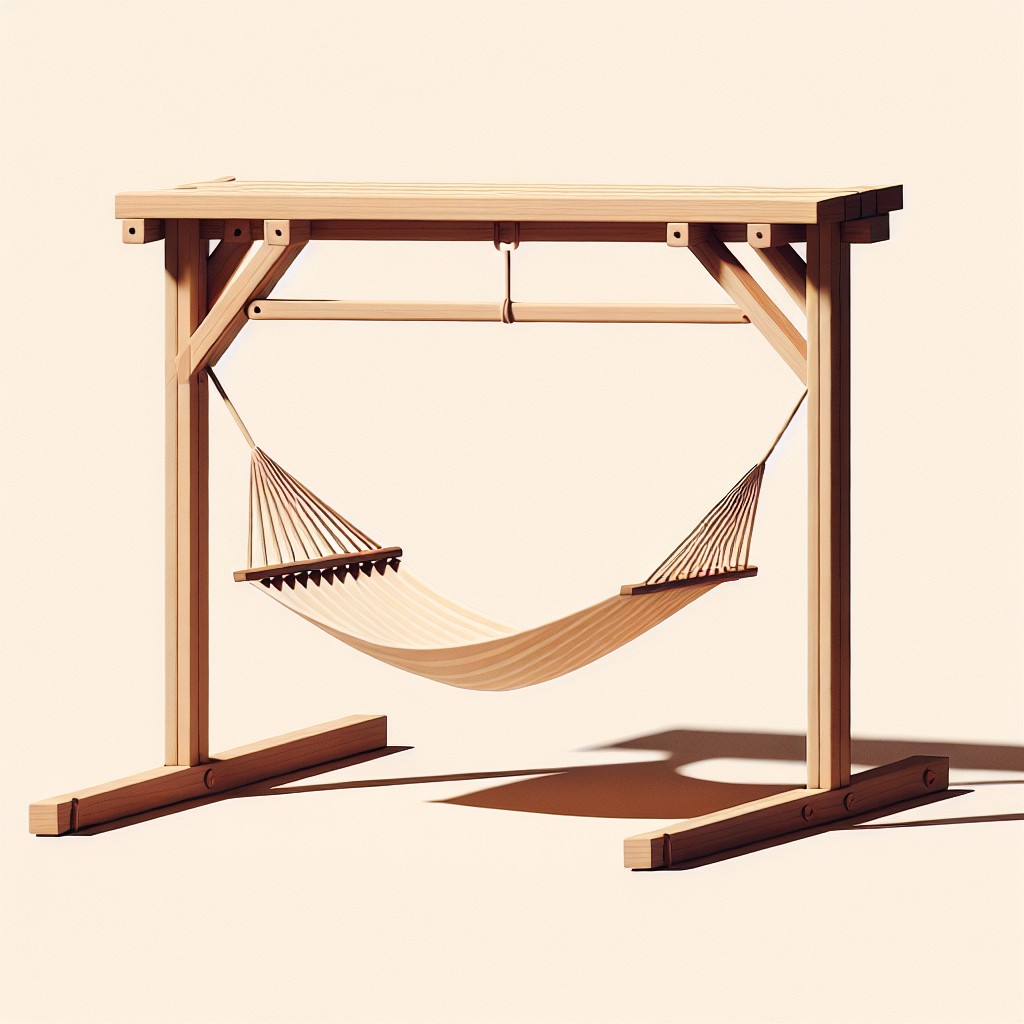
Creating a minimalist hammock stand harnesses the beauty of simple design and functionality. The goal is to use as few materials as possible to achieve a sleek, unobtrusive look. Use straight, clean lines and opt for materials like metal or smooth hardwood to encapsulate the minimalistic aesthetic.
You can achieve this with a basic “A-frame” design, consisting of two main uprights connected by a single top beam from which the hammock will hang.
To ensure stability, consider a wider base that tapers to a narrower top. Also, think about using hidden joints or seamless welding for metal stands to keep the visual lines uninterrupted. If you’re using wood, sand the wood to a smooth finish and consider a clear sealant to protect the material while showcasing its natural beauty.
The elegance of a minimalist stand is that it not only serves its practical purpose but also acts as a modern art piece for your outdoor space. Remember to balance the structure properly; it needs to be strong enough to support weight without compromising its slim profile. Keep the design straightforward, with no unnecessary embellishments or complicated construction methods. Simple, yet functional, this stand is a testimony to the concept that less is often more in design.
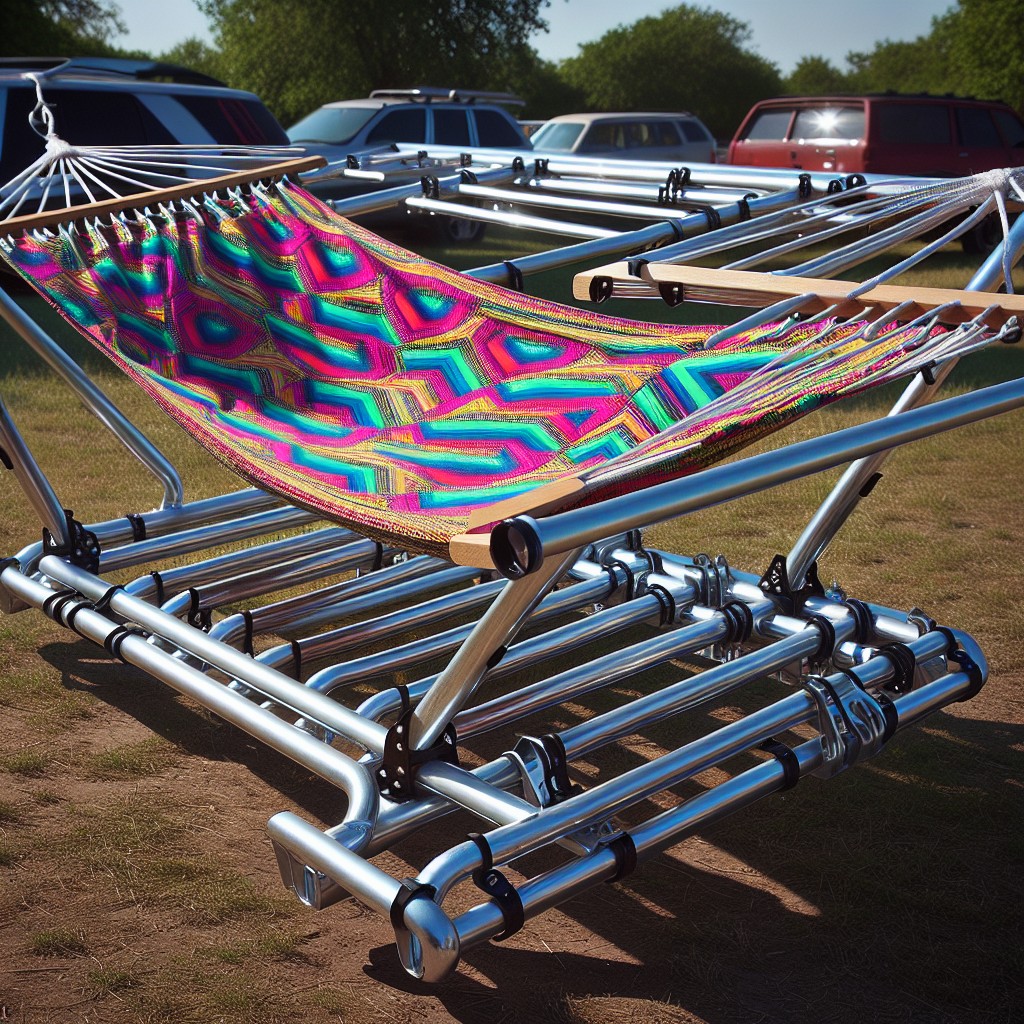
Portable Hammock Stand Design for Beachgoers

Crafting a portable hammock stand for beach excursions requires lightweight materials and collapsible features for easy transport.
Consider using aluminum tubing, known for its strength-to-weight ratio and resistance to corrosion.
Opt for snap-button connections to quickly assemble and disassemble the structure without tools.
Ensure stability in the sandy environment by incorporating wide feet or stakes that anchor securely into the ground.
For optimal sunbathing and relaxation, integrate an adjustable sunshade attachment.
Remember, the key is convenience; your design should fit within a carrying bag to sling over your shoulder as you head to the shore.
Sleek Steel Hammock Stand DIY
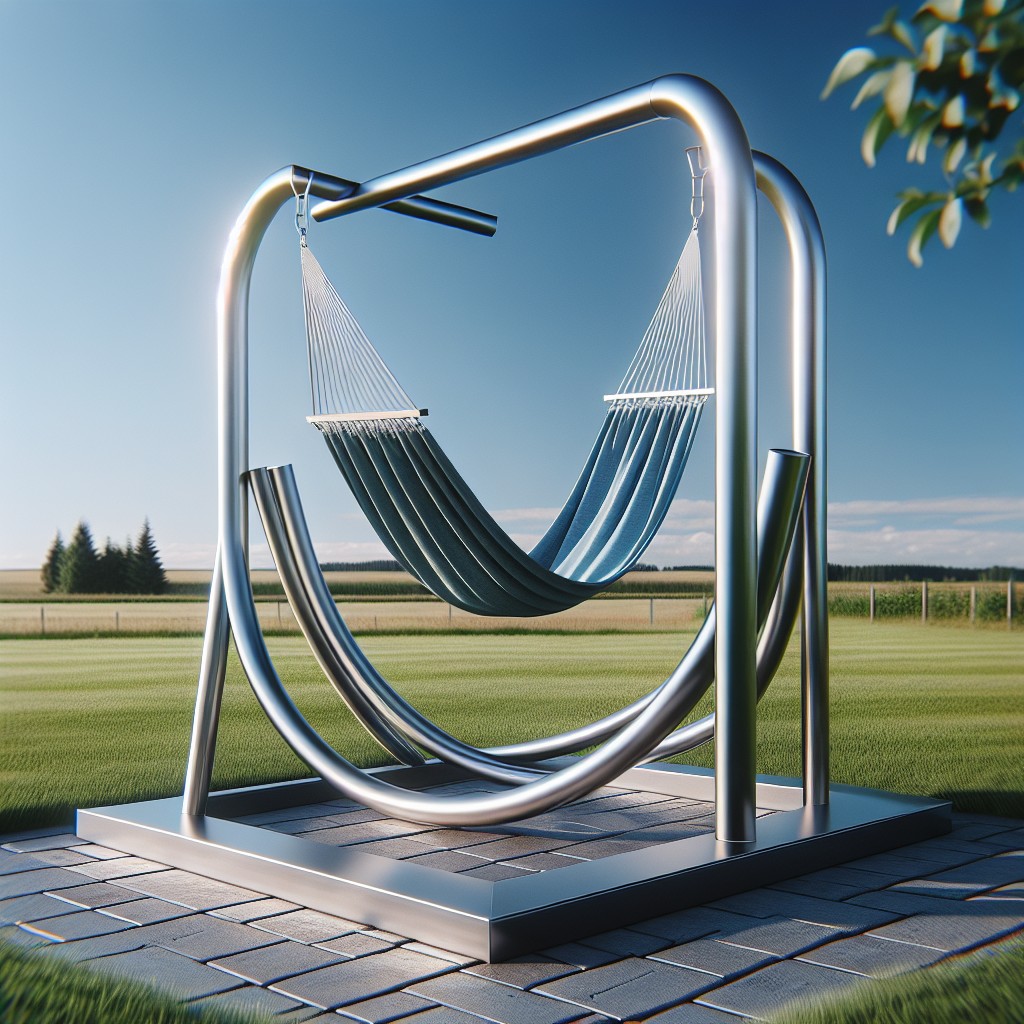
Harnessing the durability and modern aesthetic of steel, this hammock stand combines strength with elegance. To construct, you’ll need steel tubing, a welding kit, and a protective finish to prevent rust.
Begin by creating the base with horizontal supports for stability. Then, shape the main stand using steel pipes bent into graceful arcs that will cradle the hammock snugly, ensuring the curves are symmetrical for a harmonious look and functionality.
Weld joints thoroughly to ensure safety and longevity. Apply a coat of weather-resistant paint or sealant, choosing a sleek hue that complements any outdoor setting.
Adjustable hooks or a chain system can be added to accommodate various hammock lengths, making it versatile. Rubber feet or a steel plate can be attached to the base to protect the ground and add extra stability.
Remember, precise measurements and careful attention during the welding process are critical for a successful build. The result: A chic, streamlined stand that enhances your relaxation space.
Sturdy Rocking Hammock Stand

This unique design blends the calming movement of a rocking chair with the comfort of a hammock. Here’s how to create this fusion:
- Use curved wooden beams to form the base, allowing for a smooth rocking motion.
- The structure’s stability is key; ensure the base is wide enough to prevent tipping.
- Integrate a locking mechanism to secure the stand in place when getting in and out.
- Select durable materials like treated lumber or cedar that resist weather and wear.
- Padding on the edges of the wooden beams can add both comfort and safety.
The construction should prioritize both flexibility and sturdiness, creating a relaxing retreat perfect for lazy afternoons outdoors.
DIY Hammock Stand With Padded Headrest
Adding a padded headrest to your hammock stand enhances comfort while providing a touch of luxury to your relaxation space. To begin, choose a weather-resistant fabric that complements the aesthetic of your hammock. Memory foam works well for padding due to its resilience and comfort. Cut the foam to size, ensuring it spans the width of the hammock and is thick enough to provide ample support.
Cover the foam with your selected fabric using a staple gun or weather-resistant adhesives to create a secure envelope. If you’re handy with a sewing machine, consider sewing a cover with a zipper for easy removal and cleaning.
For the attachment, incorporate sturdy straps that can wrap around the top bar of the stand. Velcro or snap fasteners can offer adjustability and make the headrest removable for storage.
To install, align the headrest at your desired height and fasten securely. Testing its stability and comfort is key—make adjustments as necessary to ensure your headrest remains firmly in place while offering the desired level of comfort.
Hammock Stand Design With a Built-in Umbrella Holder
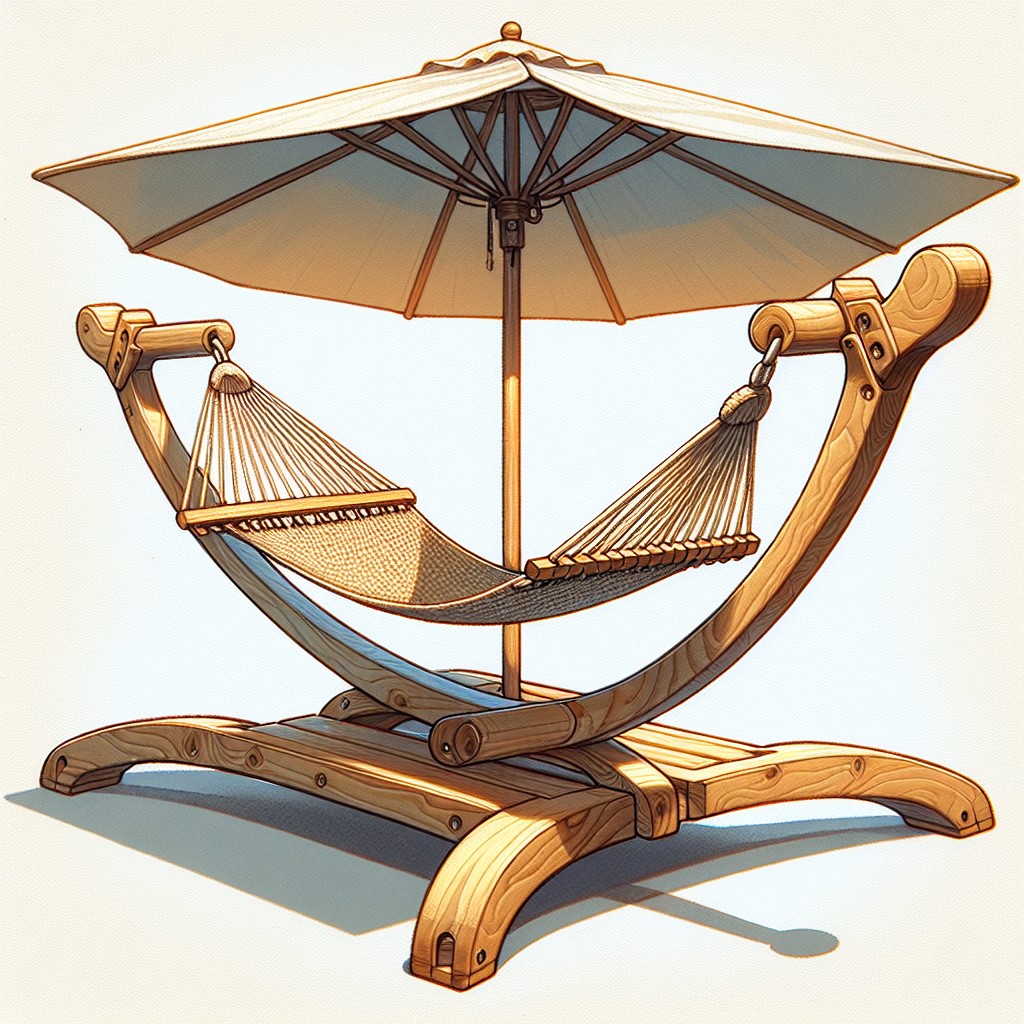
Maximize your outdoor relaxation by incorporating a built-in umbrella holder into your hammock stand design. This feature ensures you can lounge in the shade on sunny days, enhancing comfort and protecting your skin.
Consider these key points as you plan:
- Positioning: The umbrella holder should be centrally located along the top bar of the stand, ensuring even shade coverage for the entire hammock.
- Stability: Design the holder to support the umbrella’s weight and resist wind. A locking mechanism or a weighted base can prevent tipping.
- Material: Use weather-resistant materials, such as stainless steel or heavy-duty plastic, to safeguard against rust and wear.
- Compatibility: Ensure the holder fits a range of umbrella pole diameters, offering flexibility to interchange different umbrellas as needed.
- Drainage: Include drainage holes to prevent water accumulation, which could lead to rust or mold in the umbrella holder.
- Accessibility: Place the holder within arm’s reach while lying in the hammock, making it easy to adjust the umbrella without getting up.
Leisure meets functionality with this hammock stand enhancement, allowing you to enjoy your backyard retreat in any weather.
DIY Hammock Stand Using Skateboards

Transforming old skateboards into a hammock stand not only recycles but also infuses a playful, urban vibe into your outdoor space.
To start, you’ll need two sturdy skateboards and a pair of wooden or metal posts that will serve as the main supports.
Ensure the posts are treated for outdoor use to prevent weather damage.
Attached securely near the top of the posts, the skateboards will act as the horizontal braces, holding the hammock’s weight.
It’s crucial to reinforce the connection between the skateboards and the posts with strong bolts or metal brackets for safety.
Consider the overall aesthetics—use skateboards that reflect your personal style or paint them for a custom look.
To guarantee stability, the base of each post should be anchored in concrete, buried in the ground, or set within a weighted base that can be moved if necessary.
This design not only recycles old materials but brings a touch of edgy decor.
As you lie back into your hammock, it’s a nod to the carefree days of skate parks and summer freedom.
Hammock Stand Design With a Reading Lamp
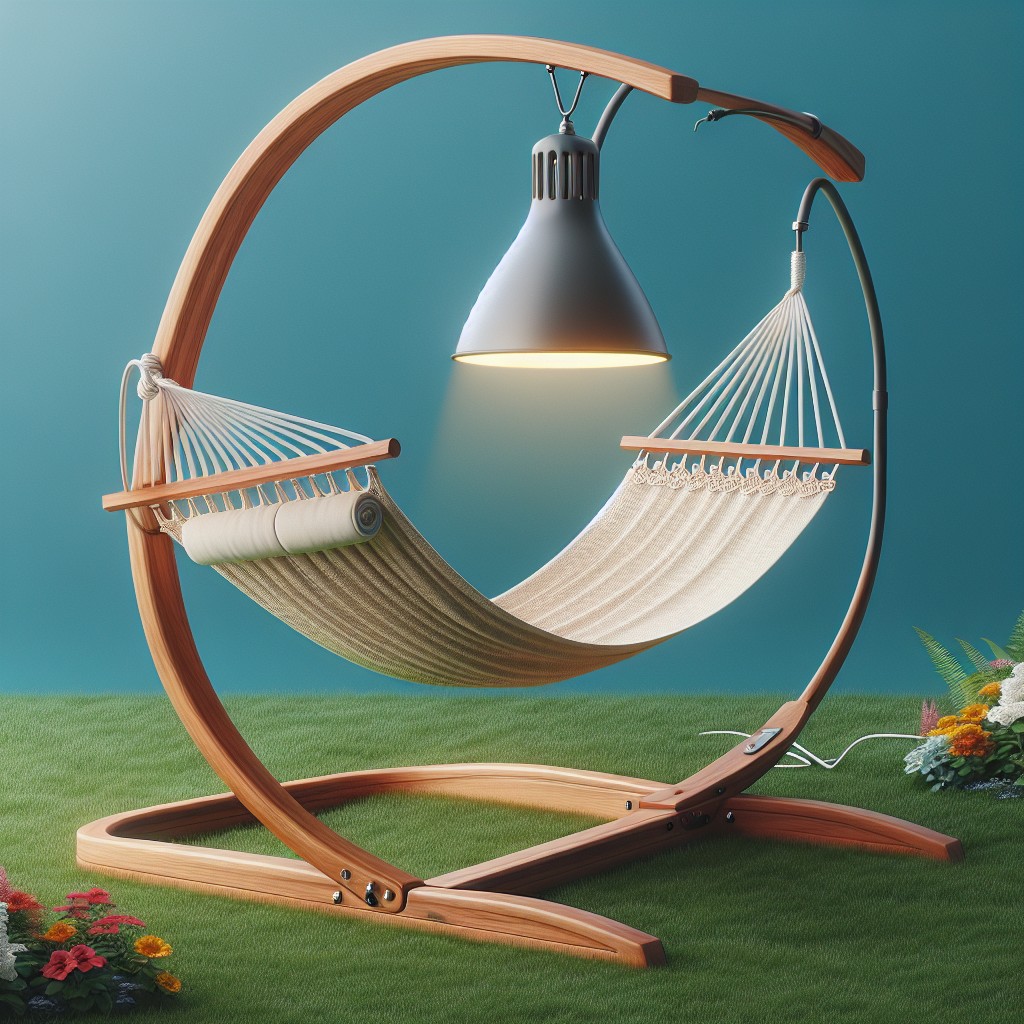
Incorporating a reading lamp into your DIY hammock stand adds functionality to your relaxation space, allowing you to enjoy a good book or flip through magazines even after the sun sets. Here’s how to achieve this:
- Choose the right location on the stand: Position the lamp at a comfortable reading height and angle to avoid glare or shadows when you’re lounging.
- Select an outdoor-rated lamp: Ensure it is weatherproof to withstand the elements.
- Consider power sources: A solar-powered lamp adds convenience and sustainability, while a wired lamp requires access to an outdoor-rated extension cord.
- Attach securely: Use strong brackets and durable materials to mount the lamp so it remains stable during use.
- Opt for an adjustable design: If possible, adding a lamp with flexible neck or swivel features allows you to direct light precisely where needed.
This feature not only enhances the usability of your hammock stand but also adds a cozy ambiance to your backyard retreat.
Innovative Hammock Stand With a Mosquito Net

Maximize your outdoor relaxation while keeping pesky insects at bay with this ingenious setup. The incorporation of a mosquito net into your hammock stand design isn’t just practical; it’s a game changer for comfortable outdoor lounging.
Here’s how you can achieve this:
- Start with a sturdy stand frame, making sure it can support both the weight of the hammock and the additional netting.
- Attach hooks at the top of each stand corner to hold the mosquito net in place.
- Opt for a fine mesh net that allows for visibility and airflow while effectively blocking insects.
- Ensure that the net drapes over the sides to provide a fully enclosed cocoon.
- Consider a zippered entry on the net for easy access to your hammock haven.
- When not needed, ensure that your net can be easily removed or tied back.
Hammock Stand Plan Using PVC Pipes
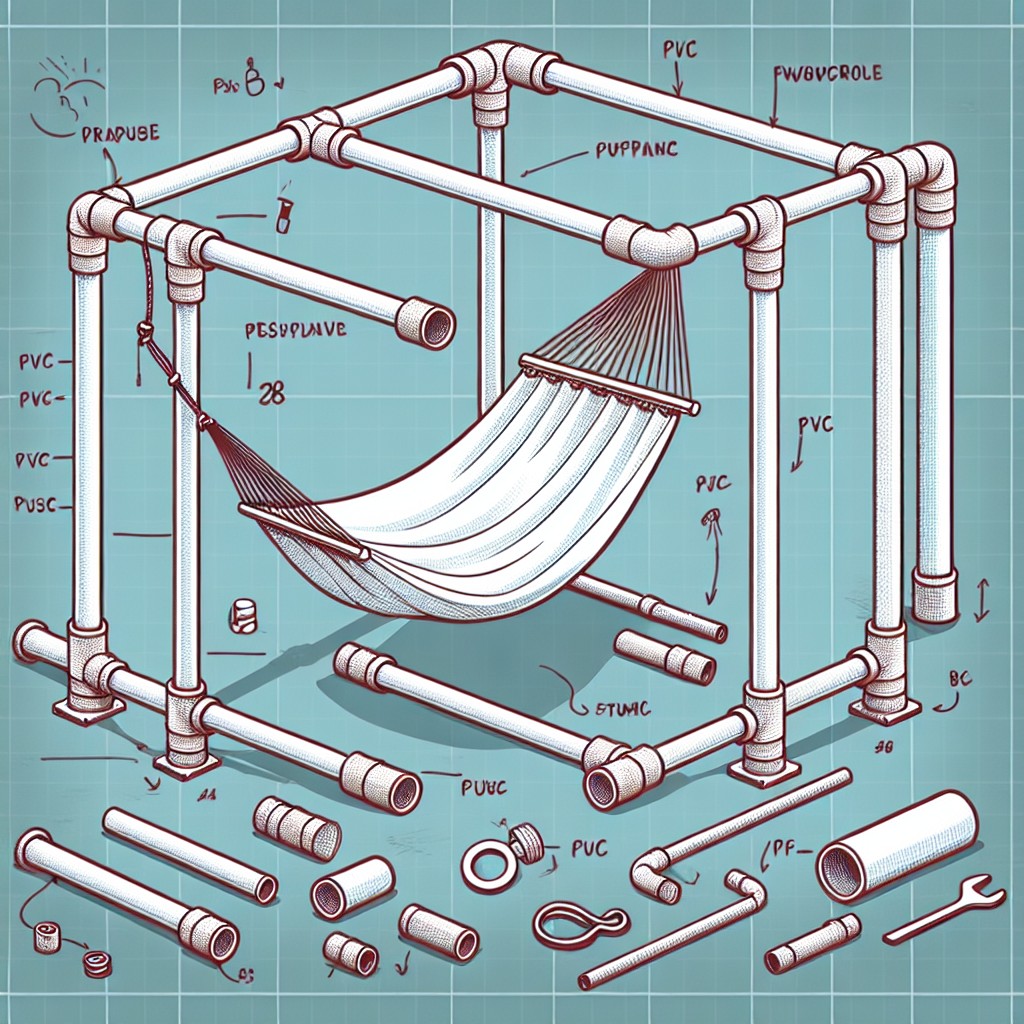
Using PVC pipes for your hammock stand is an economical and lightweight option that offers versatility and ease of assembly. Here’s how to make it work:
- Ensure to select Schedule 40 PVC pipes for their strength and durability.
- Calculate the length and width based on the size of your hammock, giving extra space for comfortable access.
- Create stability by using a rectangular or square base structure.
- Incorporate T-joints and elbow connectors to secure the frame and prevent slippage.
- For added rigidity, consider using PVC cement at connections points.
- Drill holes at the appropriate height to thread through the hammock hooks or ropes.
- If needed, use sand or water to fill the pipes, adding weight to the base for better anchorage.
- Cover the stand with spray paint or fabric for an aesthetic finish.
Remember, the design must support your hammock’s load without bowing, so adjust the pipe diameter and wall thickness accordingly.
DIY Hammock Stand With Tree Planters
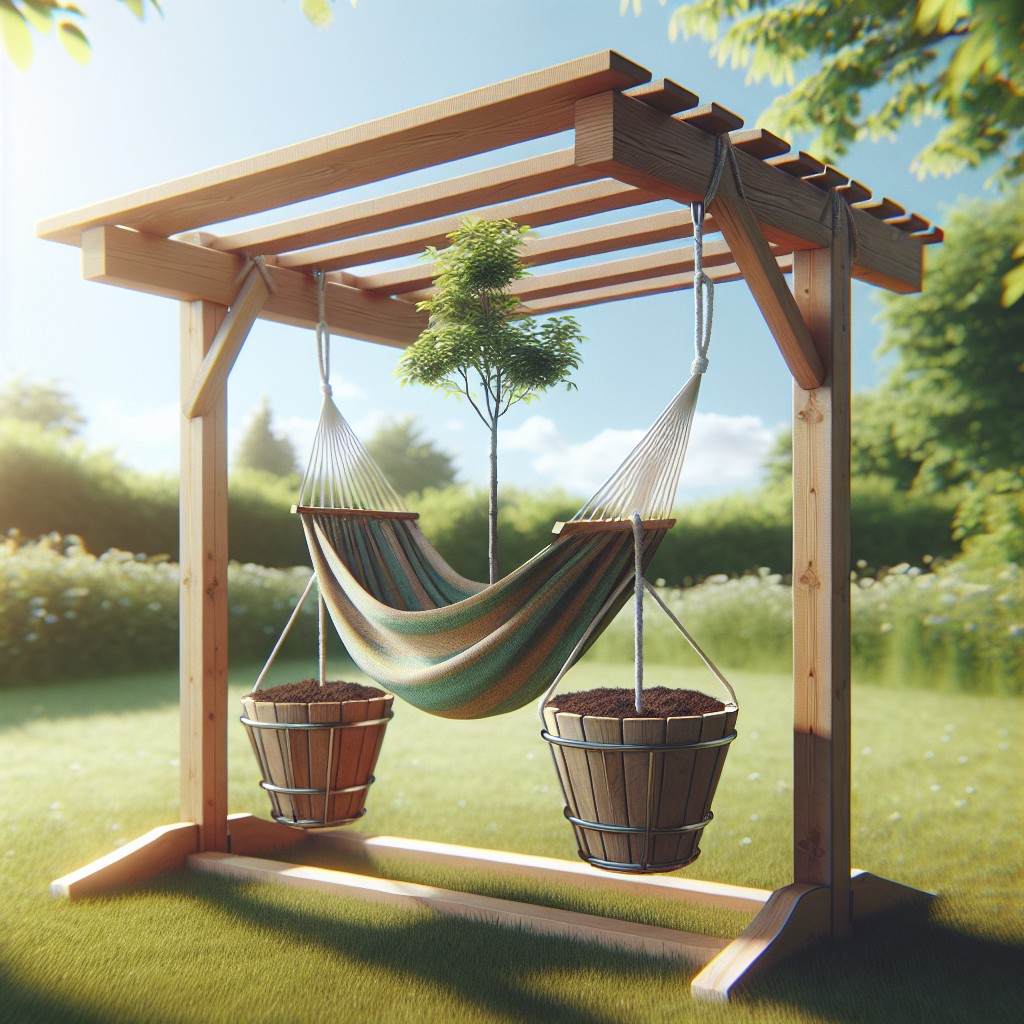
Marrying relaxation with greenery, this concept utilizes planter boxes as the base of your hammock stand. By doing so, you can enjoy the added aesthetic of plants or flowers directly beneath your lounging area, while the weight of the soil and greenery provides stability for the structure.
Key points to consider for this project include:
- Stability: Ensure the planter boxes are robust and can handle the weight of the soil, plants, and the hammock without tipping over.
- Material Selection: Choose weather-resistant materials for the planters, such as cedar or treated lumber, to prevent rot and maintain the stand’s integrity.
- Drainage: Incorporate proper drainage in the planters to prevent waterlogging, which could damage the plants and compromise the stand’s structure.
- Mobility: If you wish to move the stand, think about installing casters on the bottom of the planters or constructing them in a way that they can be easily disassembled.
- Plant Choice: Opt for plants that can thrive in the specific lighting conditions of your intended hammock area – shade-lovers for canopied spaces, sun-seekers for open areas.
- Weight Distribution: Ensure the weight of the soil and plants is evenly distributed within each planter for uniform steadiness.
This design not only adds visual appeal to your outdoor space but also contributes to the functionality and sheer joy of hammock relaxation, surrounded by nature’s touch.
Compact Folding Hammock Stand Design
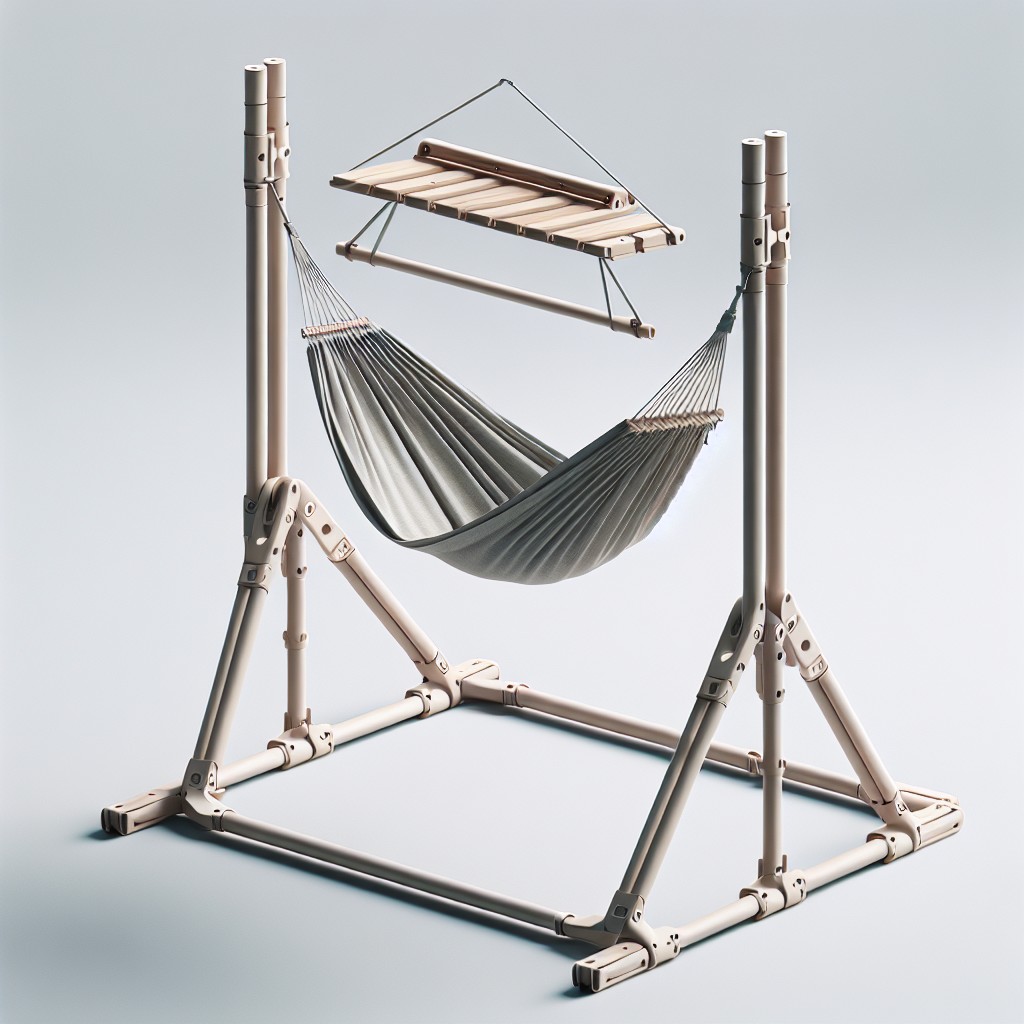
Maximizing space without compromising on comfort, the compact folding hammock stand is ideal for those with limited storage or who enjoy outdoor adventures. Its foldable feature allows for effortless transport and quick setup. Many designs utilize lightweight materials such as aluminum, which ensures both portability and durability.
When considering this design, opt for hinges and joints that are both strong and easy to operate. Some versions come with a carrying case, making them perfect for beach days or camping trips. Look for stands that have a locking mechanism to prevent accidental folding while in use.
To customize, paint or seal the frame to match your aesthetic or to add an extra layer of weather resistance. In choosing the right design, prioritize ease of assembly and disassembly, stability when in use, and a compact form when folded down.
Swinging Chair Style Hammock Stand
Embarking on this project transforms a simple hammock stand into a stylish swinging chair that injects personality and comfort into any outdoor space. The concept hinges on creating a sturdy base and frame to support the pivoting motion of the chair.
Here are key points to consider:
- Stability is crucial; ensure the footing of the stand is wide to prevent tipping.
- Use heavy-duty hooks and springs for secure attachment and flexible movement.
- Select a robust material such as metal or thick wood for the frame to handle the swinging motion.
- Integrate a deep, comfortable seat that cradles the body – consider weather-resistant fabrics.
- Keep the design ergonomic; the height and angle of the chair should support relaxation and ease of use.
- Consider adding cushions for added comfort and style.
- Remember safety; regularly inspect the stand and suspension system for wear and tear.
Hammock Stand Design With a Sunshade

Integrate comfort and functionality by adding a sunshade to your hammock stand. Here’s how:
- Choose a durable fabric like canvas or outdoor upholstery material that resists sun damage and repels water, ensuring longevity and ease of maintenance.
- Measure the length and width of your hammock when in use to determine the size of the sunshade.
- Create a frame using aluminum poles or PVC pipes for the shade structure, which offers both lightness and strength.
- Secure the shade to the stand with brackets or hooks that allow for easy removal and adjustability as the sun moves.
- Consider a design that tilts or retracts, enabling you to enjoy both sunbathing and shaded relaxation with minimal effort.
- Pair the stand color and fabric tone for an aesthetically pleasing look or add a pop of color to enhance the visual appeal of your outdoor space.
With these points in mind, enjoy a breezy retreat, even on the sunniest days.
Pirate Ship Inspired Hammock Stand DIY

Embark on a swashbuckling adventure in your own backyard with a DIY hammock stand that adds a splash of nautical charm to your outdoor space. This imaginative stand transforms the functional into the whimsical, bringing the spirit of the seven seas to leisurely afternoons.
- Construct the stand using curved wooden beams to mimic the hull of a ship—opt for pressure-treated wood to ensure durability against the elements.
- Add decorative touches like a ship’s wheel, anchor motifs, or nautical rope accents to enhance the pirate theme.
- Incorporate a mast with a crossbar from which to hang the hammock, offering the practical benefit of hammock support and the aesthetic of setting sail.
- Consider using a sailcloth or netting beneath the hammock for storing books and magazines, creating the illusion of a ship’s deck.
- Paint with marine-grade varnish or in maritime colors—darks, reds, and whites to stand up to the sun and sea, metaphorically speaking.
- For stability, anchor the stand into the ground, or if it’s a portable design, use weighted keel-like bases.
By paying homage to the classic pirate ship, this hammock stand is more than just a place to relax—it’s a conversation starter that offers an escape into the world of imagination.
Hammock Stand Plan With a Footrest
Enhance your relaxation with a hammock stand that features a convenient footrest. This addition elevates comfort by allowing a natural reclining position, which can reduce pressure on the lower back and promote better circulation in your legs.
To create this design:
- Use sturdy materials like thick wood or metal for the main frame to ensure stability.
- Connect a smaller bar at a lower height than the hammock attachment, ensuring it’s within easy reach of your feet when lying down.
- Ensure the footrest is detachable or can be tucked away to maintain versatility for various users and preferences.
- Consider padding the footrest for added comfort or using a material that contours to the feet, like a soft rope or fabric.
The integration of a footrest takes the traditional hammock experience to new levels of comfort, making it the perfect spot for an afternoon nap or a leisurely read.
DIY Hammock Stand Incorporating a Drinks Holder
Elevate your relaxation experience by adding a convenient spot for your favorite beverages. Use weather-resistant materials like cedar or treated pine to ensure durability.
Consider the height of your chosen drinks holder—it should be easily reachable while you’re lounging. Attach the holder using sturdy brackets or with a clamp for flexibility and to prevent tipping.
For a touch of customization, paint or stain the holder to match your hammock’s aesthetic. Remember to seal any wooden elements to protect against moisture.
Opt for a design that can accommodate a variety of cup or bottle sizes, and include a removable insert for easy cleaning. This feature ensures you’ll never be far from hydration or a cool drink while you sway in the breeze.
Hammock Stand Design With a Ladder Step
Transforming a pair of old ladders into a functional hammock stand adds a quirky touch to your backyard while recycling materials. The ladder step design allows for easy access to your hammock, particularly handy for those who may find getting in and out a bit challenging.
- Use two identical ladders and secure them at a fixed distance apart, ensuring they can support the hammock’s tension.
- Horizontal bars of the ladders can serve as steps, making it easier to climb in and out of the hammock.
- Attach strong hooks or metal loops to the top rung for securing the hammock ends.
- Stability is crucial; affix additional wooden or metal crosspieces between the ladders if needed.
- Protect the construction from wear and tear by sealing the wood or metal against the elements.
By reimagining ladders into a sturdy stand, you create a dual-purpose structure that’s both eye-catching and practical.
DIY Hammock Stand Using Car Roof Racks
Capitalizing on existing car roof racks, this DIY approach aligns with a resourceful and cost-effective philosophy. The racks, initially designed to secure luggage, are surprisingly suitable for supporting a hammock’s weight.
Create a stable foundation by ensuring the racks are firmly anchored to the vehicle and evenly spaced to balance the hammock’s tension. Attach strong straps or ropes from the hammock’s ends to the roof racks, adjusting for preferred height and sag. Consider padding the contact points to prevent damage to the vehicle or hammock.
This innovative solution boasts easy assembly and disassembly, making it perfect for road trips and ensures you have a relaxing spot whenever you park. Remember, however, to never use the hammock while the vehicle is in motion.
Freestanding Hammock Stand With Adjustable Angle
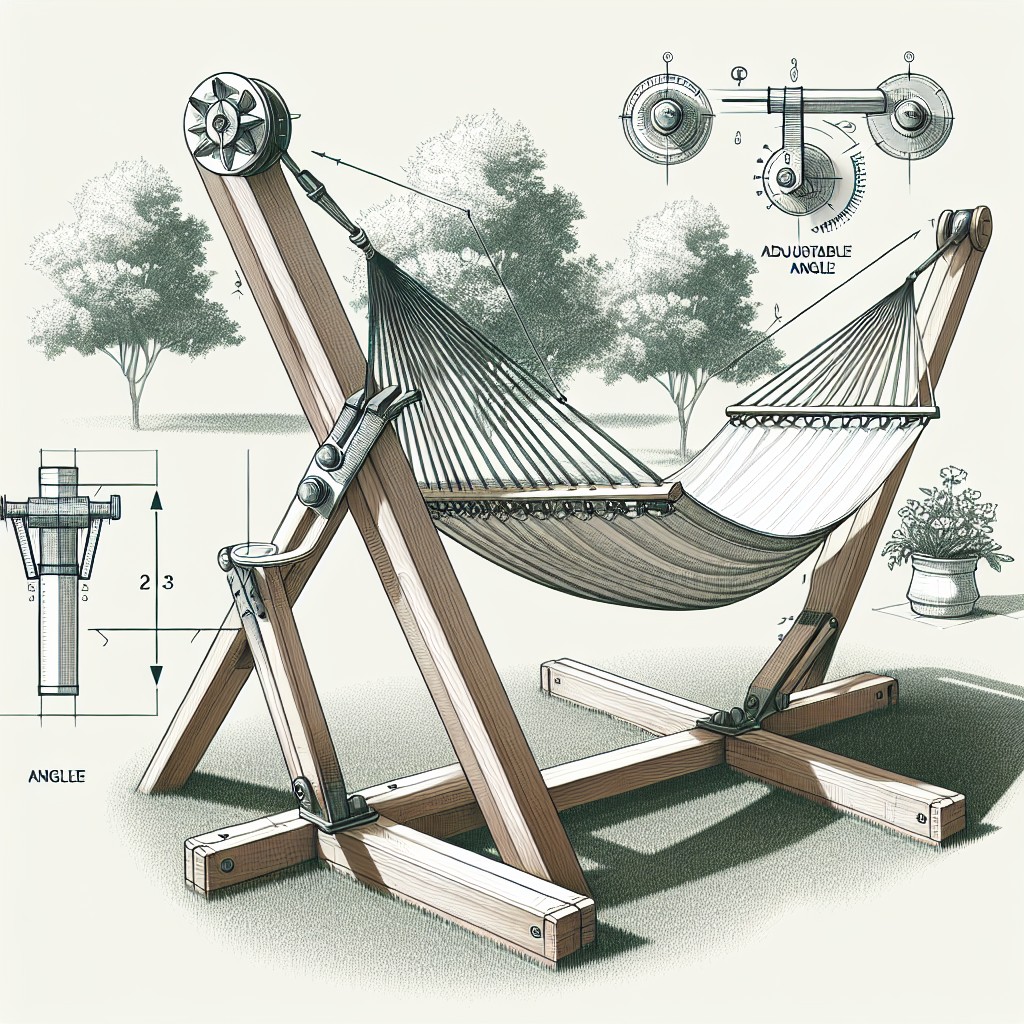
Maximizing comfort often requires adjusting the tilt of your hammock, and a freestanding stand with an adjustable angle allows you to find that perfect position. To achieve this, hinges or a similar mechanism are installed at the base of the stand, enabling you to change the angle of elevation.
Consider the following:
- Stability: Ensure that the stand’s base is broad and weighted enough to prevent tipping when the angle is adjusted.
- Materials: Select durable materials such as thick steel or treated wood to withstand the stresses of movement and weight.
- Mechanism: Choose a sturdy and easily operable mechanism for angle adjustment, like a chain and notch system or locking pins, for quick and secure alterations.
- Safety: Implement a strong locking system to maintain the chosen angle without risk of collapse.
- Design: Keep the stand’s aesthetics in mind; the functional components should integrate seamlessly into the overall design without being an eyesore.
This stand’s adjustability not only adds to its functionality but also caters to personalized comfort, making it a practical and coveted addition to any relaxation space.
Hammock Stand Design With Storage Pockets
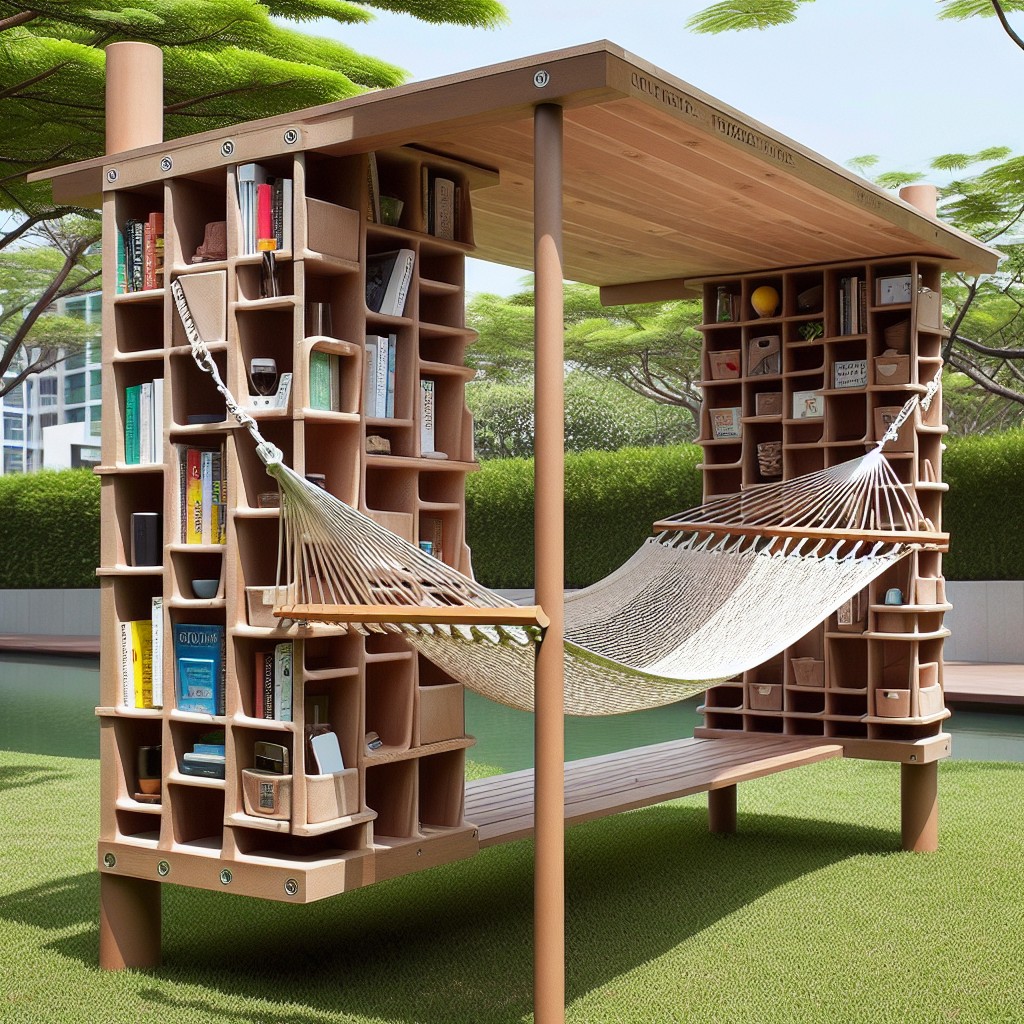
Integrating storage pockets into your hammock stand isn’t just about convenience; it’s a clever use of space that can elevate the functionality of your relaxation area. Here are key points to consider:
- Measurements: Tailor pocket sizes to common items you’ll have on hand, such as books, sunscreen, or beverages. This customization adds a personal touch and ensures everything fits snugly.
- Material Choice: Opt for durable, weather-resistant fabrics like canvas or nylon that can withstand the elements and the weight of stored items without tearing.
- Accessibility: Position pockets at arm’s reach from the hammock, allowing for easy access without having to get up—ideal for uninterrupted leisure time.
- Secure Attachment: Sew pockets with reinforced stitching and consider using Velcro or snaps to attach them to the stand, ensuring stability and ease of removal for washing or adjustments.
- Weight Distribution: Evenly disperse pockets around the stand to maintain balance, preventing tipping or swaying when items are placed in storage.
By focusing on these aspects, your hammock stand not only serves its main purpose but also adds an extra layer of convenience, keeping essentials organized and within arm’s reach.
DIY Hammock Stand With Built-in Solar Lights
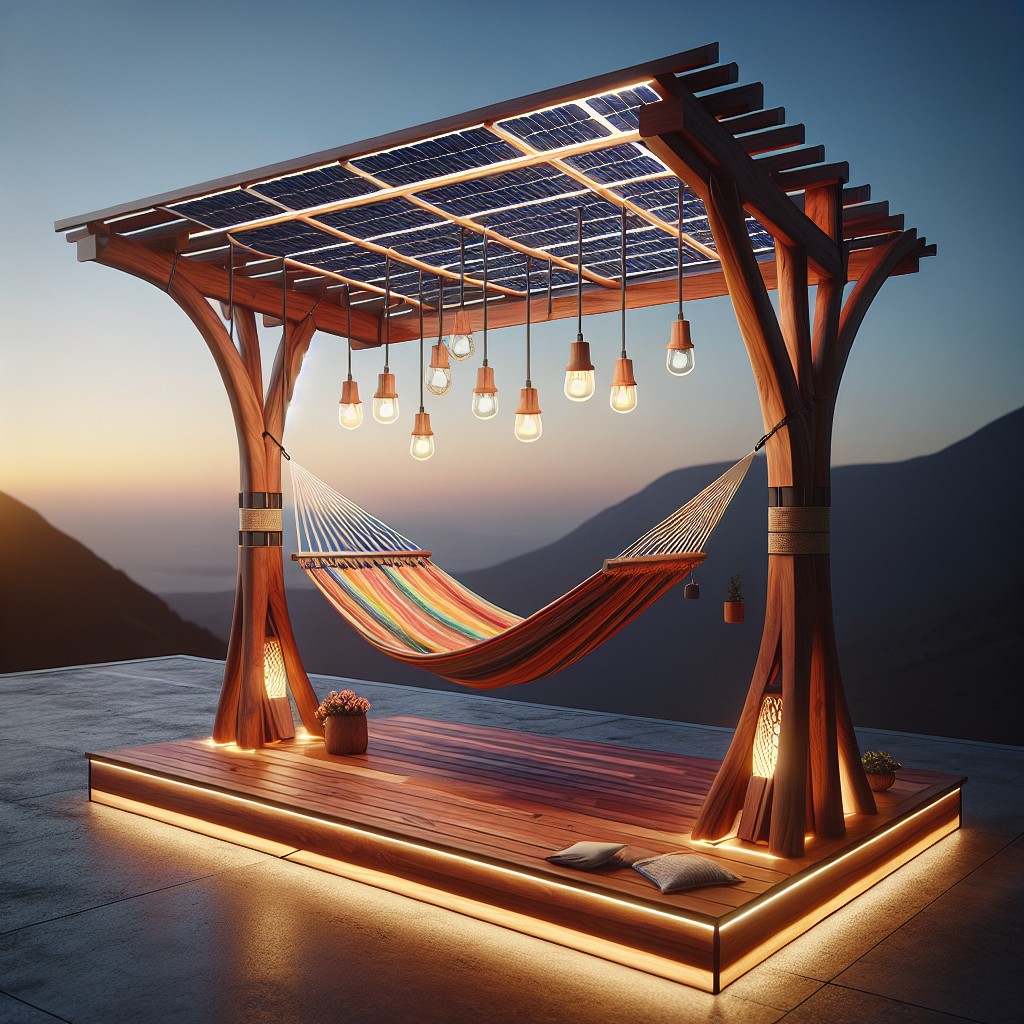
Transform your nocturnal hammock experience with the ambient glow of solar lights. This eco-friendly project harnesses the sun’s power to keep your lounging area well-lit after dark without increasing your electricity bills.
Start by choosing sturdy wooden or metal posts to support the weight of the hammock and reinforcement for the light fixtures. Attach solar light units on top of the stand’s arms, ensuring they receive ample daylight for charging. Consider waterproof and durable solar lights designed for outdoor use to withstand the elements.
For added aesthetics, wrap string lights around the stand’s base or along its sides. Cable clips or adhesive fixtures will help keep the lights in place. Ensure all lighting fixtures are securely fastened to avoid any sagging or dangling, which could detract from the hammock’s safety.
This setup not only provides essential lighting but also creates a magical atmosphere for your backyard or patio.
Ideas Elsewhere
- https://www.instructables.com/How-to-Build-an-Outdoor-Hammock-Stand-25/
- https://www.anikasdiylife.com/diy-hammock-stand-ideas-with-plans/
- https://www.hammockforums.net/forum/showthread.php/165836-DIY-airline-portable-hammock-stand
- https://www.reddit.com/r/Hammocks/comments/1tuuso/anyone_have_a_good_diy_hammock_stand_build/
- https://www.thespruce.com/diy-hammock-stand-5525805
- https://myoutdoorplans.com/furniture/hammock-stand-plans/
More Like This
 20 Cheap Walkway Ideas DIY Benefits
 15 Ingenious DIY Pantry Cabinet Ideas
 15 Creative DIY Buffet Table Ideas for Your Next Gathering
 15 Genius Office Supply Storage Ideas to Boost Your Productivity
 15 Garage Organization Ideas to Simplify Your Space
Recap