Last updated on
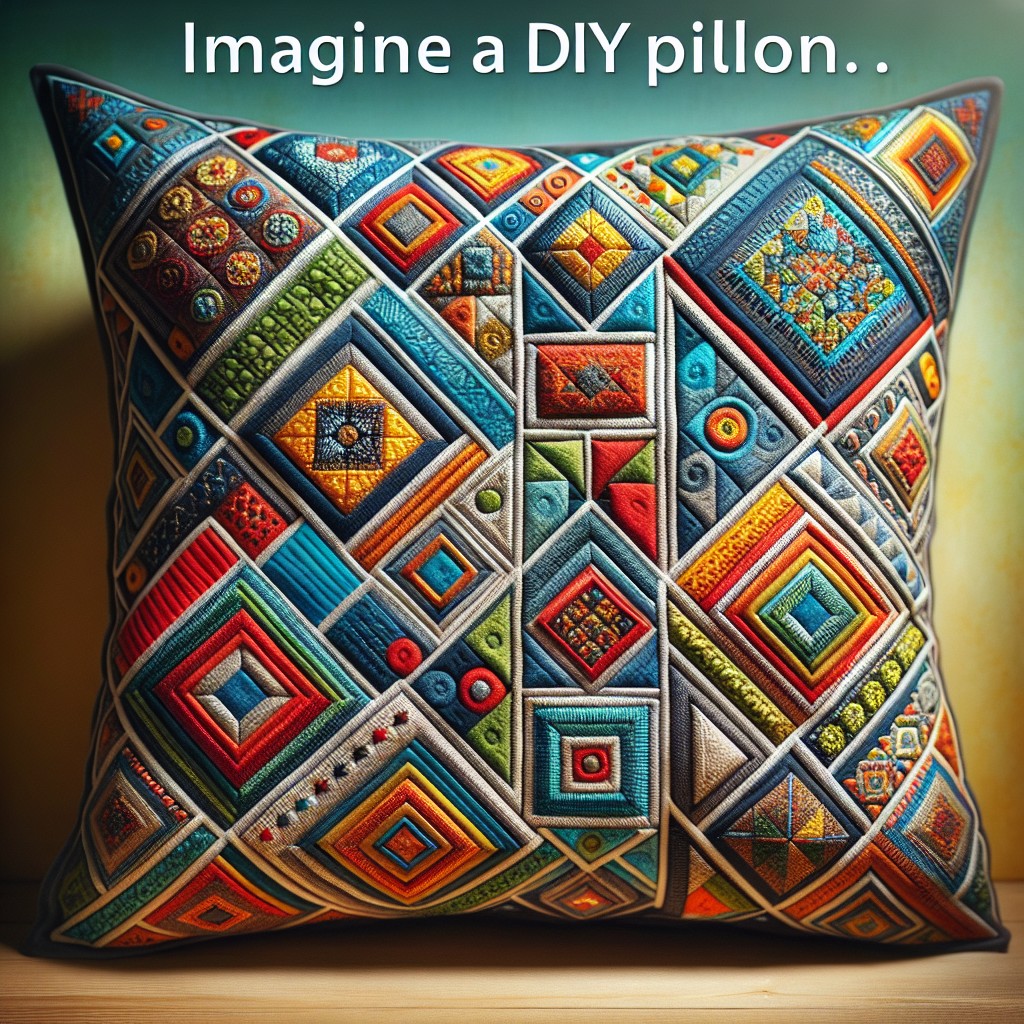
Transform your tired-looking cushions with our insanely easy DIY pillow cover ideas, simply because a new pillow cover offers a fresh dash of style without busting the budget.
This article includes my original designs. Some of them may be exaggerated to make a point — that’s my style. Enjoy them for your inspiration!
If you thought pillow cover DIY projects were outdated, think again. This compilation of insanely easy DIY pillow cover ideas will not only rekindle your love for throw pillows but also ignite a spark of creativity.
While there’s an abundance of existing ideas out there, our aim is to provide fresh unique angles and make this list a helpful resource for you. Sure, incorporating the best of the popular designs isn’t entirely off the table. After all, we’re all about mixing classic and contemporary.
Expect a list of resources paying homage to the most practical, cherished ideas at the end. But, for now, gear up and let’s dive headfirst into this journey of colors, textures, and awe-inspiring DIY pillow cover innovation.
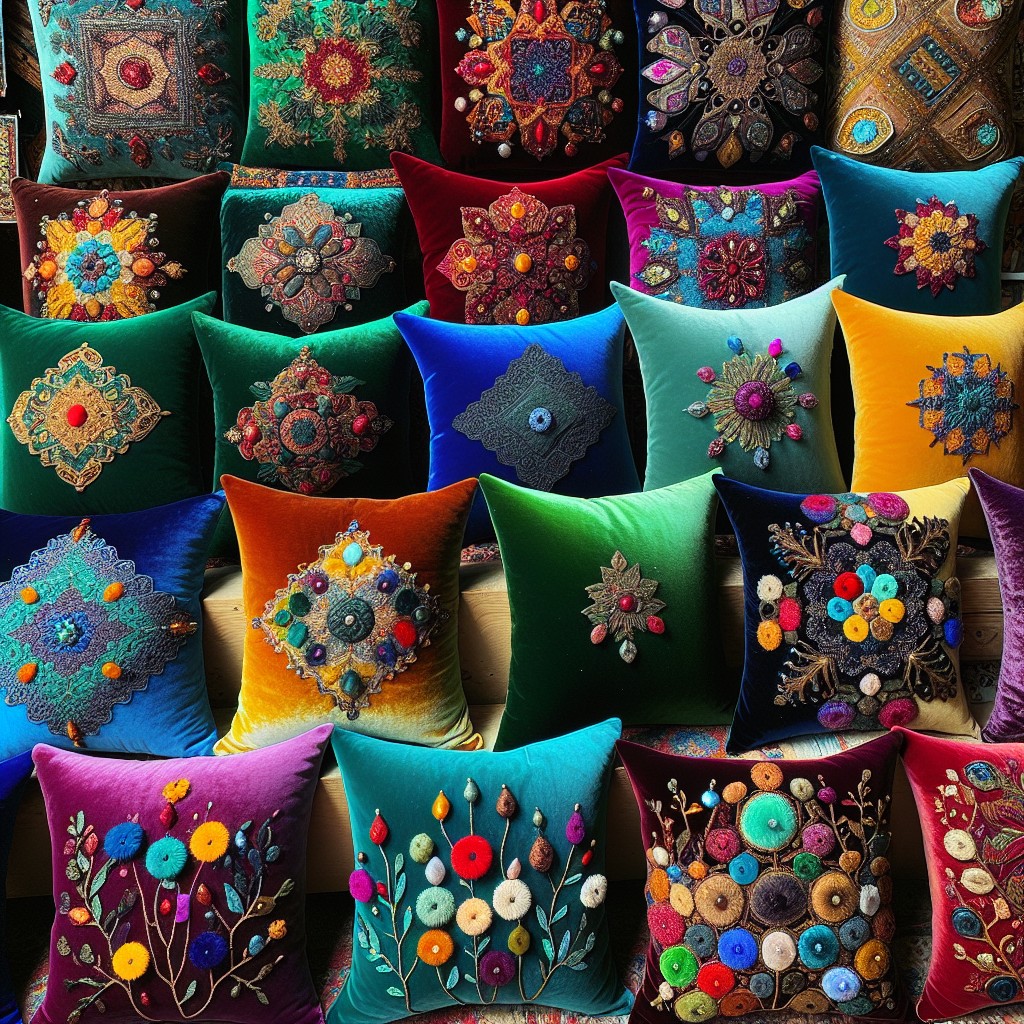
DIY Bohemian Pillow Covers

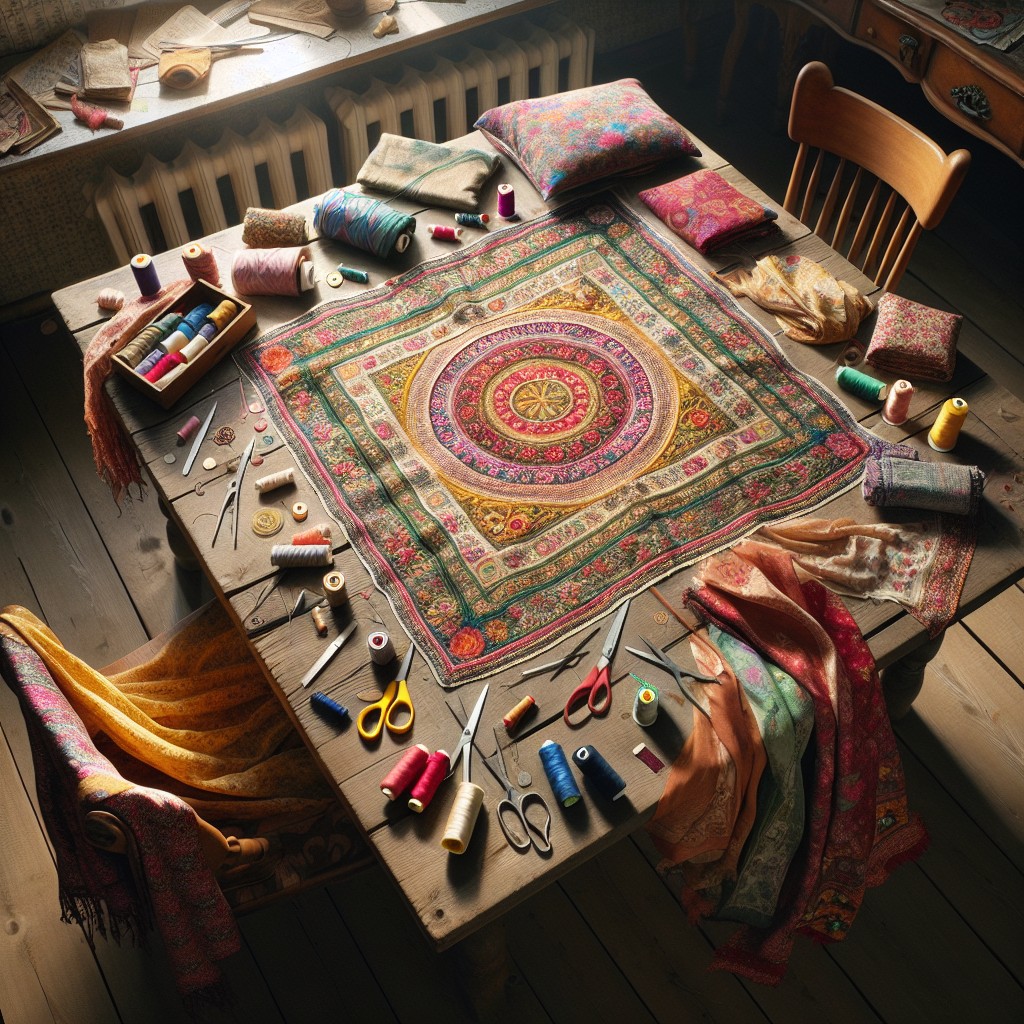
Embrace the eclectic charm of boho decor by creating your own pillow covers with mixed patterns and vibrant colors. To start, choose fabric with bold prints—think florals, ikat, or tribal designs. Opt for material like cotton or linen for a natural, textured look.
To add dimension, incorporate various materials such as trimmings, fringes, or even pompoms along the edges. These embellishments enhance the bohemian vibe and can be easily attached with fabric glue or a simple stitch.
When it comes to shape, don’t feel confined to the traditional square. Experiment with different sizes and silhouettes, such as lumbar or round cushions, to add diversity to your space.
For a personal touch, consider hand painting or dyeing your covers. Techniques like tie-dye or batik create unique patterns, ensuring no two cushions are alike. Finally, remember that imperfections are part of the bohemian charm—embrace the handmade feel.
DIY Stenciled Pillowcase
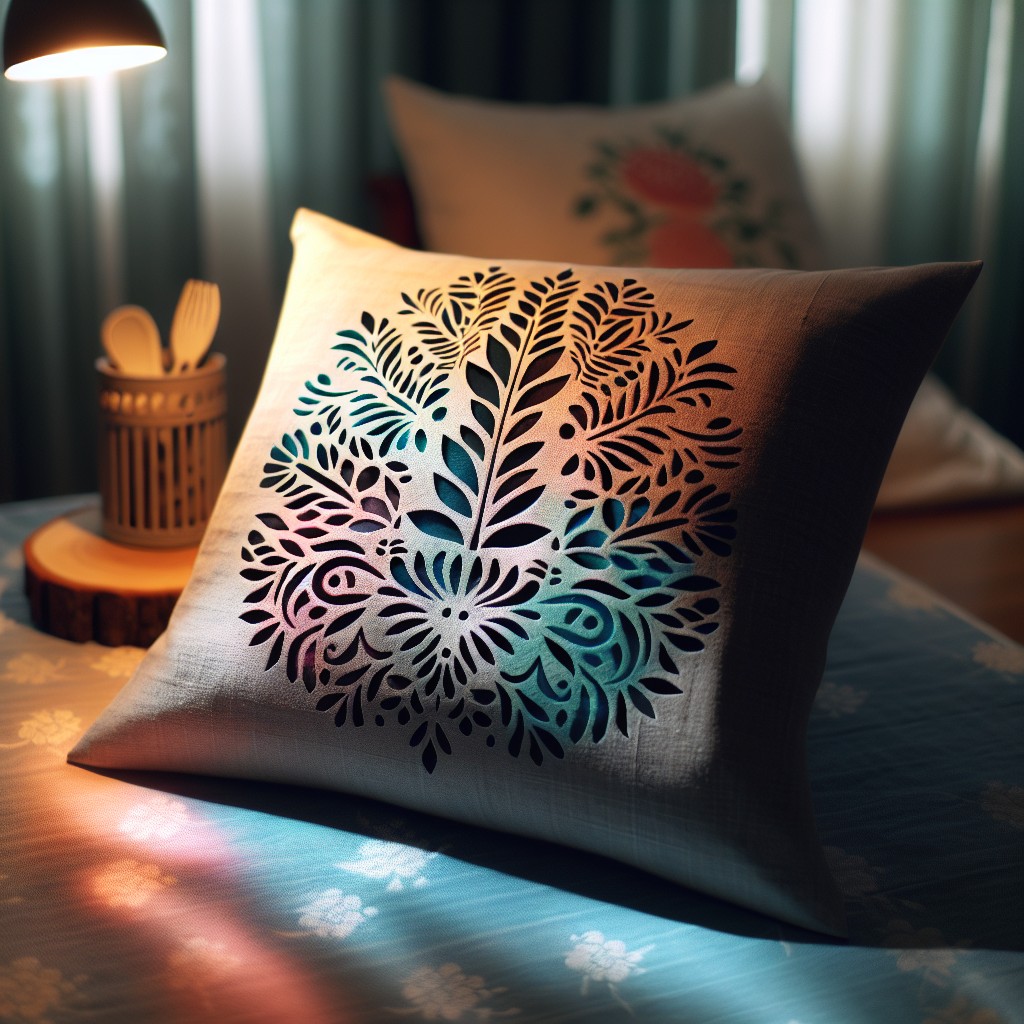
Transform an ordinary pillowcase into a work of art with simple stenciling. This project allows for endless creativity and personalization.
Choose a stencil that reflects your style—geometric shapes, botanical patterns, or even a favorite quote.
For a durable design, use fabric paint, which adheres well and can withstand washing.
To start, secure the stencil onto the pillowcase using painter’s tape to prevent shifting.
With a foam brush or sponge, dab the paint onto the fabric, taking care not to overload the brush to avoid bleeding.
For a multi-colored effect, wait for the first color to dry before layering the next.
Once finished, remove the stencil carefully to reveal your design.
This technique can refresh any room, adding a custom touch to your decor.
DIY Sew-Free Pillow Cover

Creating a stylish pillow cover without sewing is easier than you think. All you need is fabric glue, hemming tape, or Velcro strips along with your choice of fabric.
Here’s how:
- First, cut the fabric to size, ensuring it’s a few inches larger than your pillow insert on all sides for proper coverage and seam allowances.
- Fold the edges to create clean lines, securing them with fabric glue or iron-on hemming tape for a no-sew hem.
- For the pillow cover’s opening, choose Velcro strips for easy removal. Place them strategically along one side to keep the case closed while still allowing for easy access.
- For added decoration, consider applying iron-on patches, fabric paint, or even decorating with tassels or pom-poms to the edges.
With these materials, you can transform fabric pieces into a comfortable and chic pillowcase without a single stitch.
DIY Velvet Pillow Covers
Dive into the luxurious feel of velvet without the hefty price tag by crafting your own sophisticated pillow covers. Choose stretch velvet for ease of sewing and a forgiving fit over inserts.
Measuring your pillow form, add an inch to both length and width for seam allowances. Cut two identical fabric pieces, layering them right sides together.
Begin by sewing around the perimeter, leaving about a 5-inch gap for turning and stuffing. Clip the corners for clean, sharp edges when turned right-side-out. Once inverted, use a chopstick or pencil to gently poke out the corners. Insert the pillow form, then hand stitch or use fabric glue to seal the opening.
For a design twist, consider creating a fold-over flap on the backside, for a sophisticated yet practical envelope closure, eliminating the need for zippers or buttons. If you crave more visual interest, add details like contrast piping, buttons, or even create a color-blocked pattern using different hues of velvet. Remember to iron inside out on a low setting to avoid crushing the pile of the velvet if needed.
DIY Button-Down Shirt Pillow Cover
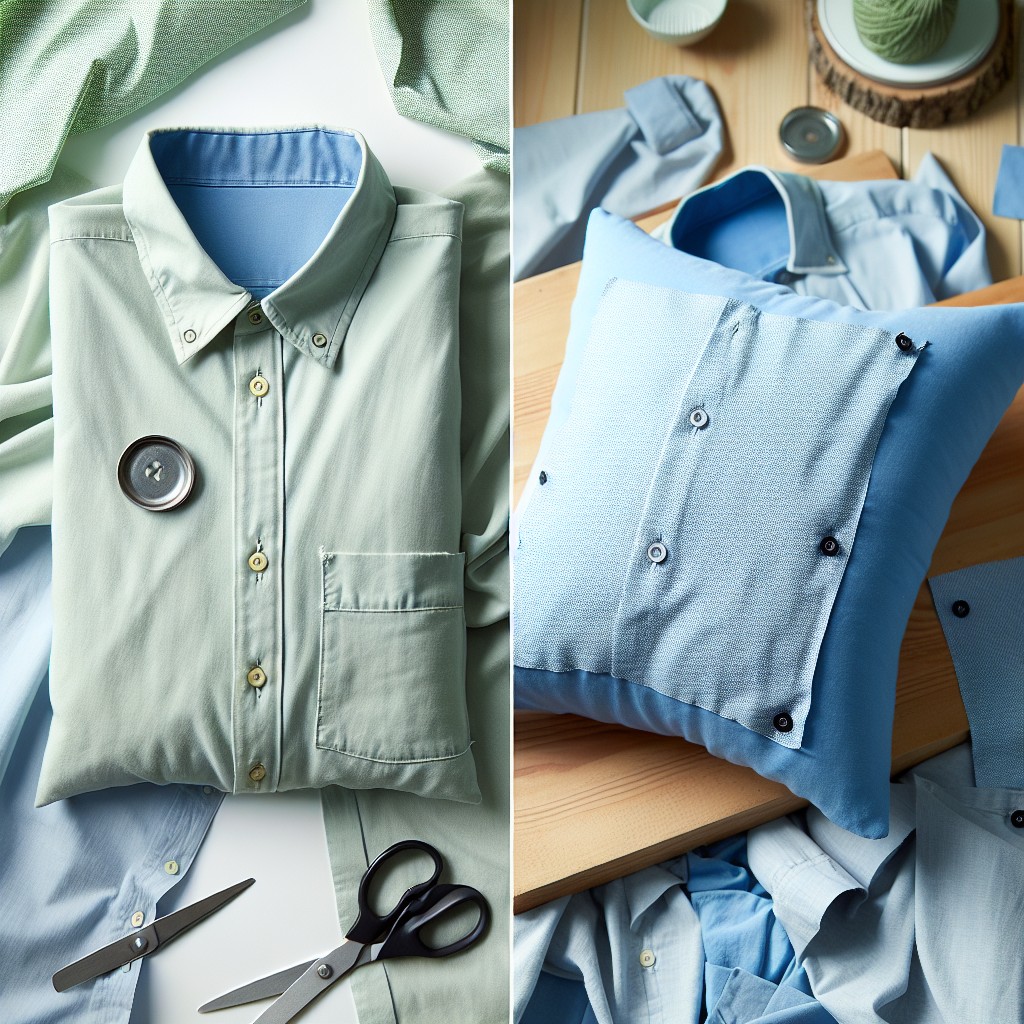
Transform an old button-down shirt into a charming pillow cover with ease. The front placket becomes a unique closure, adding a touch of casual elegance.
Start by cutting the shirt to slightly larger than your pillow insert, ensuring to keep the button placket intact. Flip inside out, and sew the sides, leaving the buttoned area as the opening.
If sewing isn’t your forte, fabric glue or fusible hemming tape are reliable no-sew options.
Once the sides are secure, turn it right side out, insert the pillow filling, and button it up.
This method also works splendidly with flannel or patterned shirts for a cozy, personalized touch.
DIY Burlap Throw Pillow
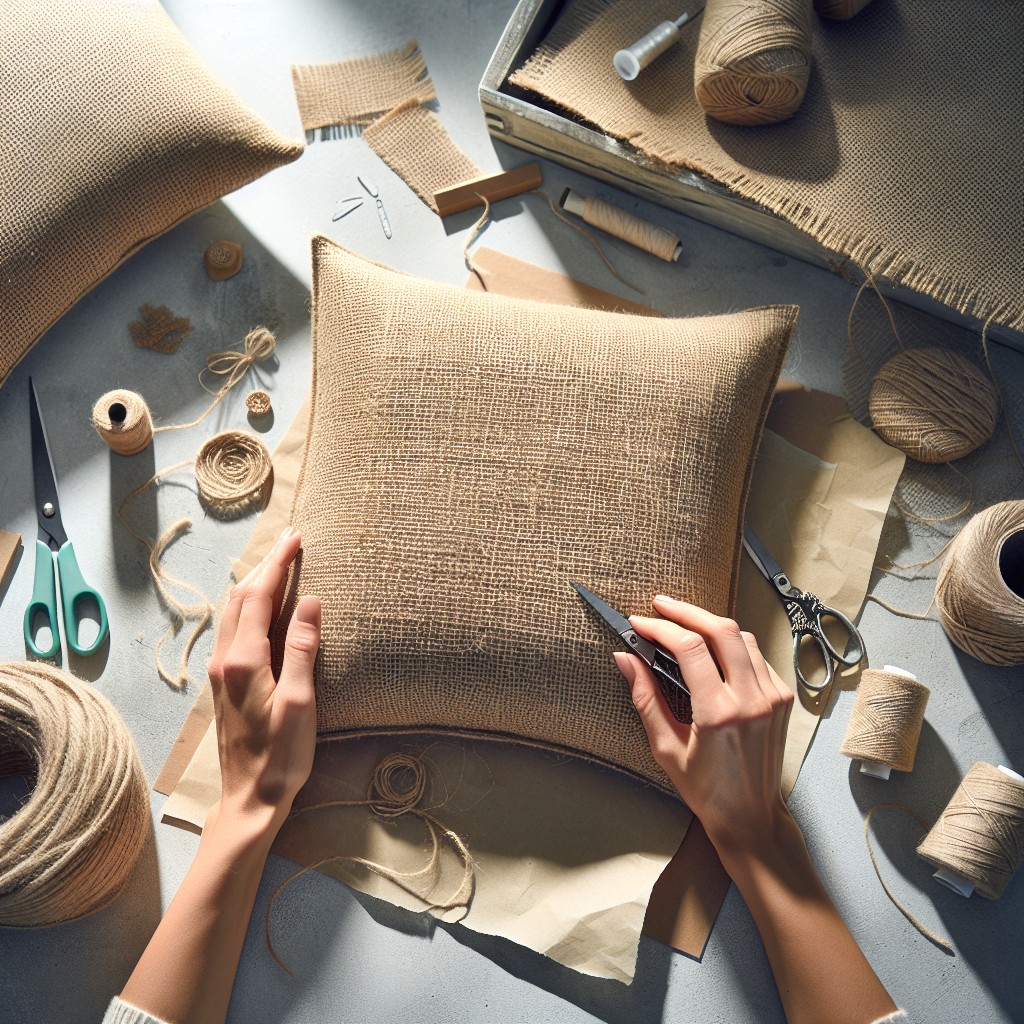
Utilize burlap’s rustic charm to craft a decorative throw pillow with a natural, cozy vibe. Start by cutting two equal squares or rectangles of burlap, depending on the desired pillow size. Overlock or zigzag the edges to prevent fraying. With the rough sides facing out, sew three sides together using a basic running stitch or a sewing machine for a more durable edge. Turn the cover right-side-out, insert a pillow or stuffing, then hand-stitch the open side with an invisible stitch for a neat finish.
Personalize your creation by adding a painted design or monogram. Use fabric paint and a stencil for precision. Consider incorporating lace trim or hessian ribbons along the seams for added texture. Opt for a burlap-friendly needle and thick thread to ensure the fabric is handled correctly and to make your stitches robust and long-lasting. Remember, burlap can be itchy, so a liner fabric may be used within the cover for added comfort when used on furniture.
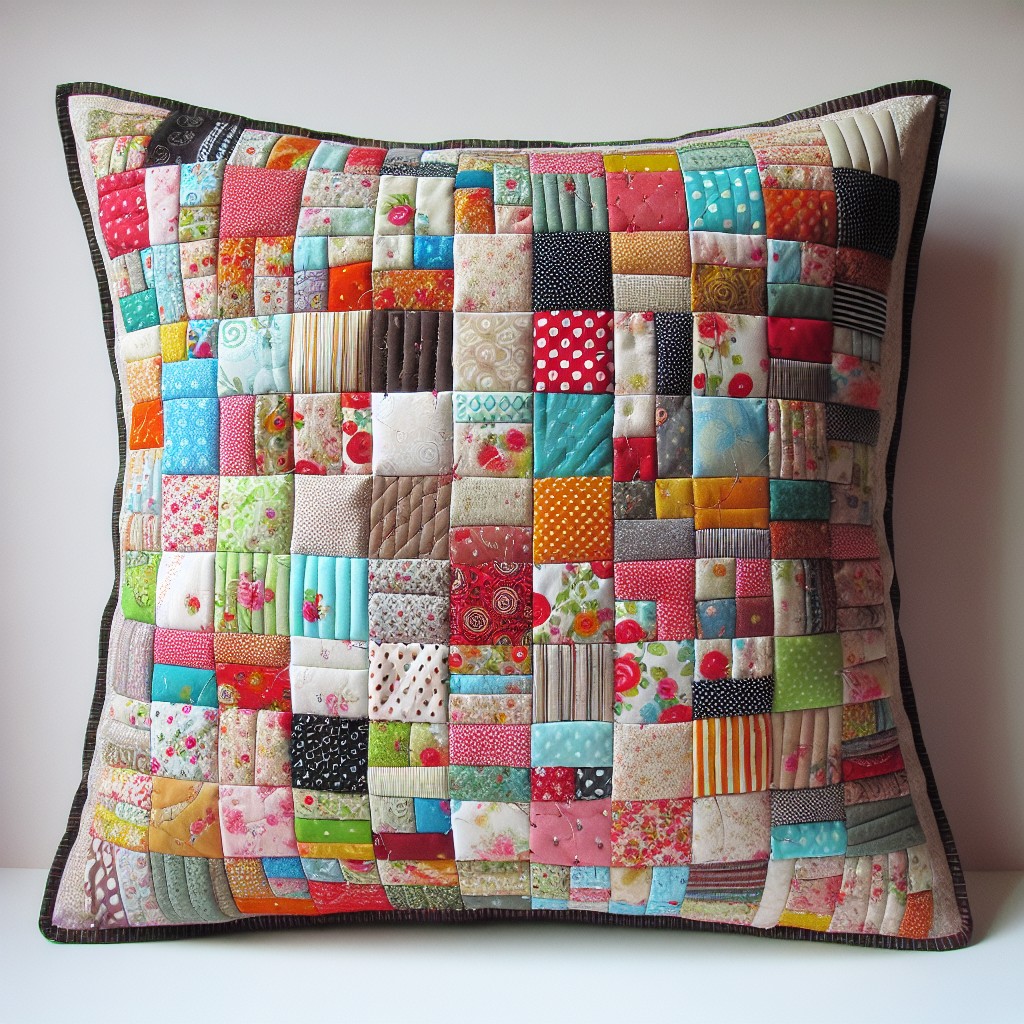
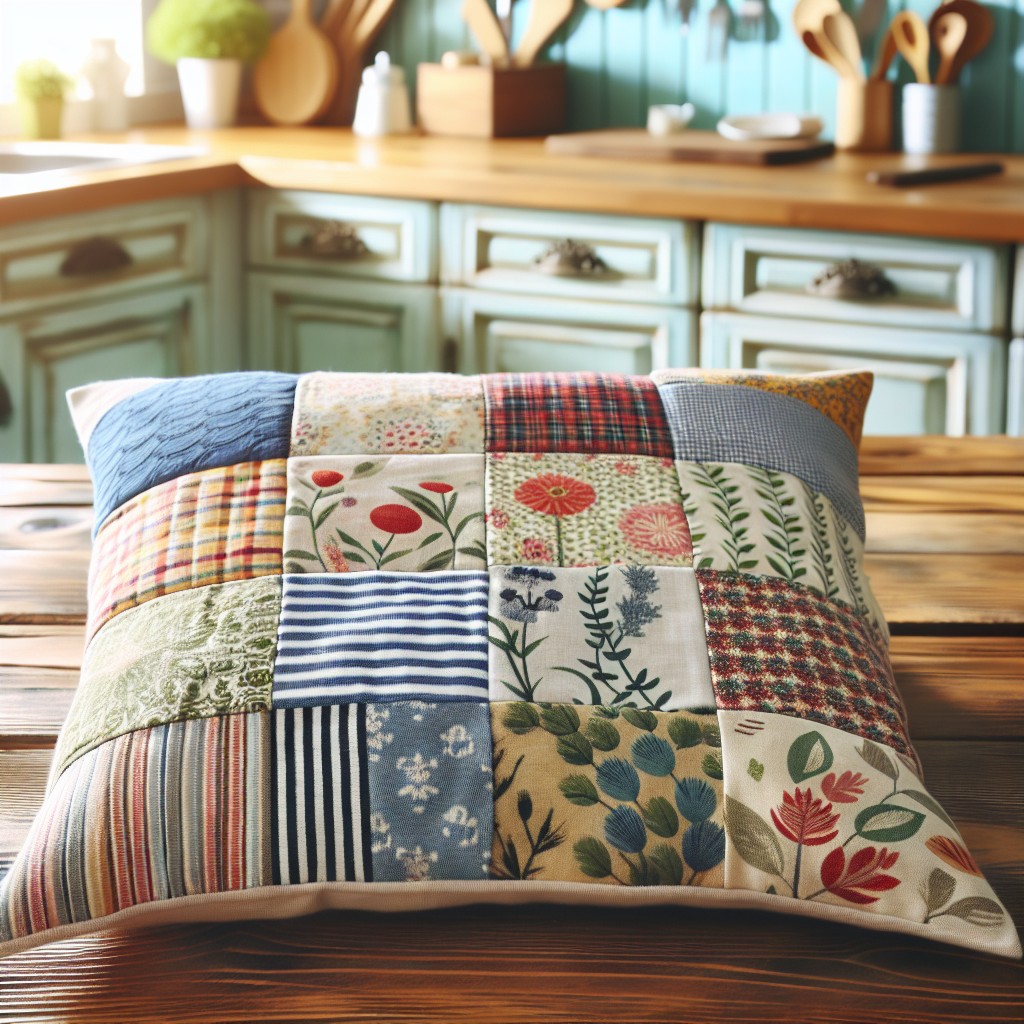
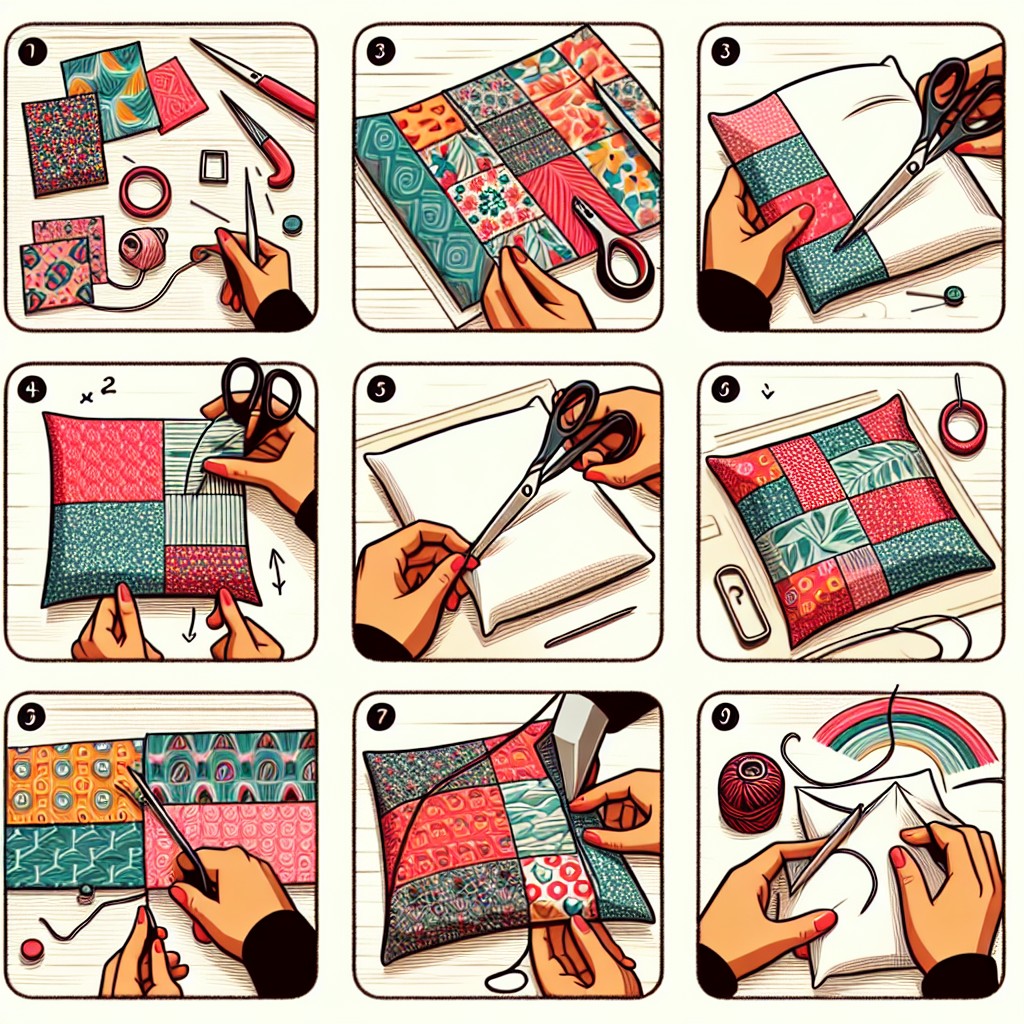
DIY Patchwork Pillow Cover

Bring vibrancy to any room with a homemade patchwork pillow, seamlessly combining various fabric scraps. By selecting remnants of different colors, patterns, and textures, you can create a harmonious design brimming with personality.
First, cut the scraps into uniform squares or rectangles, ensuring each piece is of the same size for a cohesive look. Sew the patches together, either in rows or a random layout, allowing the contrasts to create visual interest.
Consider using a simple backing fabric to highlight the patchwork front, and add a zipper or buttons for easy removal and cleaning. This approach lets you repurpose materials and tailor the aesthetic to match your living space while crafting a unique, eco-friendly cushion cover.
DIY Faux Fur Pillow Cover
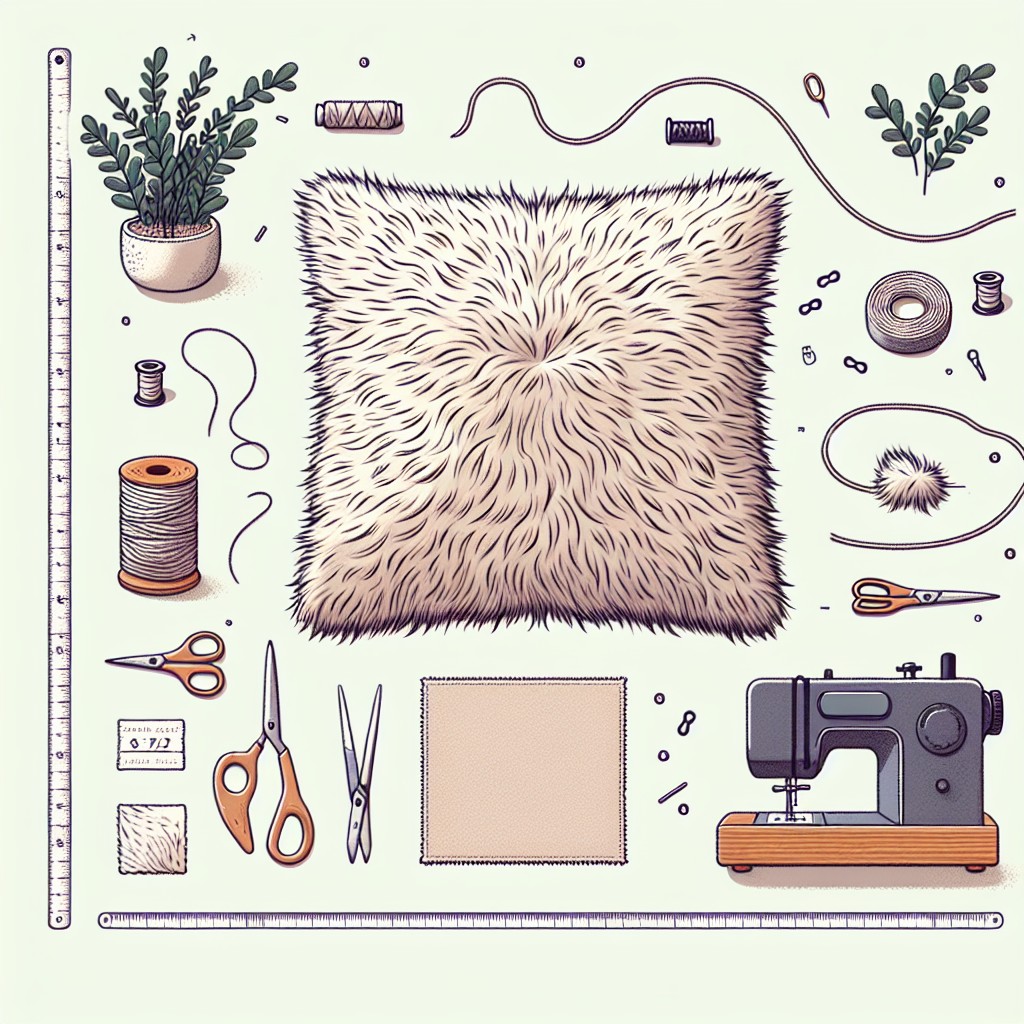
Elevate your living space’s luxury with a faux fur pillow cover you can craft at home. This project is both budget-friendly and remarkably simple.
Materials:
- Faux fur fabric
- Scissors
- Fabric marker
- Sewing machine or needle and thread
- Pillow insert or old pillow you’re giving a new life
- Straight pins
Steps:
- Measure your pillow insert and add an inch to both the length and width for seam allowance.
- Cut two pieces of faux fur fabric using your dimensions.
- Place fabric pieces right sides together and pin the edges to hold them in place.
- Sew around the edges, leaving a small opening to insert the pillow.
- Trim any excess fur from the seams to ensure a clean fit.
- Turn the cover right side out, insert the pillow, and hand-sew the opening shut.
Tips:
- Opt for a longer pile fur for a more luxurious feel.
- When sewing with faux fur, use a longer stitch length to prevent the fabric from bunching.
- Comb the fur away from the seams before you start sewing, to avoid getting it caught in the stitch.
- Consider adding a zipper or Velcro closure if you plan to wash the cover frequently.
With these steps, creating a sumptuous faux fur pillow cover is effortlessly attainable and can transform the look of any room without the high-end price tag.
DIY Quilted Cushion Cover
Transform old quilts or thrifted quilted fabric into charming cushion covers by following these simple steps.
First, measure your pillow insert to cut two fabric pieces with an added inch for seam allowances.
If you’d like to showcase multiple quilted patterns, piece together smaller sections prior to cutting.
Next, place the fabric pieces right sides together and sew along three sides, leaving one side open for the insert.
For a professional touch, consider adding piping along the seams.
Turn right side out, insert your pillow, and hand-sew the last side closed.
The texture of quilting adds a cozy, handmade feel to any room, instantly bringing in warmth and character.
This project not only upcycles materials but also preserves the craftsmanship of quilted fabrics.
DIY Monogrammed Pillow Cases
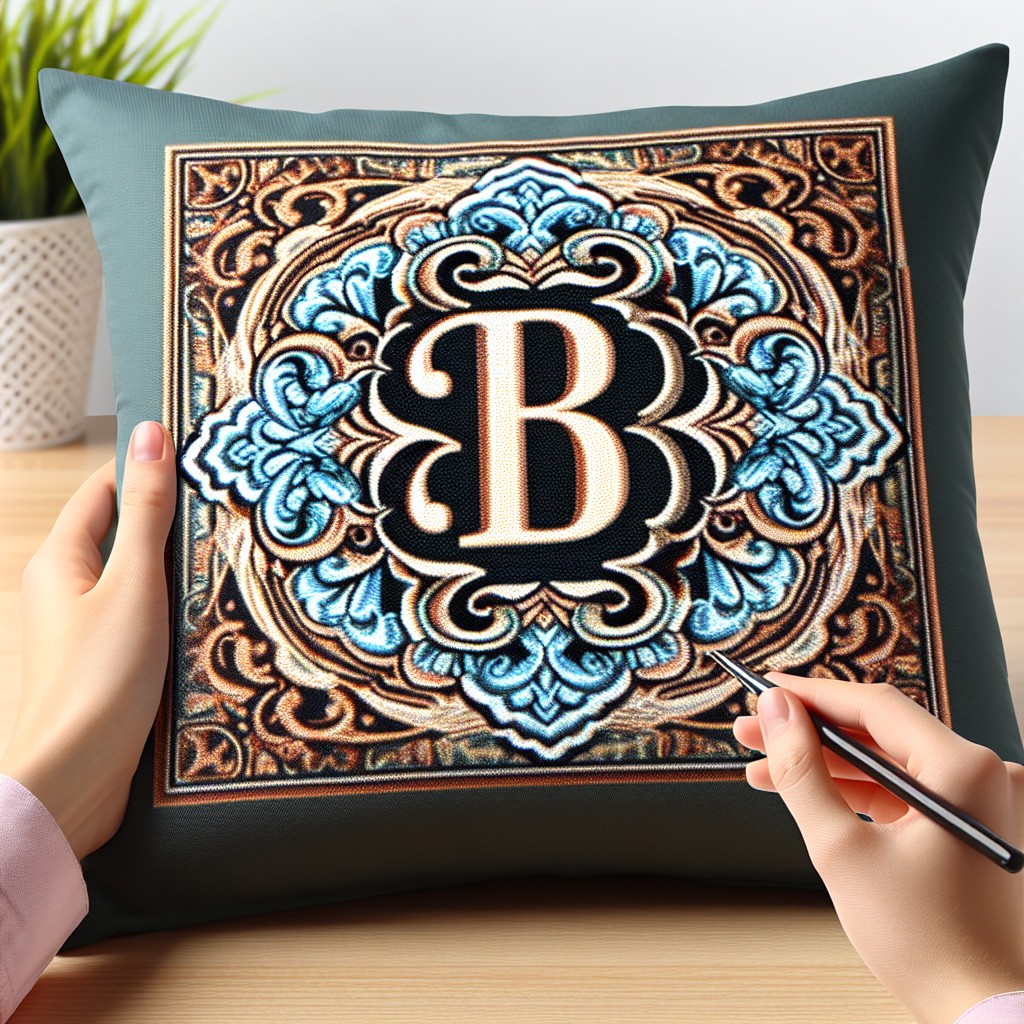
Adding a personal touch to your decor can be simple with monogrammed pillowcases. Select a pillowcase in a fabric and color that complements your room.
For the monogram, choose a style and font that reflects your personality—elegant scripts for a classic look or bold block letters for something more modern.
Iron-on transfer paper allows for an easy application of your design; print your monogram, iron it onto the pillowcase, and voilà—a custom piece!
If sewing is within your skill set, embroidery or appliqué are other methods to achieve a high-end, crafted appearance.
For a quick fix, fabric markers can be used to hand-draw or stencil your monogram for an artistic flair.
These custom pillowcases can serve as thoughtful gifts or as a means to identify pillows for individual family members.
DIY Sequin Pillow Covers
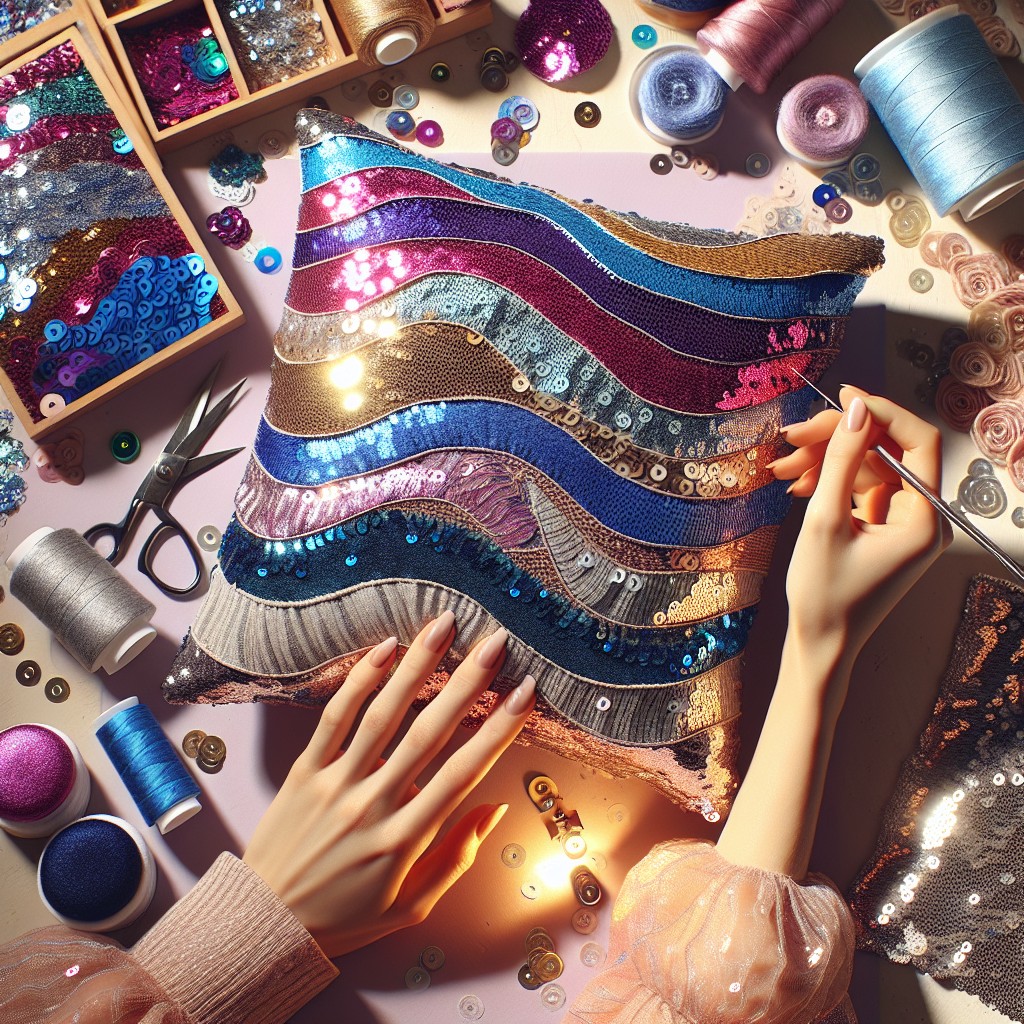
Transform a basic pillow into a dazzling accent piece with sequins. Begin by selecting a fabric base; a simple cotton or linen works well as it offers stability for the sequins. Lay out your sequin trim or fabric in the design you desire—this could be stripes, a central motif, or an all-over glitz.
For an intricate pattern, sketch it lightly with chalk on your base fabric first. If using sequin trim, hand-stitch it following your lines. For sequin fabric, cut the shape you want and use fabric glue to adhere it to the pillow cover. Ensure the edges are firmly pressed down to avoid snags.
Remember to carefully handle sequins as you stitch or glue to maintain their alignment and prevent overlaps that could cause puckering. Once your sequin design is secure, let it dry if glued, and then insert your pillow form. This method can elevate your living space with the right balance of sparkle and sophistication.
DIY Bandana Pillow Covers
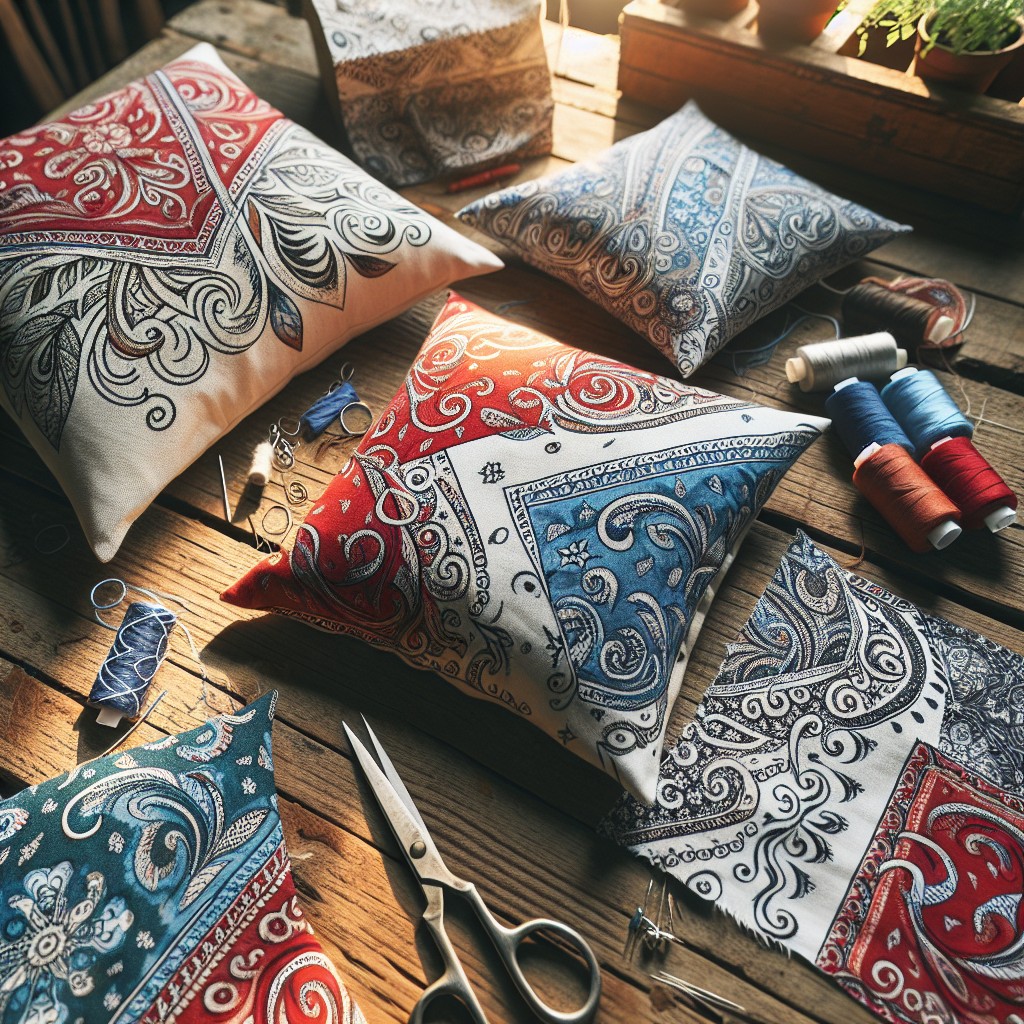
Embrace a western or boho vibe by transforming ordinary bandanas into stylish pillow covers.
Choose two bandanas for a standard square pillow, ensuring they mirror each other in design for a cohesive look.
Align the bandanas with the right sides facing each other, then sew along the edges, leaving an opening on one side for the pillow insert.
Flip the cover right-side out, insert the pillow, and hand-stitch the opening closed.
For seasonal or themed decor, explore various bandana colors and patterns.
This project doesn’t require advanced sewing skills and can be finished within an hour, offering a quick yet impactful decor update.
DIY Plaid Flannel Pillow Covers
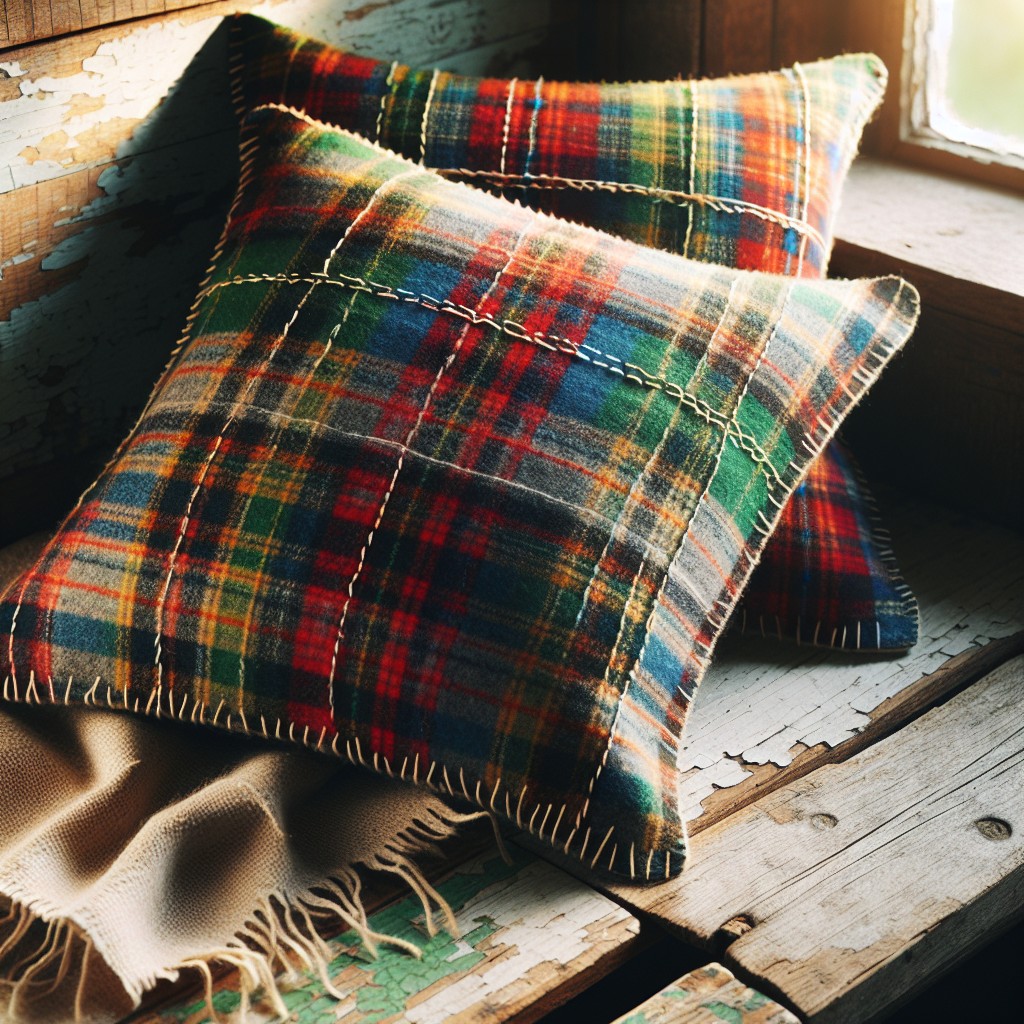
Transform an old flannel shirt or thrifted plaid fabric into a cozy pillow cover perfect for adding a touch of warmth to your decor. This project is simple and ideal for beginners, with no advanced sewing skills required.
- Choose Your Fabric: Look for a flannel shirt or fabric with a plaid pattern that complements your room’s color scheme. The thicker the material, the more durable your pillow cover will be.
- Cut to Size: Lay the fabric flat and cut two squares or rectangles based on your pillow form’s size, allowing an extra inch on all sides for seam allowance.
- Pin and Sew: Face the right sides of the fabric together and pin around the edges. Sew along the edges, leaving an opening large enough to insert your pillow form.
- Finishing Touches: Clip the corners for a polished look, turn the cover right side out, and press with an iron. Insert your pillow form and hand-stitch the opening closed.
Enjoy the cozy comfort of your new flannel pillow, adding a rustic touch to any room.
DIY Pillow Cover From Kitchen Towels
Transforming kitchen towels into pillow covers is a clever and cost-effective decor solution. The absorbent and decorative fabric makes for an unexpected textile choice for a cozy accent.
To start, select a kitchen towel with a pleasing design and ample size to fit over your pillow insert. If the towel is too thin, consider doubling up or adding a liner for extra thickness.
The process involves:
- Measuring the pillow insert: Ensure the towel’s dimensions can accommodate the pillow’s size, allowing for a half-inch seam allowance on each side.
- Cutting to size: If your towel exceeds the pillow dimensions, trim it down, keeping symmetry in mind.
- Sewing the edges: With the right sides together, stitch three sides using a straight stitch, then flip right-side-out.
- Inserting the pillow: Slide the insert into the now-sewn cover.
- Closing the opening: For a no-sew option, use fabric glue or adhesive Velcro. If sewing, hand-stitch or use a sewing machine to finish the final edge.
Consider embellishments like tassels or trim for added flair. This simple switch elevates an everyday item into a chic and functional decorative piece.
DIY Reversible Pillow Case
Maximize your decor options with a clever reversible design. This project lets you choose two complementary fabrics that you can flip according to your mood or season.
- Select fabrics: Pick two different patterns or colors that match your room’s palette.
- Cut to size: Ensure both pieces mirror your pillow size, adding a seam allowance for stitching.
- Align and stitch: Face the right sides together and sew around the edges, leaving a gap to turn it right-side out.
- Finish: Close the gap by hand or with a hidden stitch for a seamless look.
Enjoy the versatility of two looks in one, perfect for a quick style change without extra storage needs.
DIY Pattern-Blocked Pillow
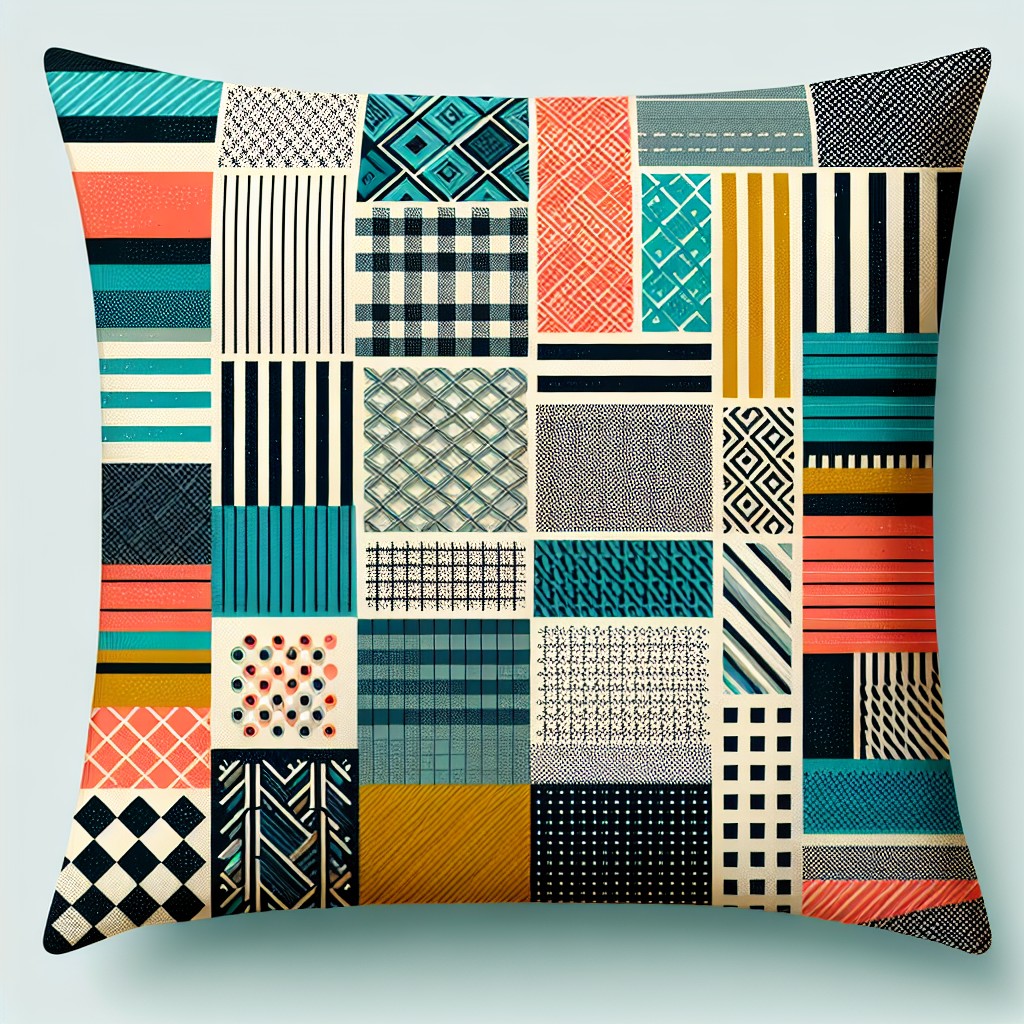
To create a pattern-blocked pillow, select fabrics with contrasting patterns, such as stripes and florals or polka dots and chevrons. Aim for a cohesive color scheme to ensure your patterns blend well. Cut each fabric into your desired shapes. Triangles and rectangles are excellent for starters, as they’re simple to cut and arrange.
Lay out your pattern pieces on a blank pillow cover to play with the design before committing. Once satisfied, iron interfacing to the backs of your fabric pieces for stability. This step helps prevent fraying and creates a crisp edge for sewing.
Sew the pieces onto the pillow cover, either by hand or with a sewing machine. Overlap the edges slightly to create a seamless look. If you’re adept at sewing, try a zigzag stitch or piping to accentuate the pattern changes.
Explore with textures within the same color family for added depth; mix a smooth cotton print with a textured weave, for example. The key is to balance visual interest with harmony, ensuring your pillow stands out without clashing with the rest of your decor.
DIY T-Shirt Pillow Cover
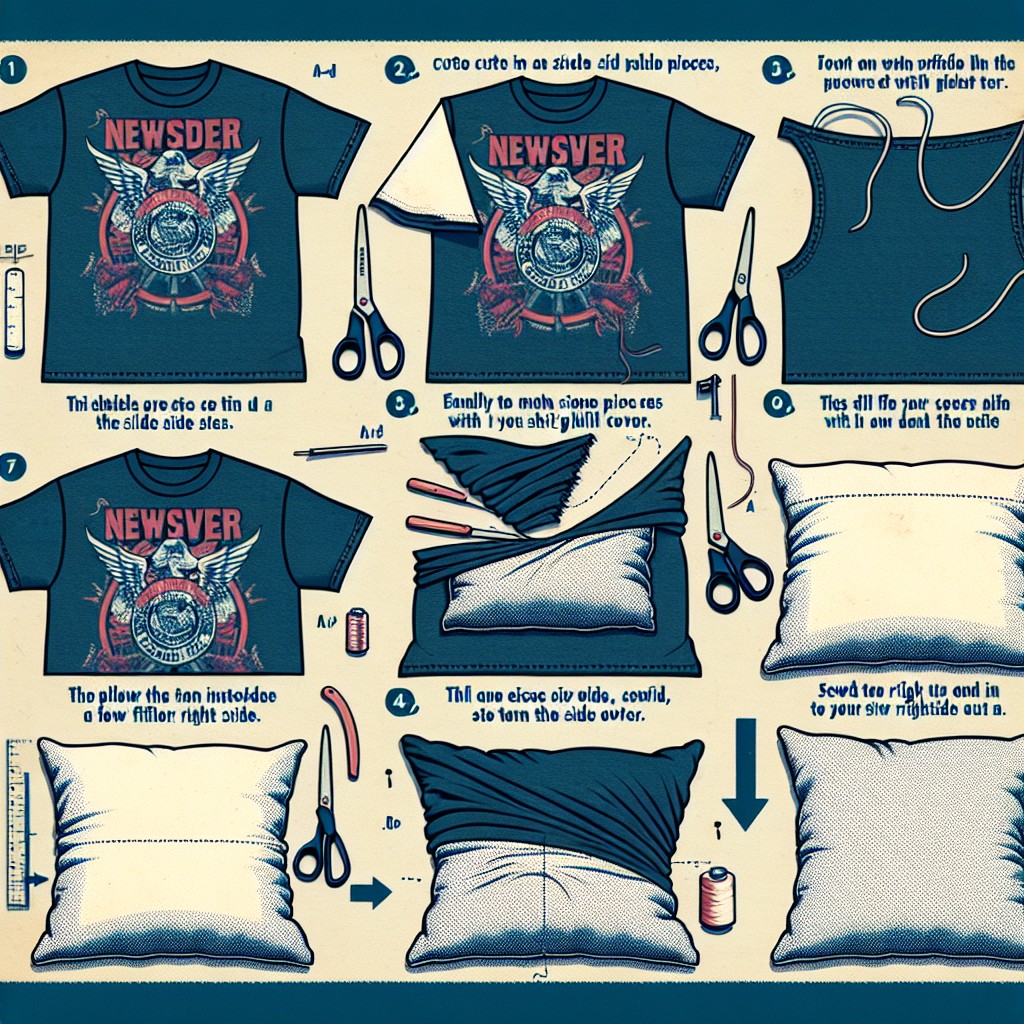
Transform a beloved old T-shirt into a unique pillow cover to add a touch of nostalgia to your decor. With minimal sewing skills, turn your tee into a conversation piece or a sentimental reminder.
- Select a T-shirt with an interesting design or sentimental value.
- Cut the T-shirt to size, ensuring it matches your pillow insert, allowing 1-inch margins for seams.
- Turn the fabric inside out and sew along the edges, leaving one side open for the pillow to be inserted.
- Flip the cover right-side out, insert the pillow, and hand stitch the remaining side closed.
- For a no-sew option, cut the edges with fringes and knot them together around the pillow insert.
This quick and easy method gives your space a personalized touch while also recycling old clothing.
DIY Pillow Cover From Old Jeans
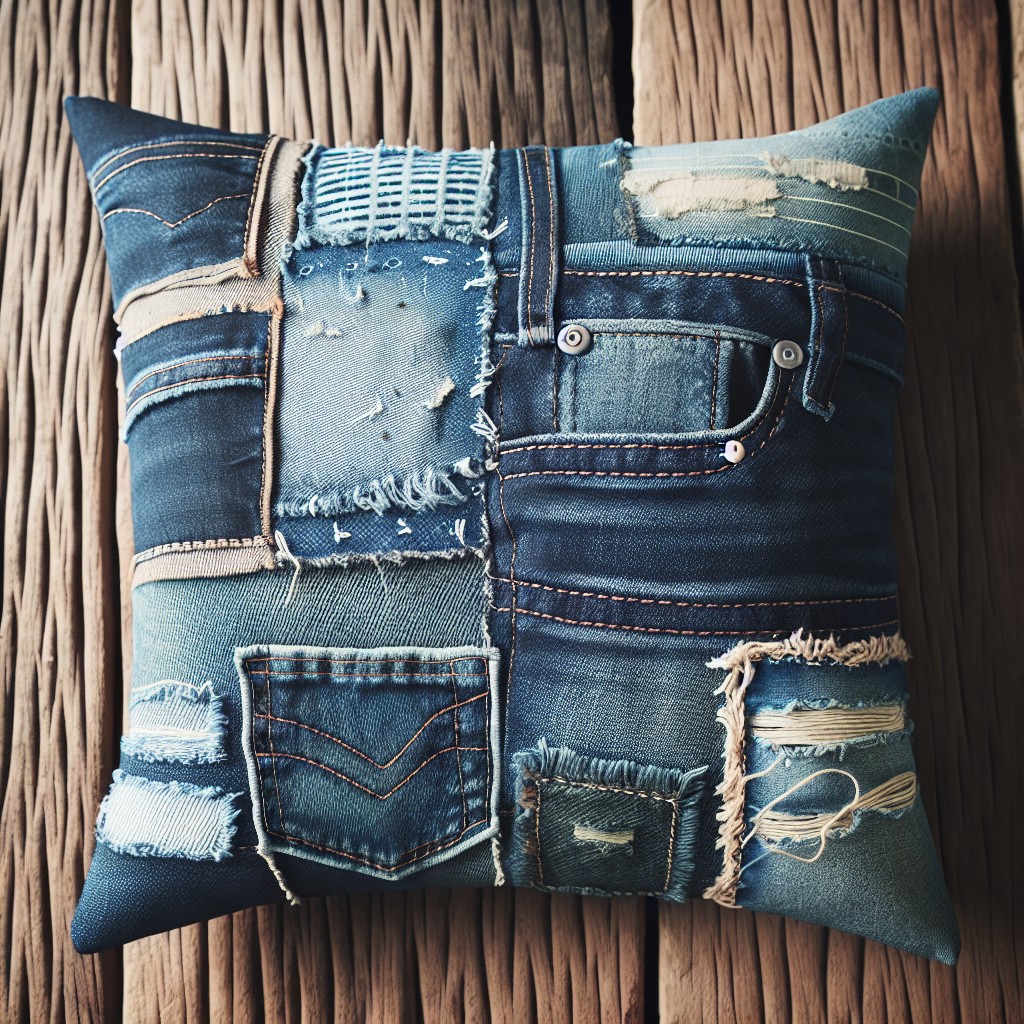
Repurposing old jeans into a pillow cover not only gives a fresh lease on life to worn-out denim but also adds a touch of casual chic to your living space.
Start by measuring your pillow insert; this will determine the size of the fabric needed.
Cut out two pieces from your jeans––one incorporating the back pocket for a decorative touch.
For an envelope closure, ensure one side of each denim piece overlaps by several inches.
This allows you to insert and remove the pillow form with ease.
If you favor a bit of texture, think about incorporating the seams or distressed areas.
Sew the right sides together, leaving the overlap unsewn to form the closure.
Turn the cover right side out, poke out the corners for a sharp edge, and insert your pillow.
There’s no need for zippers or buttons, which makes this an approachable project even for those new to sewing.
The result is a one-of-a-kind pillow cover that’s as comfortable as your favorite pair of jeans.
DIY Moroccan Pillow Cover
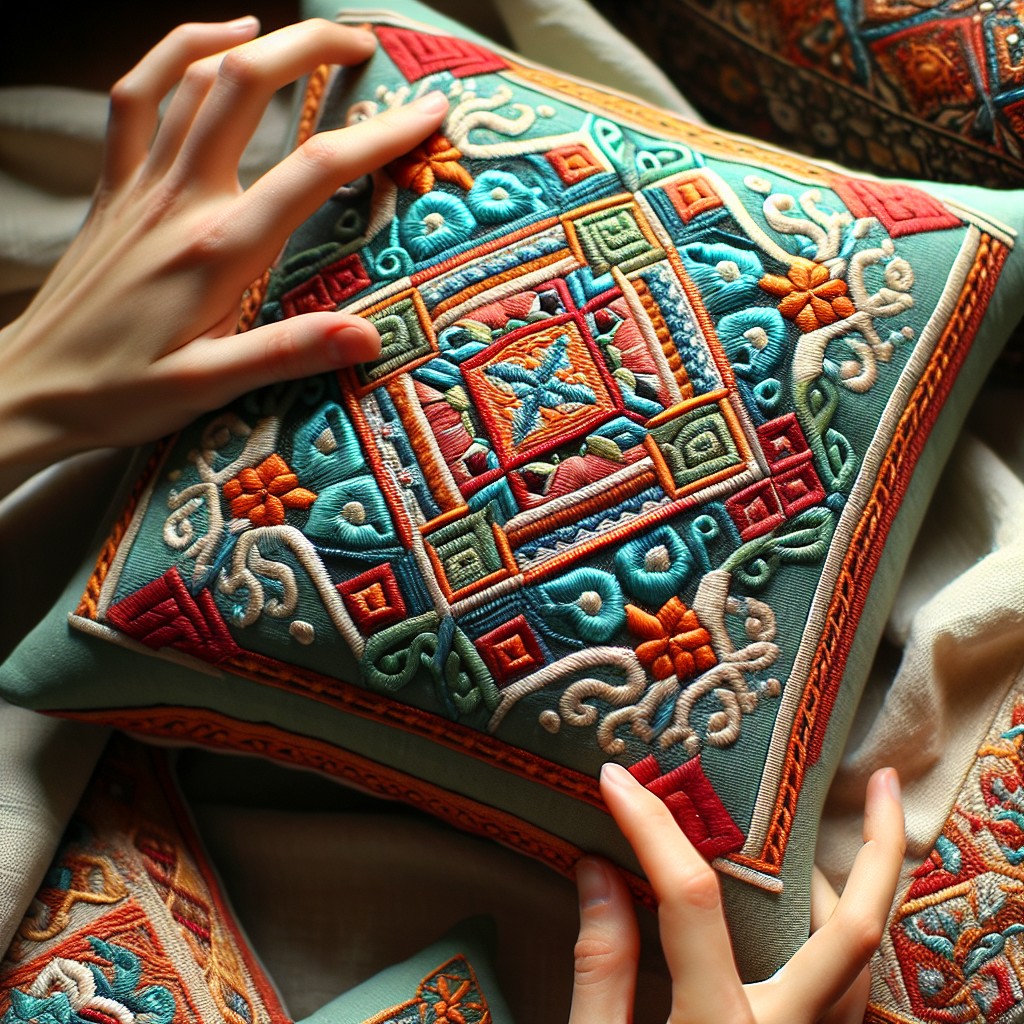
Transform your living space with the exotic flair of Moroccan-inspired decor simply by creating a pillow cover that mimics the vibrant and intricate designs characteristic of this style. Achieving this look involves using richly patterned fabric—think geometric shapes or traditional Moroccan motifs.
Get started with these easy steps:
- Select a high-quality fabric featuring a Moroccan print. Look for bold colors and metallic threads for an authentic touch.
- Cut the fabric to size, ensuring it will snugly fit your chosen pillow insert. Remember to add a half-inch seam allowance on all sides for stitching.
- If sewing, stitch the sides together inside out, leaving one side open for the insert. For a no-sew option, use fabric glue or hemming tape to secure the edges.
- Add embellishments such as tassels or pom-poms at the corners for a playful finish that enhances the theme.
- Once complete, turn the cover right side out, insert your pillow, and close the open end with a hidden zipper or fabric glue.
In no time at all, you’ll have a piece of Moroccan charm to enliven any room without needing to purchase high-end products.
DIY Pillow Cover With an Old Scarf
Transform an old scarf into a chic pillow cover without the need for complex sewing skills. Choose a scarf with a pattern that compliments your room’s aesthetic and ensure it’s large enough to wrap around your chosen pillow insert.
- Lay the scarf flat, placing the pillow in the center.
- Fold the scarf over the pillow like wrapping a gift, ensuring the pattern is positioned as desired.
- If the scarf is square, tie the opposite ends together in knots above the pillow. For a rectangular scarf, fold the longer sides to the pillow’s center and tie the shorter ends together.
- Tuck in any excess fabric to create a neat appearance.
- Secure the final shape with a few discreet stitches by hand, or use fabric glue for a no-sew option.
You’ve now repurposed a fashionable accessory into a unique and personalized home decor piece.
DIY Pillow Cover With Lace Detailing
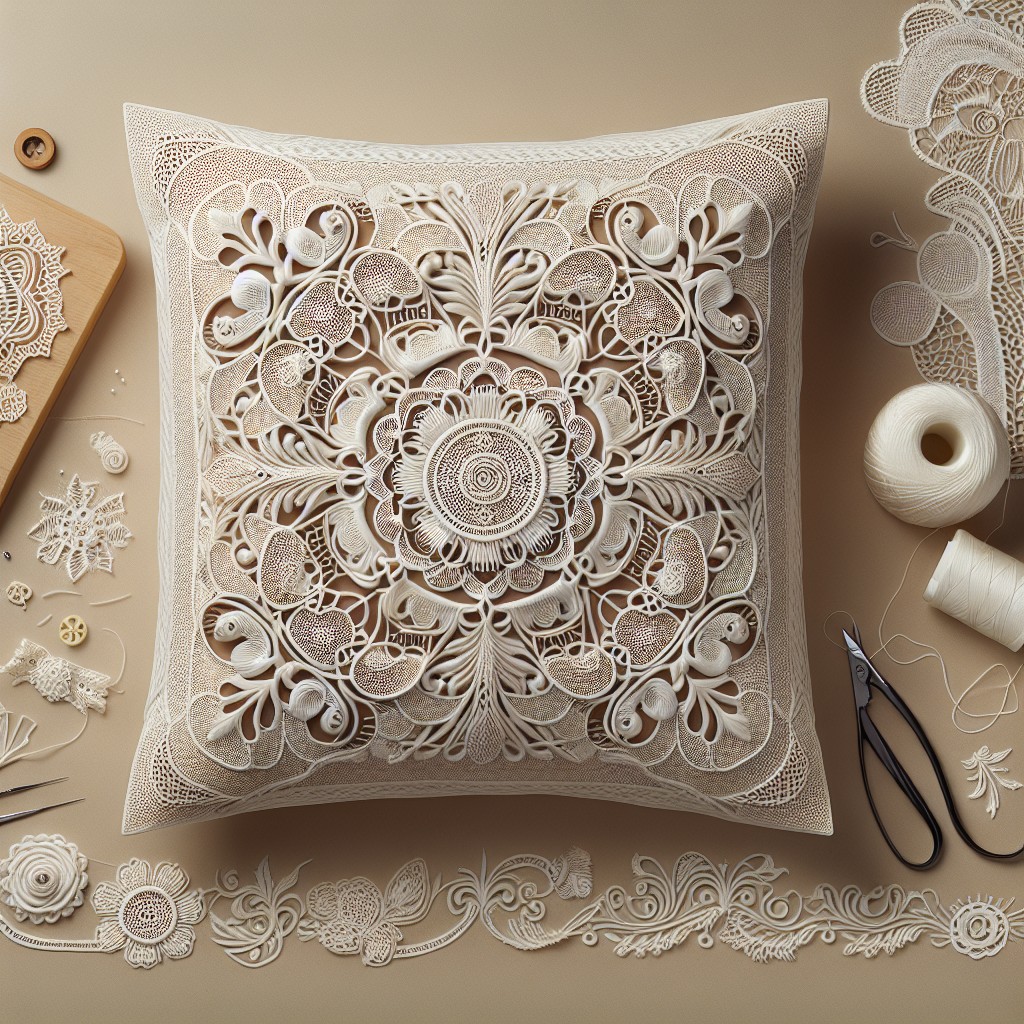
Elevate a plain pillowcase by adding delicate lace detailing for a touch of elegance. Begin with a pre-made or sewn solid-color pillow cover as your canvas. Choose lace in a color that either contrasts or complements the pillow base for either a subtle or striking effect.
Materials Needed:
- Basic pillow cover
- Lace trim or fabric
- Fabric glue or sewing kit
- Scissors
- Ruler or measuring tape
Steps:
1. Measure the dimensions of the pillow cover to determine how much lace you’ll need.
2. Cut the lace to the desired length, keeping in mind the design you want to create.
3. Using fabric glue for a no-sew option or a sewing kit for a more permanent approach, apply the lace to the pillow cover. You may outline the edges for a framed look, create a central band, or pattern pieces across the surface.
4. If you’re sewing, use a simple straight stitch along the edges of the lace, being careful to keep it flat and even.
5. Allow glue to dry thoroughly if used, or snip any loose threads if sewn.
6. Insert the pillow into the cover, and enjoy the romantic, chic addition to your room.
Customize further by using dyed lace to match your decor scheme, or by layering different types of lace for additional texture. Adding lace details not only reinvigorates an old pillow but also introduces a custom, handcrafted element to your space.
DIY Crochet Pillow Cover
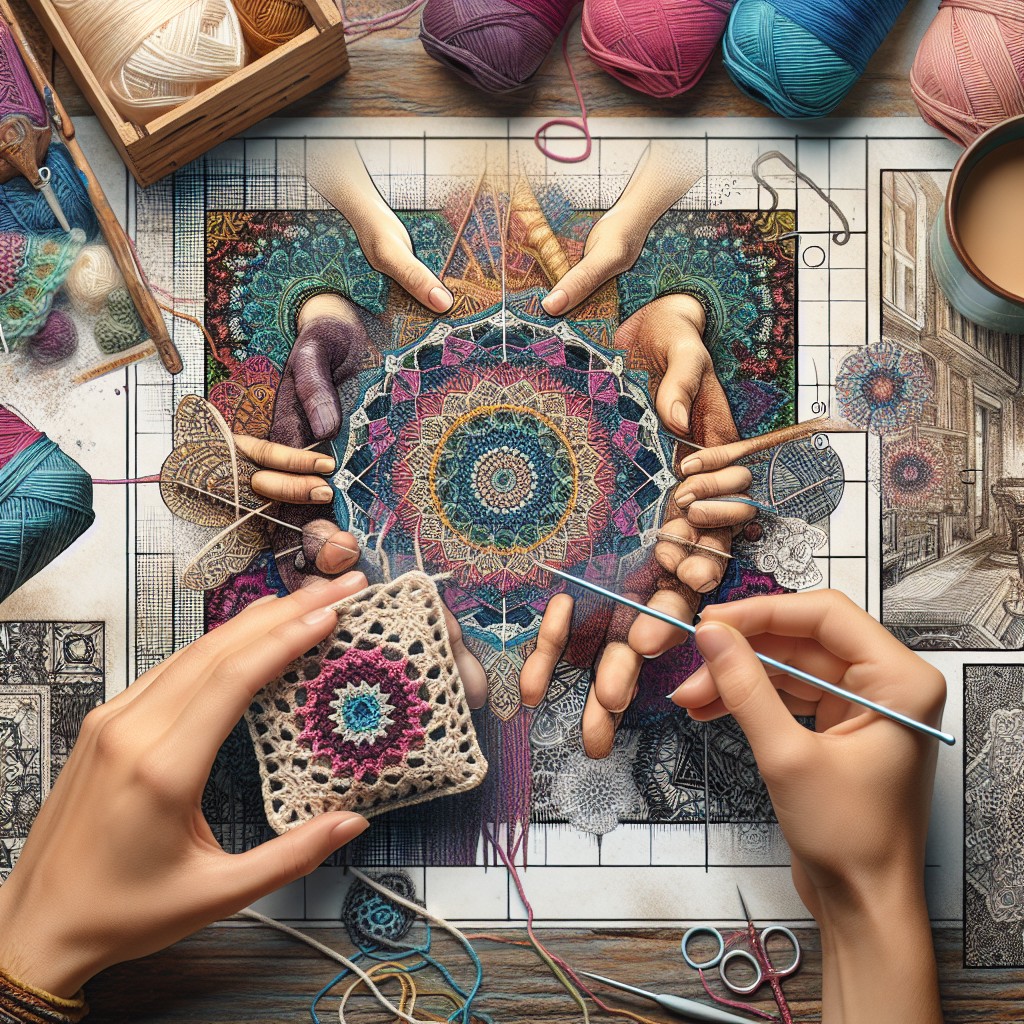
Crochet pillow covers add a cozy, handmade touch to any room and can be customized to match your decor. If you have basic crochet skills, creating a cover is a fun weekend project.
– Choose your yarn: Opt for a color and texture that complements your space. Acrylic, cotton, or wool yarns work well, depending on the desired warmth and feel.
– Select a crochet pattern: Simple stitches like single or double crochet are great for beginners, while more intricate patterns can be attempted by those with advanced skills.
– Measure your pillow insert: Craft your cover slightly smaller than the insert for a snug fit. Typically, subtracting 1-2 inches from the insert measurements will suffice.
– Crochet the front and back panels: These can be identical or you may choose to make the back panel simpler.
– Incorporate a closure: Consider adding buttons, ties, or an envelope fold so you can remove the cover for washing.
– Join the panels: Crochet the edges together, or use a yarn needle to sew them if you prefer.
With practice, this type of cover can easily be adapted to various shapes and sizes, expanding your decorating possibilities.
DIY Pom-Pom Pillow Case
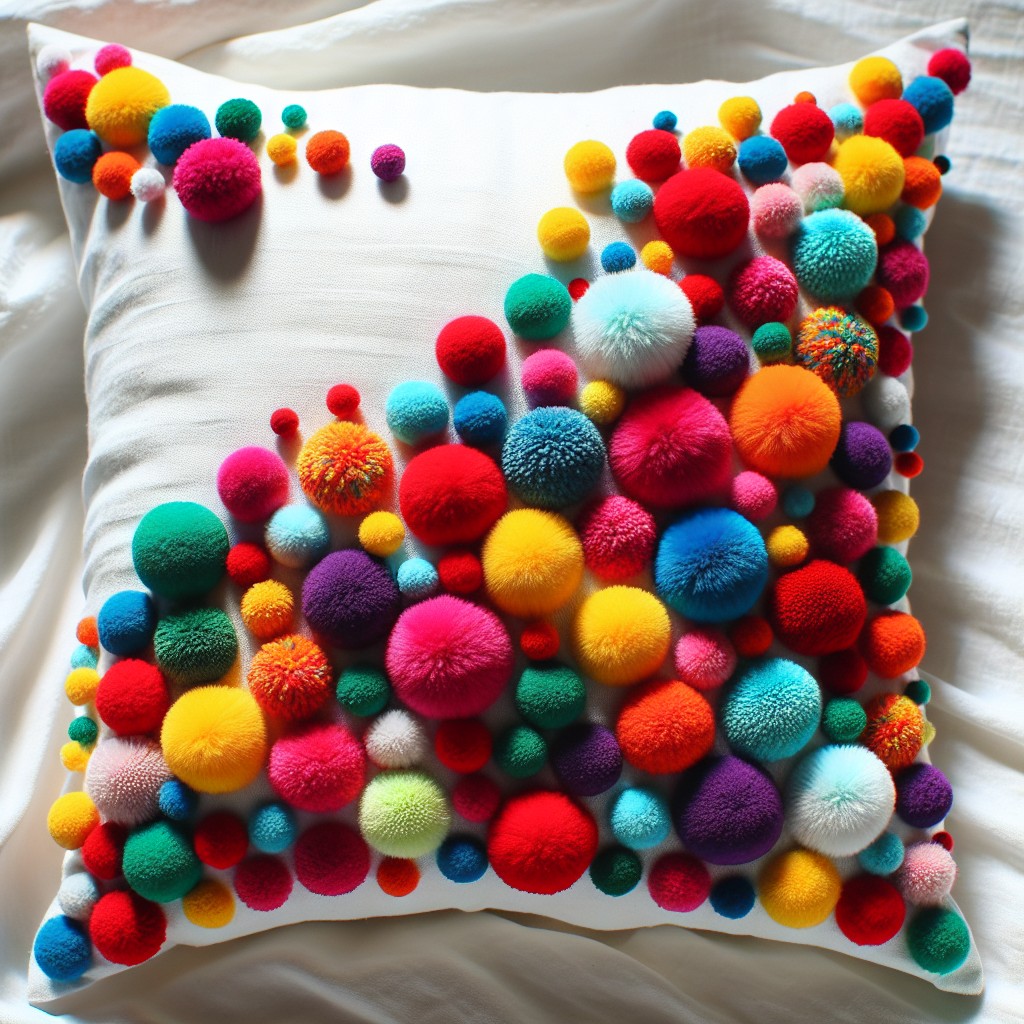
Add whimsy and texture to any room with pom-pom embellished pillow cases. Here’s a straightforward approach to crafting one:
Materials needed:
- Plain pillow case
- Yarn in desired colors
- A fork or pom-pom maker
- Needle and thread
Steps:
1. Create pom-poms using yarn and a fork or a pom-pom maker for uniform size. Wrap yarn around your tool of choice, tie in the middle, then cut the loops and trim to form a neat sphere.
2. Decide on the placement pattern for your pom-poms on the pillow case. Even spacing ensures a cohesive look.
3. Secure each pom-pom to the pillow case using a needle and thread, stitching through the center of the pom-pom for sturdy attachment.
4. Knot the thread securely and cut off any excess.
Tip: Play with color by using different yarns to match your decor. This project can be done while watching TV or as a fun activity with kids.
DIY Burlap and Lace Pillow Cover
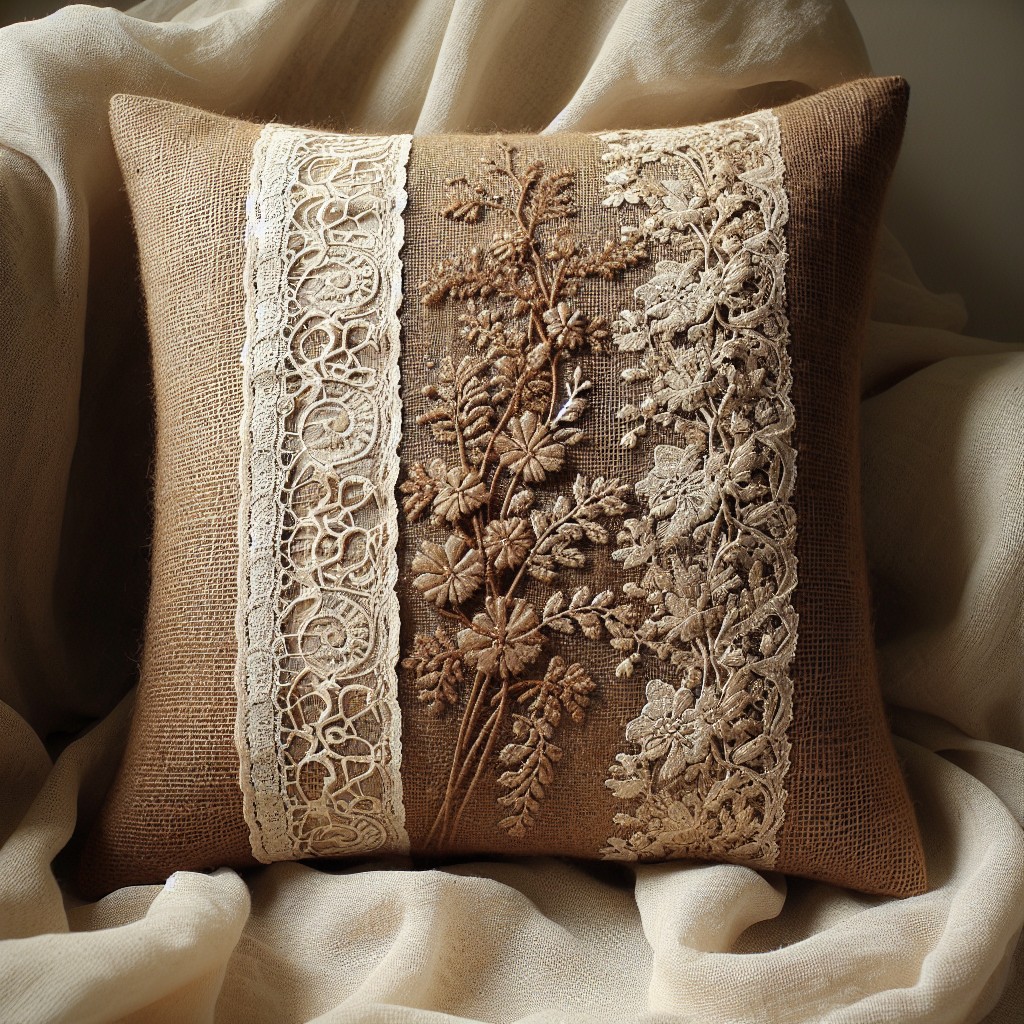
Embrace a fusion of rustic charm and delicate elegance with this burlap and lace pillow cover.
Here’s a snapshot of the process:
- Begin with a pillow insert and measure the dimensions. Cut a piece of burlap fabric allowing an extra inch on all sides for seams.
- Once cut, fray the edges for a shabby chic aesthetic by gently pulling out threads up to your seam line.
- Select a piece of lace trim or a lace doily that compliments the burlap’s color and texture. Position it on the burlap to achieve your desired design.
- Use a simple running stitch or fabric adhesive to attach lace to burlap. Ensure it’s secure, particularly if the pillow will be used frequently.
- For a pillowcase closure, choose between a hidden zipper, envelope folds on the back, or decorative buttons.
- If sewing, stitch the pillow’s perimeter, right sides together, leaving a gap to insert the pillow form; then sew shut.
- For a no-sew option, employ fabric glue or iron-on hem tape around the edges, leaving a section open to insert the pillow before sealing.
This craft pairs well with various decor styles, adding a personalized and cozy touch to your space.
DIY Comic Book Pillow Cover

Transform your living space with a pop of graphic novel charm by upcycling old comic books into a vibrant pillow cover.
Begin by selecting comic book pages that feature bold colors and dynamic action sequences.
Secure the pages onto regular fabric using decoupage glue, ensuring the entire surface is covered and smooth.
Once the glue is dry, apply a layer of mod podge for added durability.
Sew the fabric as you would any standard pillow cover, using a zipper or buttons for closure.
This project not only preserves your favorite comics but also introduces an element of nostalgia and fun to your home décor.
DIY Yarn Dyed Striped Pillow Cover
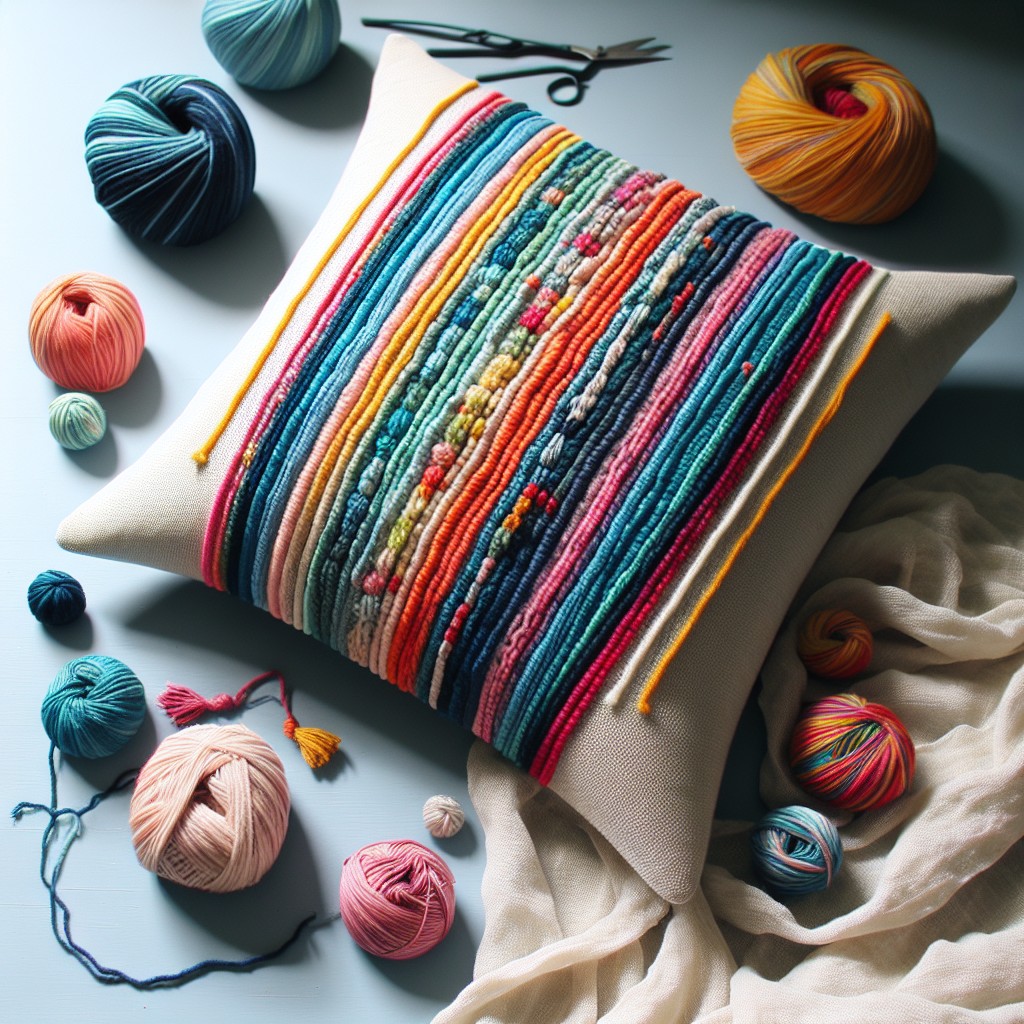
Transform a plain pillow into an artisan-inspired piece with yarn dyeing. The process involves selectively applying dye to sections of yarn before weaving your fabric for the cover.
Here’s a step-by-step guide:
- Select natural fibers like cotton or linen for optimal dye uptake.
- Choose a dye appropriate for your fabric type—natural or synthetic—and prepare it according to the package’s directions.
- Wrap sections of yarn tightly with rubber bands where you don’t want the dye to penetrate, a technique known as tie-dyeing.
- Dye your yarn in your chosen colors, working in batches to create your striped pattern. Remember, the tighter the wrap, the more distinct your stripes will be.
- Once the yarn is dyed and dried, weave it into fabric on a simple frame loom or use it to create stripes on an existing pillow cover with a needle and thread.
- This method gives you control over the color scheme and stripe width to perfectly match your decor.
Enjoy the satisfaction of crafting a unique pillow cover with rich, hand-dyed stripes that will be the highlight of any room.
DIY Window Pane Check Pillow Cover
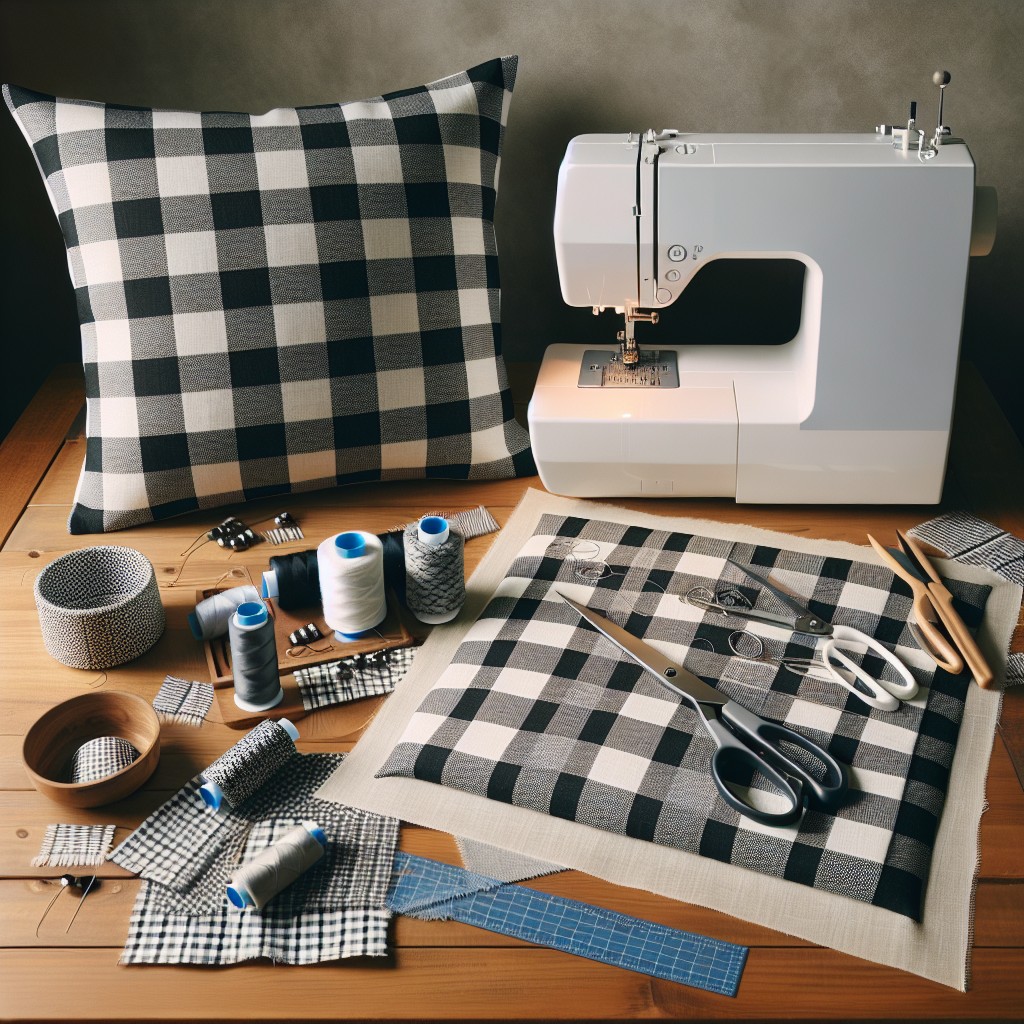
Creating the charming allure of classic windowpane checks is easier than you’d think. Start by choosing two contrasting fabric colors to achieve the signature grid look. Cut one color into 1-inch-wide strips to serve as the “panes.”
Lay out the base fabric flat and begin arranging the strips in a crisscross pattern to mimic a windowpane, spacing them evenly. Pin them down to keep them in place as you work. For a no-sew option, use fabric glue to secure the strips onto the base fabric, ensuring each intersection is well adhered. If sewing, stitch along each strip’s edge for a more durable hold.
Trim off any excess from the edges, then fold the fabric right sides together, aligning the edges. Stitch around the perimeter, leaving a small gap for inserting the pillow form. Alternatively, create an envelope closure for easy removal.
Turn the cover right side out, press for a crisp finish, and insert your pillow. The result is a classic, preppy chic pillow that elevates any space with its simple sophistication.
DIY Paisley Print Pillow Covers
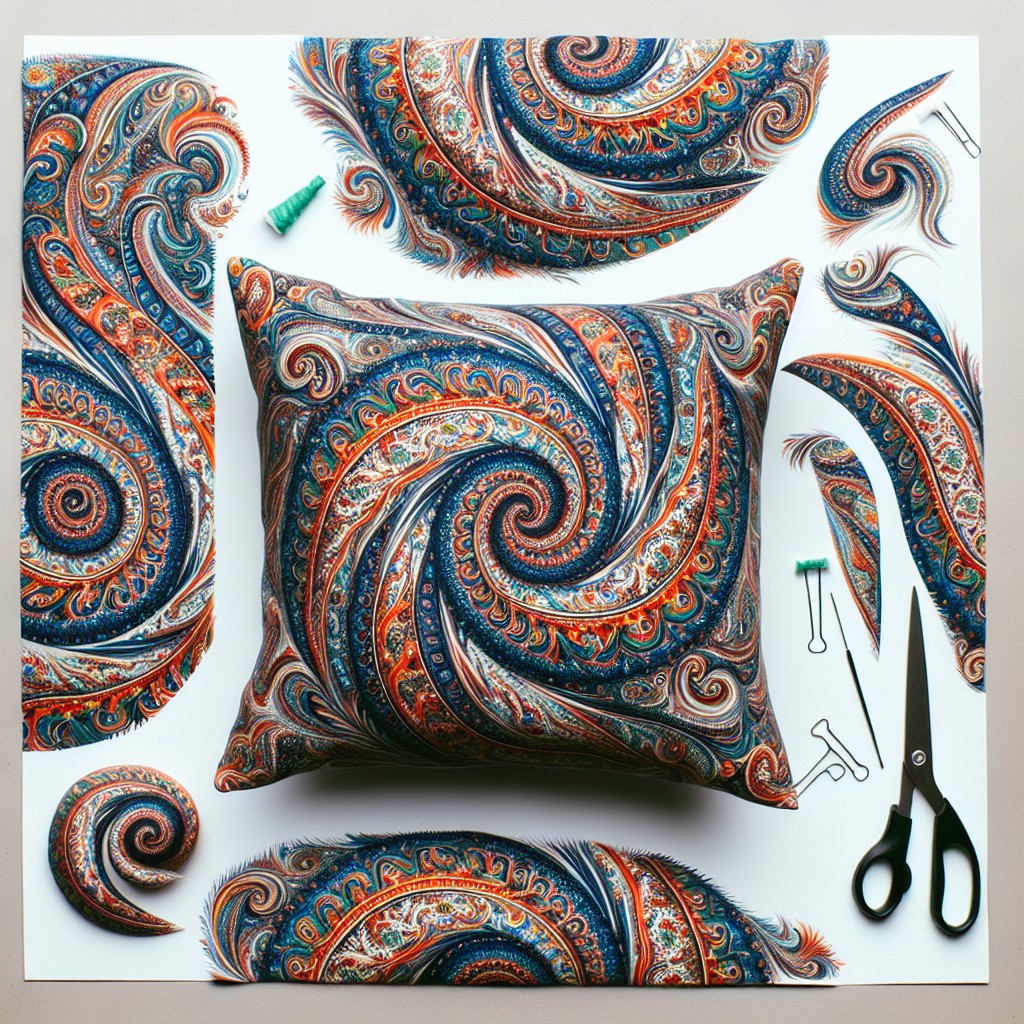
Working with a paisley print offers a timeless look that adds a touch of elegance to any living space. For this project, choose a fabric featuring this intricate design, ensuring it complements the existing room décor. Begin by cutting the fabric to fit your pillow form, adding an extra inch on each side for seam allowances.
When sewing, pay special attention to aligning the paisley pattern at the seams for a professional finish. Opt for a hidden zipper or an envelope closure on the back to insert the pillow form. If you prefer not to sew, consider using iron-on hemming tape for a no-sew option; just ensure to iron the edges neatly.
Paisley patterns are versatile – you can go for larger, bolder prints for a statement piece or smaller, subtler designs for a more understated look. This project allows you to personalize your decor, whether you lean towards traditional aesthetics or a more contemporary vibe. Enjoy the process, and soon you’ll have a unique, handcrafted accessory that breathes new life into your room.
DIY Geometric Print Pillow Cover
Harness the simplicity and boldness of geometric prints to revamp your space. Here’s how:
- Select Fabric: Opt for a sturdy cotton or linen blend with a pre-printed geometric pattern that suits your décor.
- Cut to Size: Measure your pillow insert and add an inch to both length and width for seam allowance.
- Sewing: With right sides together, stitch three-and-a-half sides of the fabric, leaving an opening for the insert.
- Corners: For sharp corners, snip the excess fabric before turning the cover right side out.
- Insert Pillow: Insert the pillow form through the opening, evenly distributing the corners.
- Close Seam: Hand-stitch the opening closed using a ladder or invisible stitch.
This impactful update instantly adds a contemporary touch to any room. Mix and match different geometric prints for a modern, eclectic look.
DIY Leather Detail Pillow Cover
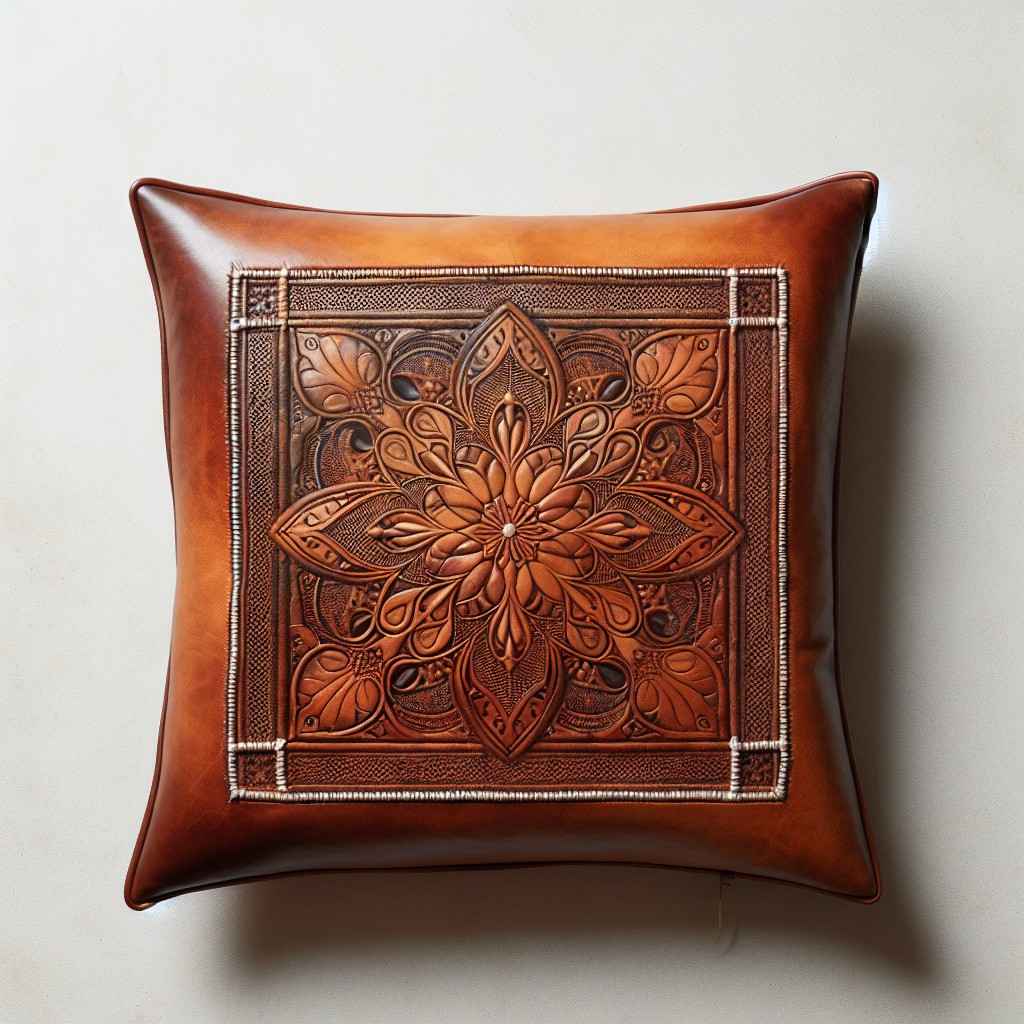
Elevate your room’s aesthetic with a touch of sophistication using faux or upcycled leather to create a bespoke pillow cover. By adding a leather strip or panel, you instantly introduce a luxurious texture contrast.
Here’s how to achieve this stylish look:
- Measure the pillow and cut a piece of fabric for the base of your cover to size.
- For the leather detail, decide on the width of the leather strip or the size of the panel you prefer.
- Cut the leather material accordingly, ensuring clean and straight edges.
- Attach the leather to the fabric base using fabric glue for a no-sew option or with a sewing machine for a more durable finish. If sewing, use a needle designed for leather.
- Allow plenty of drying time if glued.
- Once the leather is secure, finalize your pillow cover with your closure method of choice, like a zipper or fabric ties for easy removal.
Incorporating a leather detail can create a modern, industrial, or rustic look, depending on your decor. Play with the positioning—centered, corner accents, or edge trims—to suit your taste.
Ideas Elsewhere
- https://boxwoodavenue.com/diy-linen-pillow-covers-serged-edges/
- https://www.creeklinehouse.com/the-10-minute-diy-pillow-cover/
- https://tatertotsandjello.com/how-to-make-10-minute-pillow-covers-for-spring/
- https://thehomesihavemade.com/easy-diy-pillow-projects/
- https://thecraftingnook.com/envelope-pillow-cover-tutorial/
More Like This
 22 Mini Zen Gardens to Conquer Your Inner Chaos
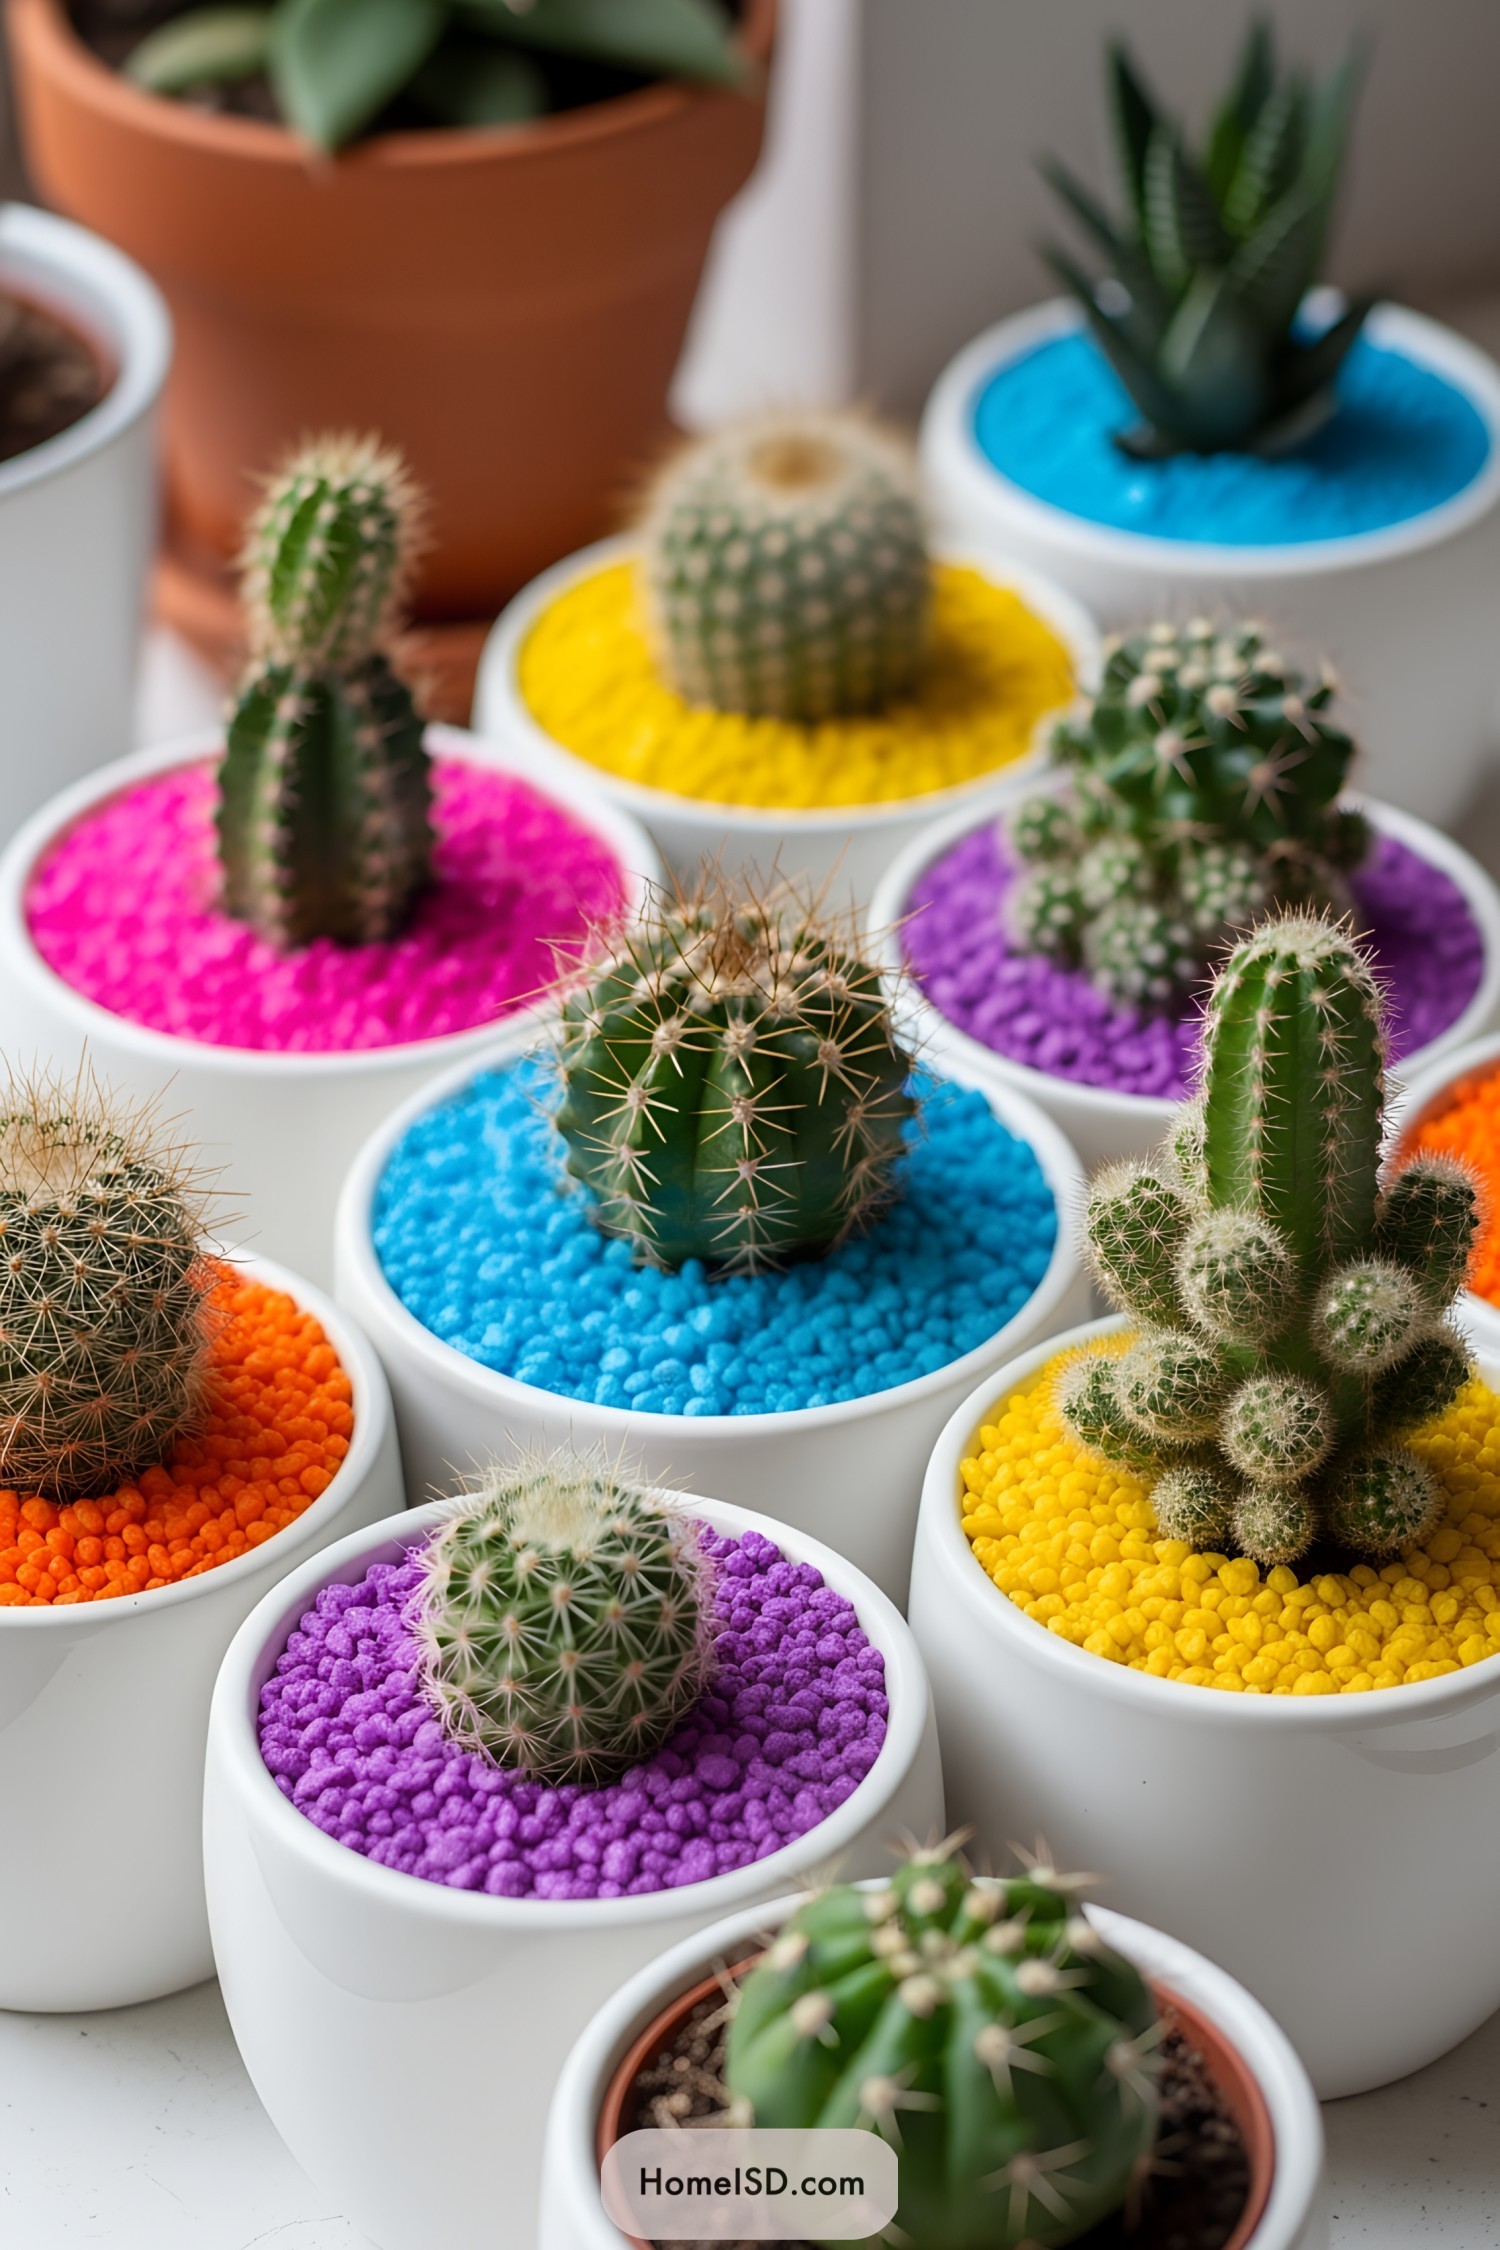 22 Mini Cactus Garden Ideas That Prickle with Delight
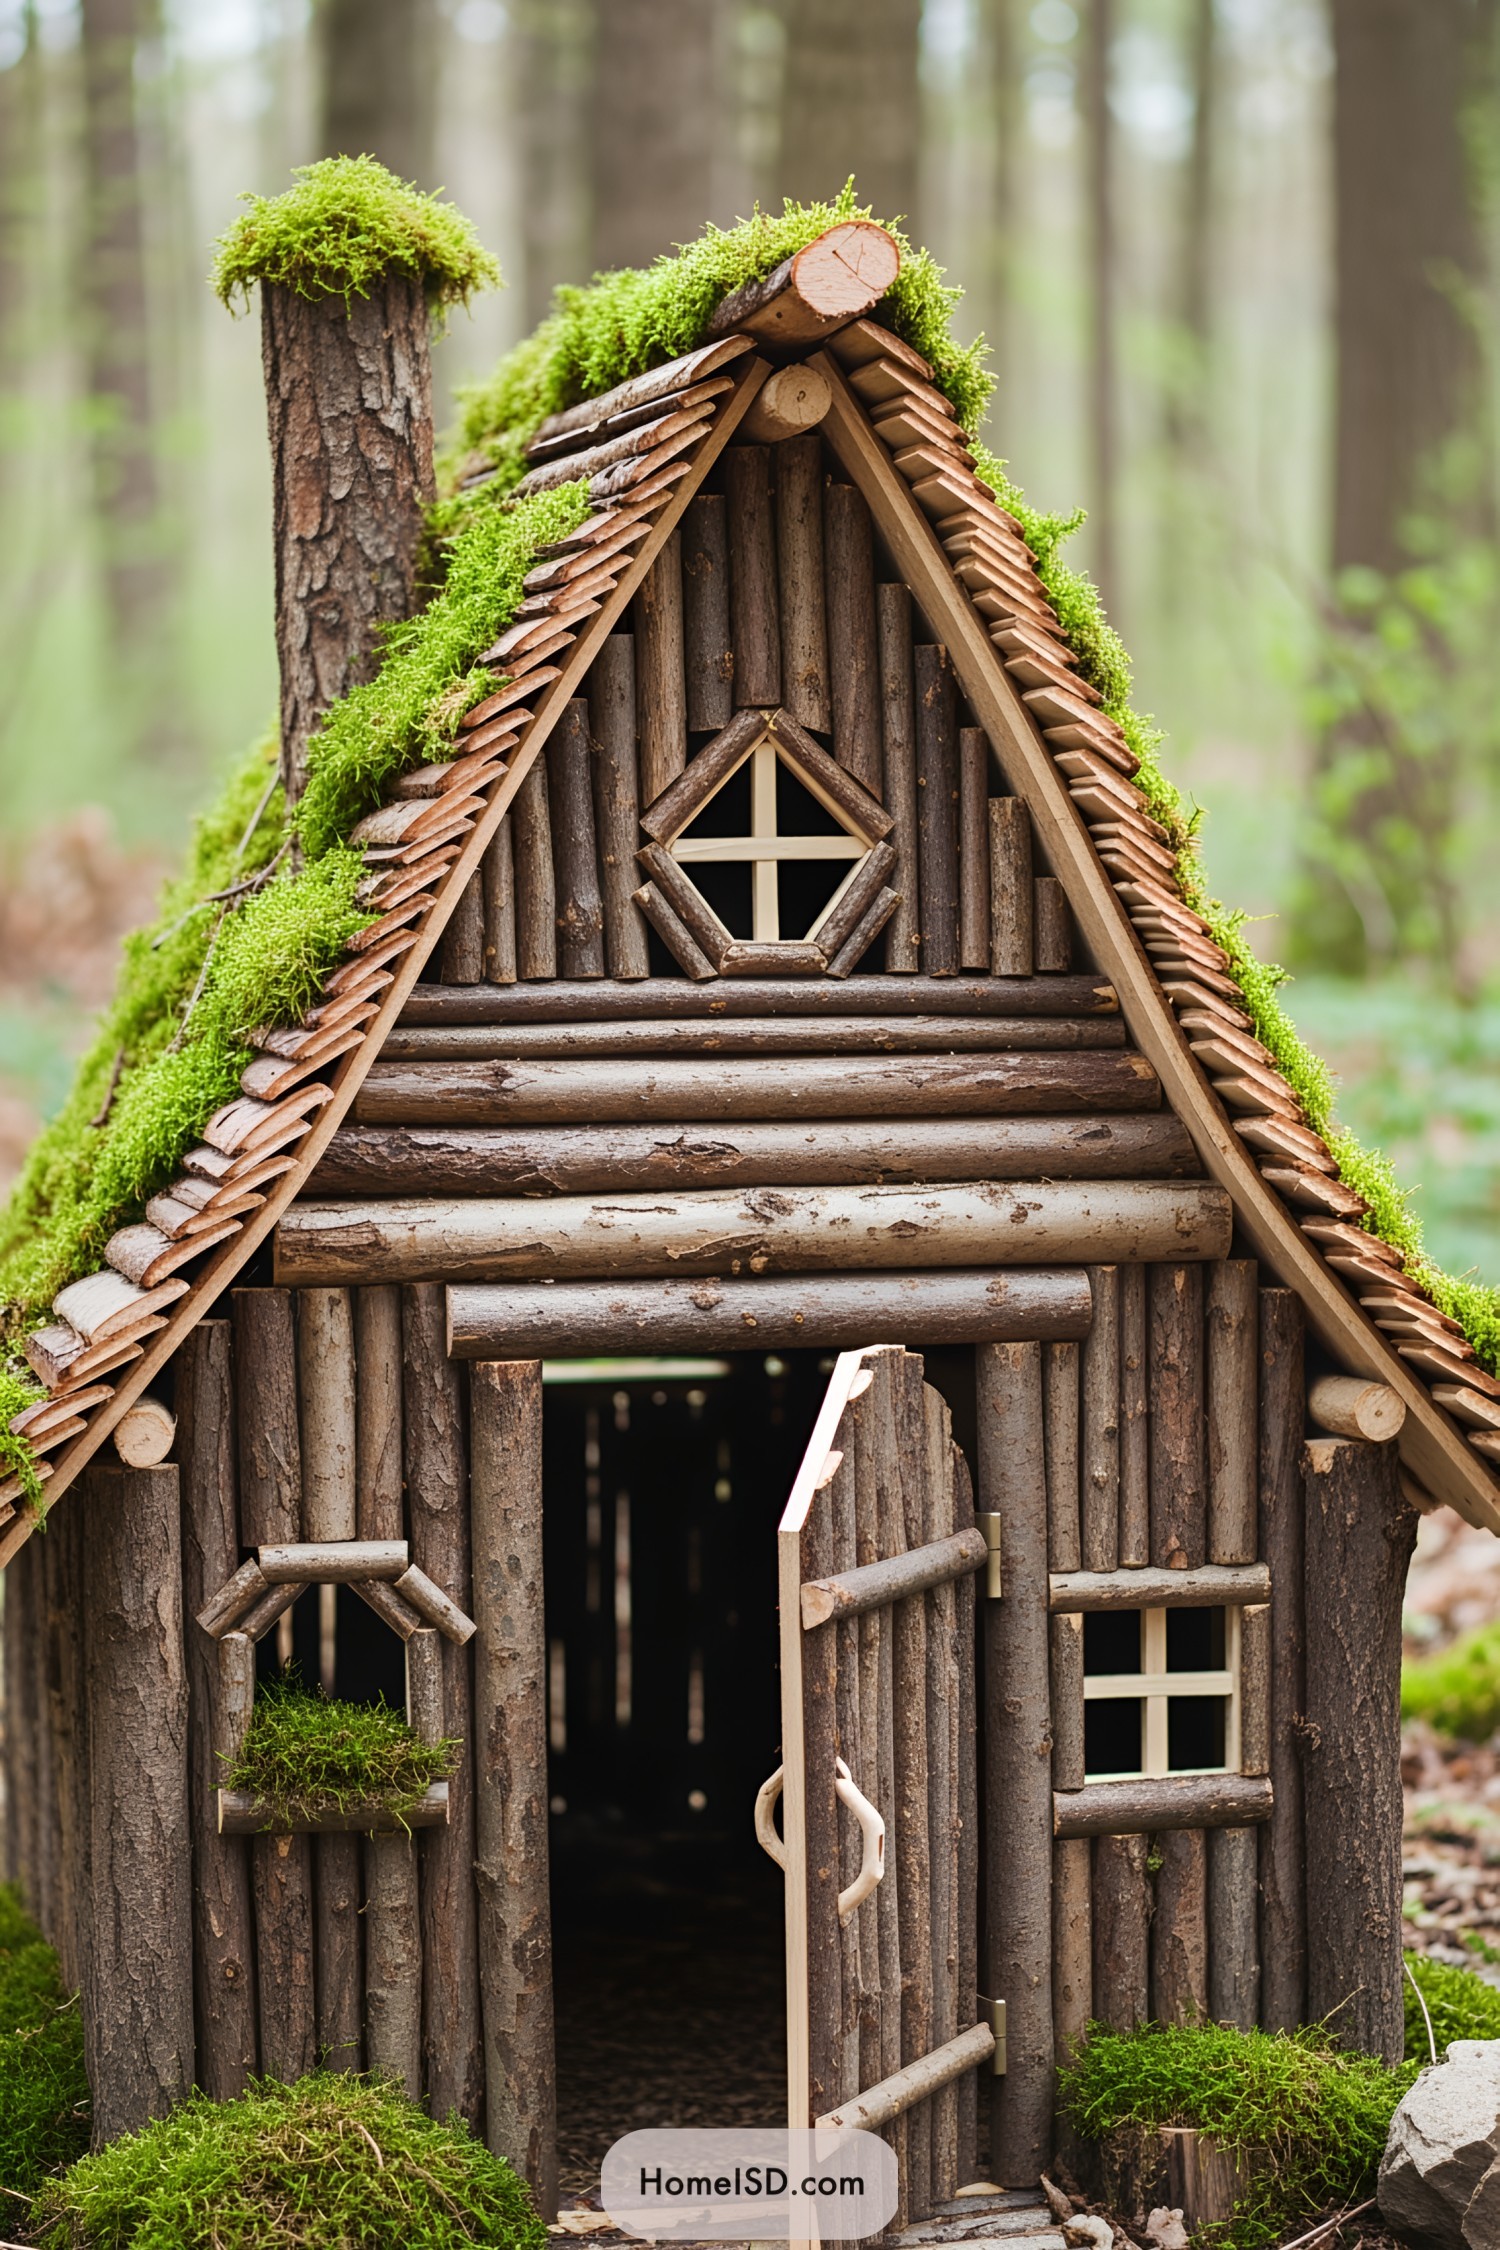 20 Fairy Houses With Natural Materials That Will Make You Believe In Magic
 20 Cheap Walkway Ideas DIY Benefits
 15 Ingenious DIY Pantry Cabinet Ideas
Recap